Deliciously Low FODMAP
Inspire yourself with hundreds of delicious low FODMAP recipes, tips, and tools, and enjoy the abundance that is yours even when you have IBS.
Use the buttons and filters to find something specific or browse the complete collection for inspiration.
Discover a treasure trove of recipes with my FREE recipe club! Get new ideas delivered straight to your inbox every week.
Deliciously Low FODMAP is a trademark of IBS Game Changer, LLC
Filter to find Recipes and Tools
More Filtering Options
- All 726
- Appetizer 50
- BBQ 46
- Bowl 32
- Breakfast 58
- Cocktails 13
- Collection 1 58
- Collection 10 27
- Collection 11 30
- Collection 12 27
- Collection 13 31
- Collection 14 29
- Collection 15 31
- Collection 16 34
- Collection 17 31
- Collection 18 33
- Collection 19 36
- Collection 2 32
- Collection 20 33
- Collection 21 33
- Collection 22 40
- Collection 23 8
- Collection 24 1
- Collection 3 28
- Collection 4 29
- Collection 5 30
- Collection 6 32
- Collection 7 31
- Collection 8 31
- Collection 9 32
- Condiments 6
- Crock Pot 4
- Dessert 107
- Diabetes Game Changer Exception Protocol Contains Alcohol 11
- Diabetes Game Changer Exception Protocol Contains Flour 108
- Diabetes Game Changer Exception Protocol Contains Flour AND Sugar 77
- Diabetes Game Changer Exception Protocol Contains Sugar 49
- Diabetes Game Changer First Four Weeks 362
- Dinner 328
- Drink 8
- Free Guide 17
- Gluten-free 588
- Gut Microbiome 2
- Guthealth 3
- Holidays 68
- IBS Triggers 4
- Keto Friendly 122
- Lactose-Free 175
- Low FODMAP Diet 712
- Low Net Carb 136
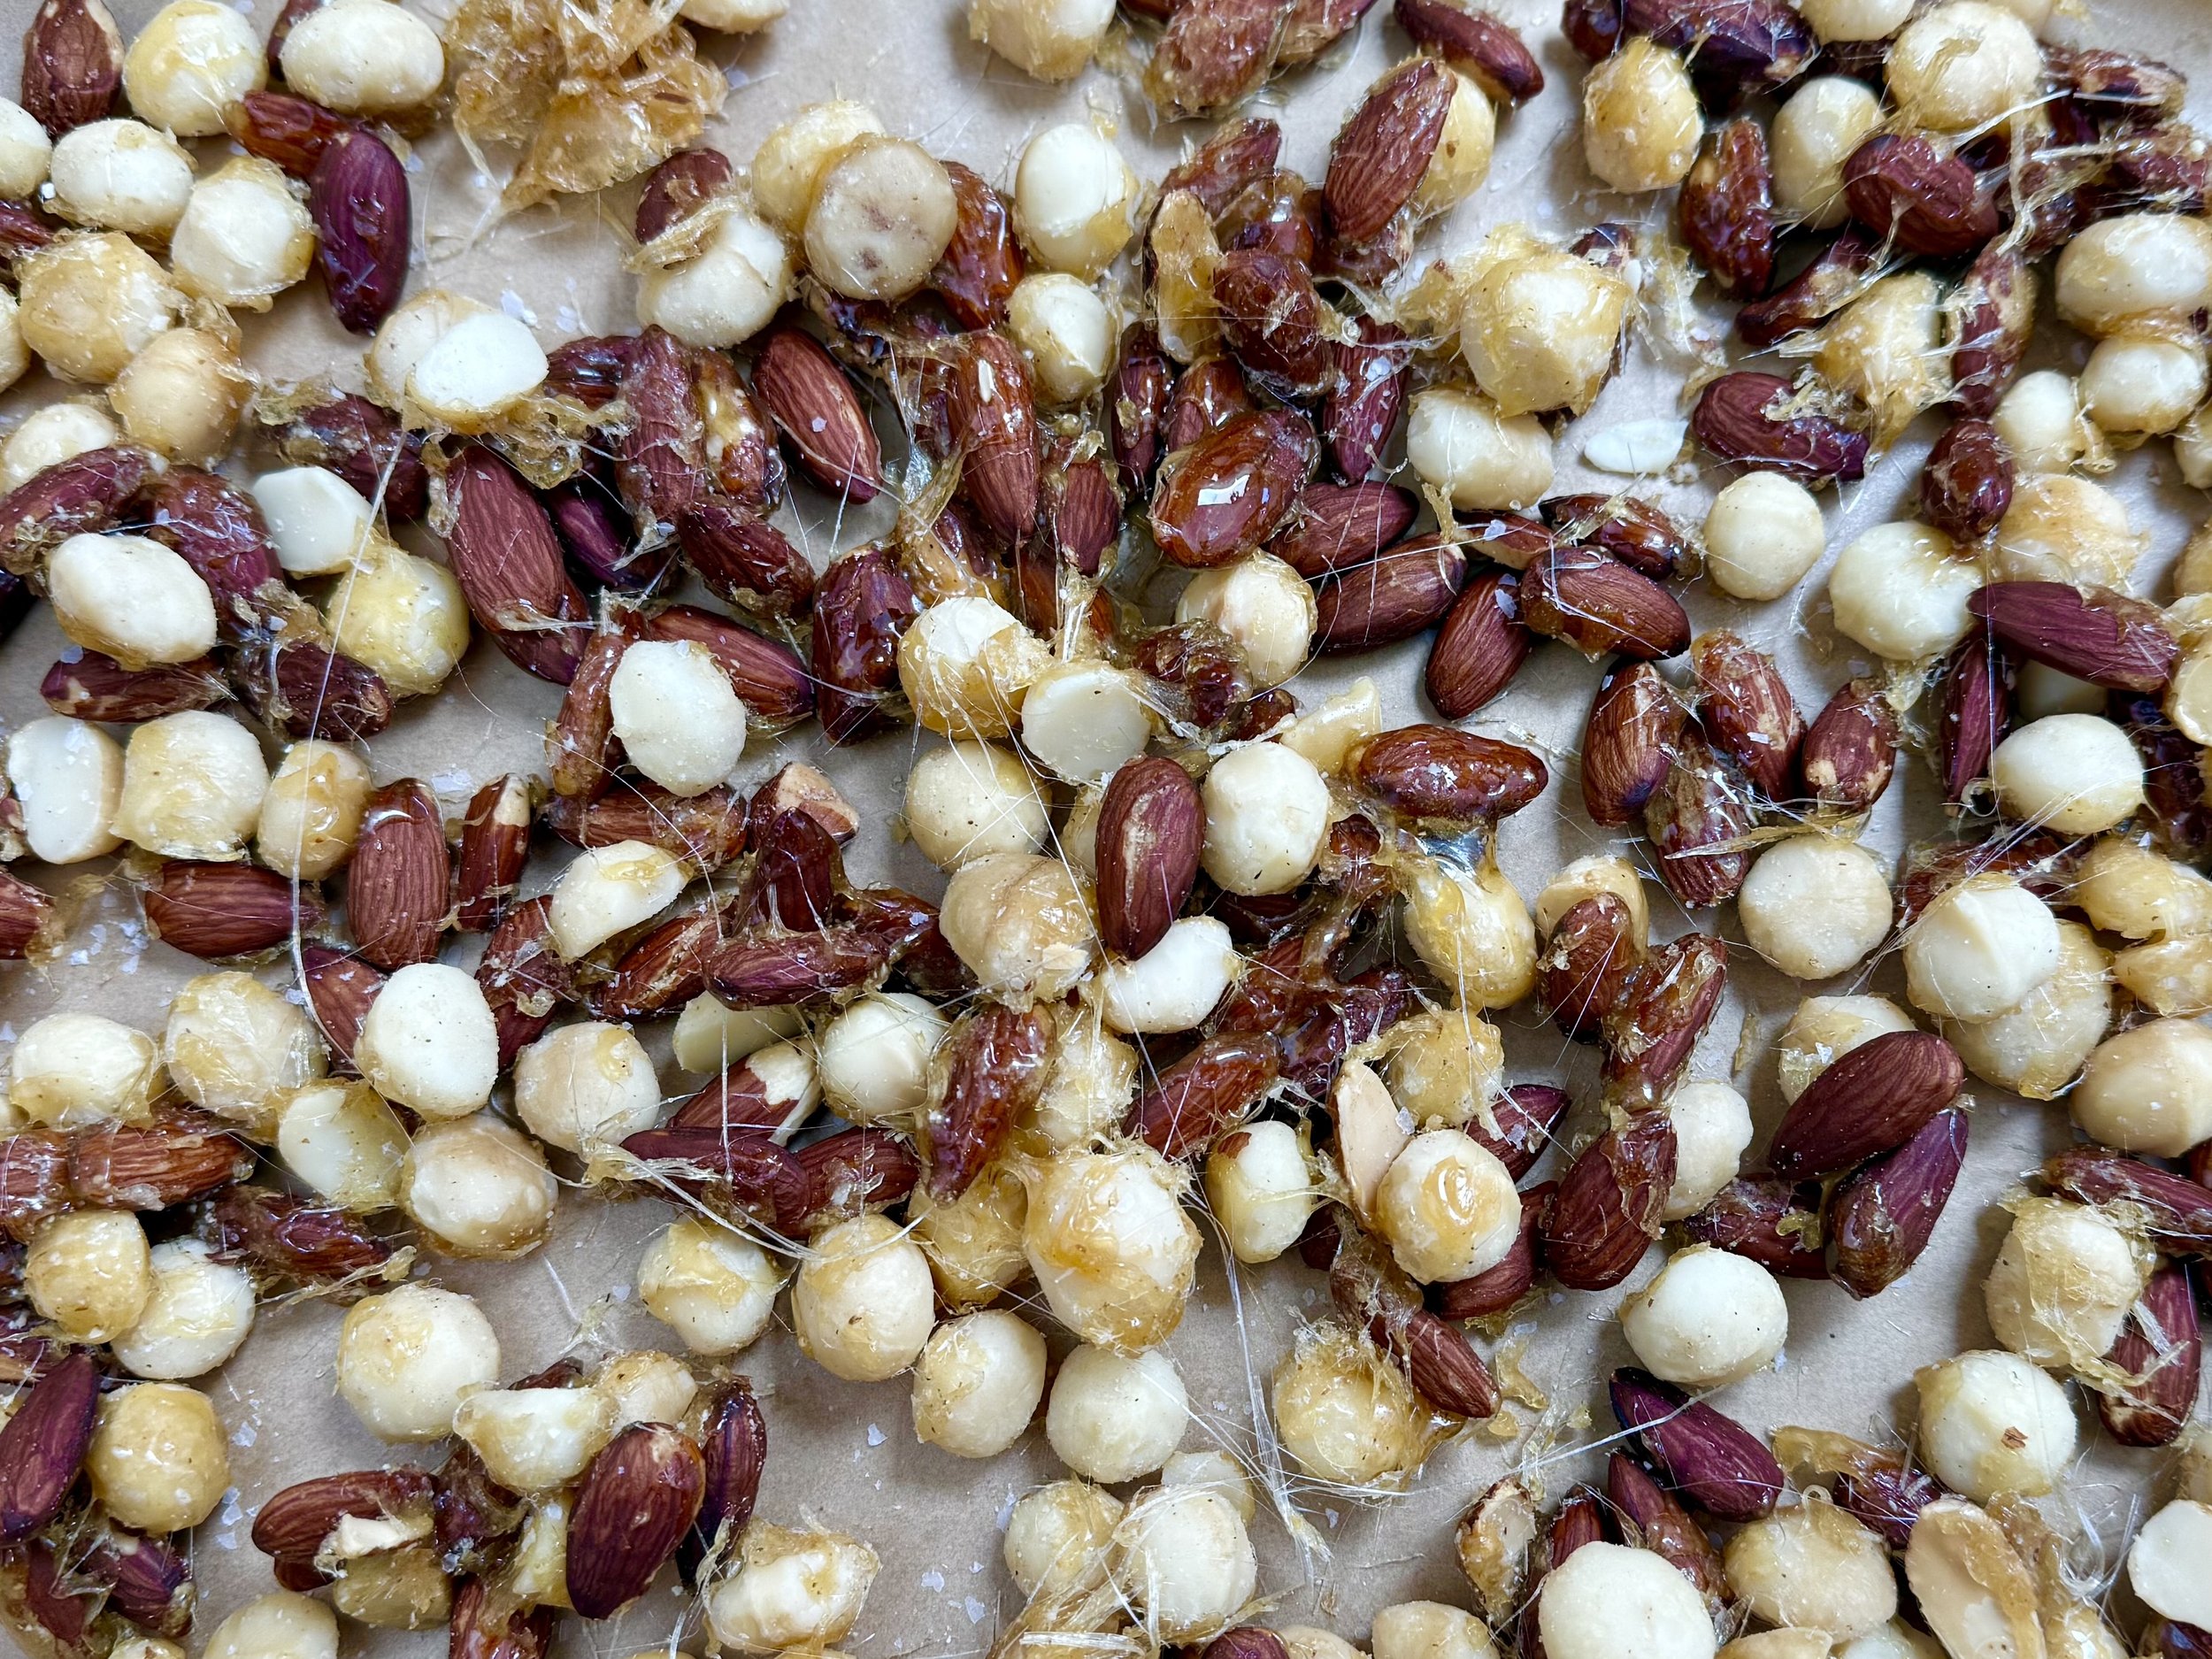
Lightly Sweet and Salty Nuts (Low FODMAP)
5 Minutes prep • 10 Minutes cook • Low FODMAP • Gluten-Free • Lactose-Free • Makes 5 cups
5 Minutes prep • 10 Minutes cook • Low FODMAP • Gluten-Free • Lactose-Free • Makes 5 cups • Ok to make-ahead: Steps 1 - 4
Craving a crunchy, flavorful snack? Look no further than these irresistible Lightly Sweet and Salty Nuts. The perfect balance of sweet and savory makes them impossible to resist. They are so easy to make, you have them ready in a jiffy. You can use other kinds of nuts instead, or in addition to, these two. I used nuts from Costco for this recipe which also made it very cost-effective.
See this new recipe in my FREE recipe club.
To streamline your search through hundreds of existing recipes, I'm moving the release of my new weekly creations to the Recipe Club on Patreon. In the club, you’ll get access to a treasure trove of low-FODMAP goodness, complete with collections and filters to use as your virtual cookbook!
Here's what awaits you in the club:
Exclusive weekly recipes: Be the first to try my latest delicious low-FODMAP creations!
Simple & Easy: My recipes continue to focus on readily available ingredients and effortless preparation, perfect for family-friendly meals (no more separate low-FODMAP meal prep!).
Hundreds of existing recipes: Gain access to my entire library of low-FODMAP recipes, all conveniently organized.
You can join for free or sign up for only $5/month. Your support fuels my passion for creating new, delicious, and easy-to-make low-FODMAP recipes just for you.
Let's go on this delicious low-FODMAP journey together.
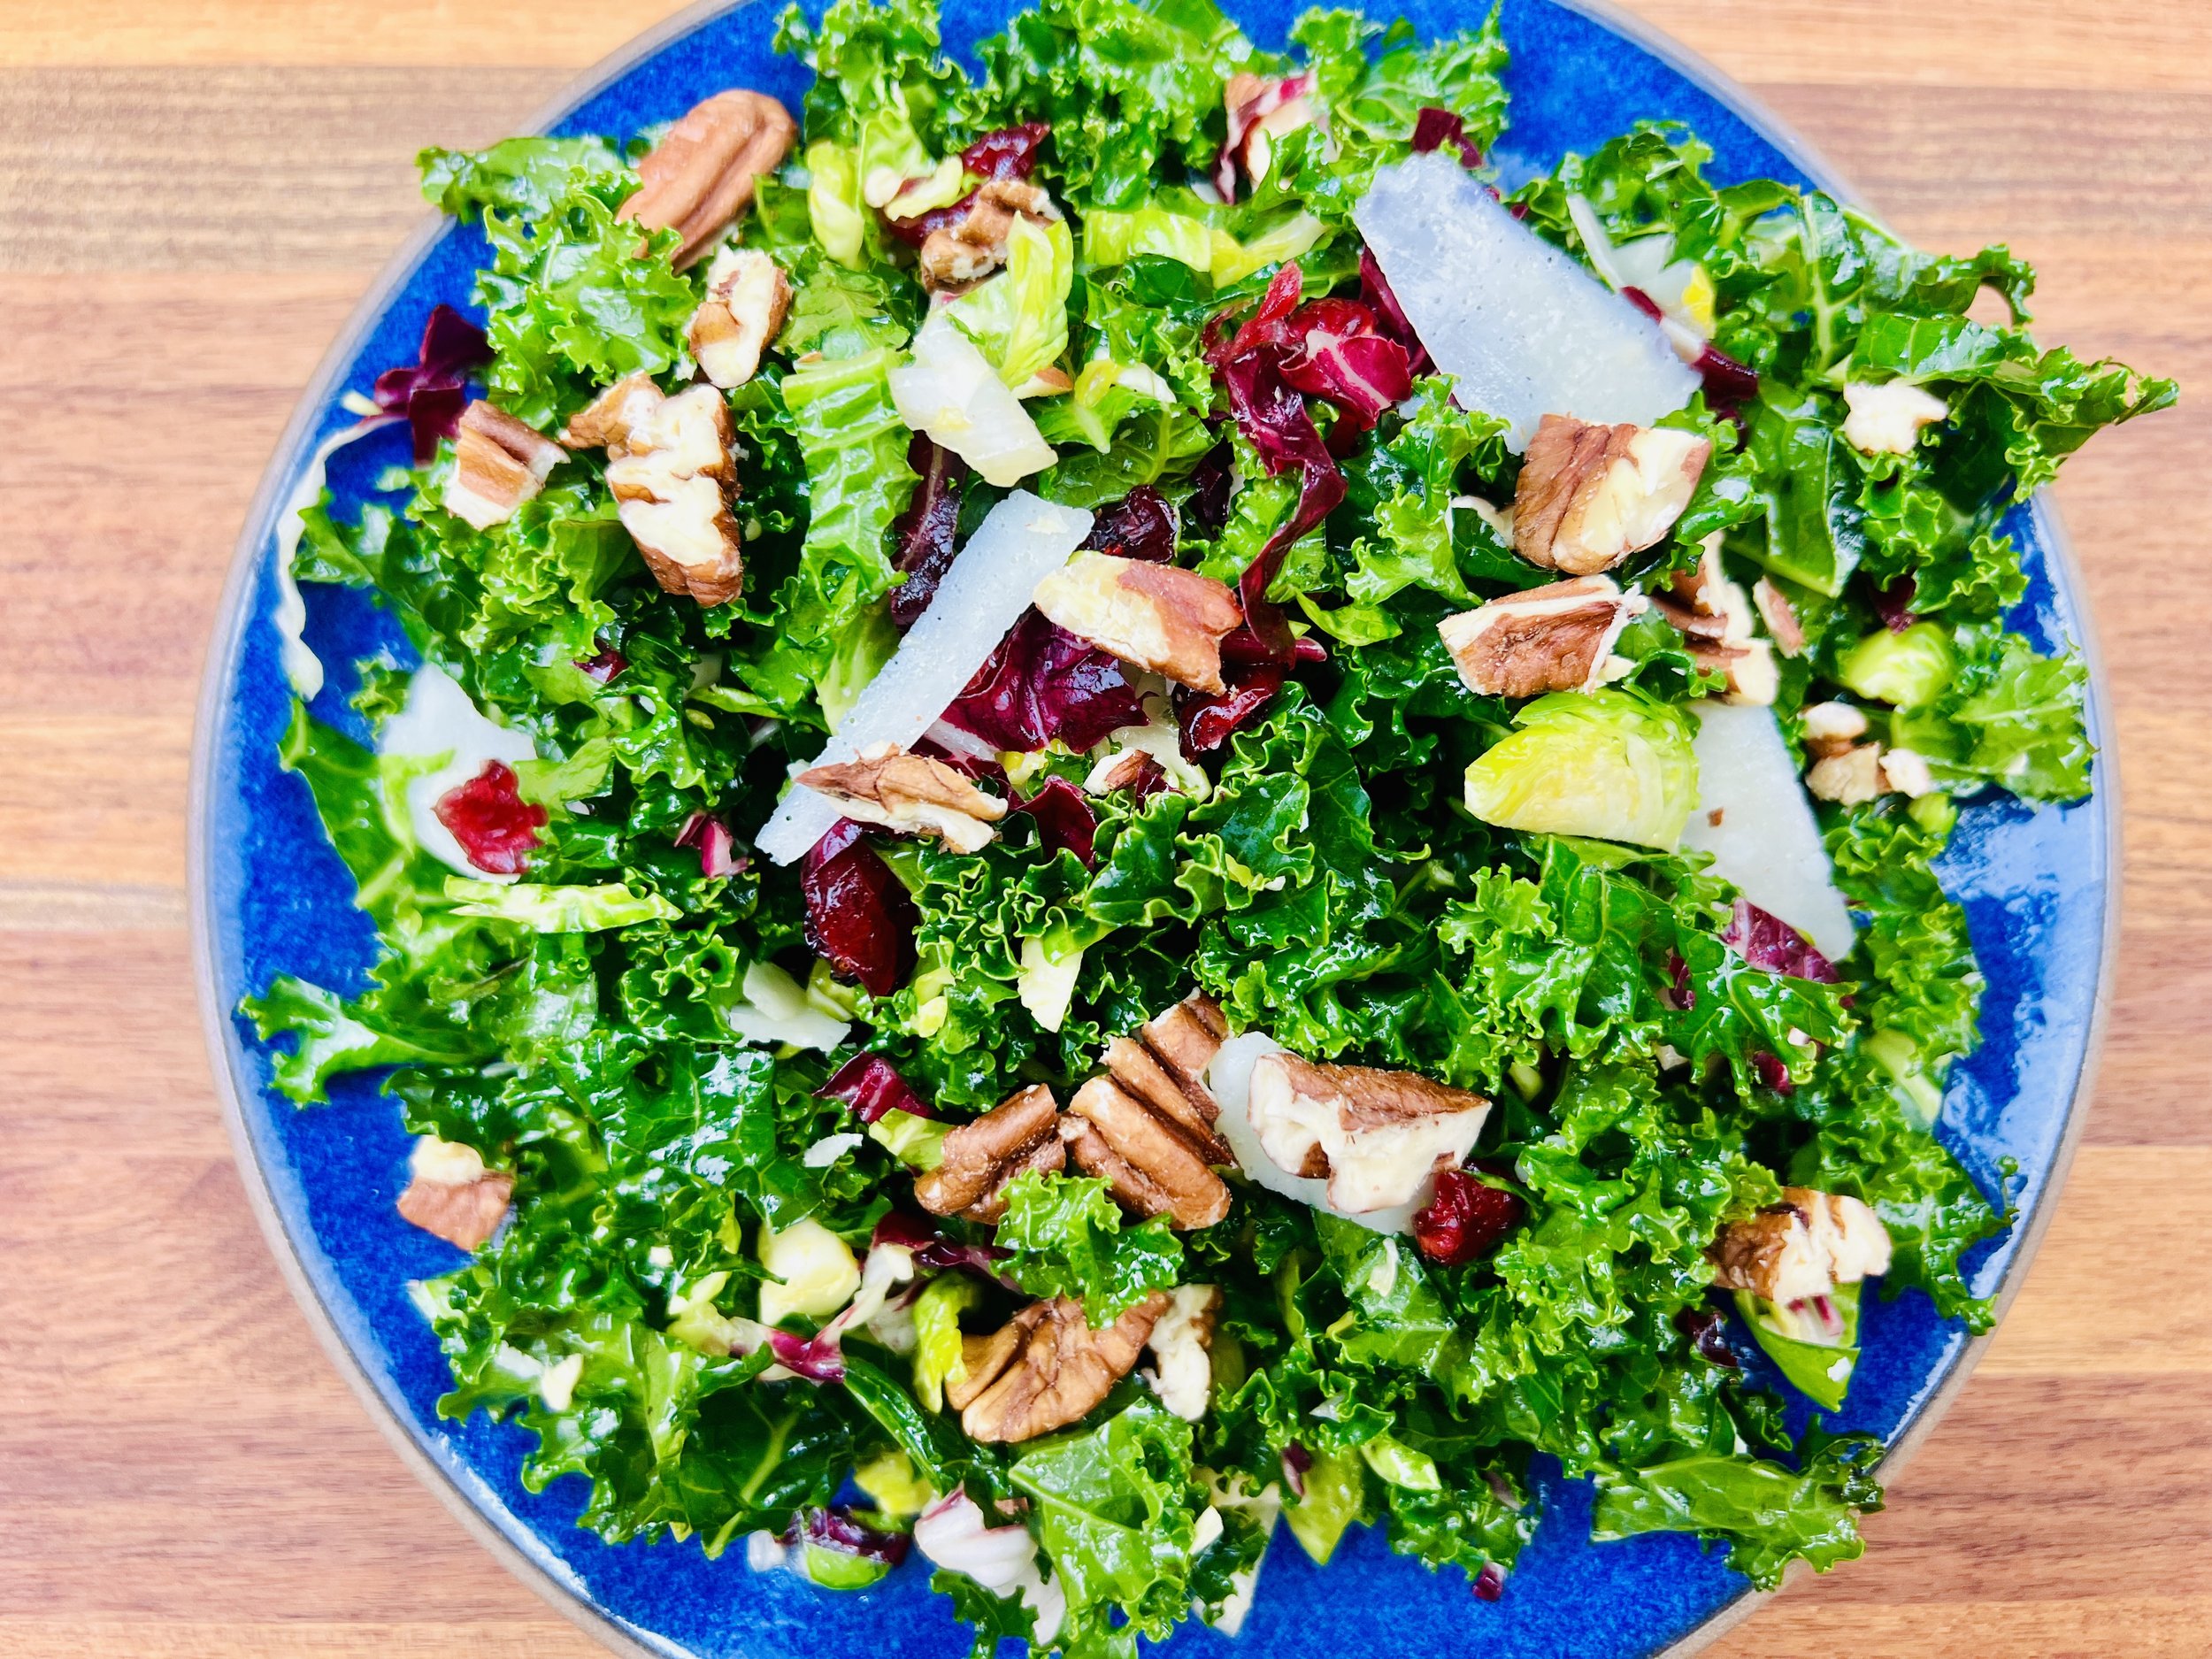
Holiday Salad Too (Low FODMAP)
20 Minutes prep • Low FODMAP • Gluten-Free • Vegetarian • Serves 6
20 Minutes prep • Low FODMAP • Gluten-Free • Vegetarian • Serves 6 • Ok to make-ahead: Steps 1 - 4
This vibrant salad is the perfect antidote to all the holiday indulgence. It's one of those recipes that will make you feel healthy just looking at it! Packed with fresh vegetables, tangy cheeses, and sweet dried cranberries, and finished with a lemony vinaigrette so it’s got a little something for everyone. Even better, it’s a great make-ahead salad because it stays perfectly fresh in the fridge even for a couple of days!
See this new recipe in my FREE recipe club.
To streamline your search through hundreds of existing recipes, I'm moving the release of my new weekly creations to the Recipe Club on Patreon. In the club, you’ll get access to a treasure trove of low-FODMAP goodness, complete with collections and filters to use as your virtual cookbook!
Here's what awaits you in the club:
Exclusive weekly recipes: Be the first to try my latest delicious low-FODMAP creations!
Simple & Easy: My recipes continue to focus on readily available ingredients and effortless preparation, perfect for family-friendly meals (no more separate low-FODMAP meal prep!).
Hundreds of existing recipes: Gain access to my entire library of low-FODMAP recipes, all conveniently organized.
You can join for free or sign up for only $5/month. Your support fuels my passion for creating new, delicious, and easy-to-make low-FODMAP recipes just for you.
Let's go on this delicious low-FODMAP journey together.
Cinnamon Spice Cake with Eggnog Buttercream (Low FODMAP)
15 Minutes prep • 30 Minutes cook • Low FODMAP • Gluten-Free • Serves 12
15 Minutes prep • 30 Minutes cook • Low FODMAP • Gluten-Free • Serves 12 • Ok to make-ahead: Steps 1 - 2
Warm, cozy, and full of festive cheer, this Cinnamon Spice Cake with Eggnog Buttercream is the perfect dessert to keep the holiday season going! The cake itself is a soft, moist masterpiece, infused with the comforting flavors of cinnamon, nutmeg, and a hint of clove—spices that evoke memories of cozy winter nights and festive gatherings. Topped with a rich, velvety Eggnog Buttercream frosting, this cake is a luxurious treat that combines the creamy, spiced flavor of eggnog with the sweetness of buttercream. Whether you're hosting a party, celebrating a special occasion, or simply treating yourself, this cake is sure to be a seasonal favorite.
See this new recipe in my FREE recipe club.
To streamline your search through hundreds of existing recipes, I'm moving the release of my new weekly creations to the Recipe Club on Patreon. In the club, you’ll get access to a treasure trove of low-FODMAP goodness, complete with collections and filters to use as your virtual cookbook!
Here's what awaits you in the club:
Exclusive weekly recipes: Be the first to try my latest delicious low-FODMAP creations!
Simple & Easy: My recipes continue to focus on readily available ingredients and effortless preparation, perfect for family-friendly meals (no more separate low-FODMAP meal prep!).
Hundreds of existing recipes: Gain access to my entire library of low-FODMAP recipes, all conveniently organized.
You can join for free or sign up for only $5/month. Your support fuels my passion for creating new, delicious, and easy-to-make low-FODMAP recipes just for you.
Let's go on this delicious low-FODMAP journey together.
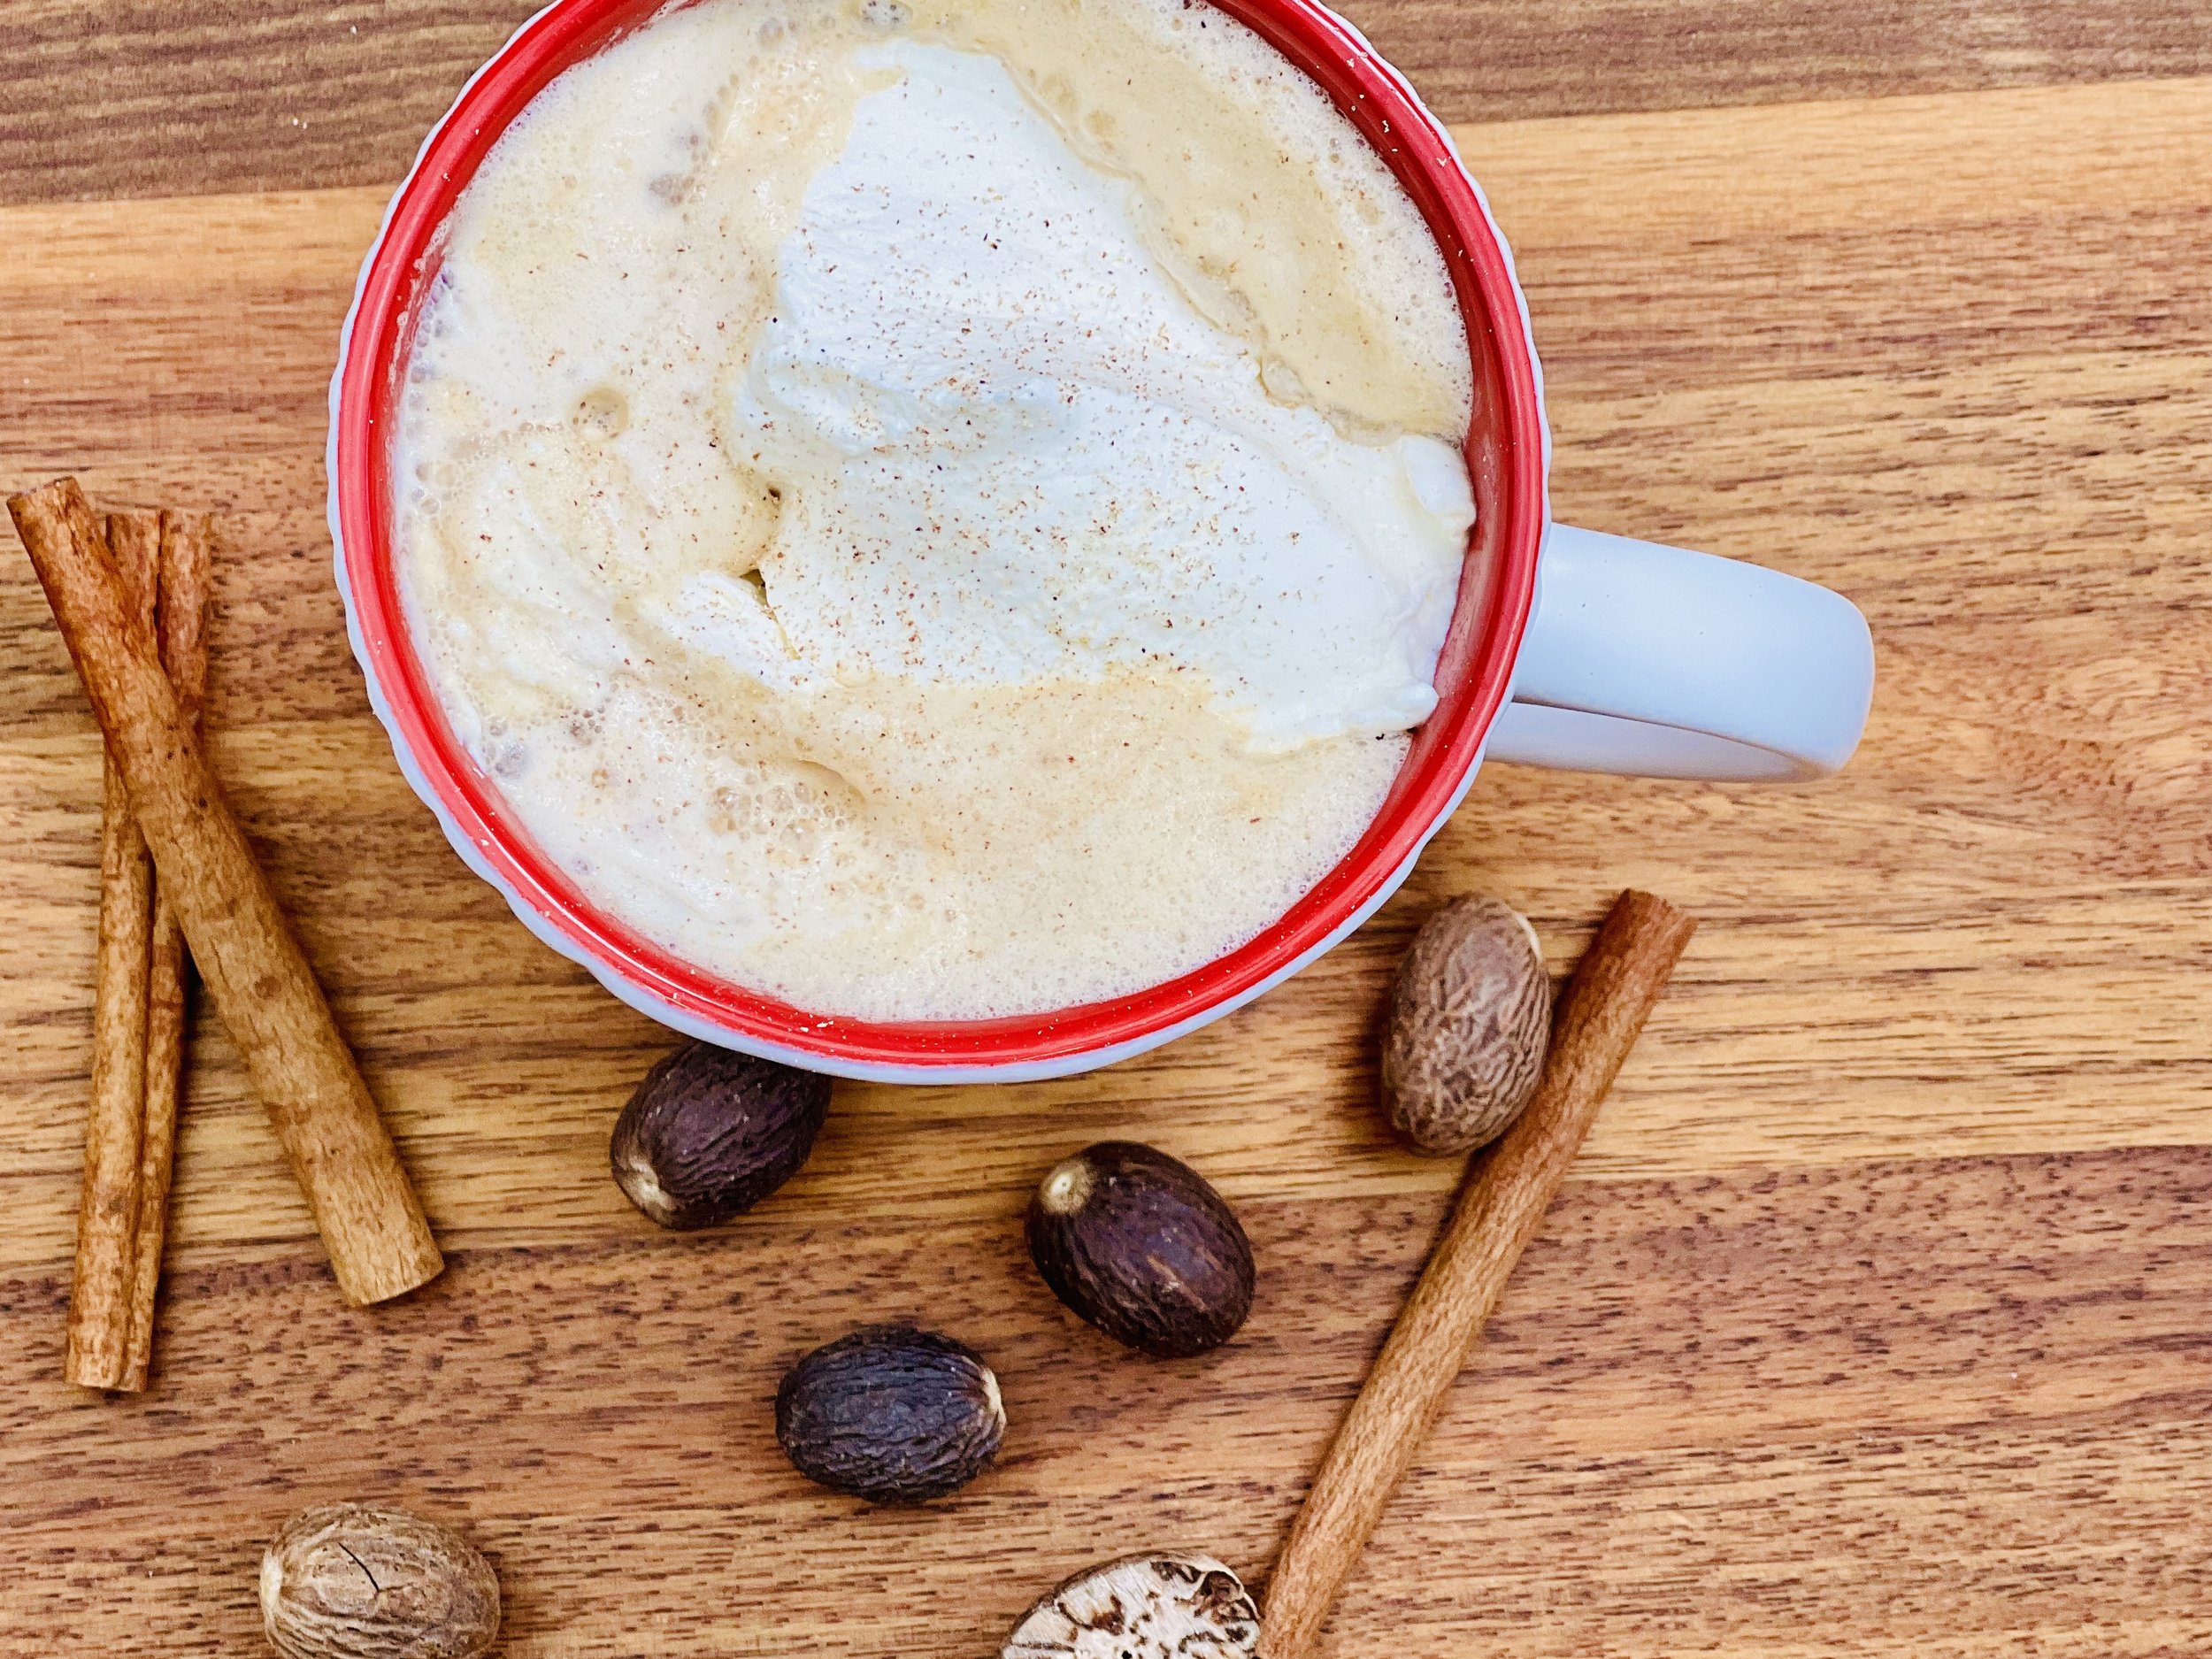
Creamy Holiday Eggnog (Low FODMAP)
20 Minutes prep • 4 Hours chill • Low FODMAP • Gluten-Free • Serves 8
20 Minutes prep • 4 Hours chill • Low FODMAP • Gluten-Free • Serves 8 • Ok to make-ahead: Steps 1 - 6
This holiday season, treat yourself to the rich, creamy, and comforting taste of homemade eggnog. A timeless tradition, this recipe captures the essence of winter warmth in every sip. Crafted with low FODMAP ingredients in mind, including velvety cream, fragrant spices, and a touch of sweetness, this eggnog is the perfect holiday libation. Whether you prefer it spiked with a bit of brandy or bourbon or non-alcoholic, this recipe is sure to become a cherished part of your holiday celebrations. So gather your loved ones, pour a cup of this delightful beverage, and savor the magic of the season.
See this new recipe in my FREE recipe club.
To streamline your search through hundreds of existing recipes, I'm moving the release of my new weekly creations to the Recipe Club on Patreon. In the club, you’ll get access to a treasure trove of low-FODMAP goodness, complete with collections and filters to use as your virtual cookbook!
Here's what awaits you in the club:
Exclusive weekly recipes: Be the first to try my latest delicious low-FODMAP creations!
Simple & Easy: My recipes continue to focus on readily available ingredients and effortless preparation, perfect for family-friendly meals (no more separate low-FODMAP meal prep!).
Hundreds of existing recipes: Gain access to my entire library of low-FODMAP recipes, all conveniently organized.
You can join for free or sign up for only $5/month. Your support fuels my passion for creating new, delicious, and easy-to-make low-FODMAP recipes just for you.
Let's go on this delicious low-FODMAP journey together.
Cranberry Chutney (Low FODMAP)
5 Minutes prep • 15 Minutes cook • Low FODMAP • Gluten-Free • Lactose-Free • Makes 2 cups
5 Minutes prep • 15 Minutes cook • Low FODMAP • Gluten-Free • Lactose-Free • Makes 2 cups • Ok to make-ahead: Steps 1 - 4
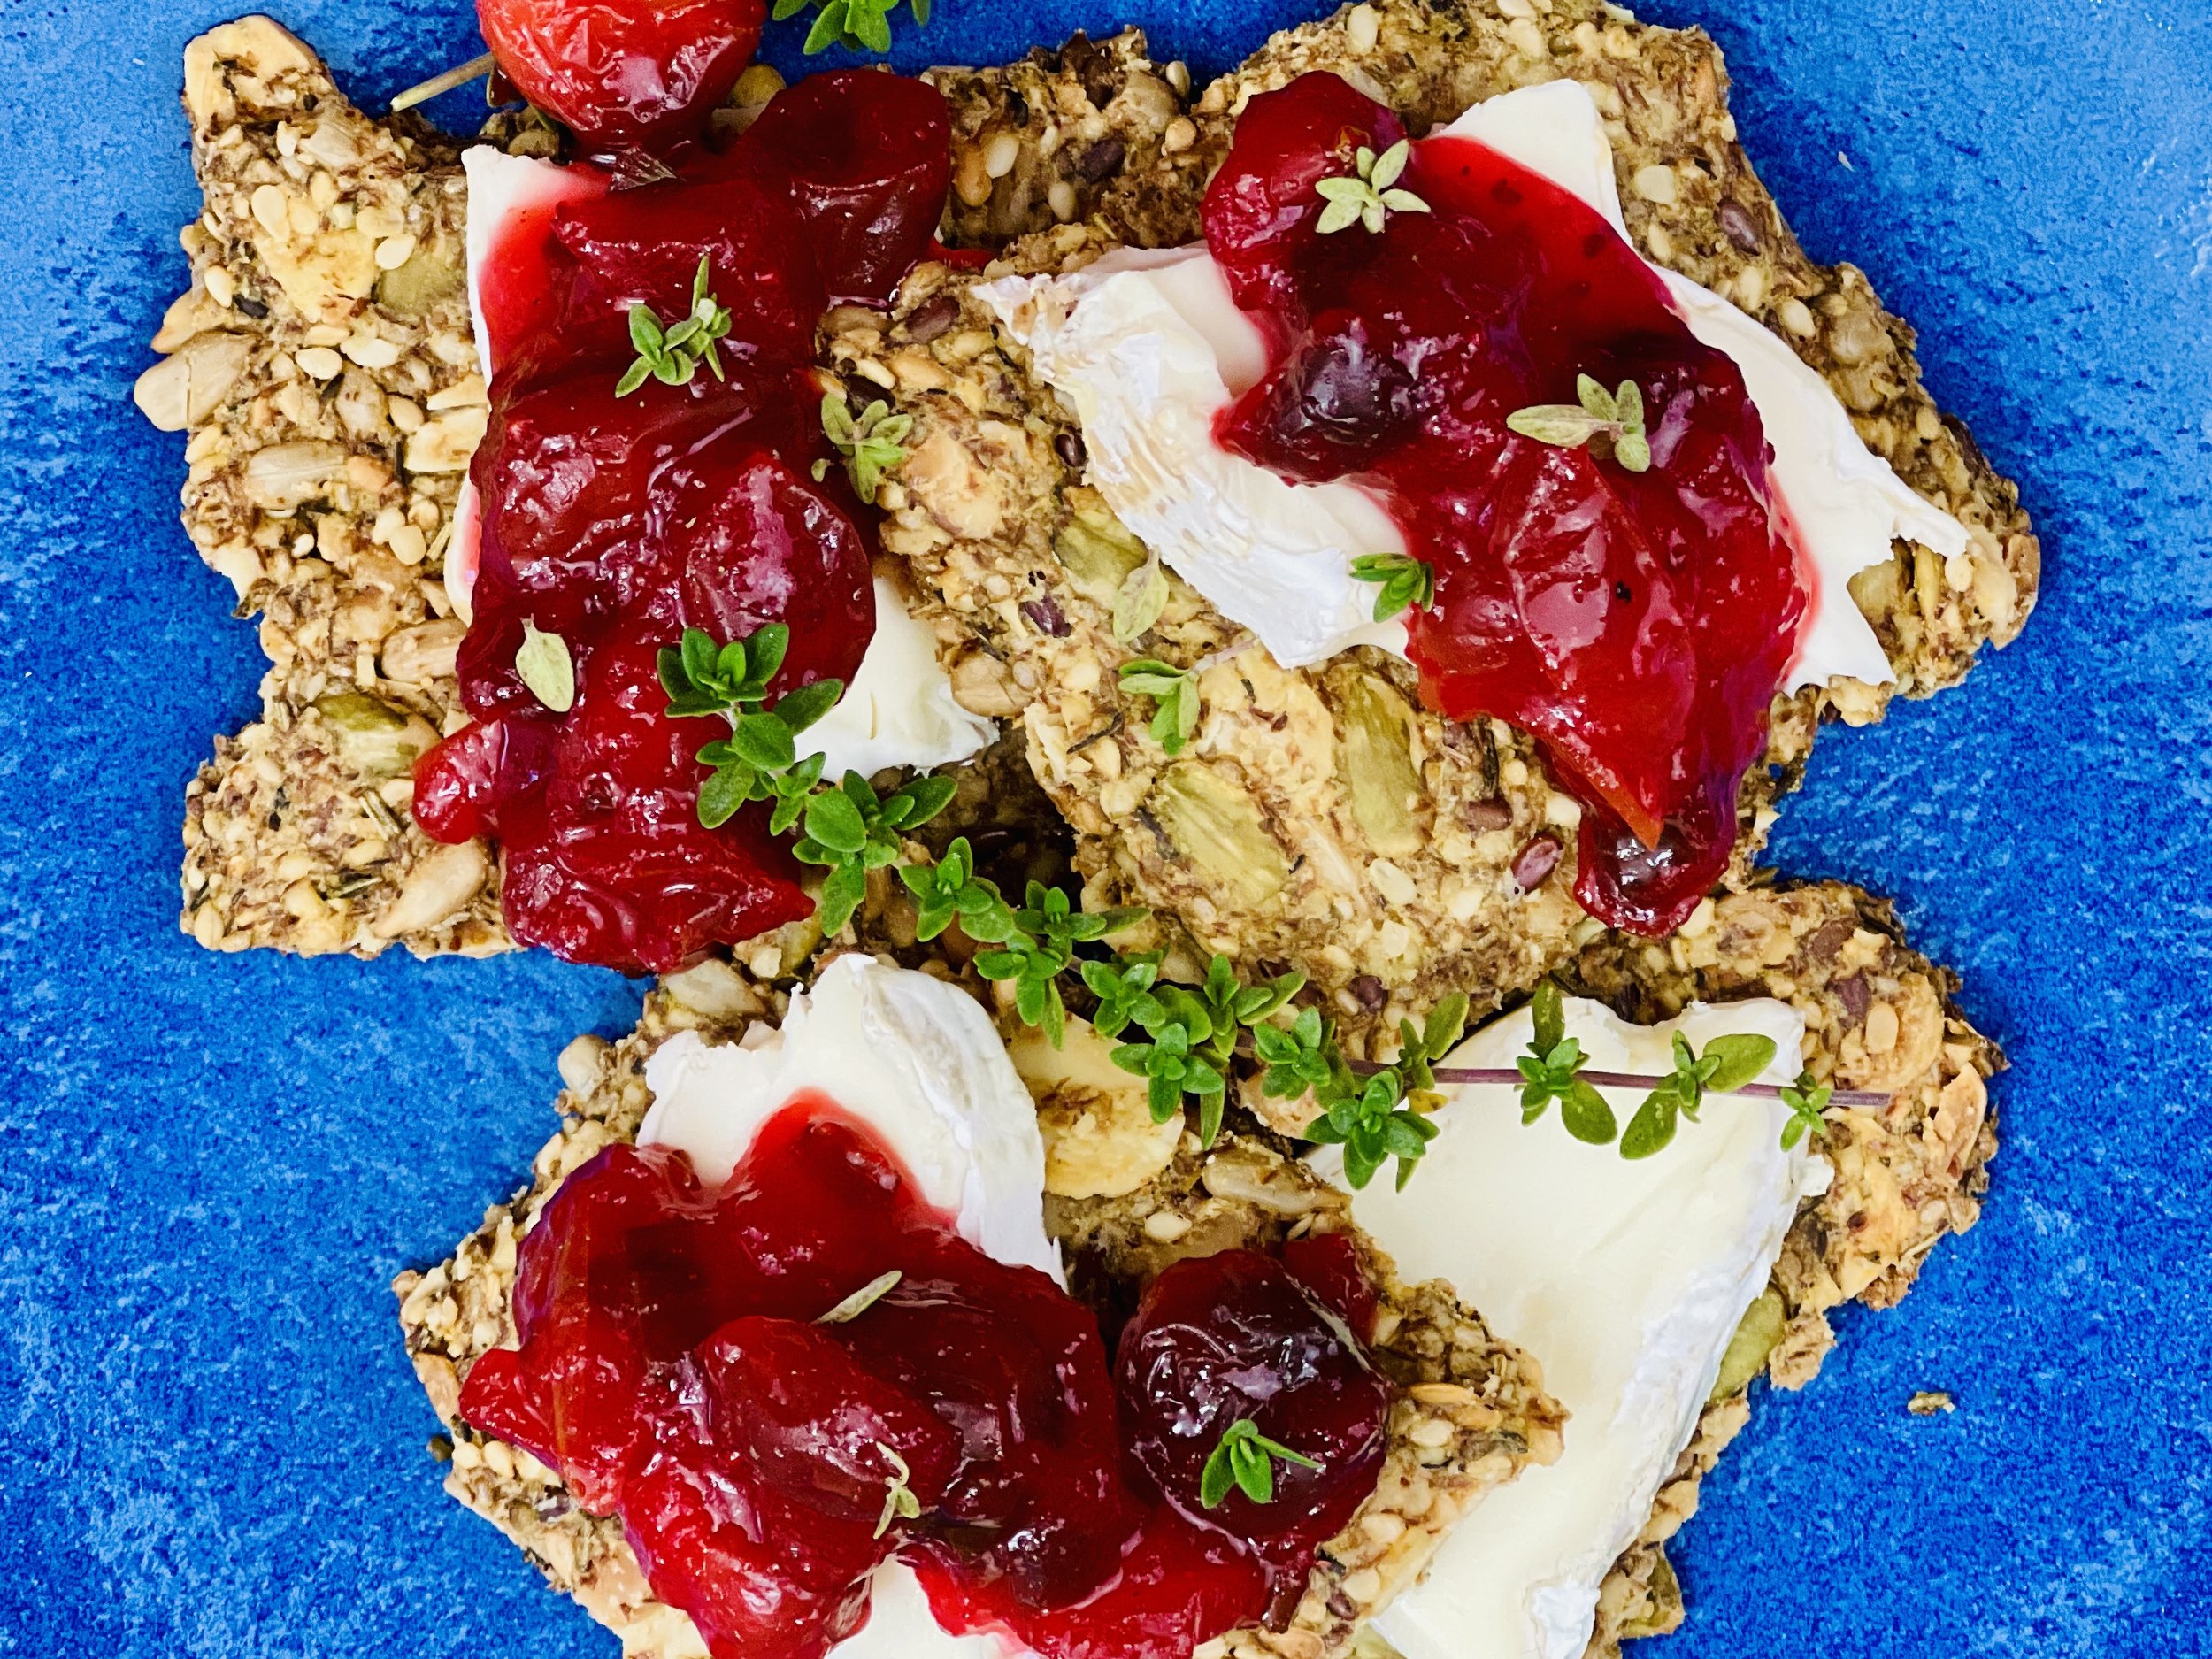
This lightly spicy and sweet cranberry chutney is the perfect accompaniment to your holiday feast or a delightful spread for any occasion. Bursting with the vibrant flavors of cranberries, apples, and warm spices, this chutney is easy to make and even easier to love. Whether you serve it with roasted meats, cheese, and my seed crackers, or simply enjoy it on its own, this recipe is sure to become a new family favorite.
See this new recipe in my FREE recipe club.
To streamline your search through hundreds of existing recipes, I'm moving the release of my new weekly creations to the Recipe Club on Patreon. In the club, you’ll get access to a treasure trove of low-FODMAP goodness, complete with collections and filters to use as your virtual cookbook!
Here's what awaits you in the club:
Exclusive weekly recipes: Be the first to try my latest delicious low-FODMAP creations!
Simple & Easy: My recipes continue to focus on readily available ingredients and effortless preparation, perfect for family-friendly meals (no more separate low-FODMAP meal prep!).
Hundreds of existing recipes: Gain access to my entire library of low-FODMAP recipes, all conveniently organized.
You can join for free or sign up for only $5/month. Your support fuels my passion for creating new, delicious, and easy-to-make low-FODMAP recipes just for you.
Let's go on this delicious low-FODMAP journey together.
Buttery BBQ Snack Mix (Low FODMAP)
10 Minutes prep • 35 Minutes cook • Low FODMAP • Gluten-free • Serves 8
10 Minutes prep • 35 Minutes cook • Low FODMAP • Gluten-free • Serves 8 • Ok to make ahead: Steps 1-4
Get ready to roll out an especially delicious snack mix for your next barbecue or potluck. Featuring my “Squarefish” Cheesey Cracker Crisps, it’s loaded with flavor the whole family will love. Crisp, crunchy, buttery, with just the right amount of spice, this snack mix is like the classic Chex Mix, only better!
Ingredients
6 tablespoons salted butter, melted
2 tablespoons Smoke N Sanity Garlic Parmesan Seasoning (Use code IBSGC15 for 15% discount)
1 tablespoon smoked paprika
2 teaspoons chili powder
2 tablespoons Smoke N Sanity Essence of Garlic Salt (Use code IBSGC15 for 15% discount)
1/4 teaspoon cayenne
1/2 teaspoon light brown sugar
1 teaspoon each Kosher salt and black pepper
3 cups gluten-free salted mini pretzel twists or pretzel sticks cut in half
3 cups Squarefish Cheesy Crackers (or sub additional rice chex and pretzels)
2 cups Rice Chex Ceareal
1 cup roasted and salted peanuts (optional)
Directions
(1) Prepare: Make my “Squarefish” Cheesy Cracker Crisps (if using). Preheat the oven to 300 degrees F.
(2) Blend the seasonings: In a large bowl, combine the melted butter, SnS Garlic Parmesan Seasoning, smoked paprika, chili powder, dill, essence of garlic salt, cayenne, brown sugar, Kosher salt, and pepper. Stir well to blend.
(3) Add the crackers/cereal: Add the pretzels, cheese crackers, and Chex cereal, tossing well for about 3 minutes or until the mixture is evenly coated. Spread the mix evenly over a rimmed baking sheet.
(4) Bake: Transfer to the oven and bake for 30-35 minutes. Toss 1-2 times throughout cooking. Once cooked, remove from the oven and stir the peanuts in, if using.
(5) Plate and serve: Serve immediately, or store in an airtight container for up to 1 week.
Eat and enjoy every bite because you can!
Recipe note: I use Diamond Crystal Kosher salt in all my recipes because it has a wonderful flat and crisp flake that tastes delicious. It is also the least salty salt available so you can use it more liberally as a seasoning than you can table salt or sea salt. If you use another type of salt, you may need to reduce the amount so it is not over-salted.
Have a question you’d like to have answered? Email me at hello@ibsgamechanger.com
Link note: This post may contain affiliate links for you to easily purchase items that are linked. I may earn a small commission from qualifying purchases but none of this costs you a thing so feel free to use the links! In addition, for some items, I have provided a special discount code for IBS Game Changers so be sure to use the code when you purchase an item to get the discount that has been arranged just for you.
More Deliciously Low FODMAP™ snack recipes
Hot Cross Bun Waffles (Low FODMAP)
15 Minutes prep • 15 Minutes cook • Low FODMAP • Serves 4
15 Minutes prep • 15 Minutes cook • Low FODMAP • Serves 4 • Ok to make ahead: Steps 1-4
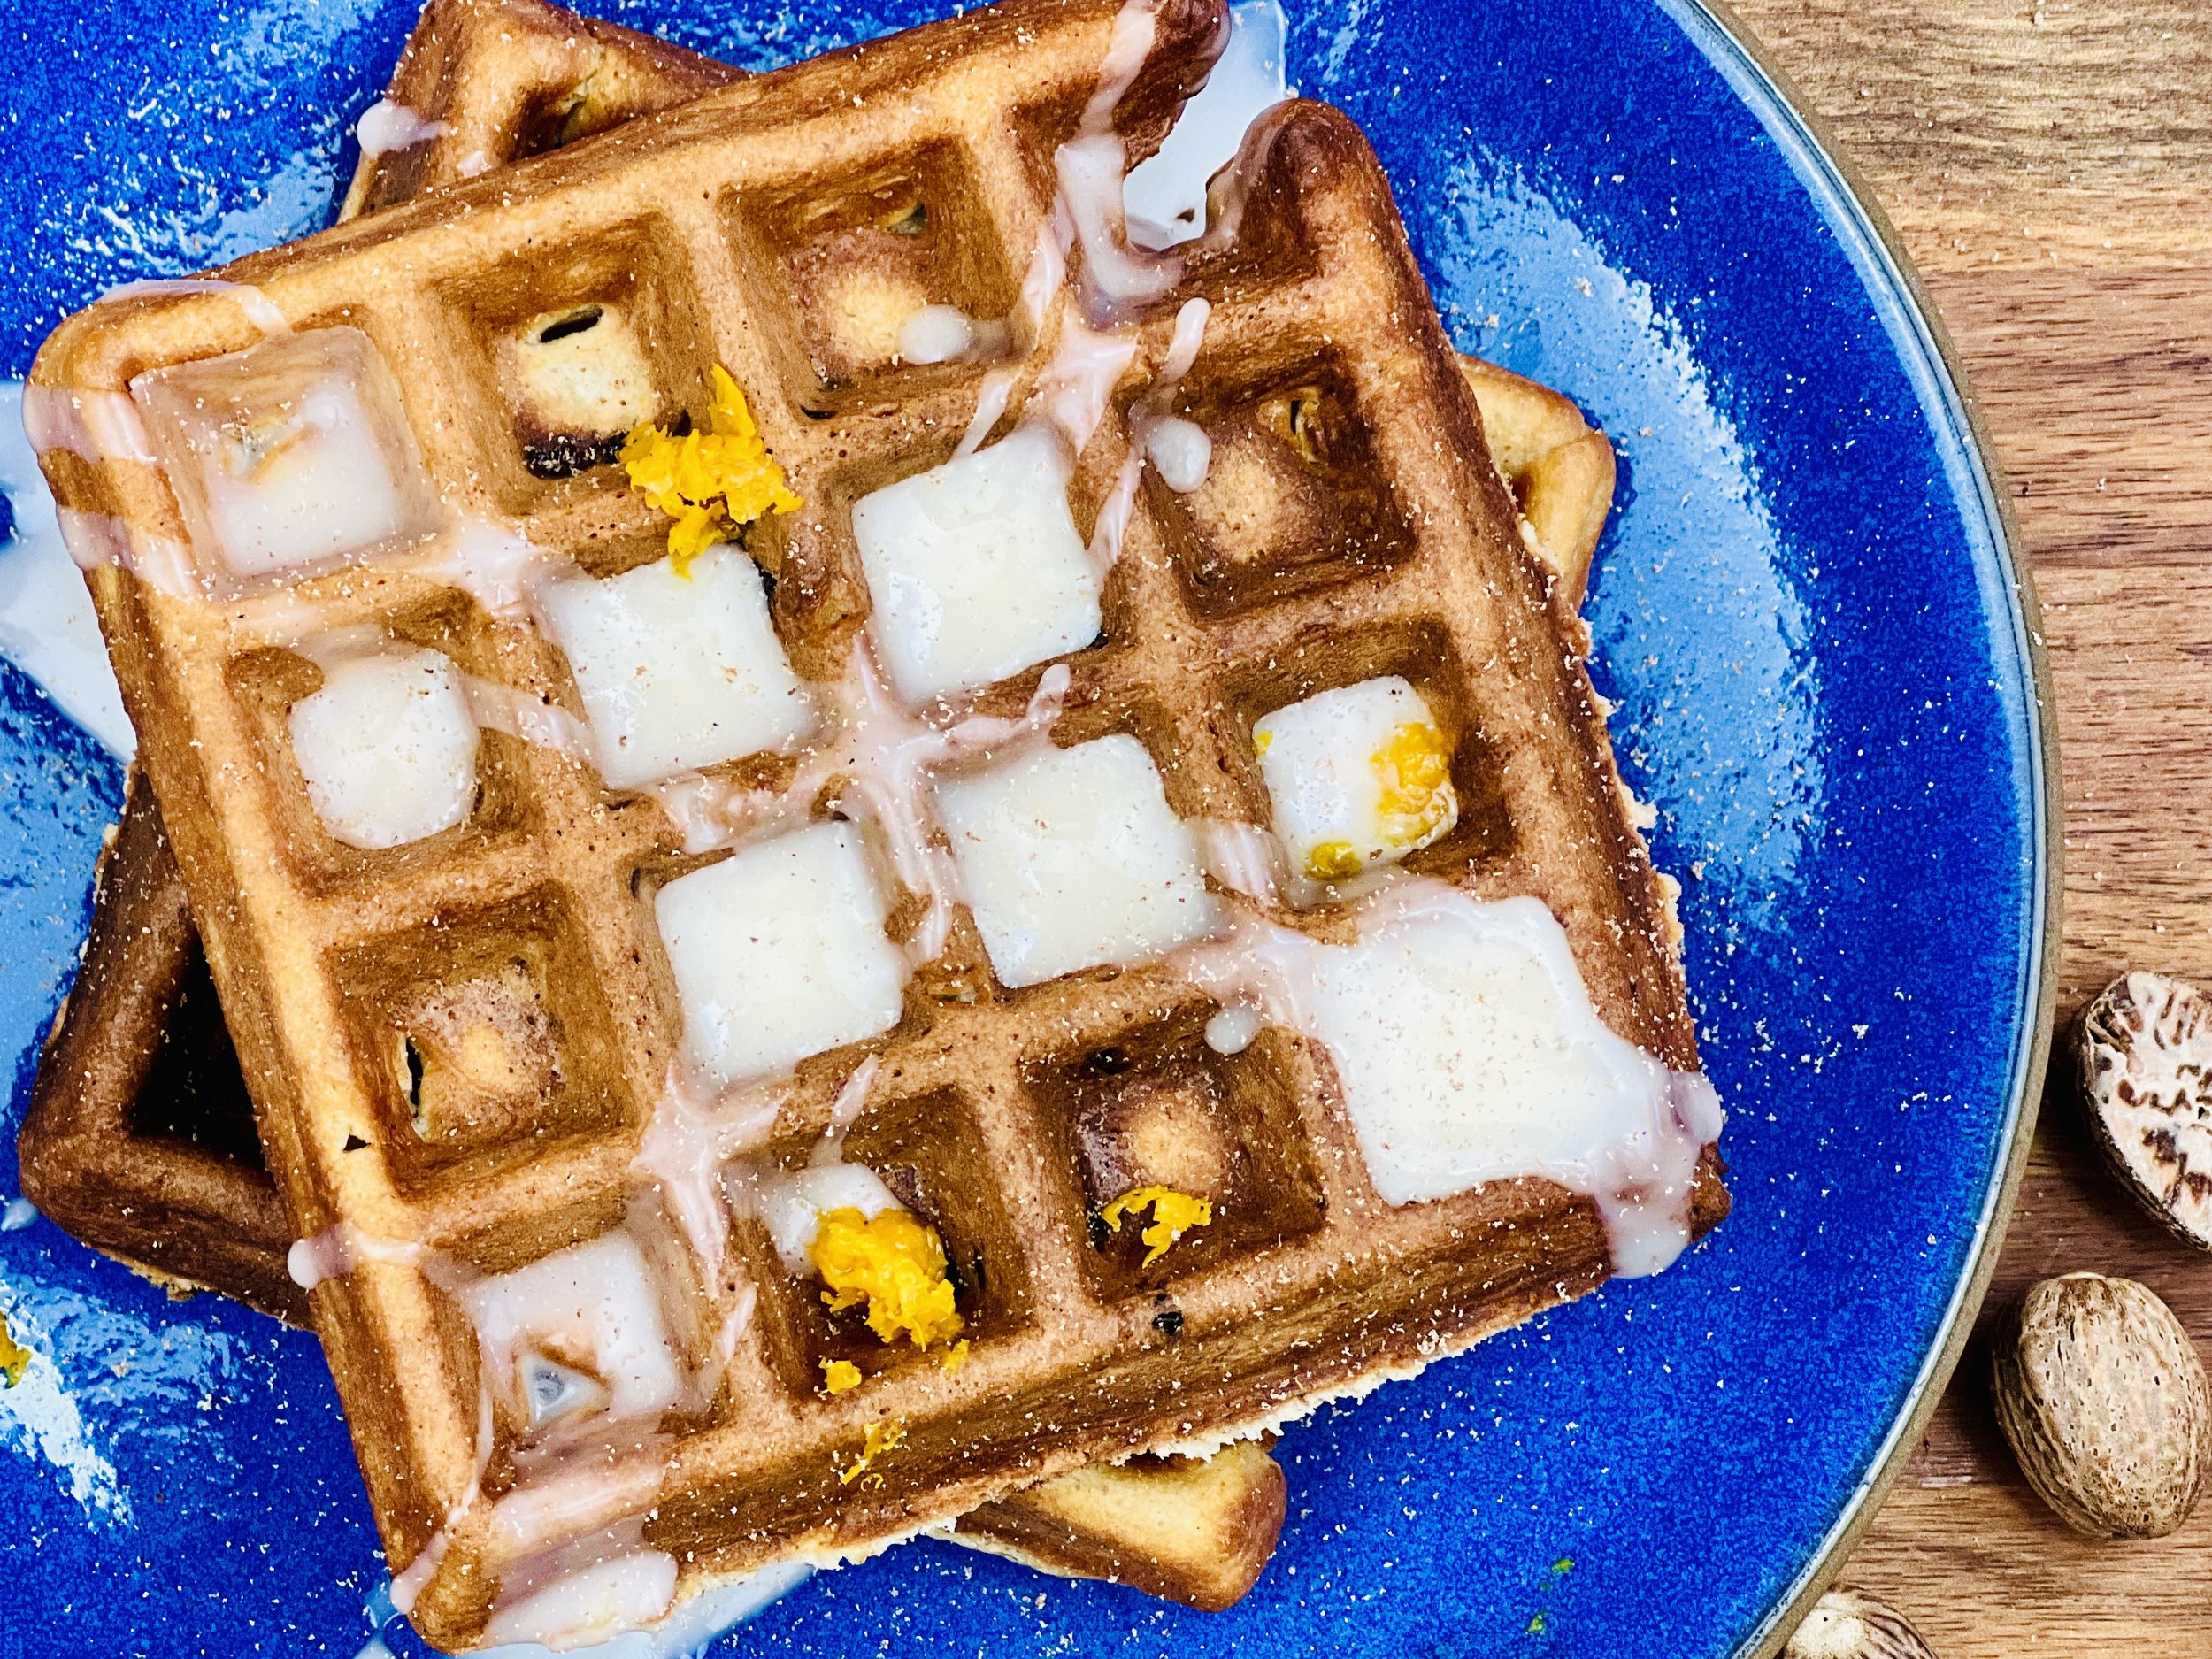
This is a delightful twist on a classic Easter treat: Hot Cross Bun Waffles! These waffles infuse all the cozy warmth and spice of traditional hot cross buns into a crisp and delicious breakfast delight. Imagine the comforting aroma of cinnamon, nutmeg, and cardamom wafting through your kitchen as these waffles cook. Topped with a generous drizzle of melted butter and an orangey glaze, they're a surefire way to elevate your breakfast or brunch spread. Whether you're celebrating Easter morning or simply craving a cozy indulgence, these Hot Cross Bun Waffles are guaranteed to delight your taste buds and warm your soul.
Ingredients: Waffles
2 cups gluten-free flour
1 teaspoon Kosher salt
1 1/2 teaspoons baking powder
2 tablespoons granulated sugar
1/2 teaspoon ground cardamom
1/2 teaspoon cinnamon
1/2 teaspoon allspice
2 cups lactose-free milk
2 eggs, at room temperature
1/2 stick (4 tablespoons) unsalted butter, melted
1 teaspoon vanilla extract
1 teaspoon orange zest
1/4 cup currents (or raising roughly chopped)
Maple syrup and melted butter for serving
Ingredients: Orange Glaze
3/4 cup powdered sugar
1 teaspoon orange juice
1/4 teaspoon fresh grated nutmeg (optional)
Directions
(1) Prepare: Melt the butter, chop the raisins (if using), and zest the orange.
(2) Combine dry ingredients: Put flour, salt, baking powder, sugar, cinnamon, cardamom, and allspice in a medium mixing bowl and whisk to combine.
(3) Combine wet ingredients: In a separate bowl, whisk the milk, eggs, melted butter, and vanilla together.
(4) Blend the batter: Pour the blended wet ingredients over the dry ingredients and stir with a wooden spoon until well combined. Fold in the chopped raisins and orange zest. There’s no need to get all the lumps out.
Make-ahead note: At this point, you can let the batter rest while you preheat the waffle iron, or you can cover the bowl tightly with plastic wrap and keep it in the refrigerator for a day or so until you’re ready to cook the waffles. Bring the batter to room temperature before cooking the waffles so the batter will pour. Add additional milk or melted butter if the batter is too thick after chilling.
(5) Cook the waffles: Once your waffle iron is heated, ladle an equal amount in each segment of the waffle iron. Cook until crisp but not burned. Remove from the waffle to a cooling rack to keep it crisp.
(6) Plate and serve: Serve warm with a drizzle of warm syrup, melted butter, and orange glaze. Top with a sprinkle of grated nutmeg.
Eat and enjoy every bite because you can!
Recipe note: I use Diamond Crystal Kosher salt in all my recipes because it has a wonderful flat and crisp flake that tastes delicious. It is also the least salty salt available so you can use it more liberally as a seasoning than you can table salt or sea salt. If you use another type of salt, you may need to reduce the amount so it is not over-salted.
Have a question you’d like to have answered? Email me at hello@ibsgamechanger.com
Link note: This post may contain affiliate links for you to easily purchase items that are linked. I may earn a small commission from qualifying purchases but none of this costs you a thing so feel free to use the links! In addition, for some items, I have provided a special discount code for IBS Game Changers so be sure to use the code when you purchase an item to get the discount that has been arranged just for you.
More Deliciously Low FODMAP™ breakfast recipes
Sour Cream Blueberry Coffee Cake (Low FODMAP)
15 Minutes prep • 45 Minutes cook • Low FODMAP • Gluten-free • Serves 8
15 Minutes prep • 45 Minutes cook • Low FODMAP • Gluten-free • Serves 8 • Ok to make ahead: Steps 1-2
This is a classic. Tender cake with a crunchy streusel on top and in the middle with bright blueberries throughout. It’s comfort food that’s even more delicious when it’s warm with a bit of butter melting into it. Perfect for a slow Sunday morning with a cup of coffee and your slippers on. The kitchen will smell delightful so you’ll have to work fast before the house wakes up and realizes you’ve made something scrumptious!
Ingredients: Coffee Cake
1 stick (8 tablespoons) salted butter, at room temperature
1/2 cup granulated sugar
1 tablespoon lemon zest
1/2 cup lactose-free sour cream
1 tablespoon vanilla extract
3 large eggs, at room temperature
3/4 cup all-purpose gluten-free flour
1/4 cup gf Jules gluten-free flour (makes it lighter, but you can use all gluten-free all-purpose flour if you prefer)
3/4 cup almond flour
2 teaspoons baking powder
1/2 teaspoon Kosher salt
1 cup fresh or frozen blueberries
Ingredients: Streusel
1/2 cup light brown sugar
2 tablespoons gluten-free flour
2 tablespoons butter
Directions
(1) Prepare: Preheat the oven to 375 degrees F. Grease the bottom and sides of a 9-inch springform pan or (9 x 5-inch) loaf pan.
(2) Make the streusel: To make the streusel. Combine all ingredients in a bowl and mix until a crumble forms.
(3) Make the batter: In the bowl of your stand mixer, beat together the butter, sugar, and lemon zest until combined. Add the sour cream and vanilla, beating until smooth. Beat in the eggs, one at a time, until combined. Add the flour, almond flour, baking powder, and salt. Fold in the blueberries by hand so they don’t get crushed.
(4) Finish: Spoon half the batter into the prepared pan. Sprinkle 1/2 the streusel evenly over the batter. Add the remaining batter and then sprinkle evenly with the remaining streusel.
(5) Bake: Bake for 55-60 minutes, or until the center is just set and toothpick comes out clean.
(6) Plate and serve: Slice and serve warm with a pat of butter melting into the streusel topping.
Eat and enjoy every bite because you can!
Recipe note: I use Diamond Crystal Kosher salt in all my recipes because it has a wonderful flat and crisp flake that tastes delicious. It is also the least salty salt available so you can use it more liberally as a seasoning than you can table salt or sea salt. If you use another type of salt, you may need to reduce the amount so it is not over-salted.
Have a question you’d like to have answered? Email me at hello@ibsgamechanger.com
Link note: This post may contain affiliate links for you to easily purchase items that are linked. I may earn a small commission from qualifying purchases but none of this costs you a thing so feel free to use the links! In addition, for some items, I have provided a special discount code for IBS Game Changers so be sure to use the code when you purchase an item to get the discount that has been arranged just for you.
More Deliciously Low FODMAP™ dessert recipes
Mastering Mindful Eating: 13 Essential Strategies to Detox from Mindless Munching
After the holidays or any time you want to improve your relationship with food, use these techniques to master mindful eating and regain control of your health.
For better or for worse, the holidays are often focused on food. And not just healthy, nourishing food, but food that may be extra rich, extra sugary, and full of FODMAP Triggers. So how do you get back to a mindful mindset when it comes to eating? Detoxing from mindless eating involves building (or rebuilding) mindful eating habits and breaking free from automatic, unconscious consumption. In this blog post, I am sharing some steps to help you regain control and foster a more mindful relationship with food.
You can start by creating a focus on what your body needs, not what your primitive brain wants. This will help you make decisions and prioritize those decisions that support your focus on health. For me, that focus is captured in this variation on Michael Pollan’s philosophy on food: Eat real food. Mostly plants. Prepare it yourself.
Read on for some specific things you can do to help yourself reset after the holidays.
Raise Awareness:
Start by acknowledging and recognizing your mindless eating habits. Be aware of situations, emotions, or triggers that lead to unconscious eating.
Be Mindful:
Engage your senses when eating. Sit down and pay attention to the food on your plate. Notice the colors, textures, and flavors of your food. Chew slowly. Savor each bite. This helps you appreciate your food and recognize the signals your body sends when you have had enough.
Create a Distraction-Free Zone:
Designate specific eating areas and times. Avoid eating in front of the TV, or computer, or while scrolling through your phone. Minimize distractions so you can focus on your meal.
Control Your Portion Sizes:
Eat your meals on a plate or in a bowl to maintain a clear sense of how much you’re eating and encourage appropriate portion sizes. Don’t eat out of the container, bag, or carton. This can help prevent overeating.
Meal Planning:
Plan your meals in advance. Having a structured eating schedule reduces the likelihood of impulsive, mindless eating.
Stay Well-Hydrated:
Stay hydrated throughout the day. Sometimes, feelings of hunger are actually signals of dehydration. Start your day with a big glass of water (this can also help regulate your bowel movements). Drink water before reaching for a snack, then wait 15 minutes to be sure you're truly hungry before eating.
Listen to Hunger Cues:
Pay attention to your body's hunger and fullness signals. Eat when you're hungry and stop when you're satisfied, rather than relying on external cues or emotional triggers. Don’t eat so fast that you zoom right past your body’s ability to let you know it’s full! Slow down, chew your food, and put your fork down between bites.
Mindful About Snacking:
If you can break the habit of snacking altogether, that’s a great way to minimize mindless eating. But, if you want to keep snacks in your diet, choose them thoughtfully. Opt for real food here too, and something with protein, fiber, and fat that will be filling and satisfying (a handful of nuts, a few of my Amazing Seed Crackers with cheese or Nutzo Nut & Seed Butter, or some chopped vegetables and lactose-free cottage cheese or Nutzo Nut & Seed Butter are great choices). Be conscious of portion sizes. Sit down and savor your snack rather than eating it on the go.
Emotional Awareness:
Identify emotional triggers for mindless eating. When you feel stressed, bored, or anxious, find alternative ways to cope, such as taking a short walk, practicing deep breathing, or engaging in a hobby. Work on just feeling your emotions instead of letting them drive you to the kitchen to drown them in a bag of chips or a box of cookies. If you give them time, these feelings usually pass within a few minutes, and you can avoid the need to buffer them with food.
Keep a Food Journal:
Track your meals and snacks in a journal or phone app. This helps you become more aware of what, when, and how. much you eat, making it easier to identify patterns of mindless eating. It’s a great way to be “onto yourself” about portions and portion sizes too.
Mindful Grocery Shopping:
Plan your meals and related grocery shopping list ahead of time and stick to it. Avoid shopping when hungry, as this can lead to impulse purchases of unplanned and less nutritious foods.
“Safe” Refrigerator and Pantry Shelves:
Clear out your fridge and pantry of the foods that you tend to eat mindlessly. Often that means the highly processed salty, sugary, or fatty foods that come in boxes and bags. If you live with others and the refrigerator and pantry are shared, then establish certain shelves that are just for you and that contain only the foods you want to be eating. Then you can focus only on those shelves when you’re hungry or preparing a meal. Avoiding temptations is a huge step in the direction of preventing mindless eating in the first place!
Seek Support:
Share your goals with friends, family, or a support group. Having a supportive network can provide encouragement and accountability on your journey toward more mindful eating.
Remember, developing mindful eating habits takes time and patience. Be kind to yourself throughout the process, celebrate small victories, and gradually integrate these practices into your daily life for a sustainable and positive transformation. The more you practice these techniques, the less you overload your body and the better you feel. It’s something to look forward to!
Need help on your journey? Make an appointment and let’s talk!
Have a question you’d like to have answered? Email me at hello@ibsgamechanger.com
Link note: This post may contain affiliate links for you to easily purchase items that are linked. I may earn a small commission from qualifying purchases but none of this costs you a thing so feel free to use the links! In addition, for some items, I have provided a special discount code for IBS Game Changers so be sure to use the code when you purchase an item to get the discount that has been arranged just for you.
More Deliciously Low FODMAP™ Tips and Tools
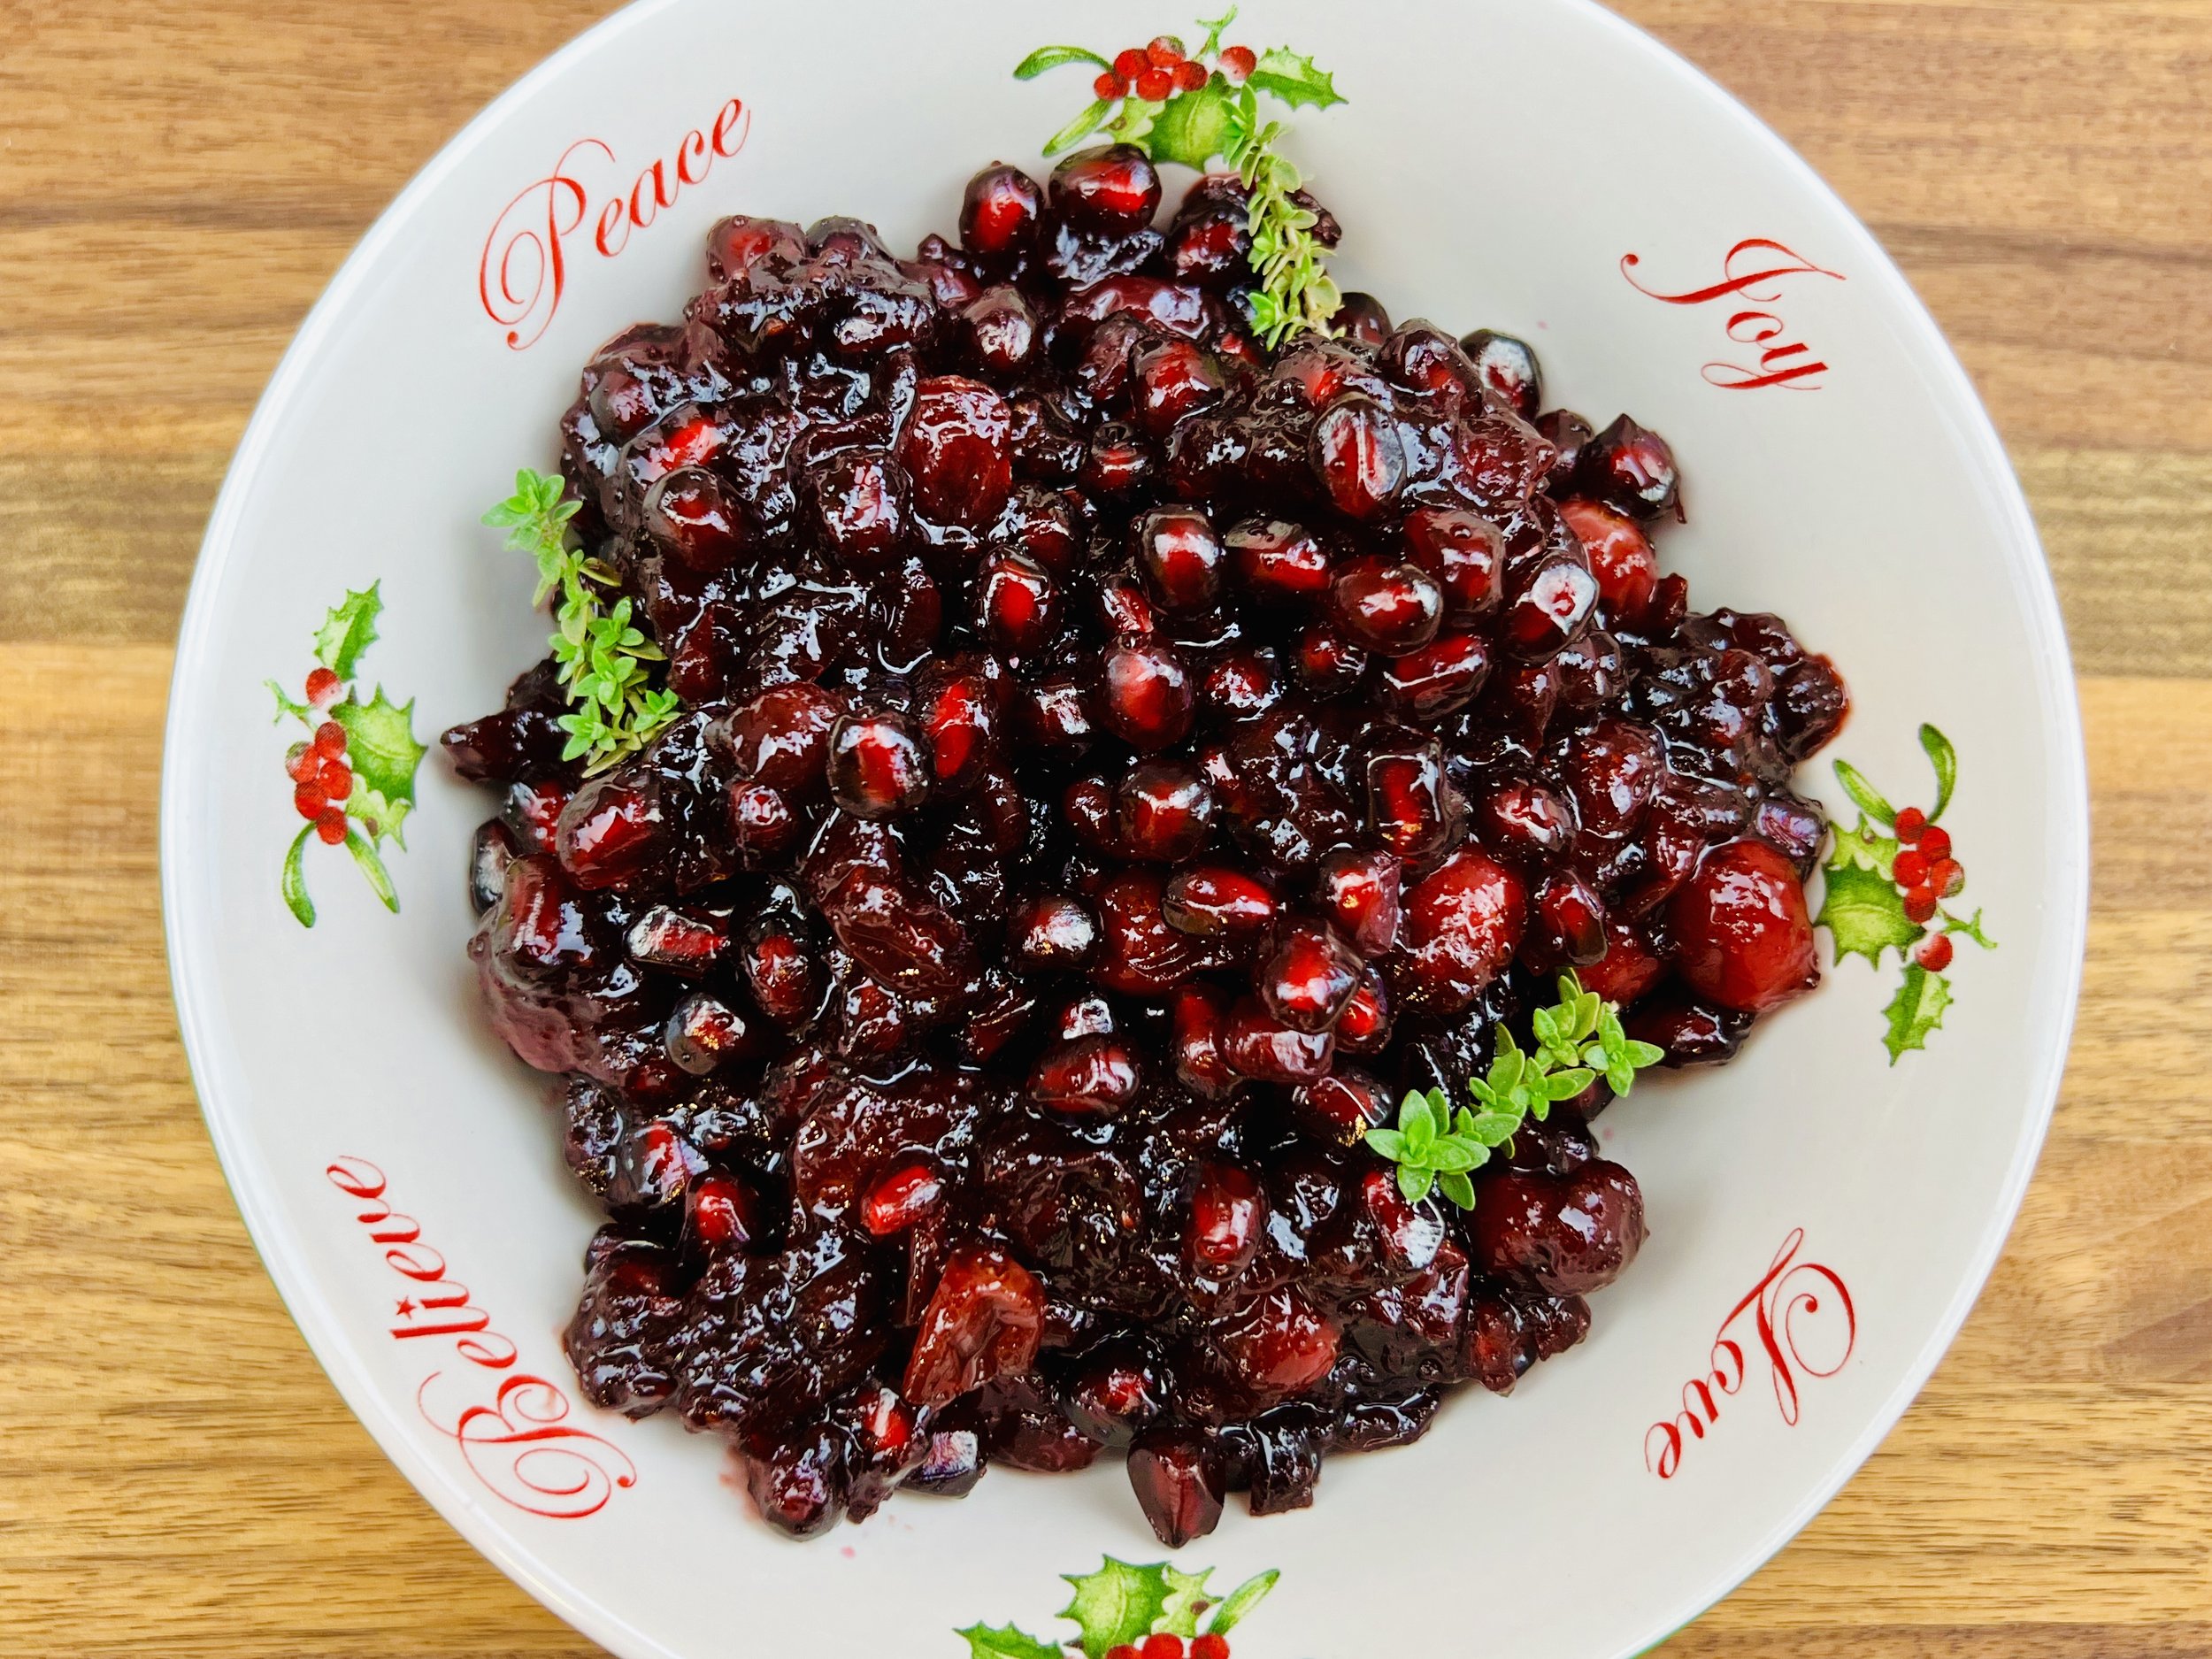
Pomegranate Cranberry Sauce (Low FODMAP)
20 Minutes prep • 8 Hours chill • Low FODMAP • Gluten-free • Lactose-free • Serves 8
20 Minutes prep • 8 Hours chill • Low FODMAP • Gluten-free • Lactose-free • Serves 8 • Ok to make ahead: Steps 1-4
Celebrate the season with the perfect blend of cranberries and pomegranates in this delicious Pomegranate Cranberry Sauce that’s about to become your new favorite! Both of these vibrant gems come together to create a sauce that strikes the perfect balance between sweet and tart. Whether you're serving it alongside the classic turkey, spreading it on warm rolls, or pairing it with your other favorite festive dishes, this Pomegranate Cranberry Sauce will add a touch of elegance and a burst of holiday flavor to every bite.
Ingredients
12 ounces fresh cranberries
1/2 cup light brown sugar, packed
1/4 cup pomegranate molasses (or corn syrup* will also work)
3 sprigs fresh thyme
1 medium pomegranate, arils (seeds) removed (about 1 cup pomegranate arils)
Directions
(1) Prepare: Remove the seeds from the pomegranate, being careful to keep them whole.
(2) Cook the cranberries: Put the cranberries, sugar, pomegranate molasses or corn syrup, and thyme in a saucepan over medium heat. Bring to a boil and stir gently, but often, as it cooks for about 5 minutes until most of the cranberries have burst open.
(3) Cool: Remove from the heat, remove the thyme sprigs, and let cool.
(4) Finish: When cooled to room temperature, add the pomegranate arils and stir gently to combine.
Make-ahead note: At this point, you may put it in an airtight container and refrigerate it overnight (or longer), until ready to serve
(5) Plate and serve: Serve chilled with your holiday turkey, pork loin, or everyday chicken!
Eat and enjoy every bite because you can!
*Recipe note: If you use corn syrup in place of the pomegranate molasses, please use Karo brand corn syrup, which contains no high-fructose corn syrup (HFCS is high in FODMAPS).
Have a question you’d like to have answered? Email me at hello@ibsgamechanger.com
Link note: This post may contain affiliate links for you to easily purchase items that are linked. I may earn a small commission from qualifying purchases but none of this costs you a thing so feel free to use the links! In addition, for some items, I have provided a special discount code for IBS Game Changers so be sure to use the code when you purchase an item to get the discount that has been arranged just for you.
More Deliciously Low FODMAP™ holiday recipes
Classic Sour Cream Cheesecake (Low FODMAP)
20 Minutes prep • 9 Hours cook/chill • Low FODMAP • Serves 8
20 Minutes prep • 9 Hours cook/chill • Low FODMAP • Serves 8 • Ok to make ahead: Steps 1-6
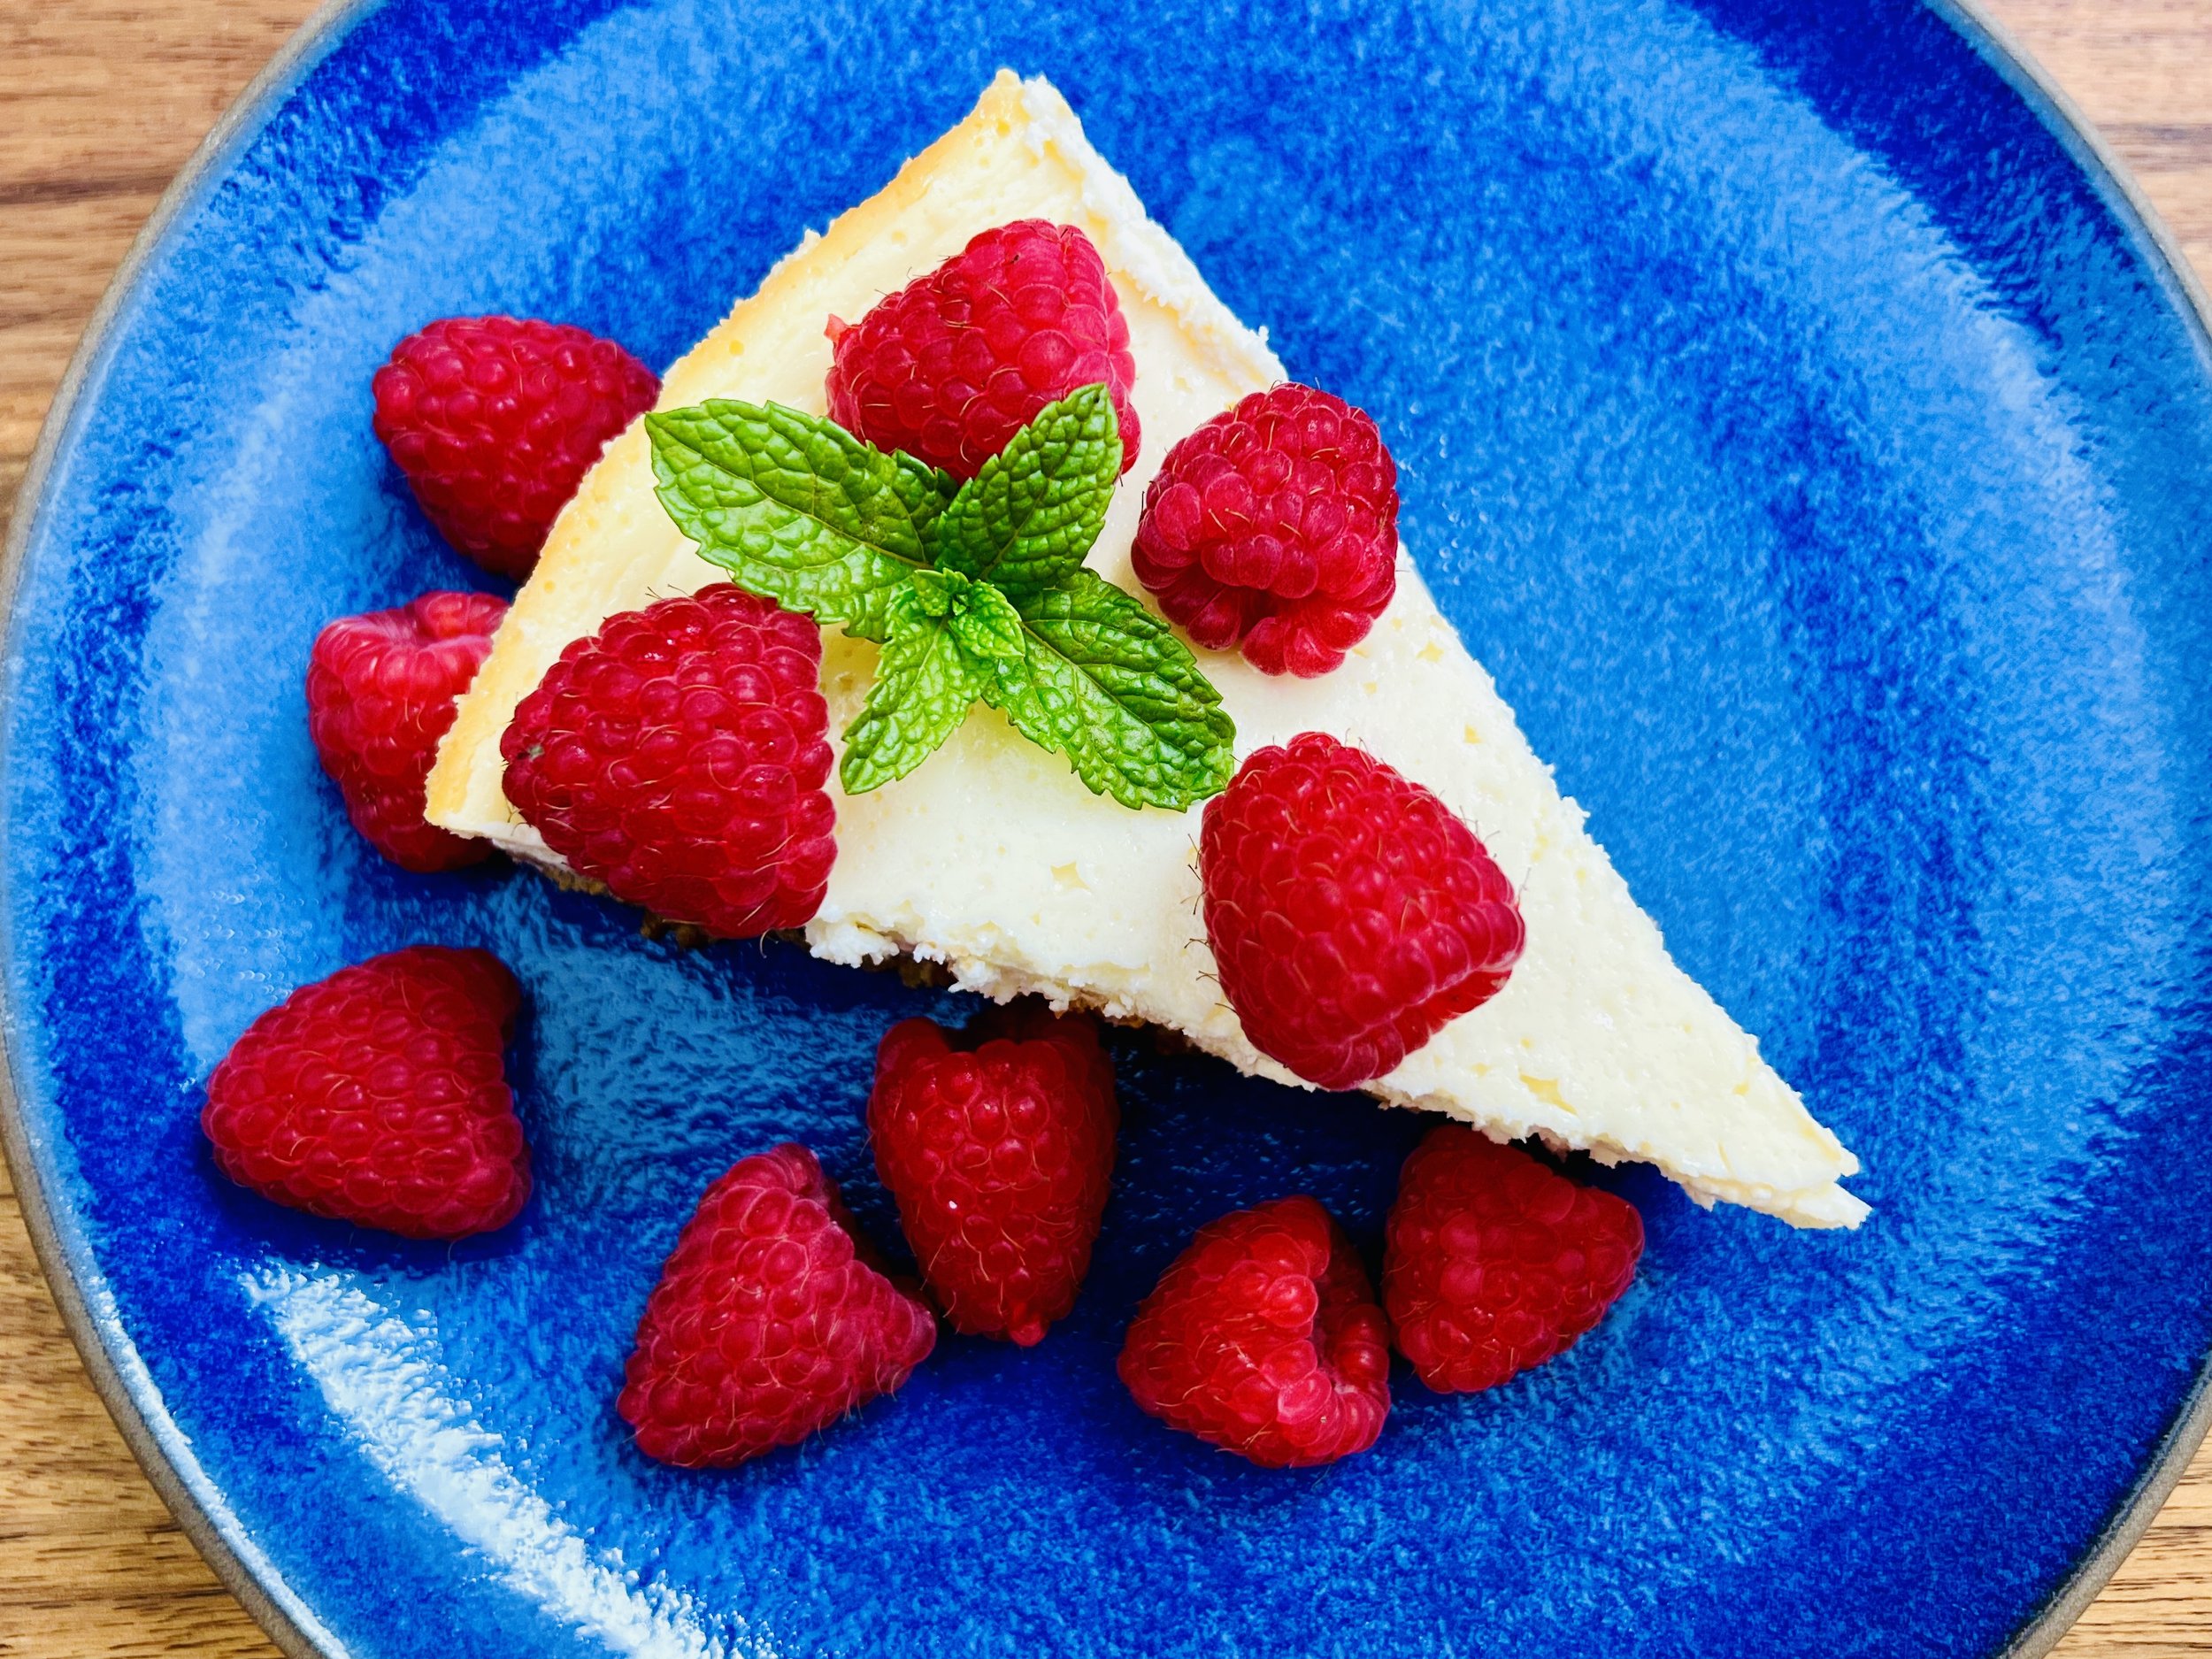
This Classic Sour Cream Cheesecake has the perfect harmony of rich creaminess and just the right amount of sweetness. The velvety texture of cream cheese blends seamlessly with the tangy flavor of sour cream, creating a truly delicious filling that sits atop a buttery graham cracker crust. Whether you're entertaining guests or simply treating yourself, this Classic Sour Cream Cheesecake is a perfect choice because it’s easy to make, you can make it ahead of time, and it’s low FODMAP so everyone at the table can enjoy it.
Ingredients: Crust
1 1/2 cups gluten-free graham crackers (about 1 sleeve), ground into crumbs
6 tablespoons salted butter, melted
Ingredients: Cheesecake
16 ounces lactose-free cream cheese, at room temperature
16 ounces lactose-free sour cream, at room temperature
1 cup superfine white sugar (you can also use granulated sugar and be sure to blend very well)
3 eggs, at room temperature
1 tablespoon vanilla extract, vanilla bean paste or any other flavoring of your choice
Directions
(1) Prepare: Preheat the oven to 350 degrees F. Bring the cream cheese, sour cream, and eggs to room temperature. Melt the butter.
(2) Make the graham cracker crumbs: In the bowl of your food processor, add the graham crackers. Pulse on and off until all crackers have turned to crumbs. You can also do this by putting the graham crackers in a ziploc bag and using a rolling pin or heave glass to crunch them up.
(3) Make the crust: Drizzle the melted butter over the cracker crumbs in the bowl of your food processor. Pulse until all crumbs and butter are combined. You can also combine butter and crumbs in a mixing bowl with a wooden spoon. Pour the crumbs into the bottom of a 7 - 9-inch springform pan and pat them with your fingers to make an even layer or make it slightly thicker at the edges if you prefer.
(4) Bake the crust: Bake in the preheated oven for 10 minutes until the crust has dried out and begins to brown just a bit. Remove from the oven and set aside.
(5) Make the filling: In the bowl of your food processor or stand mixer, combine cream cheese and sour cream and blend until completely smooth. Add the sugar, eggs, and vanilla and blend well but don’t whip air into the mixture. Scrape down the sides to ensure all sugar and eggs are blended into the cheese mixture. Pour the batter into the pan gently so as not to disturb the crumb crust.
(6) Bake: Put in the preheated oven and bake for 30 minutes. Turn off the oven. Don’t open the oven door. Leave the cheesecake in the oven for one hour. Remove and let cool to room temperature. Cover with plastic wrap and refrigerate for at least 8 hours (more is fine).
(7) Plate and serve: Run a knife around the edge of the pan and carefully remove the sides of the springform pan. Slice the cake and serve with fresh berries or your favorite topping.
Eat and enjoy every bite because you can!
Have a question you’d like to have answered? Email me at hello@ibsgamechanger.com
Link note: This post may contain affiliate links for you to easily purchase items that are linked. I may earn a small commission from qualifying purchases but none of this costs you a thing so feel free to use the links! In addition, for some items, I have provided a special discount code for IBS Game Changers so be sure to use the code when you purchase an item to get the discount that has been arranged just for you.
More Deliciously Low FODMAP™ dessert recipes
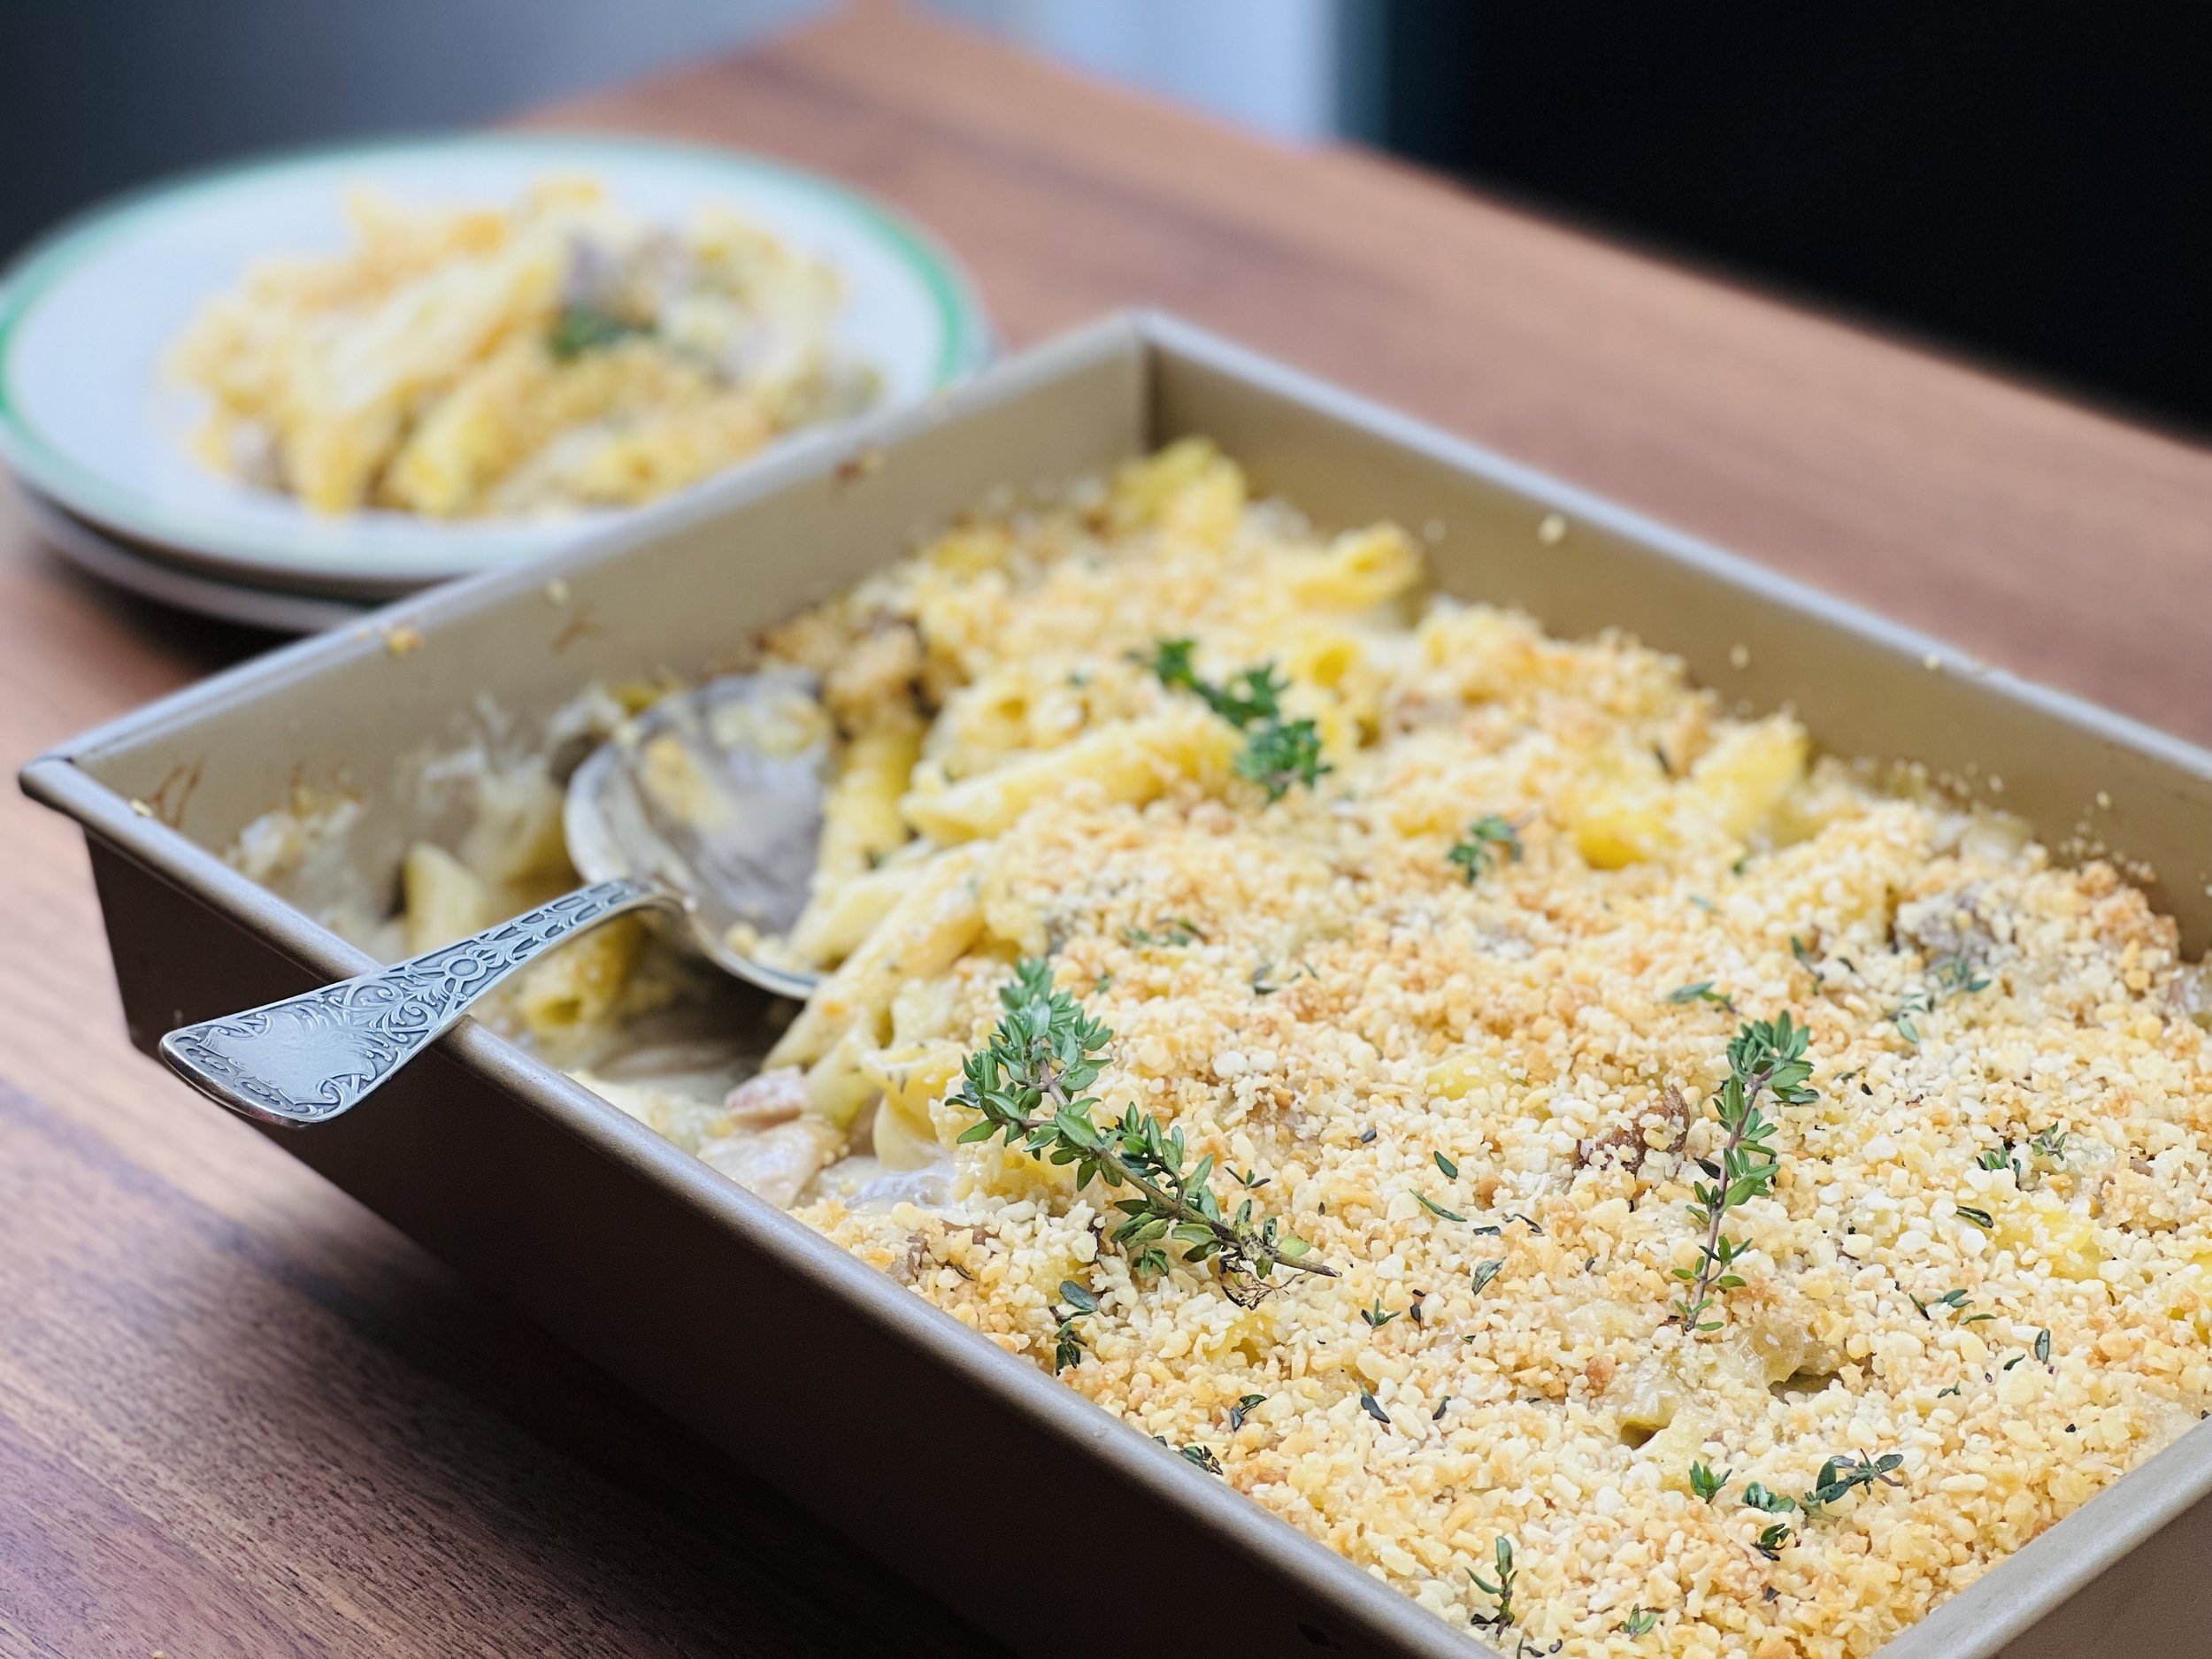
Extra Special Turkey Tetrazzini (low FODMAP)
20 minutes prep • 25 minutes cook • Low FODMAP • Gluten-free • Serves 6
20 minutes prep • 25 minutes cook • Low FODMAP • Gluten-free • Serves 6 • Ok to make ahead: Step 1
This is not an old-fashioned mushroom soup tetrazzini! It’s super creamy, full of fresh herbs and seasonings, and topped with parmesan panko crumbs that form a wonderful crisp crust over the creamy pasta. It’s easy to make and turns your holiday leftover turkey into a delicious dish the whole family will love. Serve it with some crusty sourdough and our Holiday Salad or our Simple Gem Salad and you’ll have a perfect meal.
Ingredients
12 ounces gluten-free pasta (I used Delallo Penne Rigate)
7 tablespoons butter, divided
One bunch green onions (green part only) chopped
2 stalks celery, chopped
1 pound oyster mushrooms, chopped (optional)
1/2 cup white wine (I used Sauvignon Blanc)
1 teaspoon Smoke N Sanity Essence of Garlic Salt (use code IBSGC15 for 15% discount)
1 teaspoon Smoke N Sanity Essence of Onion Salt (use code IBSGC15 for 15% discount)
2 teaspoons fresh or freeze-dried chives
1/4 cup gluten-free flour (I used Bob’s Red Mill 1 for 1)
2 1/4 cups low FODMAP chicken broth (I use Whole Foods Organic 365 chicken broth or Gourmend low FODMAP Organic Chicken Broth - use code IBSGC15 for 15% discount)
1 cup heavy cream
1 pound cooked turkey, chopped (about 2 1/2 cups)
1 cup extra sharp cheddar cheese, grated
1 cup fresh grated parmesan, divided
1 cup chopped roasted vegetables if you have them leftover (optional)
1/2 cup walnuts, chopped (optional)
1 teaspoon dried thyme
1 cup gluten-free panko bread crumbs (or pork panko for lower carb version)
2 tablespoons garlic-infused olive oil
Directions
(1) Prepare: This recipe leverages leftovers so if you’re making from scratch, you’ll want to cook the turkey ahead of time. Preheat oven to 350 degrees F and grease a 9”x13” (or equivalent) baking dish with 1 tablespoon of butter.
(2) Make the pasta: In a large pot of boiling salted water cook the pasta according to package directions. Drain. Do not rinse. Toss with a drizzle of garlic-infused olive oil if it begins to stick together.
(3) Cook the vegetables: In a large skillet over medium heat, melt 2 tablespoons of butter. Add green onions and celery, and cook until tender, 1 minute. Add the mushrooms and wine and cook until most of the wine is absorbed and the mushrooms are soft, 5 minutes.
(4) Make the creamy sauce: Add the remaining 4 tablespoons of butter to the skillet with the vegetables and stir gently until butter is melted. Whisk in the flour and cook until golden, 2 - 3 minutes. Slowly add the chicken broth and the cream and whisk until no lumps remain. Simmer until thickened, 3 - 5 minutes. Add Smoke N Sanity seasonings and chives. Taste and season with additional salt and pepper if needed.
(5) Add remaining ingredients: Add turkey, cheese, chopped veggies, and thyme, and toss until combined. Add cooked pasta and toss to coat. Taste and season with salt and pepper then transfer the mixture into the prepared dish.
(6) Make the parmesan panko: In a medium bowl, toss to combine the panko, Parmesan, and garlic-infused olive oil. Sprinkle evenly over the pasta.
(7) Finish: Bake for 25 minutes until the top is golden and the sauce is bubbly.
(8) Plate and serve: Let cool for 10 minutes before serving. Serve it with some crusty sourdough and our Holiday Salad or our Simple Gem Salad and you’ll have a perfect meal.
Eat and enjoy every bite because you can!
Link note: This post may contain affiliate links for you to easily purchase items that are linked. I may earn a small commission from qualifying purchases but none of this costs you a thing so feel free to use the links! In addition, for some items, I have provided a special discount code for IBS Game Changers so be sure to use the code when you purchase an item to get the discount that has been arranged just for you.
More Deliciously Low FODMAP™ main courses you might enjoy
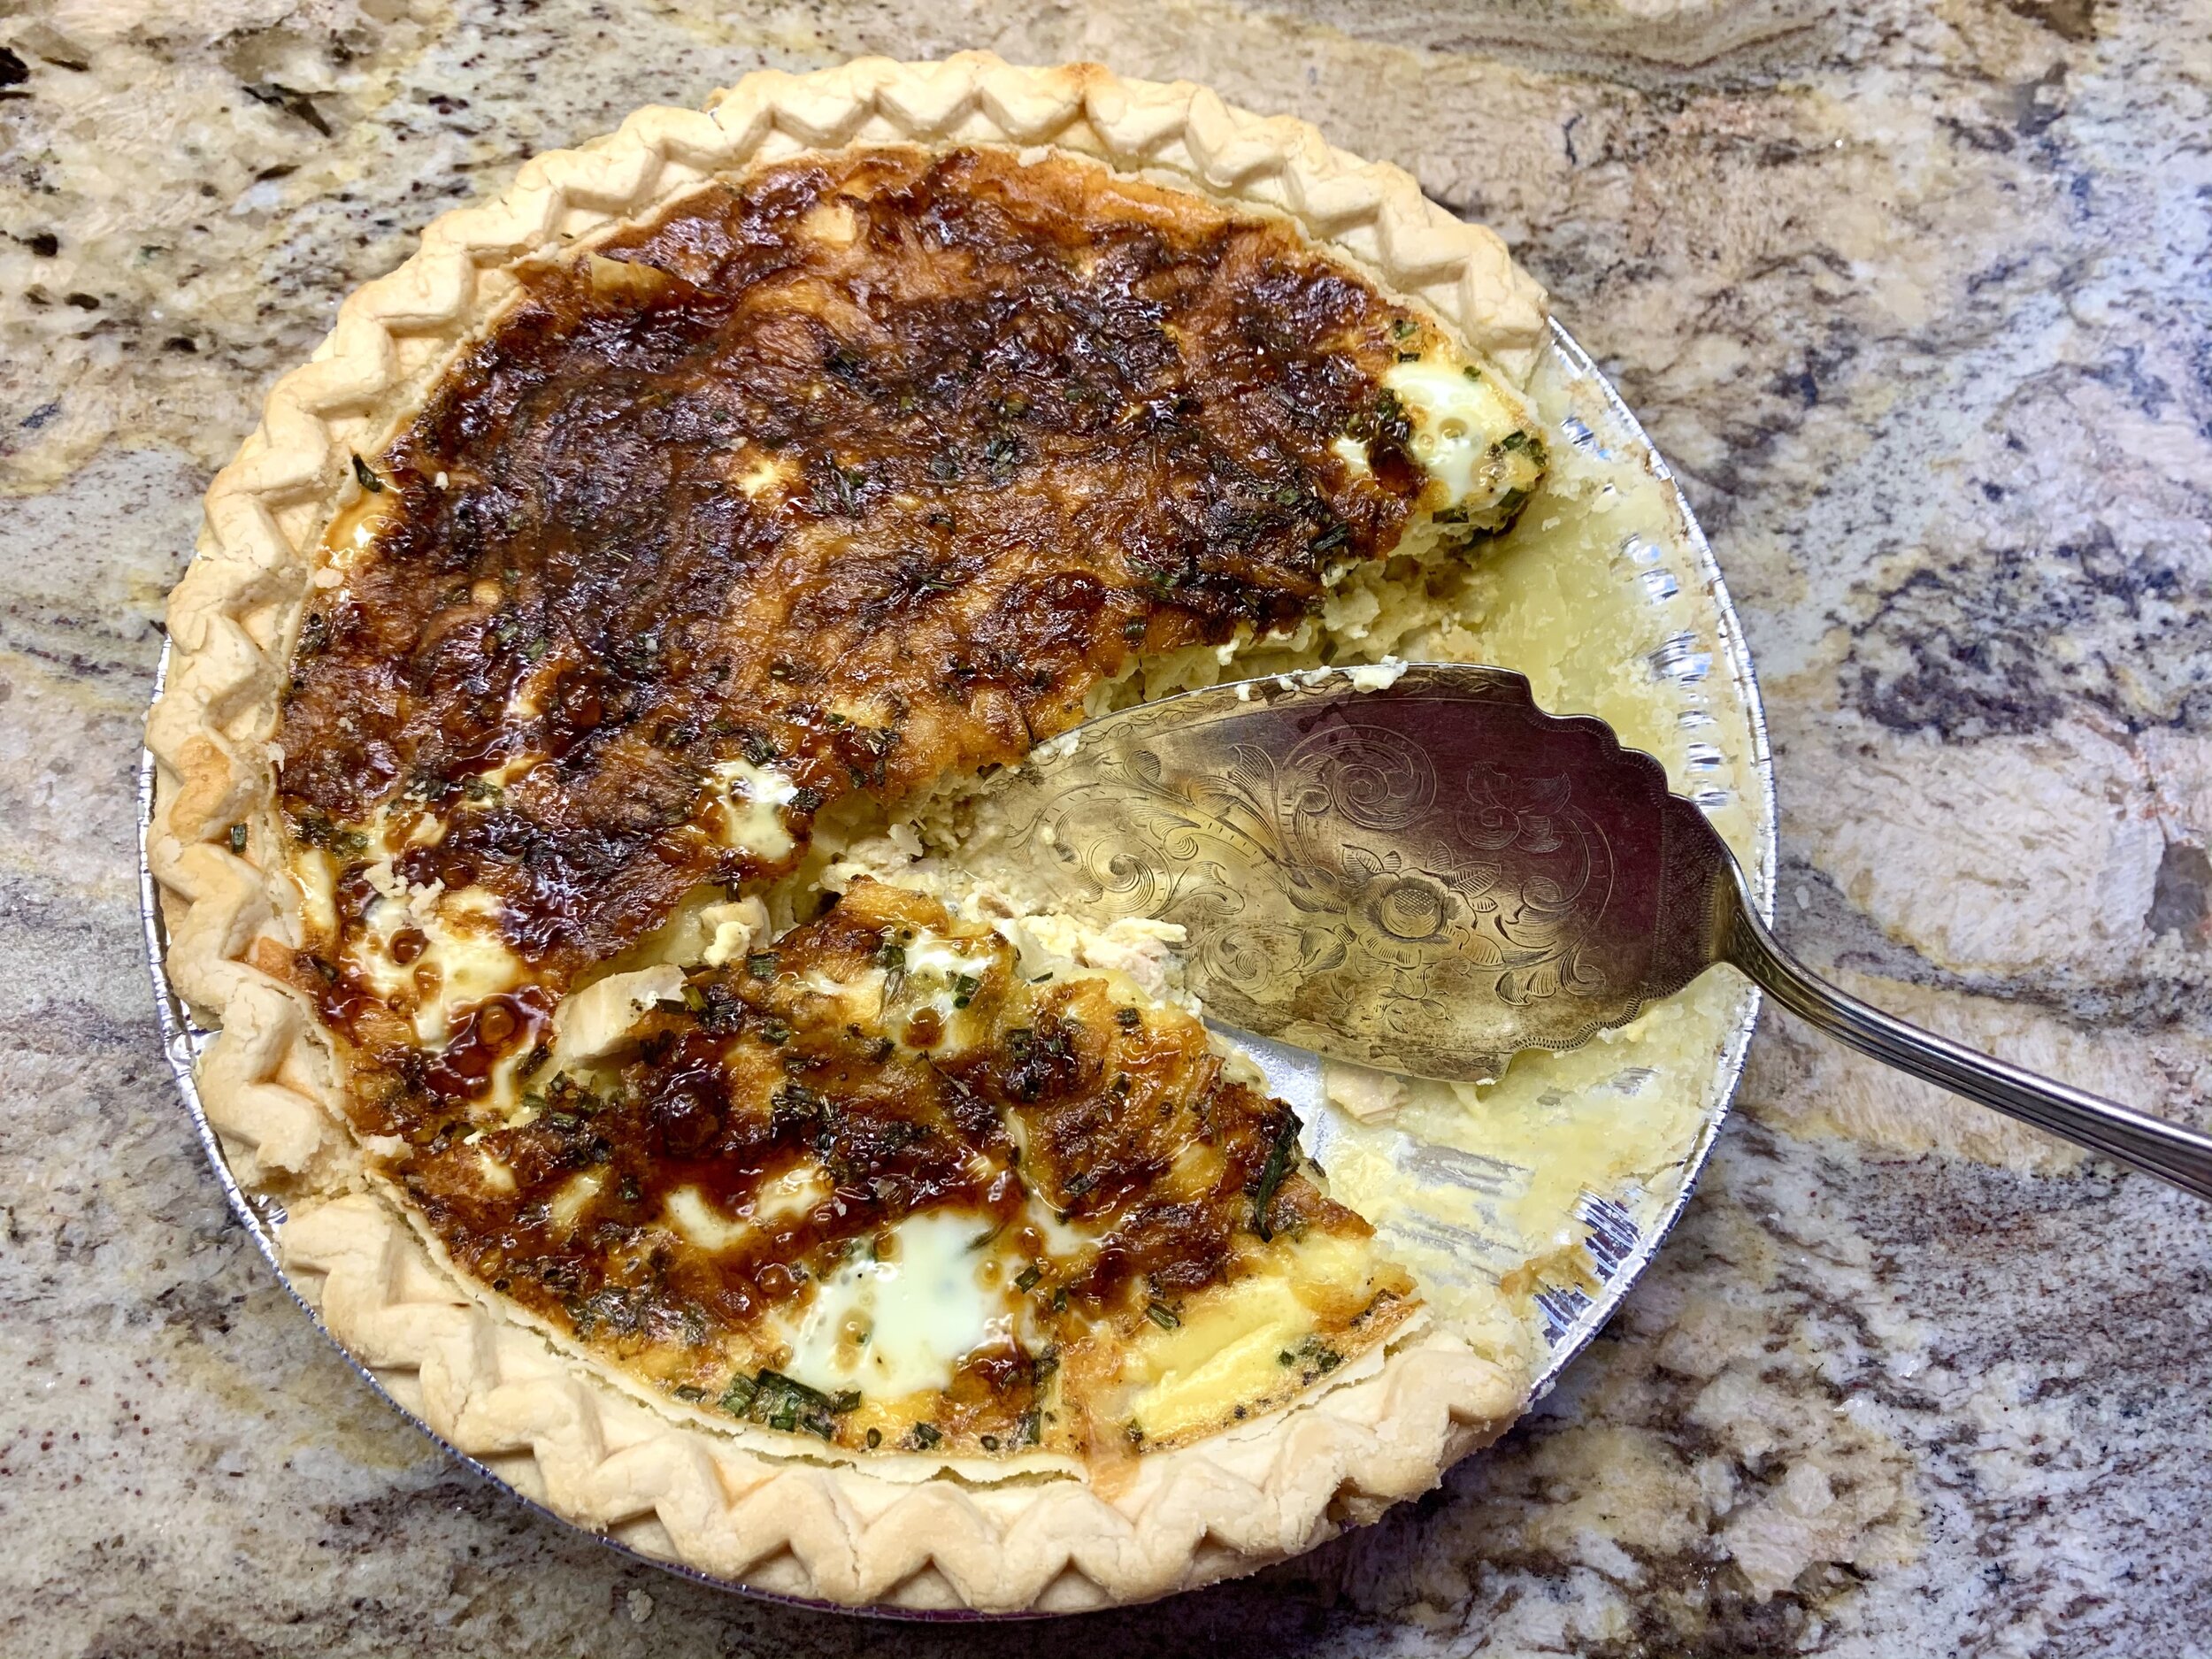
Super Easy Holiday Leftover Turkey Pie (Low FODMAP)
10 Minutes prep • 20 Minutes cook • Low FODMAP • Gluten-free • Serves 4 - 6 • Ok to make ahead: Steps 1-3
10 Minutes prep • 20 Minutes cook • Low FODMAP • Gluten-free • Serves 4 - 6 • Ok to make ahead: Steps 1-3
Turn your holiday leftovers into a new meal by baking them into a savory pie. You’ll have all your favorite holiday flavors combined into one scrumptious, easy-to-make pie. You can even use a frozen gluten-free butter crust as I did here to make this savory pie in a snap! Also, you can easily modify this recipe and use turkey only, or turkey and stuffing only, or whatever you have left over. You can even add cooked greens such as spinach or mushrooms (just make sure you cook them before you put them in the pie so they don’t give off too much moisture). The thyme/sage eggs, milk, and cheese bring it all together so don’t worry if you don’t have ALL the leftovers. It will still be delicious!
Ingredients
1 butter pie crust (frozen gluten-free butter crust, or Bob’s Red Mill gluten-free pie crust mix, or my perfect buttery pate brisee crust)
1 pound chopped turkey meat (no skin)
2 cups mashed potatoes (optional)
2 cups cooked stuffing (optional)
1 - 2 cups grated gruyere or sharp cheddar cheese (or some of each)
5 eggs + 1 egg white
2 cups lactose-free whole milk (or lactose-free 2% milk or half and half)
1 teaspoon dry thyme
½ teaspoon dry sage
1 tablespoon chopped chives (optional)
Kosher salt and black pepper to taste
Cranberry sauce and my Great Gravy for serving (optional)
Directions
(1) Prepare: Prepare your pie crust and place in an 8 - 9-inch pie pan and place in the freezer until ready to fill. Preheat oven to 400 degrees F. Chop the turkey.
(2) Fill the crust: When ready to fill, remove the crust from the freezer and brush inside the bottom of the crust with egg white. Arrange chopped turkey in an even layer over the bottom of the crust. Spread an even layer of stuffing and then an even layer of mashed potatoes over the turkey. Spread the cheese over the mashed potatoes.
(3) Add the egg mixture: Beat the eggs, milk, thyme, sage, salt, and pepper together in a small bowl and pour over the pie. If there’s not enough liquid to just cover the ingredients in the crust, beat another egg in ½ cup of milk and add it in.
(4) Bake: Bake for 15 minutes at 400 degrees F and then turn down to 350 degrees F and cook for another 25 minutes or until golden brown and the egg mixture isn’t jiggly anymore.
(5) Plate and serve: Let the pie stand for 5 minutes before serving. Serve with cranberry sauce and gravy on the side (both optional as it’s delicious without them too.)
Eat and enjoy every bite because you can!
Recipe note: I use Diamond Crystal Kosher salt in all my recipes because it has a wonderful flat and crisp flake that tastes delicious. It is also the least salty salt available so you can use it more liberally as a seasoning than you can table salt or sea salt. If you use another type of salt, you may need to reduce the amount so it is not over-salted.
Have a question you’d like to have answered? Email me at hello@ibsgamechanger.com
Link note: This post may contain affiliate links for you to easily purchase items that are linked. I may earn a small commission from qualifying purchases but none of this costs you a thing so feel free to use the links! In addition, for some items, I have provided a special discount code for IBS Game Changers so be sure to use the code when you purchase an item to get the discount that has been arranged just for you.
More Deliciously Low FODMAP™ main course recipes
Your Guide to a Deliciously Low FODMAP Thanksgiving Feast
Your Guide to a Deliciously Low FODMAP Thanksgiving Feast
Believe it or not, another Thanksgiving feast is upon us! And with it, comes about a million decisions for you to make about what you will prepare for appetizers, the main meal, the desserts, a special cocktail, and then what to do with the leftovers! With all that in mind, I’ve put together a list (and links) to some of my most popular (and favorite) low-FODMAP recipes that would be perfect for your entire family, or whoever might be joining your Thanksgiving table. I hope you find this guide helpful as you plan your holiday weekend—wherever in the world you might be.
Stuffing/Potatoes/Sides
Salads/Vegetables
Friday Feasting
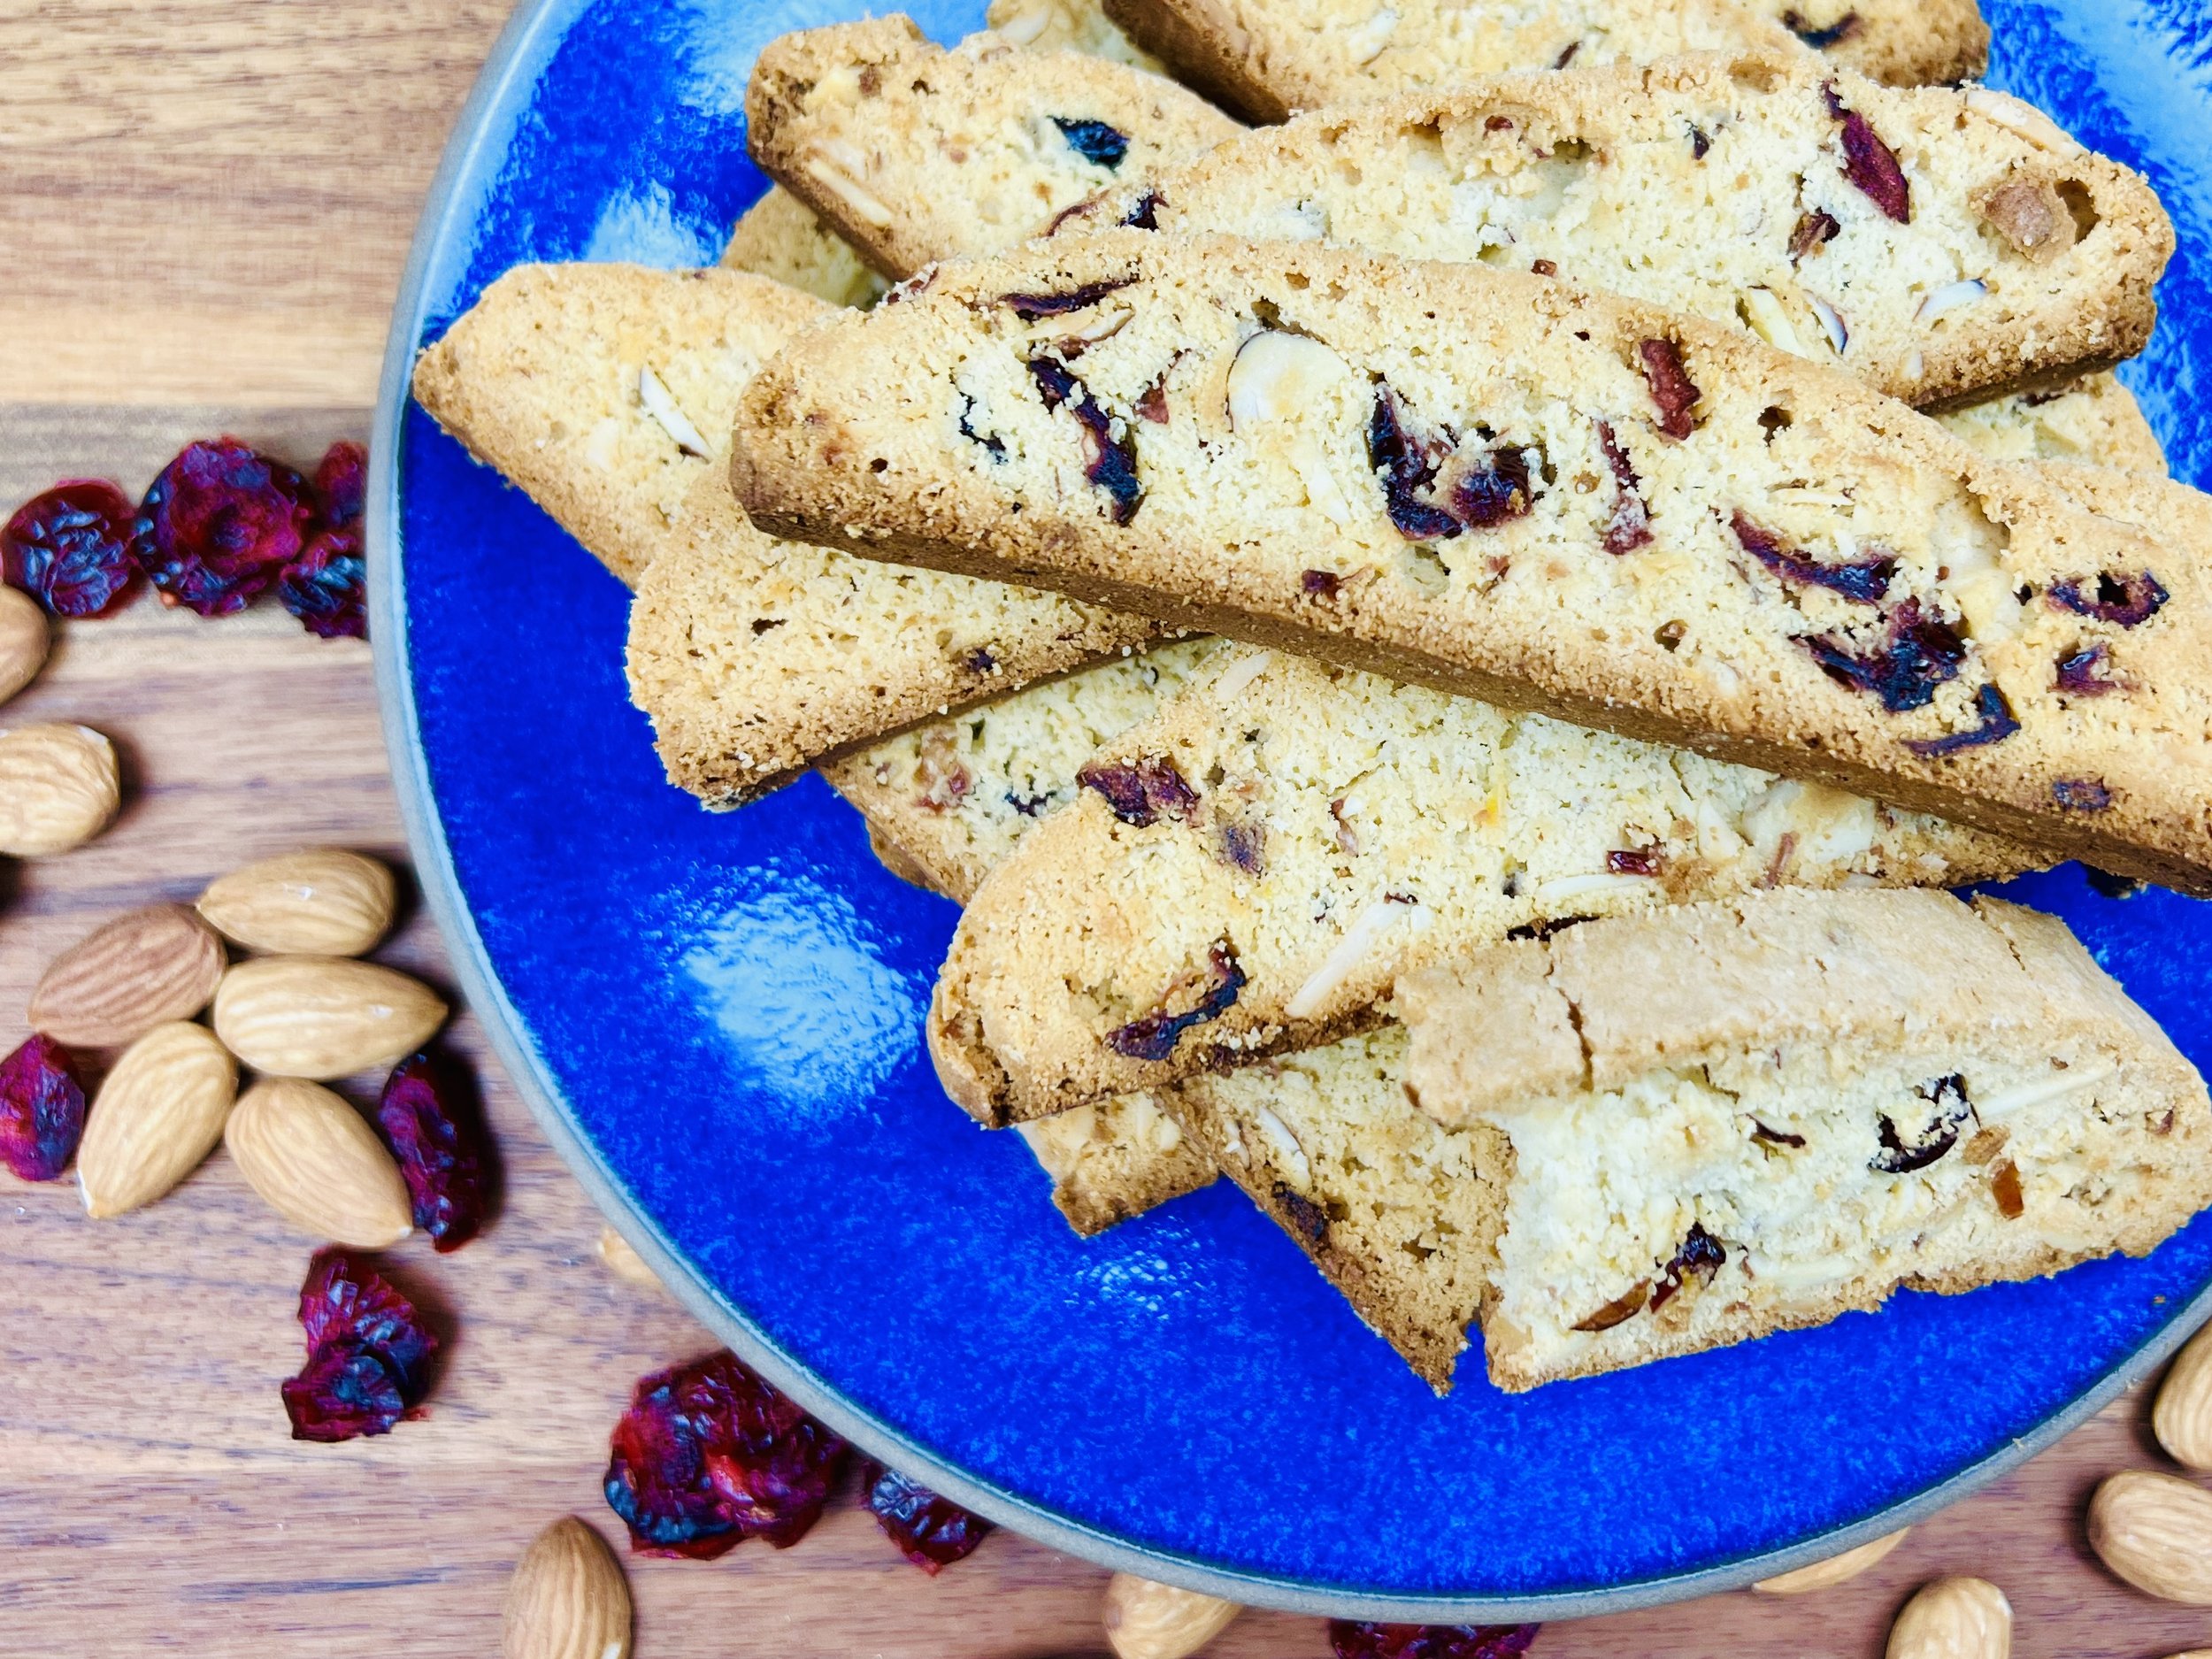
Jan’s Amazing Cranberry Almond Biscotti
Holiday Leftover Turkey Nachos
Extra Special Turkey Tetrazzini
Eat and enjoy every bite because you can!
More Deliciously Low FODMAP™ holiday recipes
Have a question you’d like to have answered? Email us at hello@ibsgamechanger.com
Cranberry Bliss Blondies (Low FODMAP)
15 Minutes prep • 20 Minutes cook • Low FODMAP • Gluten-free • Makes 16 - 25
15 Minutes prep • 20 Minutes cook • Low FODMAP • Gluten-free • Makes 16 • Ok to make ahead: Steps 1-3
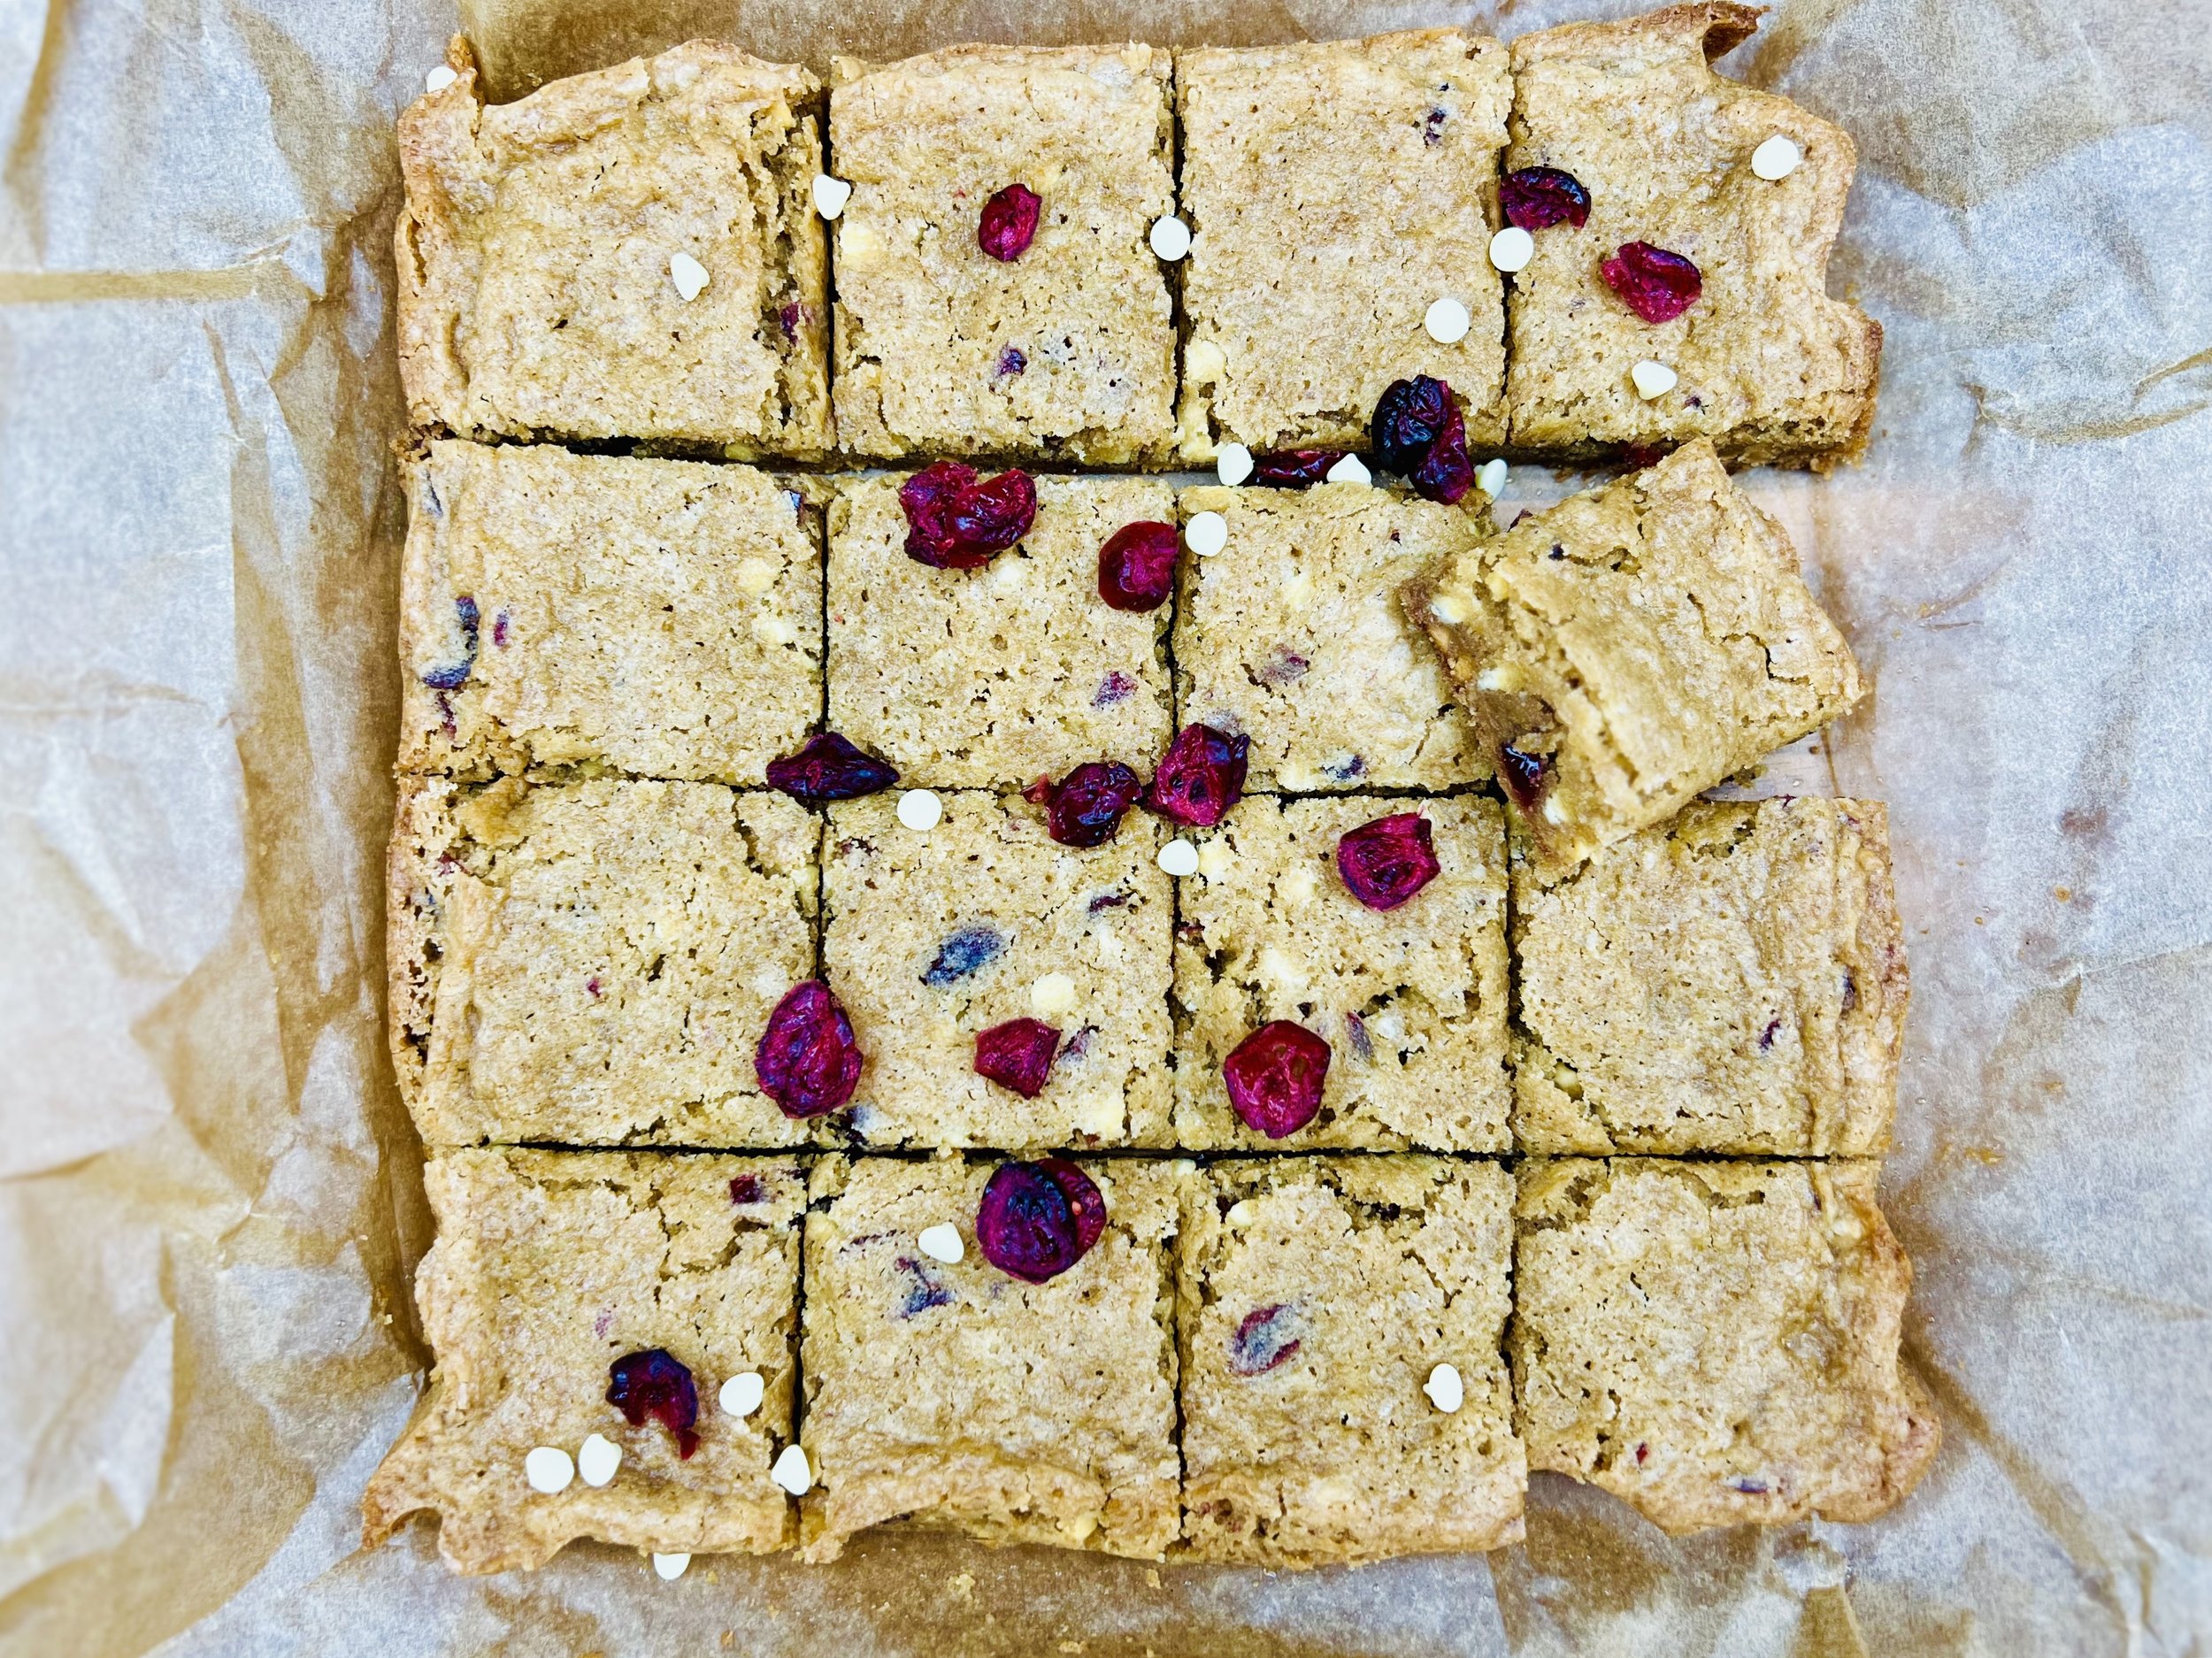
The holidays are here and there’s no better time to make Cranberry Bliss Blondies. Combining the sweetness of white chocolate with the tangy taste of cranberries is the classic “bliss” combination. These IBS-friendly blondies are quick and easy to make so you can whip them up for the family in no time or share them at the neighborhood cookie exchange and prepare for recipe requests.
This is an exclusive recipe just for recipe club members.
In addition to the two free recipes I create each week I am creating and delivering one very special recipe just for my recipe club members. If you’re not yet a member, I encourage you to join! Membership in the club includes access to the complete archive of recipes with filters so it can become your virtual low FODMAP cookbook plus, I am creating and delivering one special NEW recipe every week ONLY for recipe club members.
Your membership in the club helps me continue creating new, delicious, easy-to-make, low FODMAP recipes just for you.
As always, all recipes will emphasize simple ingredients, easy preparation, and delicious low FODMAP results. Recipes will be for everything from main courses, salads, soups, side dishes, appetizers, desserts, sauces, breakfast and lunch, and even mocktails and cocktails. Everything you need to prepare fantastic low FODMAP meals everyone will love.
Join the club. Let’s keep making delicious Low FODMAP meals together.
More Deliciously Low FODMAP™ dessert recipes
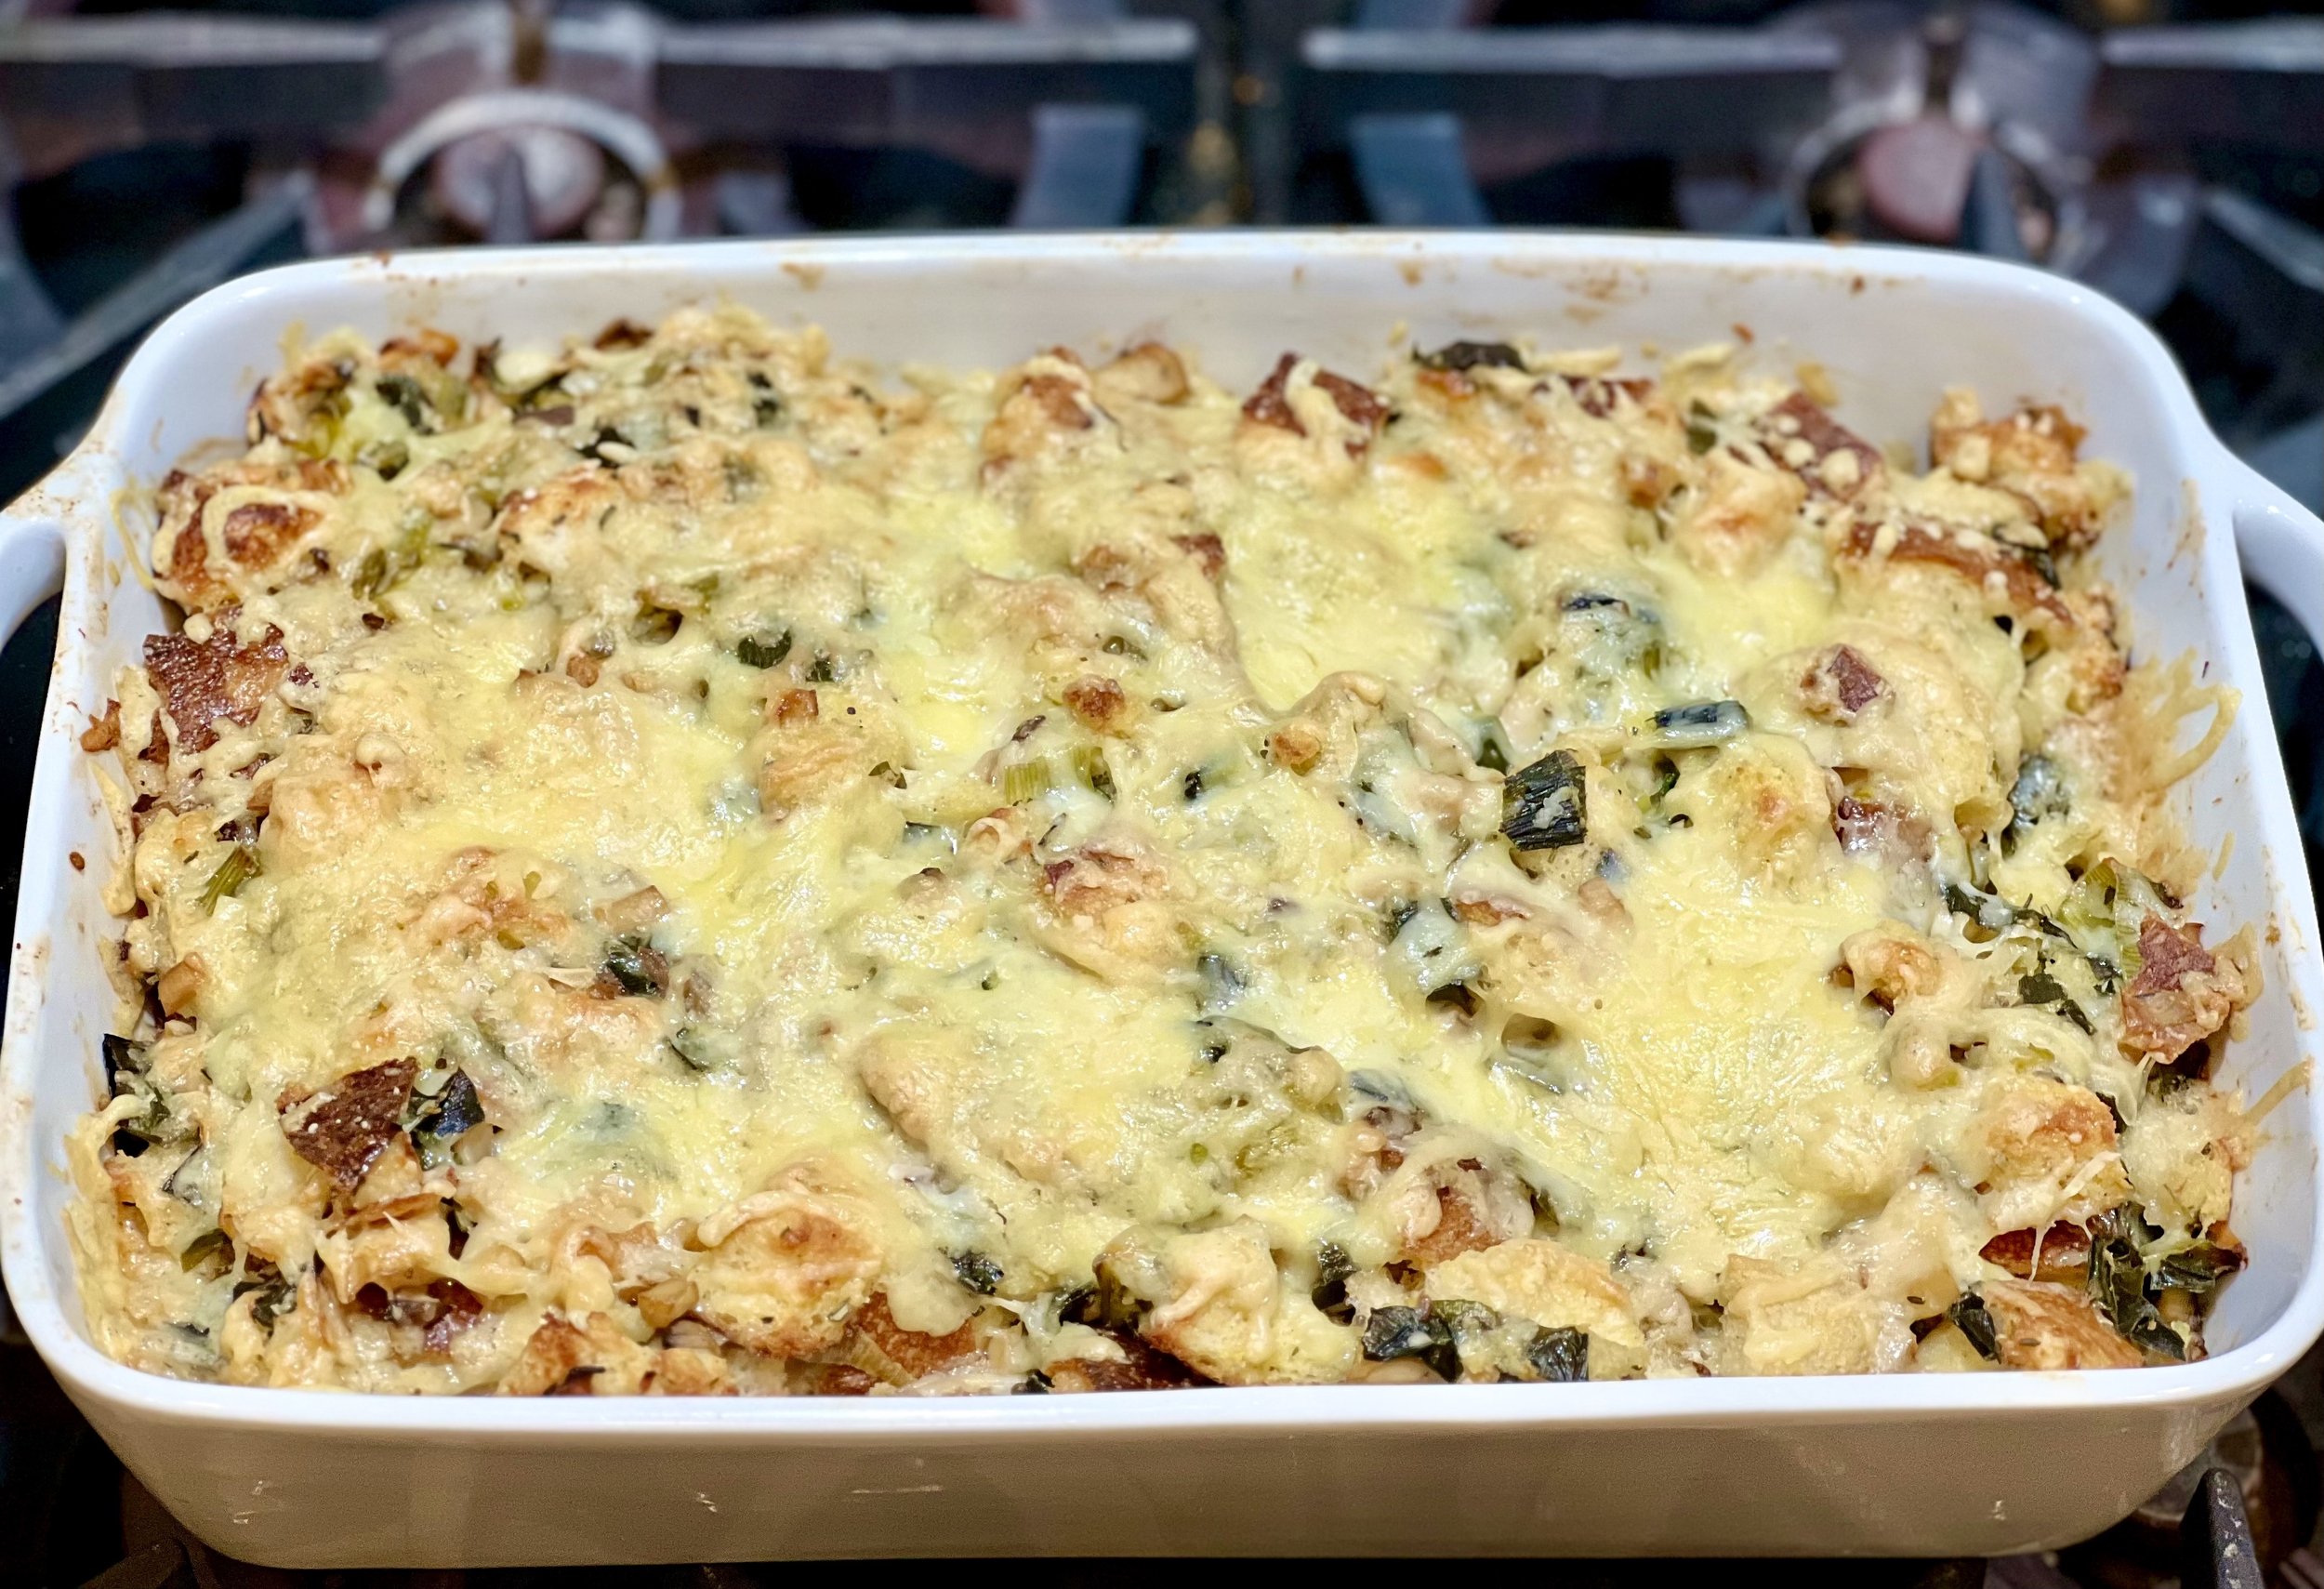
Brandon’s Cheesy Mushroom and Leek Bread Stuffing (Low FODMAP)
20 Minutes prep • 90 minutes cook • Low FODMAP • Serves 8
20 Minutes prep • 90 minutes cook • Low FODMAP • Serves 8 • Ok to make ahead: Steps 1-3
Indulge in the rich flavors of Brandon's Cheesy Mushroom and Leek Bread Stuffing this holiday season. With rosemary sourdough, oyster mushrooms, and a blend of gruyere and Jarlsberg cheeses, this dish is a celebration of tastes and texture in every bite. The final dish is a flavorful masterpiece that pairs perfectly with meats, poultry, or pork. Savor each bite, and relish the joy of good food and good company. Brandon's Cheesy Mushroom and Leek Bread Stuffing is not just a side dish—it's a culinary experience worth celebrating.
Ingredients
24 ounces Organic Rosemary Sourdough Bread (you can also use plain sourdough bread)
4 ounces dried, sweetened cranberries (optional)
1 tablespoon garlic-infused olive oil
3 tablespoons salted butter, room temperature
2 Large leeks (green part only), washed and chopped (you will need 2 cups total)
1 pound oyster mushrooms, chopped
1/2 pound gruyere cheese, grated
1/4 pound Jarlsberg cheese, grated
2 cups chicken broth (I use Whole Foods Organic 365 chicken broth or Gourmend low FODMAP Organic Chicken Broth - use code IBSGC15 for 15% discount)
3 eggs, room temperature, beaten
1 tablespoon fresh, or 1 teaspoon dry rosemary
1 tablespoon fresh, or 1 teaspoon dry thyme
2 teaspoons fresh, or 3/4 teaspoon dry sage
1 teaspoon Kosher salt
1/2 teaspoon black pepper
Directions
(1) Prepare: Preheat oven to 300 degrees F. Cube the bread (including the crust) into bite-sized pieces. Chop the mushrooms, leek greens, and fresh herbs (if using). Grate the cheeses. Grease a 9”x 13” pan or equivalent with 1 tablespoon butter.
(2) Toast bread cubes: Spread the bread cubes evenly across two rimmed baking sheets. Put in preheated oven and bake for 10 mins. Remove from the oven and sprinkle very lightly with Kosher salt. Set aside.
(3) Cook the greens: In a medium skillet over medium-high heat, add the garlic olive oil, when hot, add dry herbs and let sizzle for 30 seconds. (If using fresh herbs, add them with the leek greens.) Add the leek greens and sauté for about 5 minutes, or until tender. Add the butter to the pan and then, when melted, add the chopped mushrooms and sauté until mushrooms start to turn golden brown (about 10 minutes more). Set aside.
(4) Combine: In a large mixing bowl, combine the sauteed greens with the toasted bread cubes and cranberries (if using). Lightly whisk the eggs before you add them to the bread cube mixture. Toss well. Add 2 cups of chicken broth. Toss again. Add salt and pepper and, if it seems dry add another 1/2 cup of chicken broth. Add about 3/4 of the grated cheese to the mixture and toss once more.
(5) Bake: Put the bread cube mixture in the prepared baking dish. Cover with aluminum foil and bake for 30 minutes. After 30 minutes, remove from the oven and remove the foil. Top with your remaining cheese and bake for another 20-30 minutes until the cheese is fully melted. If you like a crisp top, you may finish the cooking time with 2 - 3 minutes under the broiler.
(6) Plate and serve: Serve as a hearty side dish for meat, poultry, or pork. This bread stuffing goes great with traditional turkey and gravy or even with a less traditional rosemary cream sauce.
Eat and enjoy every bite because you can!
Recipe note: I use Diamond Crystal Kosher salt in all my recipes because it has a wonderful flat and crisp flake that tastes delicious. It is also the least salty salt available so you can use it more liberally as a seasoning than you can table salt or sea salt. If you use another type of salt, you may need to reduce the amount so it is not over-salted.
Have a question you’d like to have answered? Email me at hello@ibsgamechanger.com
Link note: This post may contain affiliate links for you to easily purchase items that are linked. I may earn a small commission from qualifying purchases but none of this costs you a thing so feel free to use the links! In addition, for some items, I have provided a special discount code for IBS Game Changers so be sure to use the code when you purchase an item to get the discount that has been arranged just for you.
More Deliciously Low FODMAP™ side dish recipes
Pumpkin Spice Latte (Low FODMAP)
5 Minutes prep • 5 Minutes cook • Low FODMAP • Gluten-free • Serves 2
5 Minutes prep • 5 Minutes cook • Low FODMAP • Gluten-free • Serves 2
Indulge in Autumn's warm embrace with a homemade Pumpkin Spice Latte. With this simple recipe, you can experience a classic fall flavor without going to your local coffee shop and without consuming loads of sugary FODMAPs. This delicious creamy latte features the perfect blend of real pumpkin and classic pumpkin spice flavors, making it the perfect autumn treat. A dollop of whipped cream and a dusting of nutmeg make it simple perfection.
Ingredients: Latte
2 tablespoons pumpkin puree (I always use Libbys)
1/2 teaspoon pumpkin pie spice*
1 1/2 tablespoon superfine sugar
1 tablespoon vanilla extract
1 1/2 cups lactose-free whole milk, warmed
1/2 cup heavy cream
1/4 - 1/2 cup strong decaf coffee or espresso (I use Starbucks Decaf Via Italian Roast)
Ingredients: Whipped Cream
1 cup heavy whipping cream
1 tablespoon powdered sugar (or to taste)
1/2 teaspoon vanilla extract
Directions: Latte
(1) Heat the milk: Heat the milk in a small saucepan over medium heat (or in the microwave) and remove from the heat before it boils.
(2) Blend: To the blender add pumpkin, pumpkin pie spice, superfine sugar, vanilla extract, and heated milk. Blend on high until smooth and consistent. Then pour the hot coffee into the blender and blend again – about 2 minutes altogether.
(3) Serve: Pour the hot latte mixture into mugs. Add a dollop of whipped cream and a sprinkle of nutmeg.
Directions: Whipped Cream
(1) Prepare: Keep cream well-chilled until ready to whip and don’t prepare this too far ahead of time as it’s best when freshly whipped (a few hours is OK and then keep it in the fridge).
(2) Whip: Pour cream into a medium to large metal or glass mixing bowl or the largest bowl of your stand mixer and, using your largest whisk (or the whisk attachment on your mixer, or a hand mixer), beat until soft peaks form.
(3) Finish: Add the powdered sugar and vanilla and whip until the cream holds its shape nicely. Taste and adjust sugar as needed.
Drink and enjoy every sip because you can!
*Make your own Pumpkin Spice
Combine in a small bowl or jar, and stir well the following spices:
3 tablespoons ground cinnamon
1 tablespoon ground ginger
2 teaspoons ground nutmeg
1 teaspoon ground allspice
1 teaspoon ground cloves
Have a question you’d like to have answered? Email me at hello@ibsgamechanger.com
Link note: This post may contain affiliate links for you to easily purchase items that are linked. I may earn a small commission from qualifying purchases but none of this costs you a thing so feel free to use the links! In addition, for some items, I have provided a special discount code for IBS Game Changers so be sure to use the code when you purchase an item to get the discount that has been arranged just for you.
More Deliciously Low FODMAP™ drink recipes
What if you (with IBS) could eat garlic, onions, pizza, and even ice cream without GI consequences?
How can I eat fructan, GOS, and lactose when on a low FODMAP diet? FODZYME might help!
That would be a game-changer.
If you have Irritable Bowel Syndrome (IBS) and it has been recommended that you follow a low FODMAP diet you may have a lot more questions than you do answers. And you may feel completely baffled by all of the information out there and all of the various recommendations and guidelines you “should” follow.
How often have you said why can’t I just eat like everyone else does? Why does food have to make me feel sick? Where’s the magic fairy dust that I can sprinkle on my food and turn it into something I can eat without consequences?
That magic fairy dust might just be here in the form of FODZYME®
Those of you who know me, or who have worked with me as an IBS coach, know I’m not a fan of supplements and pills. But, there’s a time and a place for everything. And this product may be a game changer for many of you when you’re traveling, eating out, or choosing to eat a food you know you are sensitive to.
I wanted to learn more, so I sat down with Harvard-educated co-founder David Hachuel, to learn more about FODZYME and how it works.
FODZYME is made by Kiwi Biosciences, “a human-centered biotech company developing elegant solutions for extraordinary gut relief.” The current FODZYME formula is a highly-specific enzyme blend designed to target the FODMAPs fructan, galactooligosaccharides (GOS), and lactose.
FODZYME is a blend of digestive enzymes that has been lab tested and certified low FODMAP by Monash University, which means the ingredients in FODZYME are considered low FODMAP.
Does it work and how does it work?
As with everything else I recommend, I tried it myself. And it worked for me. Does that mean it will work for you too? The only way to find out is to give it a try yourself. Each of us has a different FODMAP sensitivity profile so we may each have a different experience with a product like FODZYME. But seriously, what do you have to lose?
We are all likely familiar with Lactaid the enzyme that breaks down lactose. FODZYME is similar in concept but, as David explained, as a powder rather than a pill, FODZYME has an advantage and works much better. And, it’s the world's first enzyme supplement that breaks down FODMAPs.
Adding FODZYME directly to the food you are eating (vs taking a pill with the same enzymes in it) has been proven to be the most effective way to activate these enzymes. Once ingested and activated these enzymes serve to reduce or eliminate the painful reaction that comes with eating foods that are high in the FODMAPs fructan, GOS, and/or lactose. And soon, the formulation will cover the Polyols too.
Need a refresher on what foods contain Fructan, GOS, and lactose? Click the expansion arrows below for some prime examples:
-
Examples: Almonds, Artichoke, Baby spinach, Banana, Beans, Beetroot, Blueberries, Broccoli, Brussels sprouts, Cabbage (red and savoy), Cashews, Chickpeas, Cranberries, Dates, Figs, Garlic, Grapefruit, Leek, Lentils, Onion, Peas, Pistachios, Pomegranate, Raspberries, Roma Tomatoes, Scallion, Shallots, Silken tofu, Wheat, and Zucchini
-
Examples: Buttermilk, Cheese, Queso Fresco, Cottage cheese, Cream, Creamy cheeses, Custard, Goats cheese, Haloumi, Ice-cream, Kefir, Milk, Paneer, Quark cheese, Ricotta cheese, Sour cream, and Yogurt
-
Examples: Apple, Apricot, Avocado, Blackberries, Cauliflower, Celery, Cherries, Lychee, Mushrooms, Nectarine, Peach, Pear, Plum, Prune, Sauerkraut, Sweetcorn, Sweet potato
Sound interesting? Want to give it a try? Use the IBS Game Changer discount code for 15% off. What are you waiting for?
More Deliciously Low FODMAP™ tips & tools
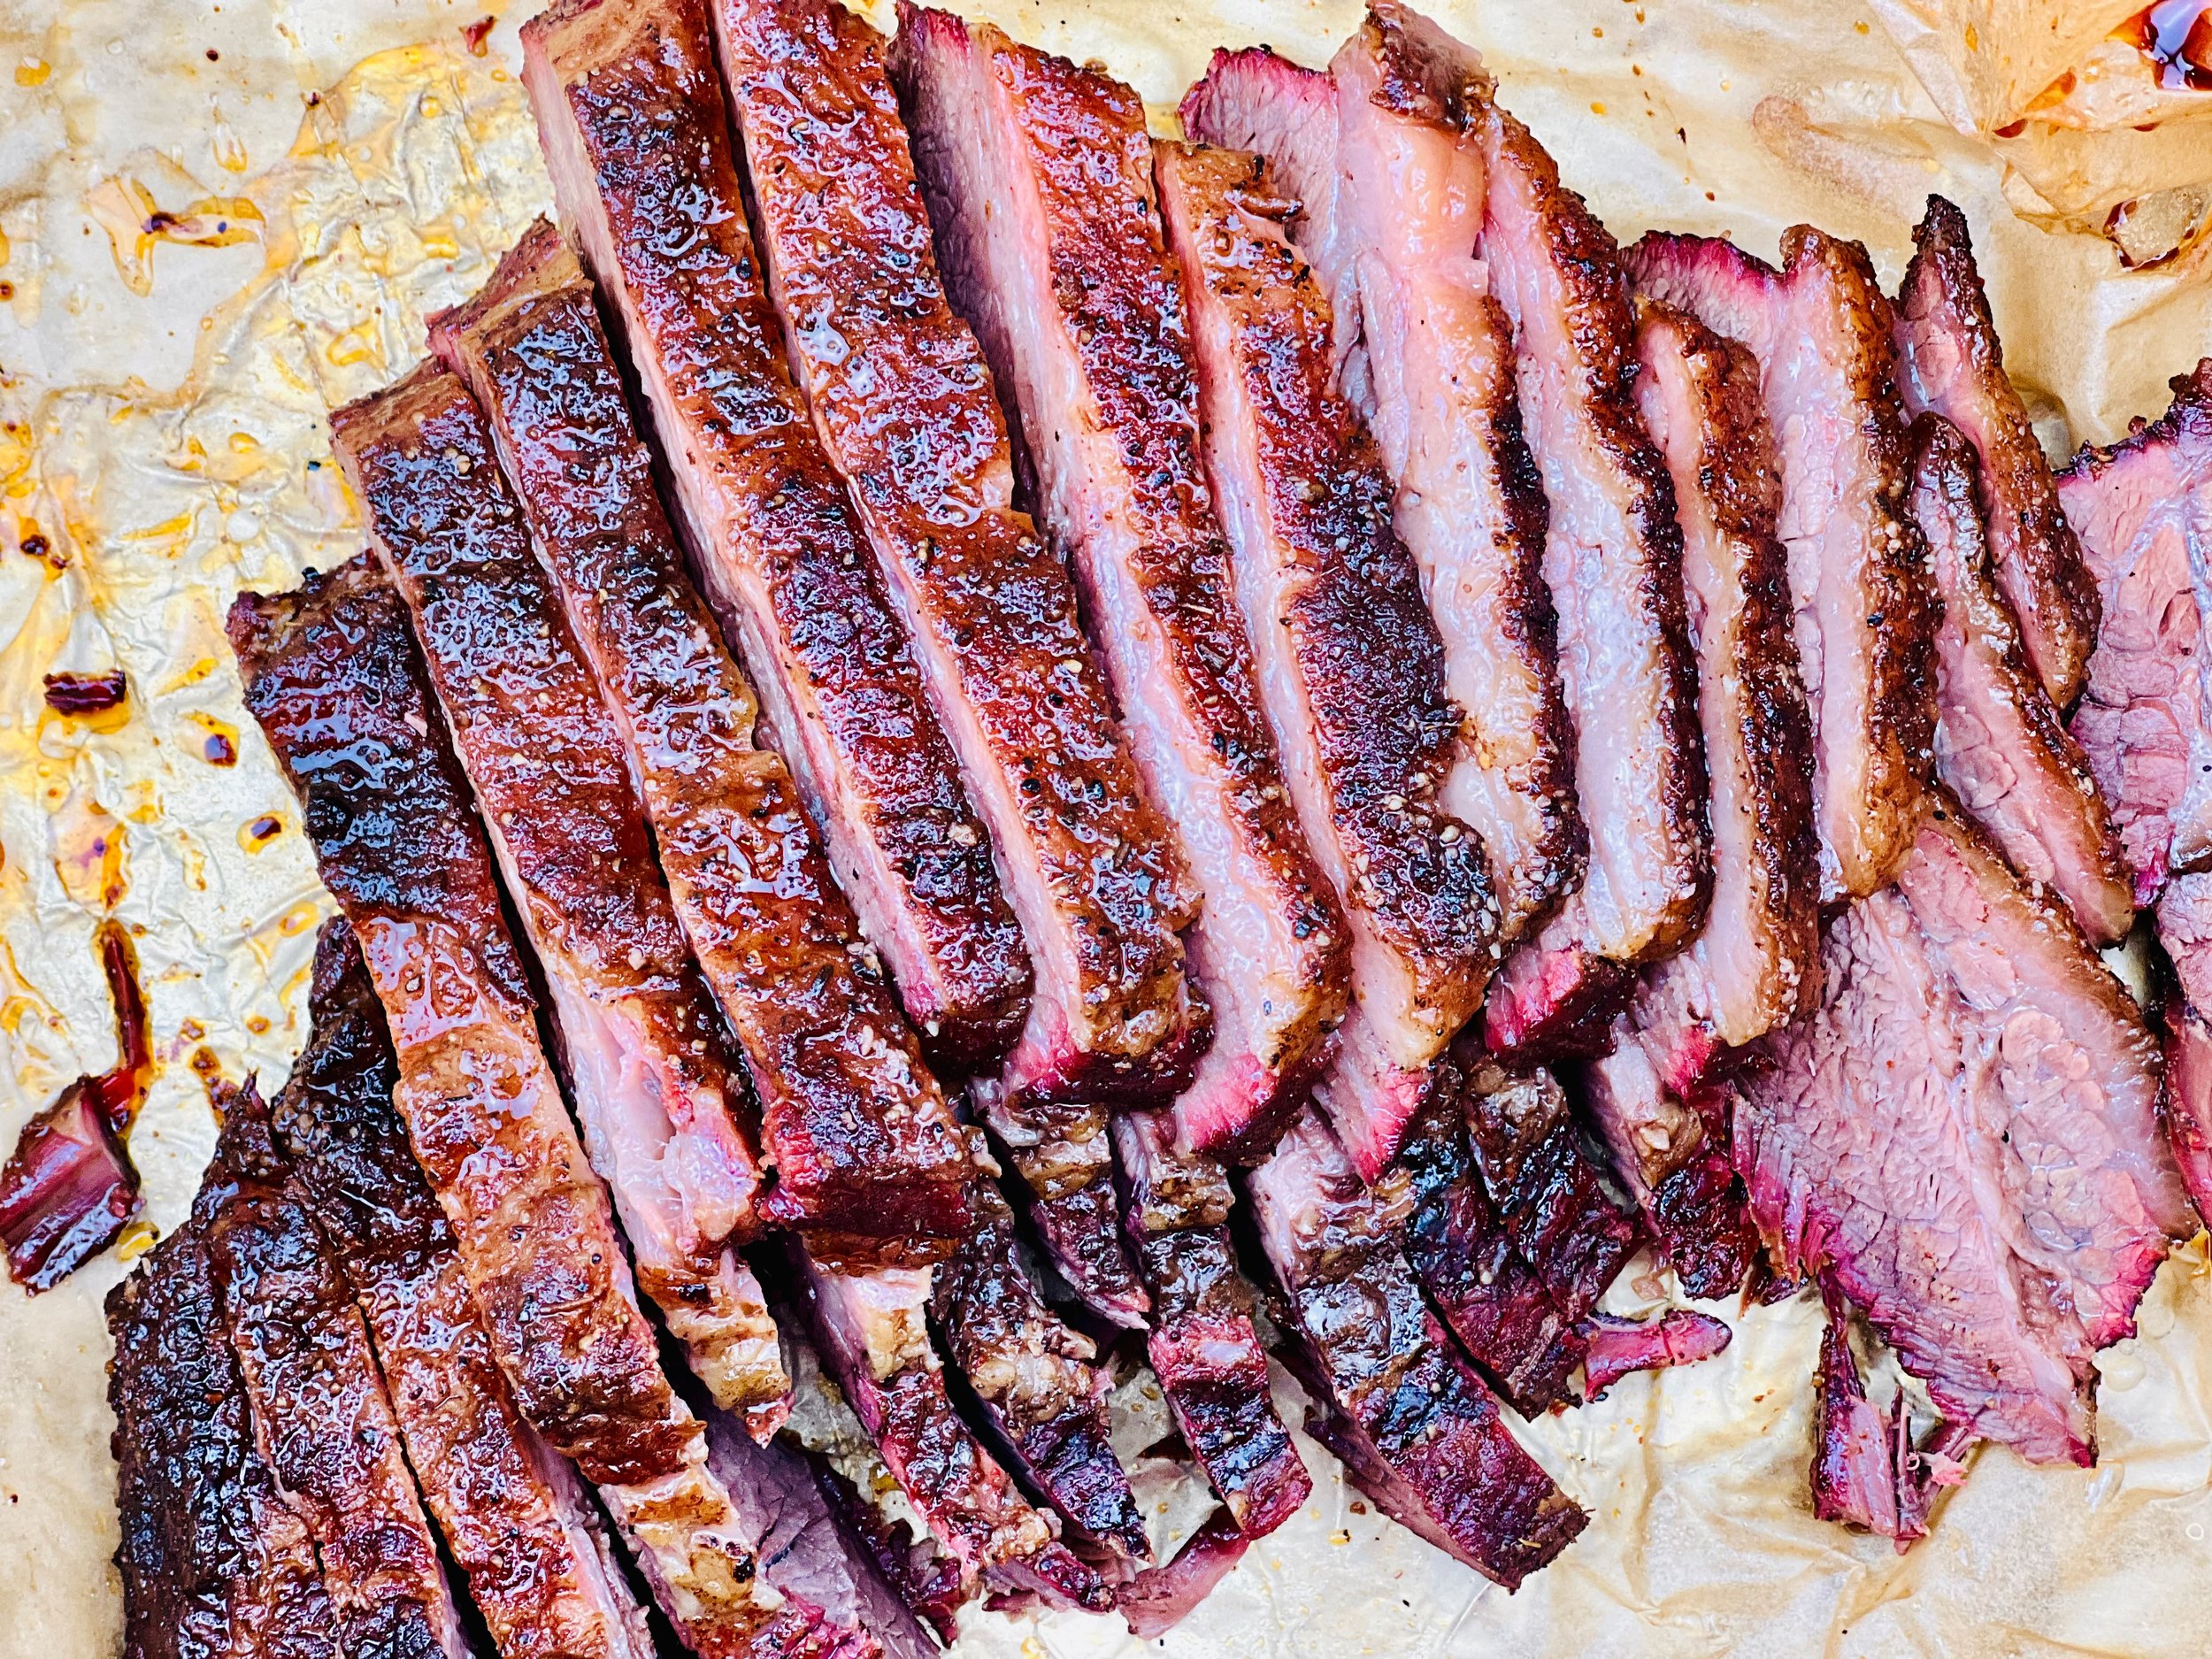
Perfect Smoked Brisket (Low FODMAP)
20 Minutes prep • 3-5 hours cook/rest • Low FODMAP • Gluten-free • Lactose-free • Serves 6
20 Minutes prep • 3-5 hours cook/rest • Low FODMAP • Gluten-free • Lactose-free • Serves 6 • Ok to make ahead: Step 1
I have wanted to make a brisket for quite some time, but every recipe I looked at seemed overwhelmingly complicated. So, when a friend walked me through how he cooked it, I finally understood the process, and then it was just a matter of ingredients. As long as you have a smoker such as a Traeger (that’s what I use) or another backyard smoker, this simple recipe delivers a tender, juicy, and oh-so-flavorful result. The secret is in the seasoning, the timing, and the temperature. I cooked a 3-pound brisket in 3 1/2 hours and let it rest for another hour (but could have let it rest for 2 or 3 hours if needed) and it was perfect.
Ingredients
3 - 4 pound brisket (estimate about 1/2 pound raw weight per person)
2 tablespoons olive oil
3 - 4 tablespoons Smoke N Sanity Steakhouse seasoning
1 tablespoon Smoked Paprika
1 teaspoon Kosher salt and 1 teaspoon black pepper
Directions
(1) Prepare the meat: You definitely want some fat to make the meat juicy and flavorful, but you don’t want too much. So, have the butcher trim the brisket, or trim it yourself, so the fat on the fat layer is trimmed to about 1/2 inch and all the hard fat is removed.
(2) Salt the meat: Then, if you like, you can salt the meat ahead of time. This step is optional but results in more flavorful and tender meat. Remove the meat from the package, and put it on a rimmed plate or baking dish. Trim the fat as needed. Season both sides lightly with Kosher salt (about 1 - 2 teaspoons per side). Cover the dish with plastic wrap and refrigerate until ready to use, ideally about 4 hours before cooking or overnight.
(3) Prepare: Preheat the smoker to 275 degrees F and make sure you have plenty of fuel in the bin!
(4) Season the meat: In a small bowl, combine the Smoke N Sanity Steakhouse seasoning with the smoked paprika, salt, and pepper. Rub the meat all over with the olive oil as a “binder” for the seasonings to stick to the meat. Sprinkle all sides of the meat with the seasoning blend and then pat it all over to help the seasonings stick to the meat.
(5) Cook the meat: Once the grill reaches 275 degrees F, lay the brisket, fat side up, directly on the grill. Cook for about 90 minutes until the internal temperature of the meat reaches about 160 degrees F. Take the meat off the grill and wrap it snuggly in parchment paper and heavy foil (so the paper is against the meat and the foil is on the outside). Put the wrapped meat back on the grill (in the wrapping) with the fat side up and continue to cook until the internal temperature of the meat reaches 203 - 205 degrees F (you can stick your thermometer right through the wrapping to check).
(6) Rest the meat: Once it reaches the correct temperature, remove the wrapped brisket from the grill but keep it in the wrapping. Put the whole thing into a small cooler with a large towel under it and another one over it to help retain the heat. Keep the cooler in a warm place (inside your house not out in the garage for example). Let the meat rest in the cooler for 1 - 3 hours before slicing and serving.
(7) Slice: When ready to serve, remove the meat from the wrapping and put it on a cutting board. With a nice sharp knife, slice the meat across the grain and lay it on a warmed serving plate.
(8) Plate and serve: Serve warm with my Buttery Mashed Yukon Gold Potatoes and one of my delicious salads.
(9) Leftovers: Leftovers heat up nicely in the microwave. Just don’t overheat because you don’t want the meat to cook. Just warm it.
Eat and enjoy every bite because you can!
Recipe note: I use Diamond Crystal Kosher salt in all my recipes because it has a wonderful flat and crisp flake that tastes delicious. It is also the least salty salt available so you can use it more liberally as a seasoning than you can table salt or sea salt. If you use another type of salt, you may need to reduce the amount so it is not over-salted.
Have a question you’d like to have answered? Email us at hello@ibsgamechanger.com
Link note: This post contains links for you to easily purchase items listed on the page. In some cases, we have provided a special discount code for IBS Game Changers so be sure to use it when you purchase an item to get the discount that has been arranged just for you! As an Amazon Associate, I earn a commission from qualifying Amazon purchases.
More Deliciously Low FODMAP™ BBQ recipes
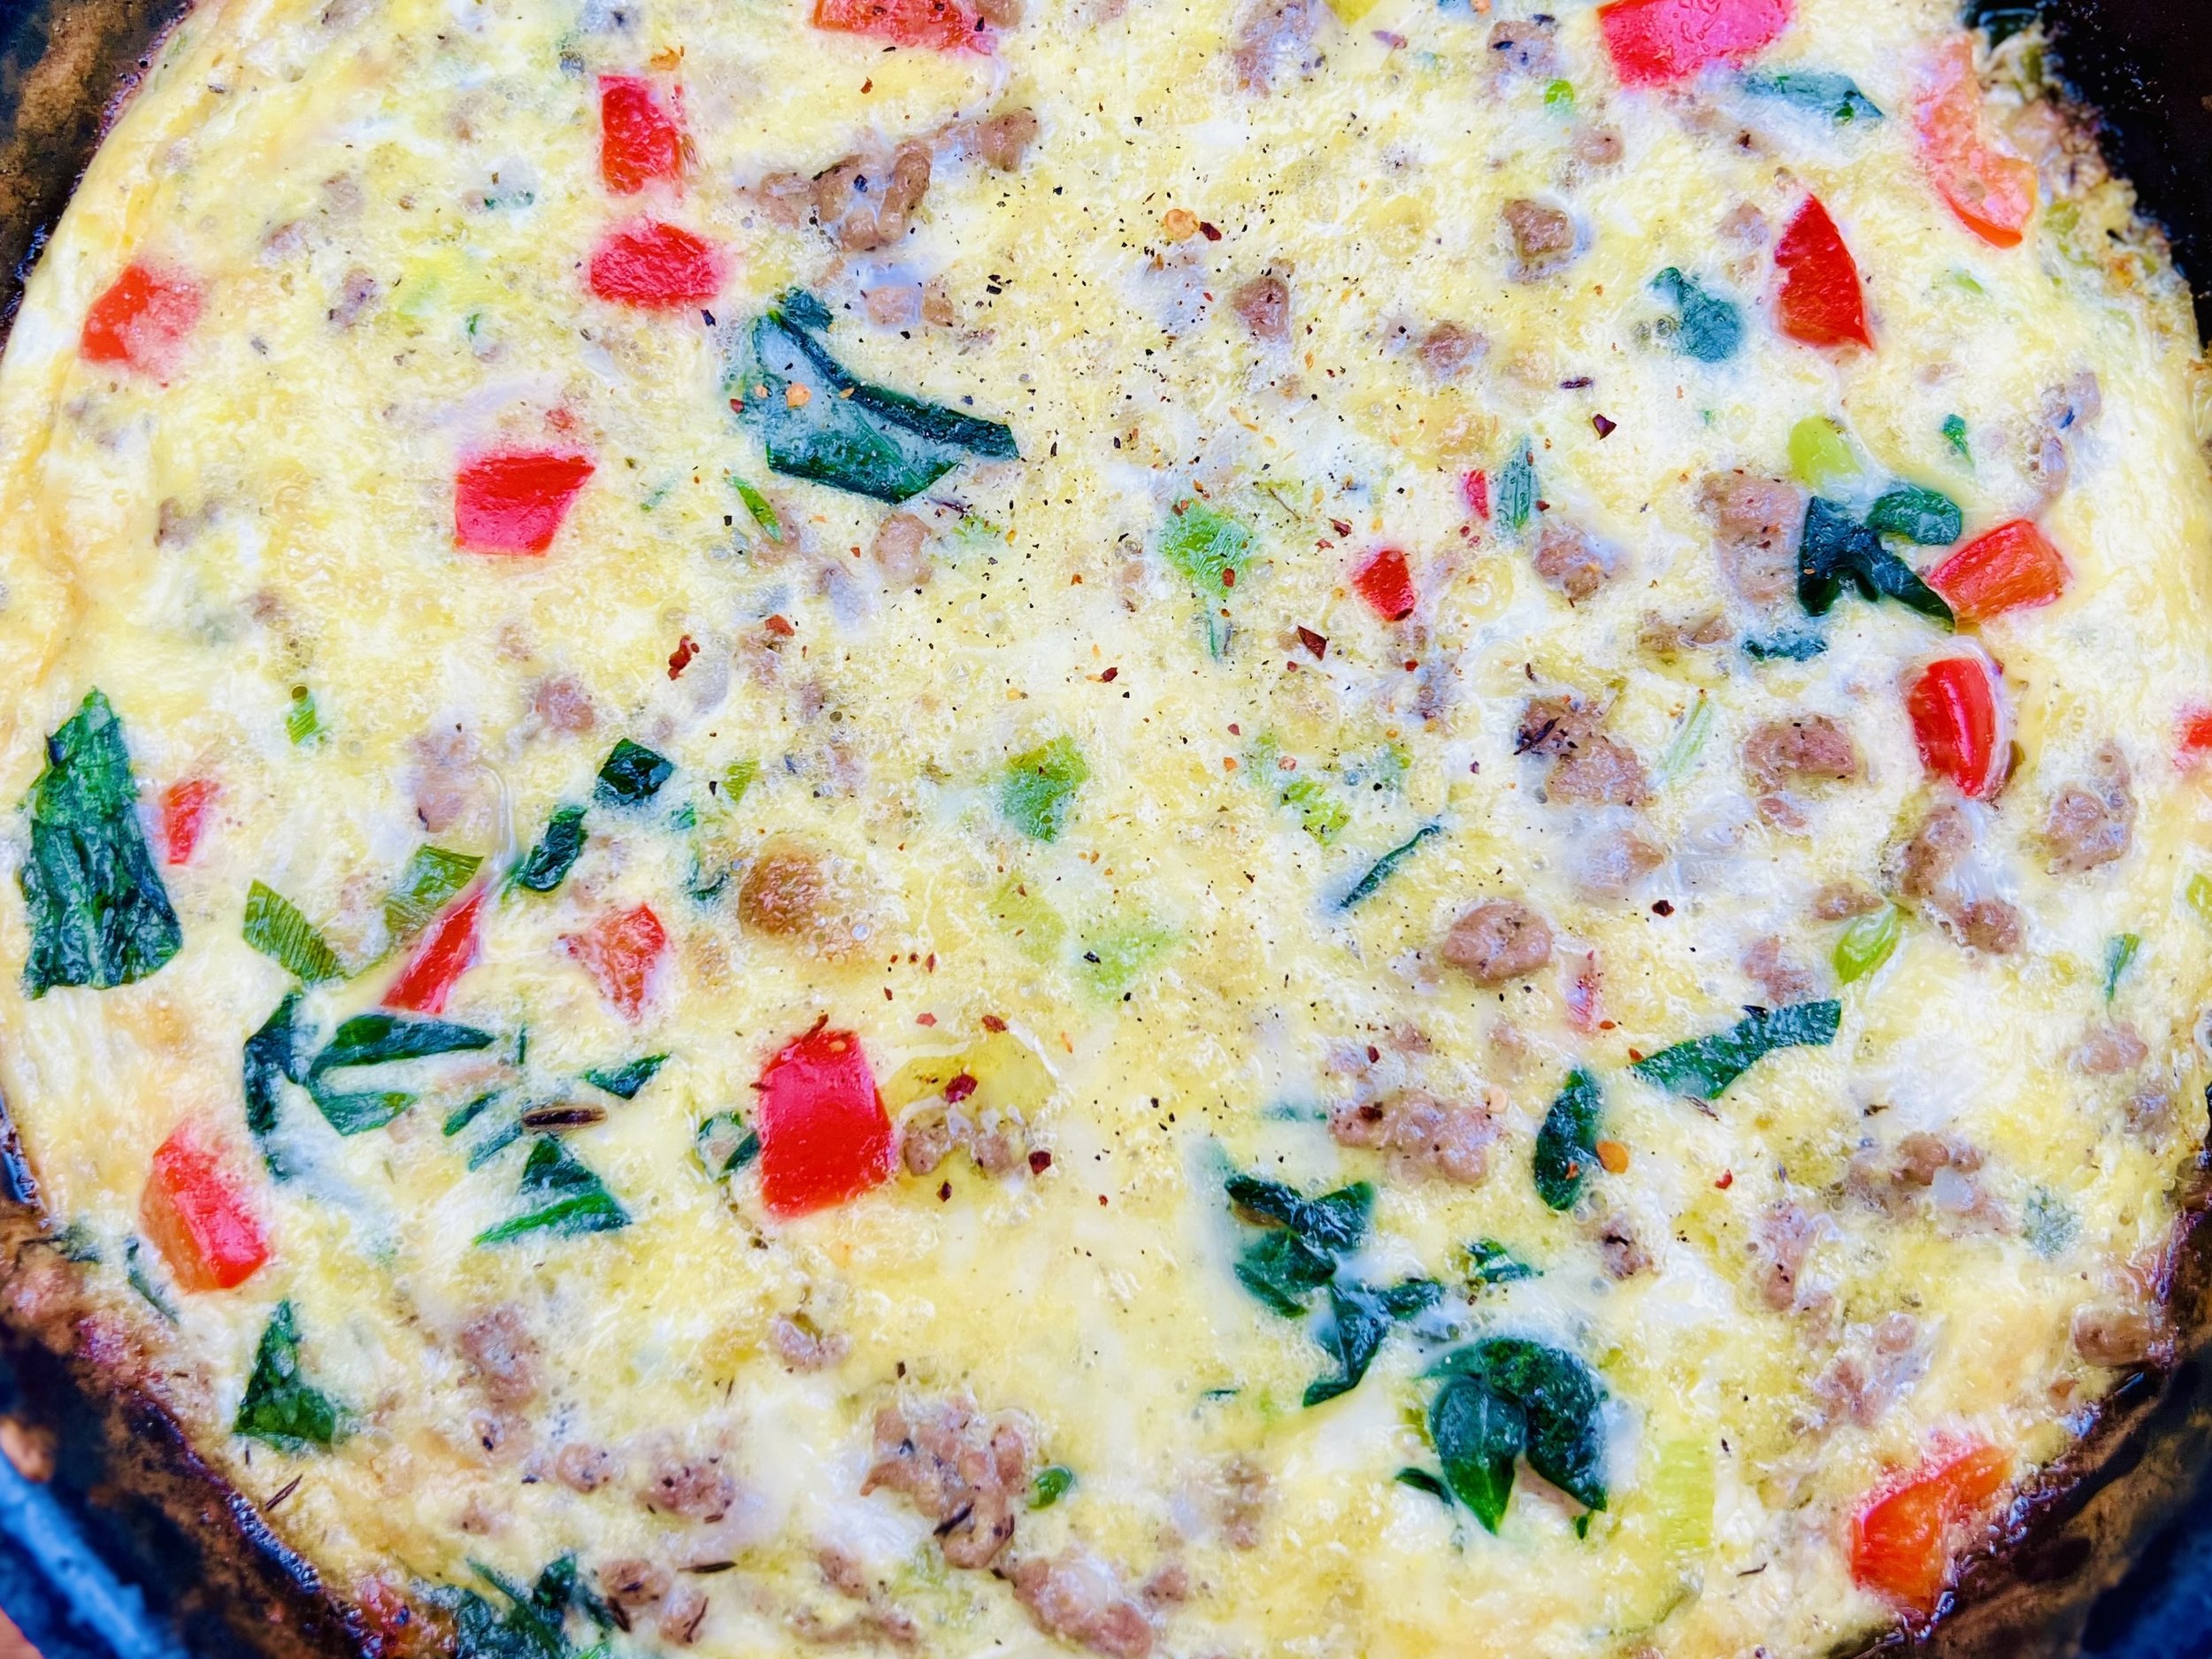
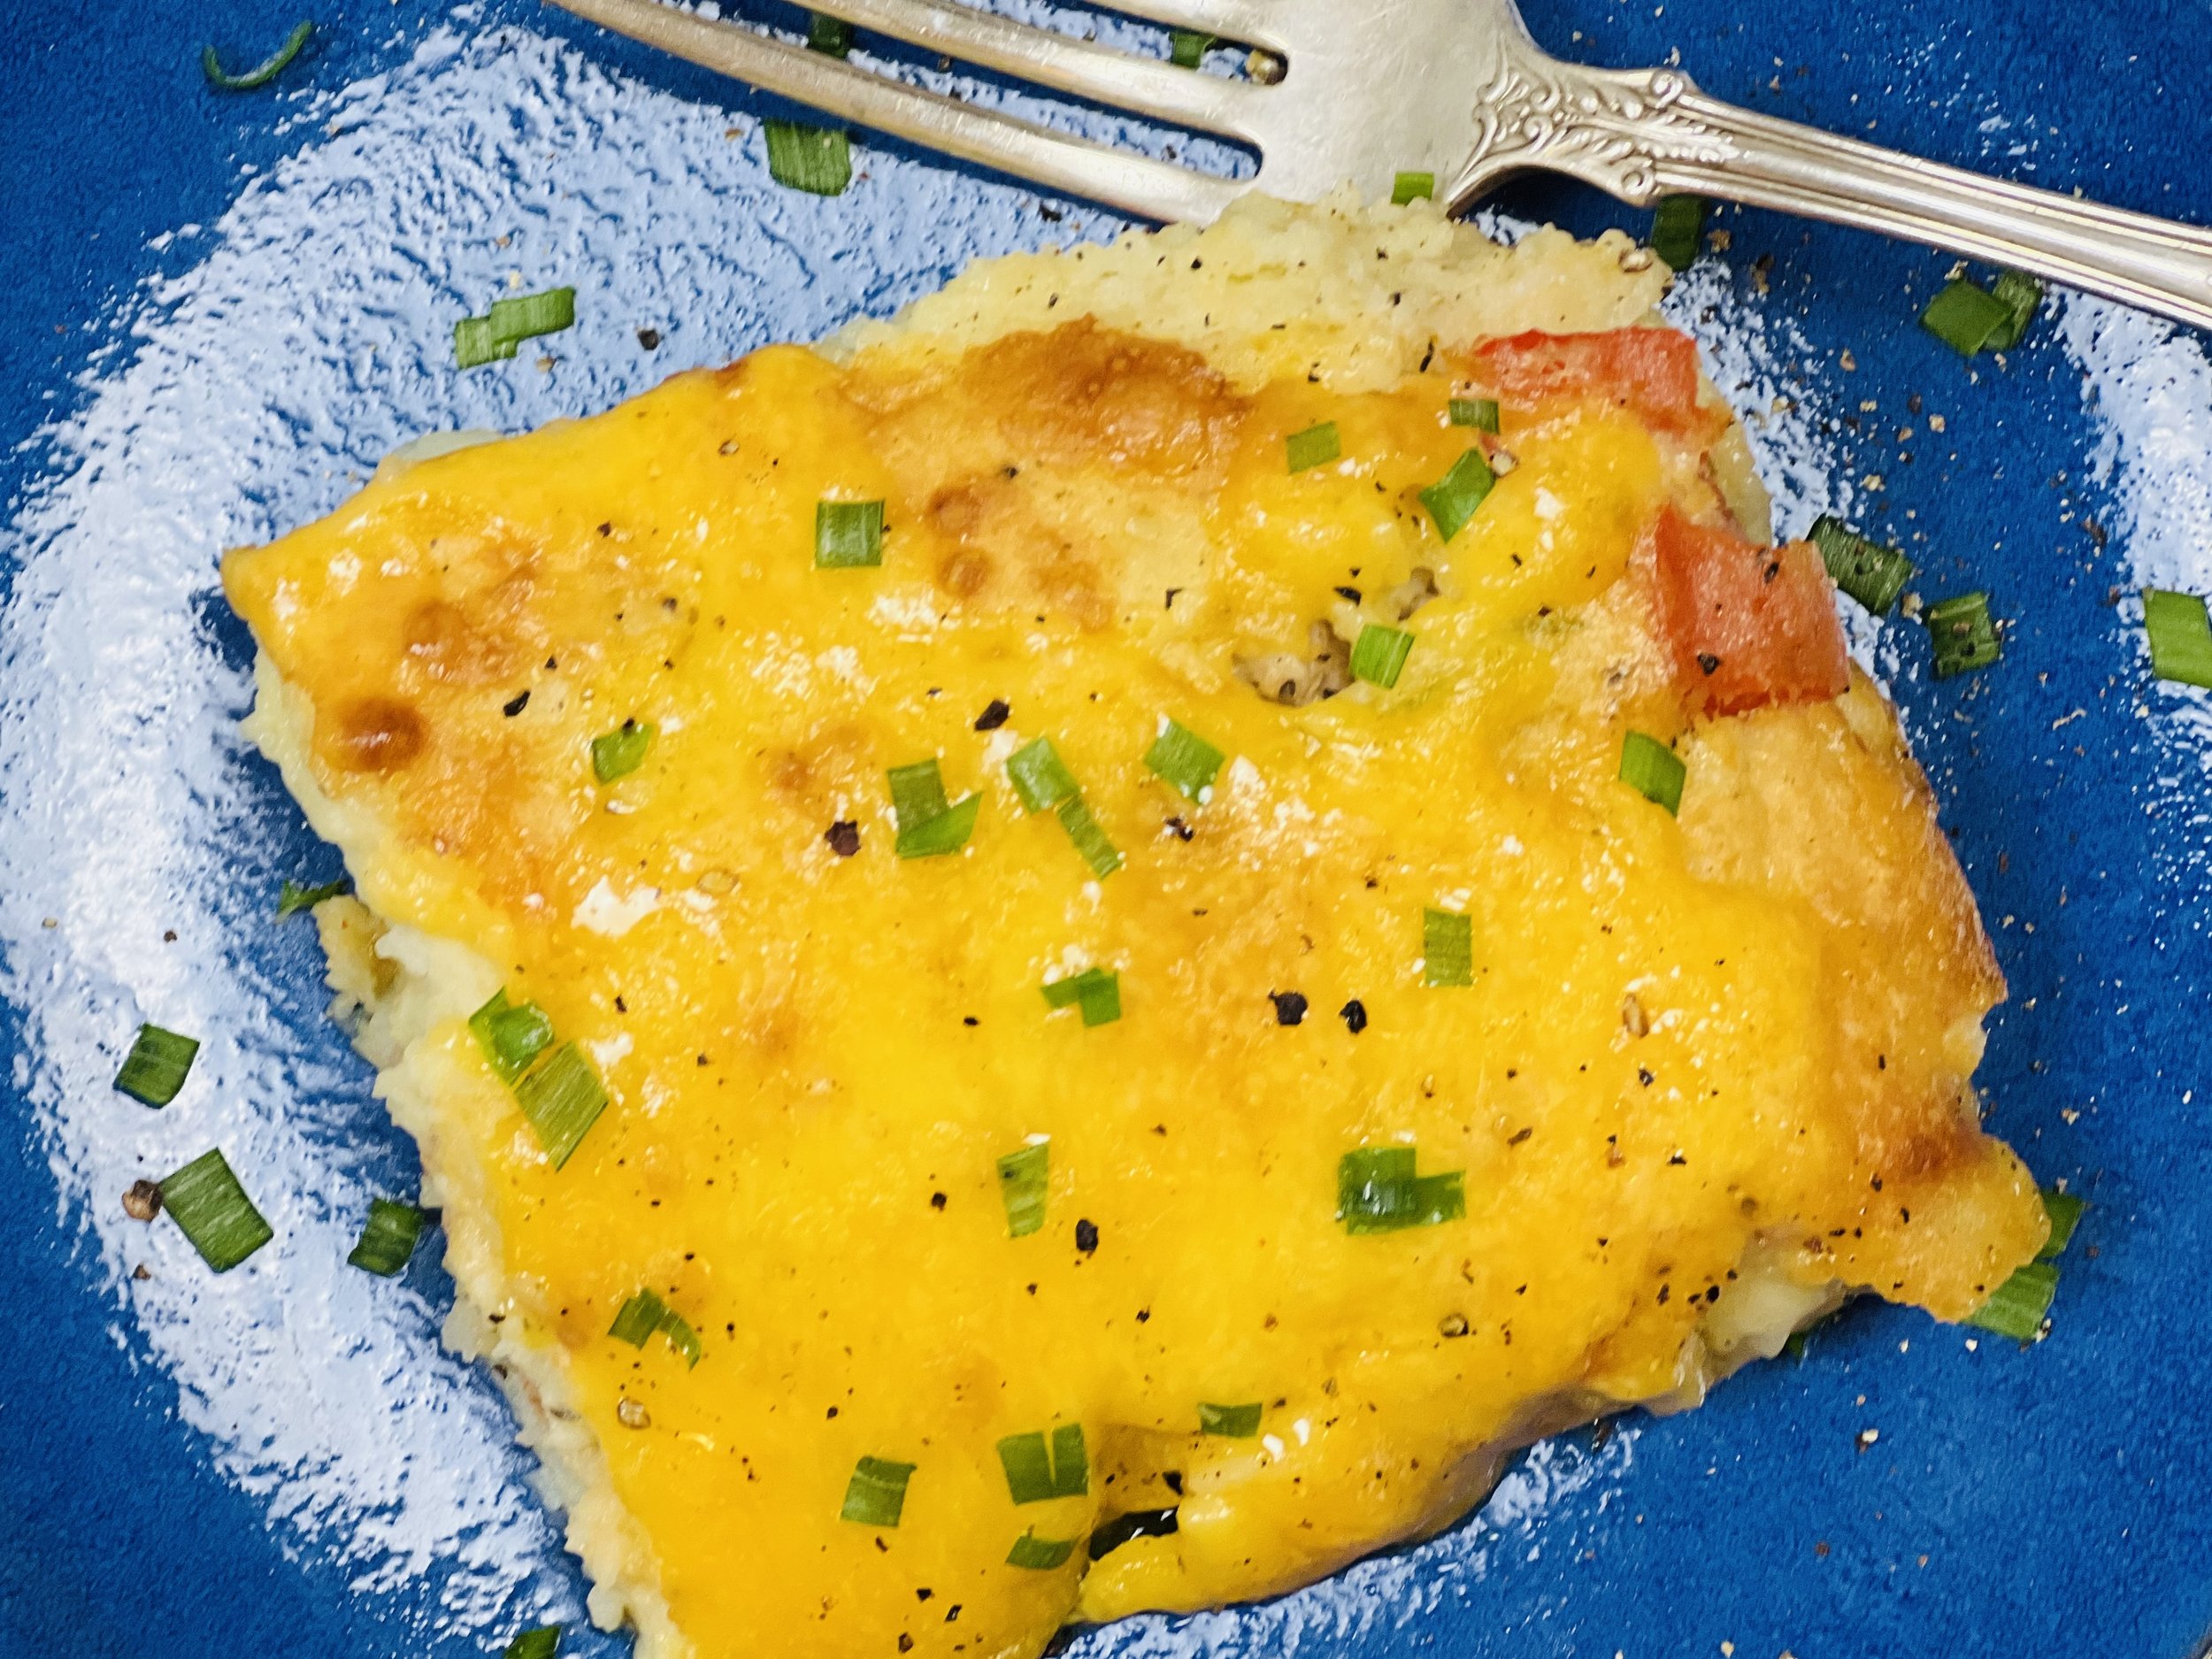
Italian Sausage Breakfast Bake (Low FODMAP)
20 Minutes prep • 45 Minutes cook • Low FODMAP • Gluten-free • Makes 12 pieces
20 Minutes prep • 45 Minutes cook • Low FODMAP • Gluten-free • Makes 12 pieces • Ok to make ahead: Steps 1-5
Delicious Italian sausage, baked together with eggs and potatoes and topped with really flavorful cheese means you have the whole breakfast menu at once! This breakfast bake comes together quickly and easily and your kitchen will smell delicious while it’s cooking so it’s a great way to greet the day. A perfect breakfast or brunch for the whole family or a table of guests—or cut the recipe in half for a smaller crowd. Leftovers are also delicious and heat up nicely in the microwave or oven.
This is an exclusive recipe just for recipe club members.
In addition to the two free recipes I create each week I am creating and delivering one very special recipe just for my recipe club members. If you’re not yet a member, I encourage you to join! Membership in the club includes access to the complete archive of recipes with filters so it can become your virtual low FODMAP cookbook plus, I am creating and delivering one special NEW recipe every week ONLY for recipe club members.
Your membership in the club helps me continue creating new, delicious, easy-to-make, low FODMAP recipes just for you.
As always, all recipes will emphasize simple ingredients, easy preparation, and delicious low FODMAP results. Recipes will be for everything from main courses, salads, soups, side dishes, appetizers, desserts, sauces, breakfast and lunch, and even mocktails and cocktails. Everything you need to prepare fantastic low FODMAP meals everyone will love.








































15 Minutes • Gluten-free • Lactose-free • Low FODMAP