Deliciously Low FODMAP

Inspire yourself with hundreds of delicious low FODMAP recipes, tips, and tools, and enjoy the abundance that is yours even when you have IBS.
Use the buttons and filters to find something specific or browse the complete collection for inspiration.
Discover a treasure trove of recipes with my FREE recipe club! Get new ideas delivered straight to your inbox every week.
Deliciously Low FODMAP is a trademark of IBS Game Changer, LLC
Filter to find Recipes and Tools
More Filtering Options
- All 723
- Appetizer 50
- BBQ 46
- Bowl 32
- Breakfast 58
- Cocktails 13
- Collection 1 58
- Collection 10 27
- Collection 11 30
- Collection 12 27
- Collection 13 31
- Collection 14 29
- Collection 15 31
- Collection 16 34
- Collection 17 31
- Collection 18 33
- Collection 19 36
- Collection 2 32
- Collection 20 33
- Collection 21 33
- Collection 22 40
- Collection 23 5
- Collection 24 1
- Collection 3 28
- Collection 4 29
- Collection 5 30
- Collection 6 32
- Collection 7 31
- Collection 8 31
- Collection 9 32
- Condiments 6
- Crock Pot 4
- Dessert 107
- Diabetes Game Changer Exception Protocol Contains Alcohol 11
- Diabetes Game Changer Exception Protocol Contains Flour 108
- Diabetes Game Changer Exception Protocol Contains Flour AND Sugar 77
- Diabetes Game Changer Exception Protocol Contains Sugar 49
- Diabetes Game Changer First Four Weeks 360
- Dinner 327
- Drink 8
- Free Guide 17
- Gluten-free 585
- Gut Microbiome 2
- Guthealth 3
- Holidays 68
- IBS Triggers 4
- Keto Friendly 121
- Lactose-Free 175
- Low FODMAP Diet 709
- Low Net Carb 135
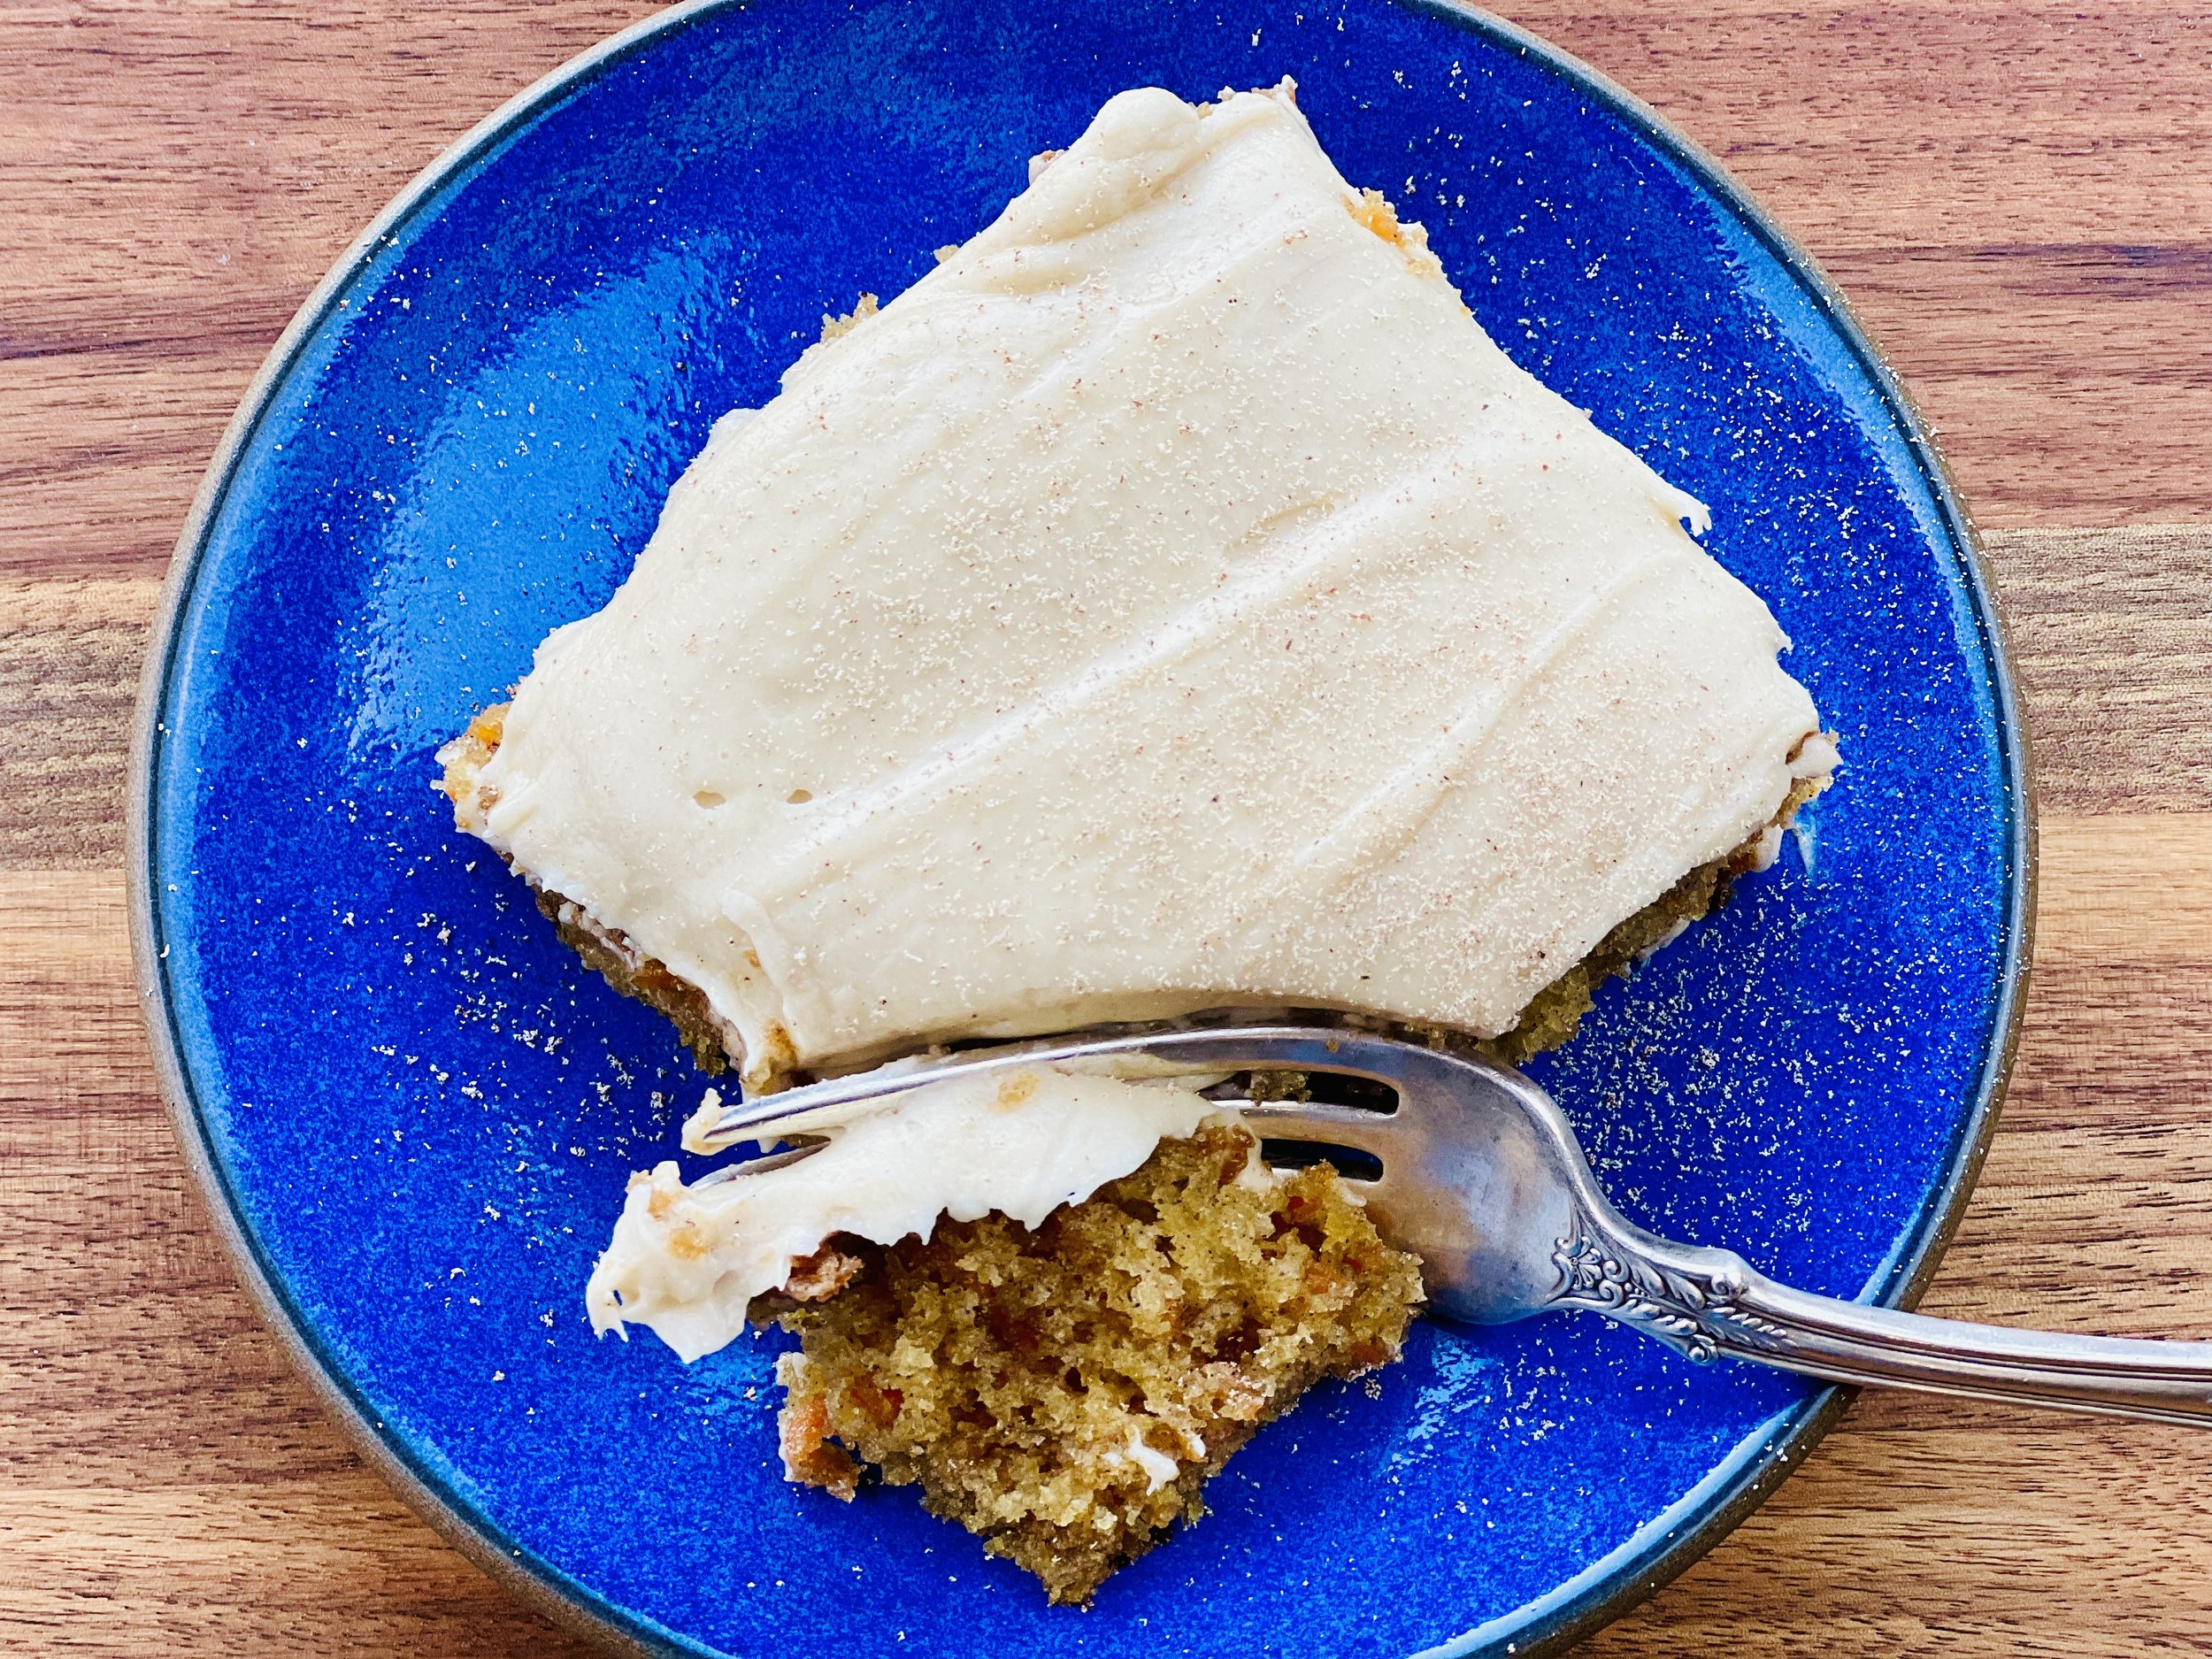
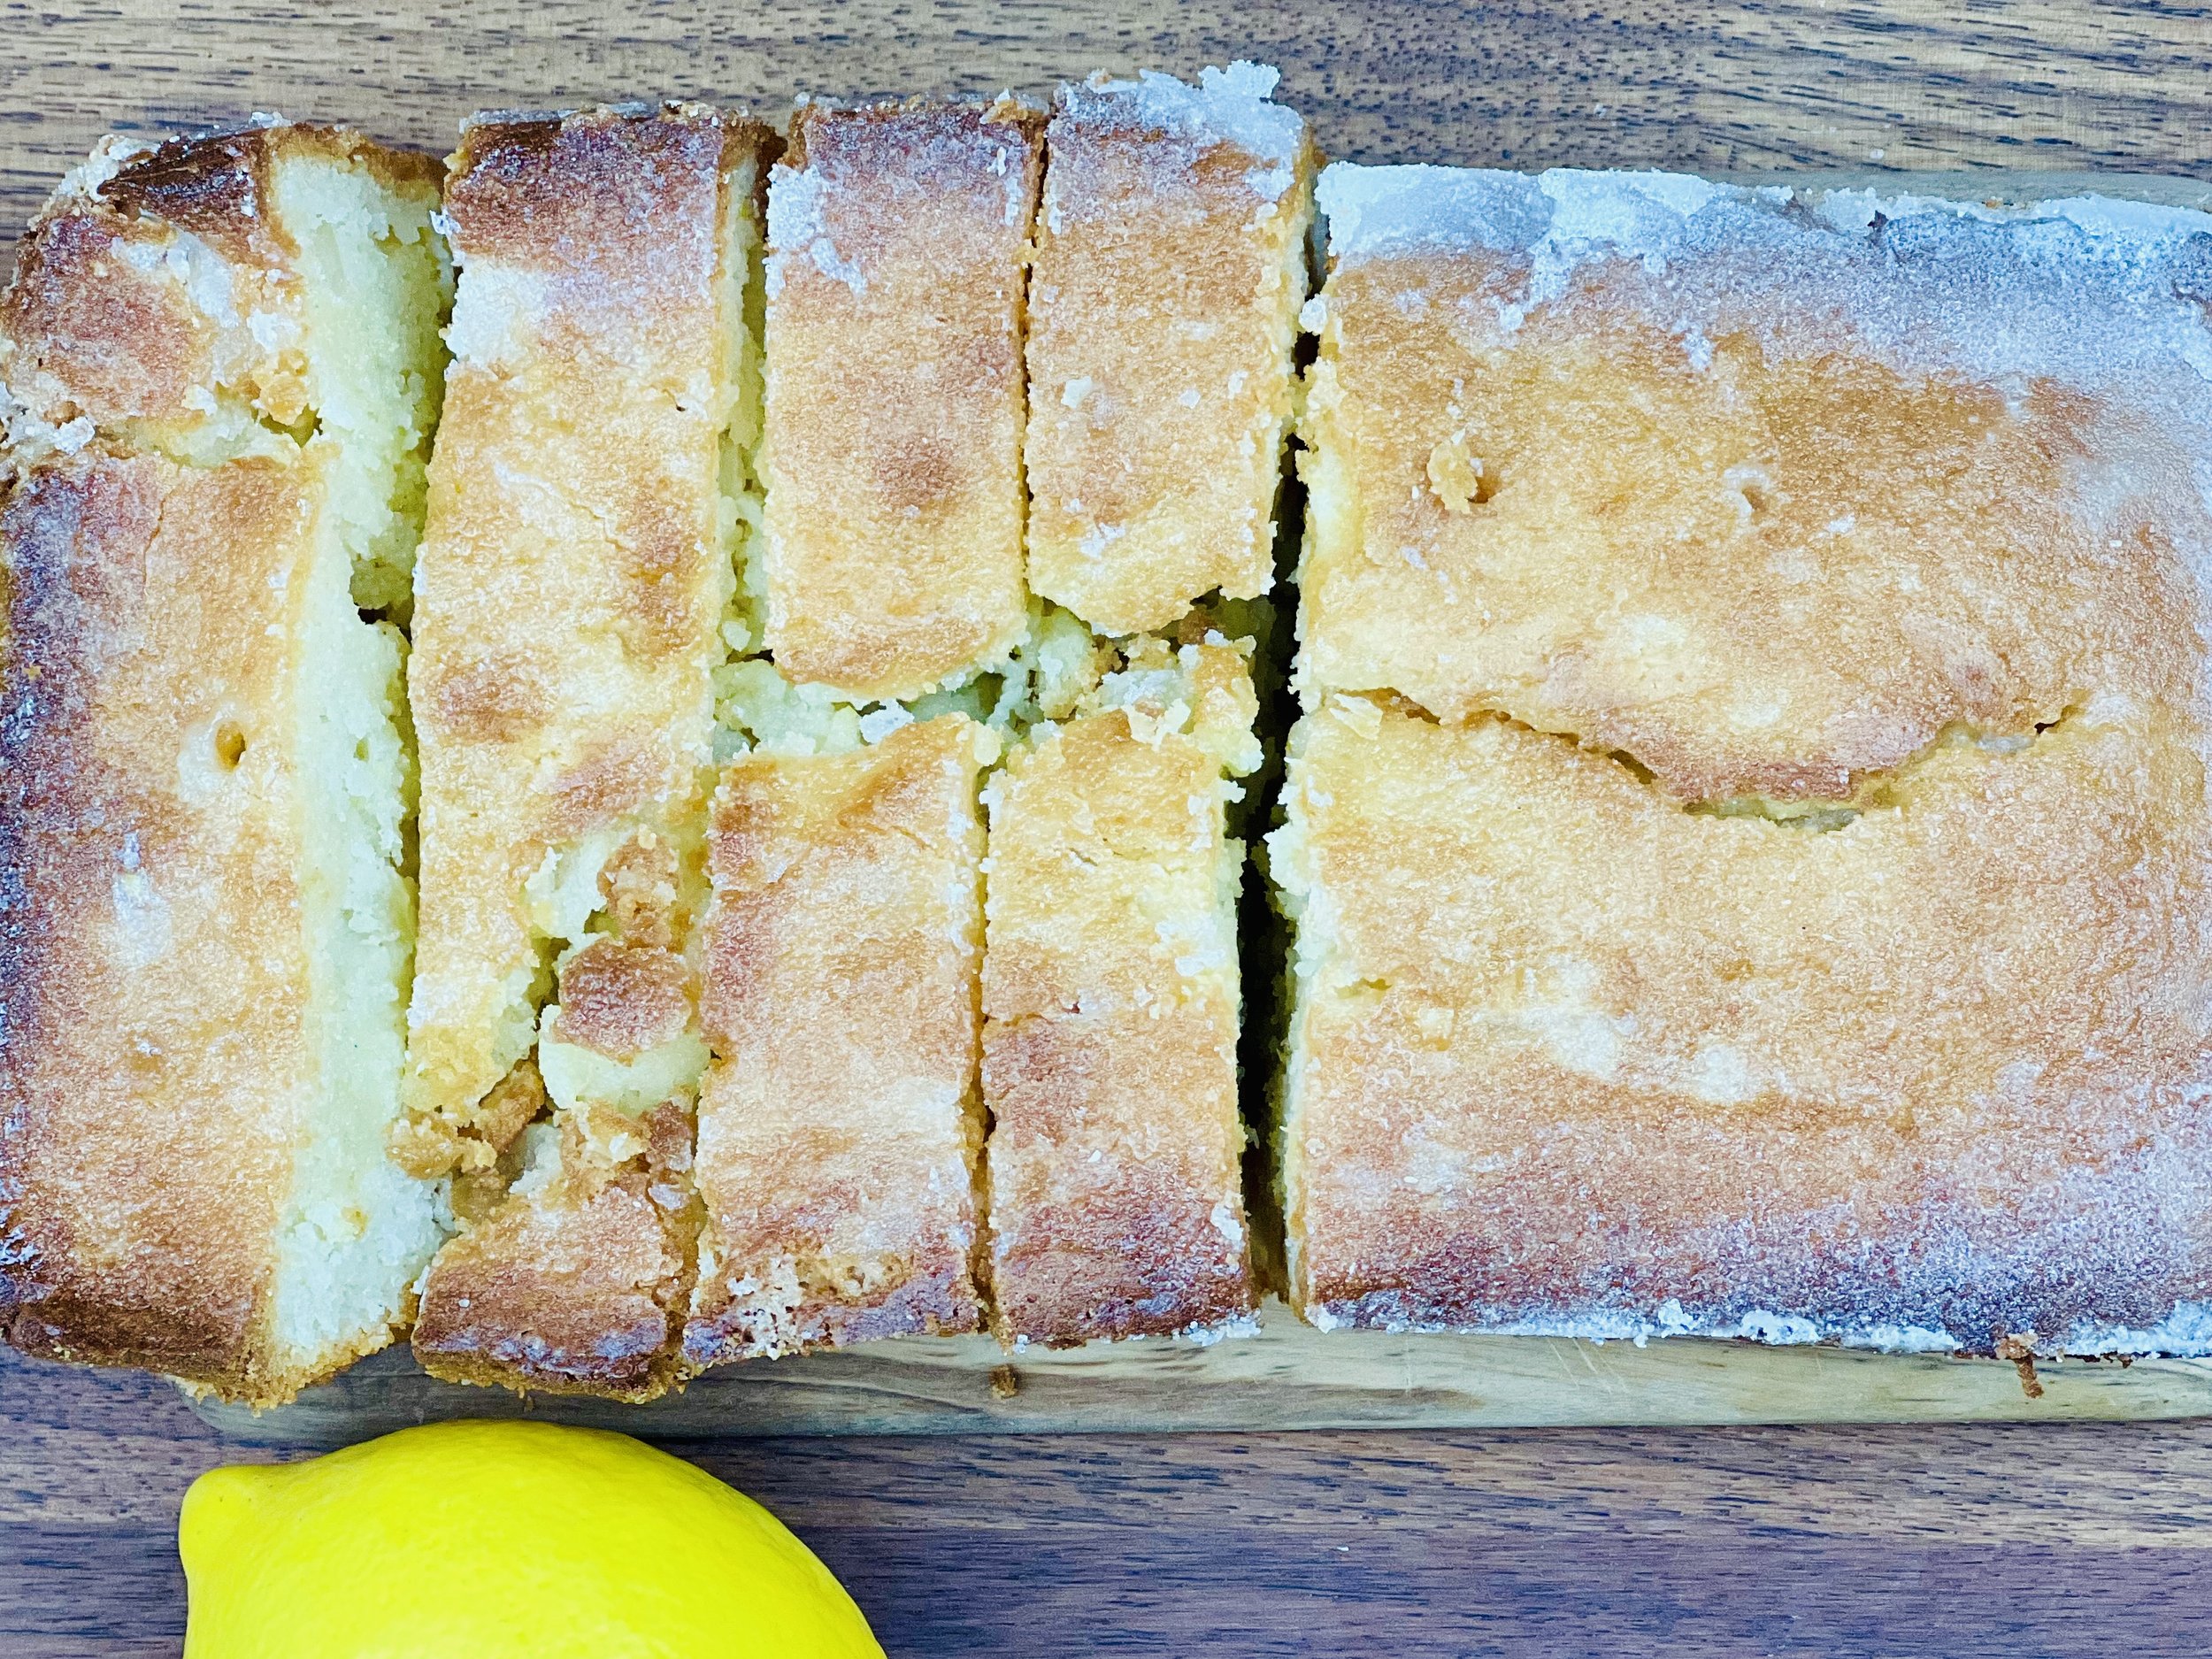
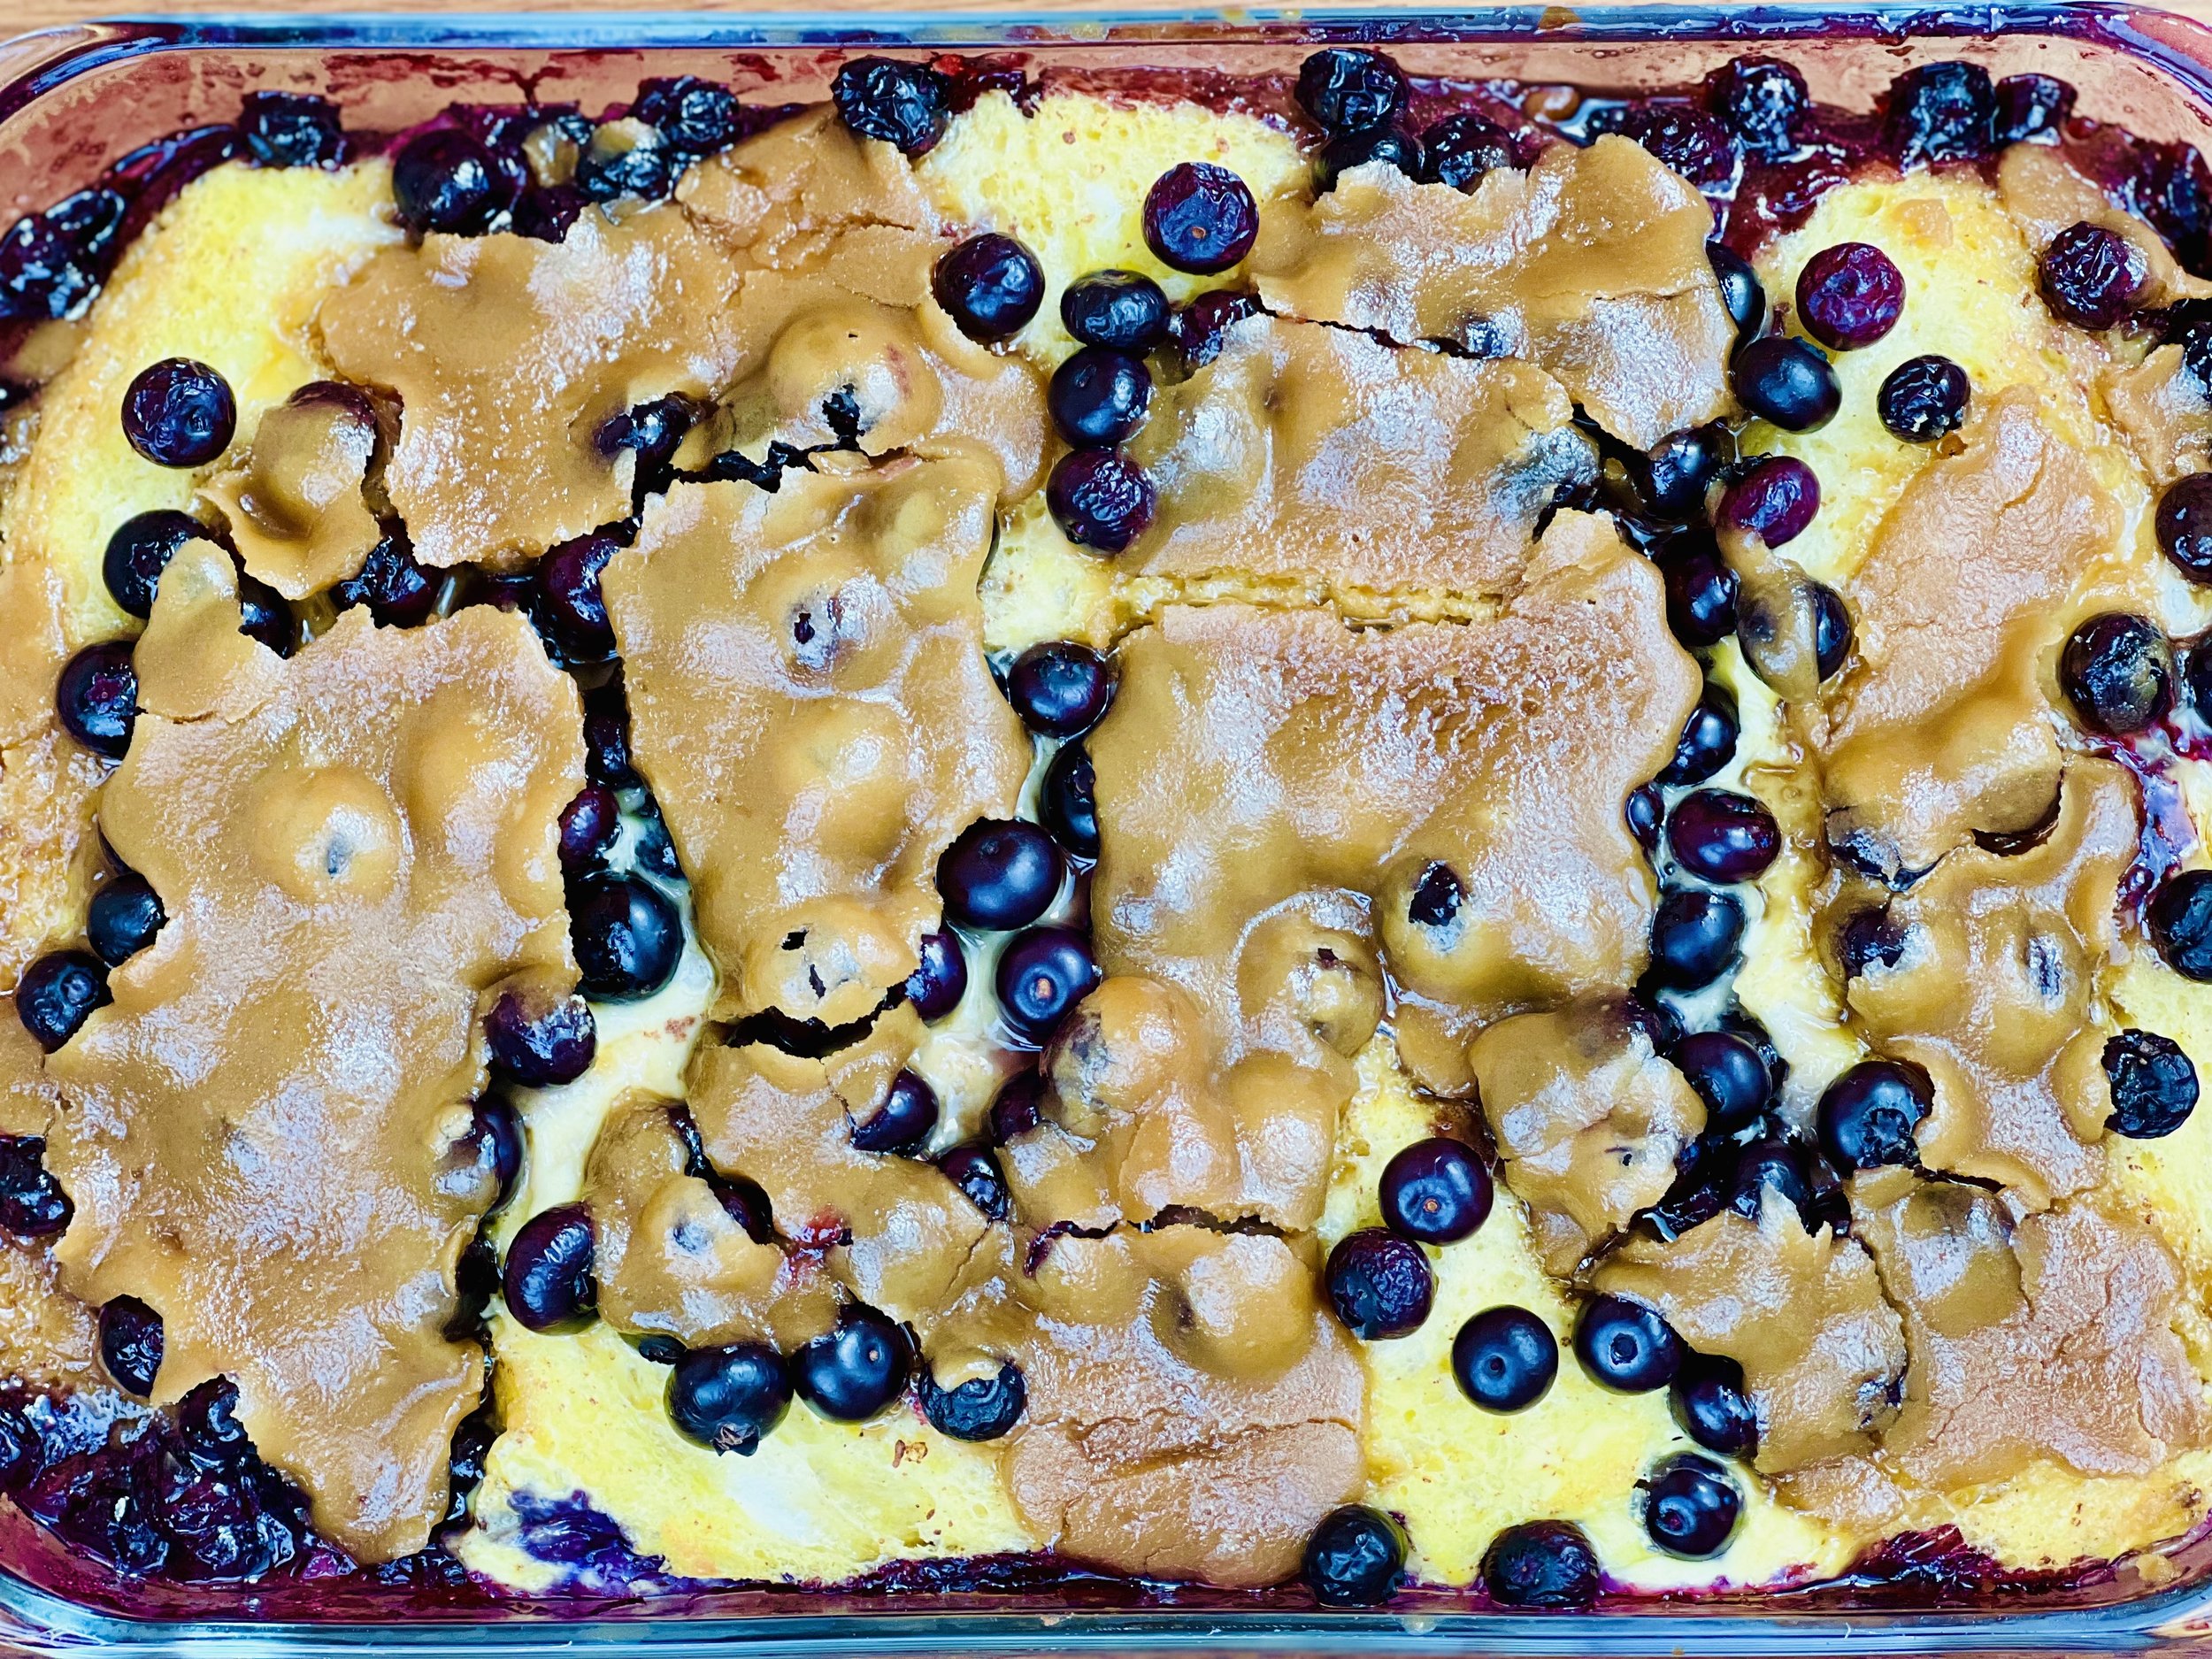
Carrot Cake with Brown Butter Caramel Cream Cheese Frosting (low FODMAP)
15 Minutes prep • 45 Minutes cook • Low FODMAP • Gluten-free • Serves 12
15 Minutes prep • 45 Minutes cook • Low FODMAP • Gluten-free • Serves 12 • Ok to make ahead: Steps 1 - 5
I used to think classic cream cheese frosting is what made carrot cake so good. And then I tried browning the butter and adding some heavy cream to the frosting — and it changed the game. This extra-special carrot cake is easy to make and you can be certain the whole table will love it. This cake is best on the second day so it’s a good one to make ahead and refrigerate overnight before serving. Perfect for a party, potluck, or picnic!
Ingredients: Cake
2 cups sifted gluten-free all-purpose flour
2 teaspoons baking soda
2 teaspoons baking powder
2 teaspoons cinnamon
1 teaspoon salt
3 cups grated carrots
1 and 1/3 cups vegetable oil
4 slightly beaten eggs
2 cups granulated sugar
1/2 cup drained crushed pineapple or finely-diced fresh pineapple
1/2 cup walnuts, chopped (optional)
Ingredients: Frosting
1/2 cup salted butter, at room temperature
1/4 cup heavy cream
3 ounces lactose-free cream cheese, at room temperature
1/12 - 2 cups powdered sugar, sifted
2 teaspoons vanilla extract
Directions: Cake
(1) Prepare: Preheat oven to 350 degrees F. Butter and flour a 9'‘ x 13” baking pan or two 9” round pans if you prefer. Line the bottom of each round pan with parchment to ensure cake layers come out of the pan cleanly.
(2) Combine dry ingredients: Measure flour, baking soda, baking powder, cinnamon, and salt in a sifter.
(3) Combine wet ingredients: Mix grated carrots, chopped pineapple, vegetable oil, and eggs in a mixing bowl and stir well to combine.
(4) Add remaining dry ingredients: Add sugar and stir in. Finally, add sifted dry ingredients and stir in.
(5) Bake: Pour batter into prepared baking pan(s). Bake at 350 degrees F for 45 minutes or until a toothpick inserted in the center comes out clean. Let cool and frost with brown butter caramel cream cheese frosting.
Directions: Frosting
(6) Make the caramel: Melt the butter together with the brown sugar and heavy cream in a saucepan. Bring to a boil and cook 2 minutes or until the sugar has dissolved. Add a pinch of salt and stir to mix in. Remove from the heat and add to the bowl of a stand mixer. Let cool completely.
(7) Add the remaining ingredients: Add the cream cheese and beat until creamy. Sift in the powdered sugar, then add the vanilla. Beat until well combined. The frosting should be creamy, if it’s too thin, put the frosting in the refrigerator for 10-15 minutes.
(8) Finish: Frost the cake and refrigerate overnight if possible for the best flavor. Serve at room temperature the next day with a dusting of fresh-grated nutmeg.
Eat and enjoy every bite because you can!
Recipe note: I use Diamond Crystal Kosher salt in all my recipes because it has a wonderful flat and crisp flake that tastes delicious. It is also the least salty salt available so you can use it more liberally as a seasoning than you can table salt or sea salt. If you use another type of salt, you may need to reduce the amount so it is not over-salted.
Link note: This post contains links for you to easily purchase items listed on the page. In some cases, we have provided a special discount code for IBS Game Changers so be sure to use it when you purchase an item to get the discount that has been arranged just for you! As an Amazon Associate, I earn a commission from qualifying Amazon purchases.
More Deliciously Low FODMAP™ dessert recipes


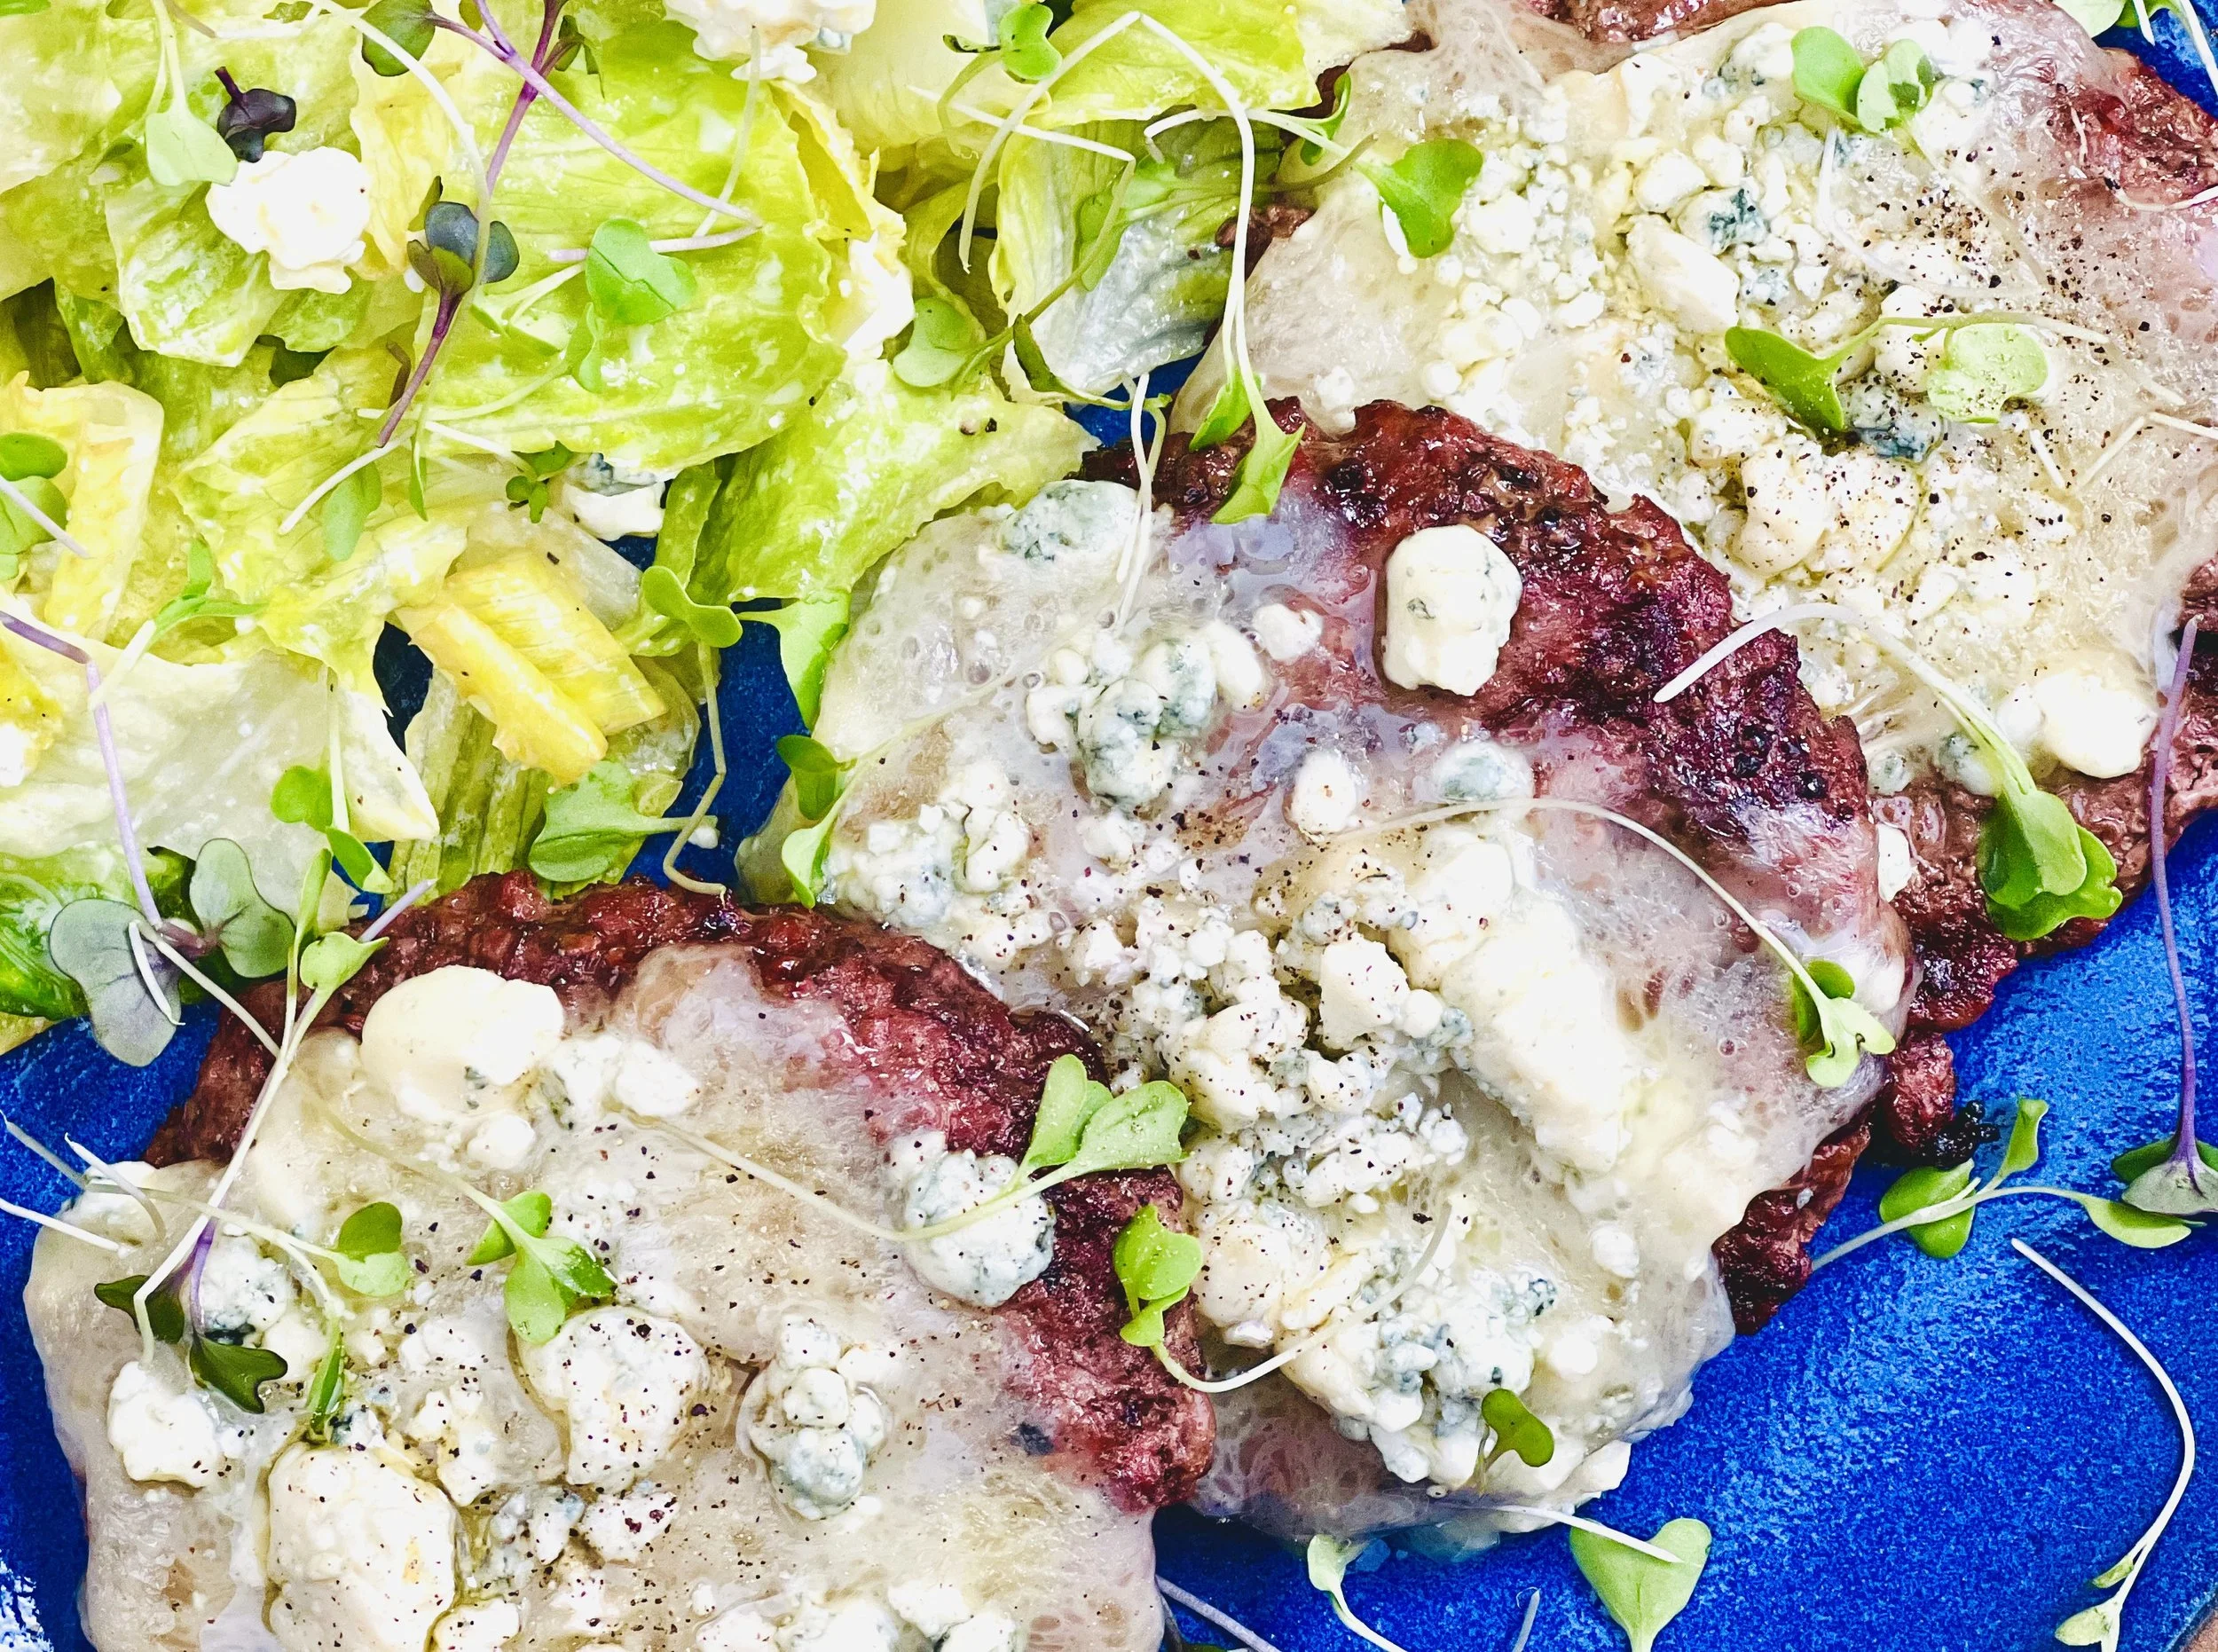
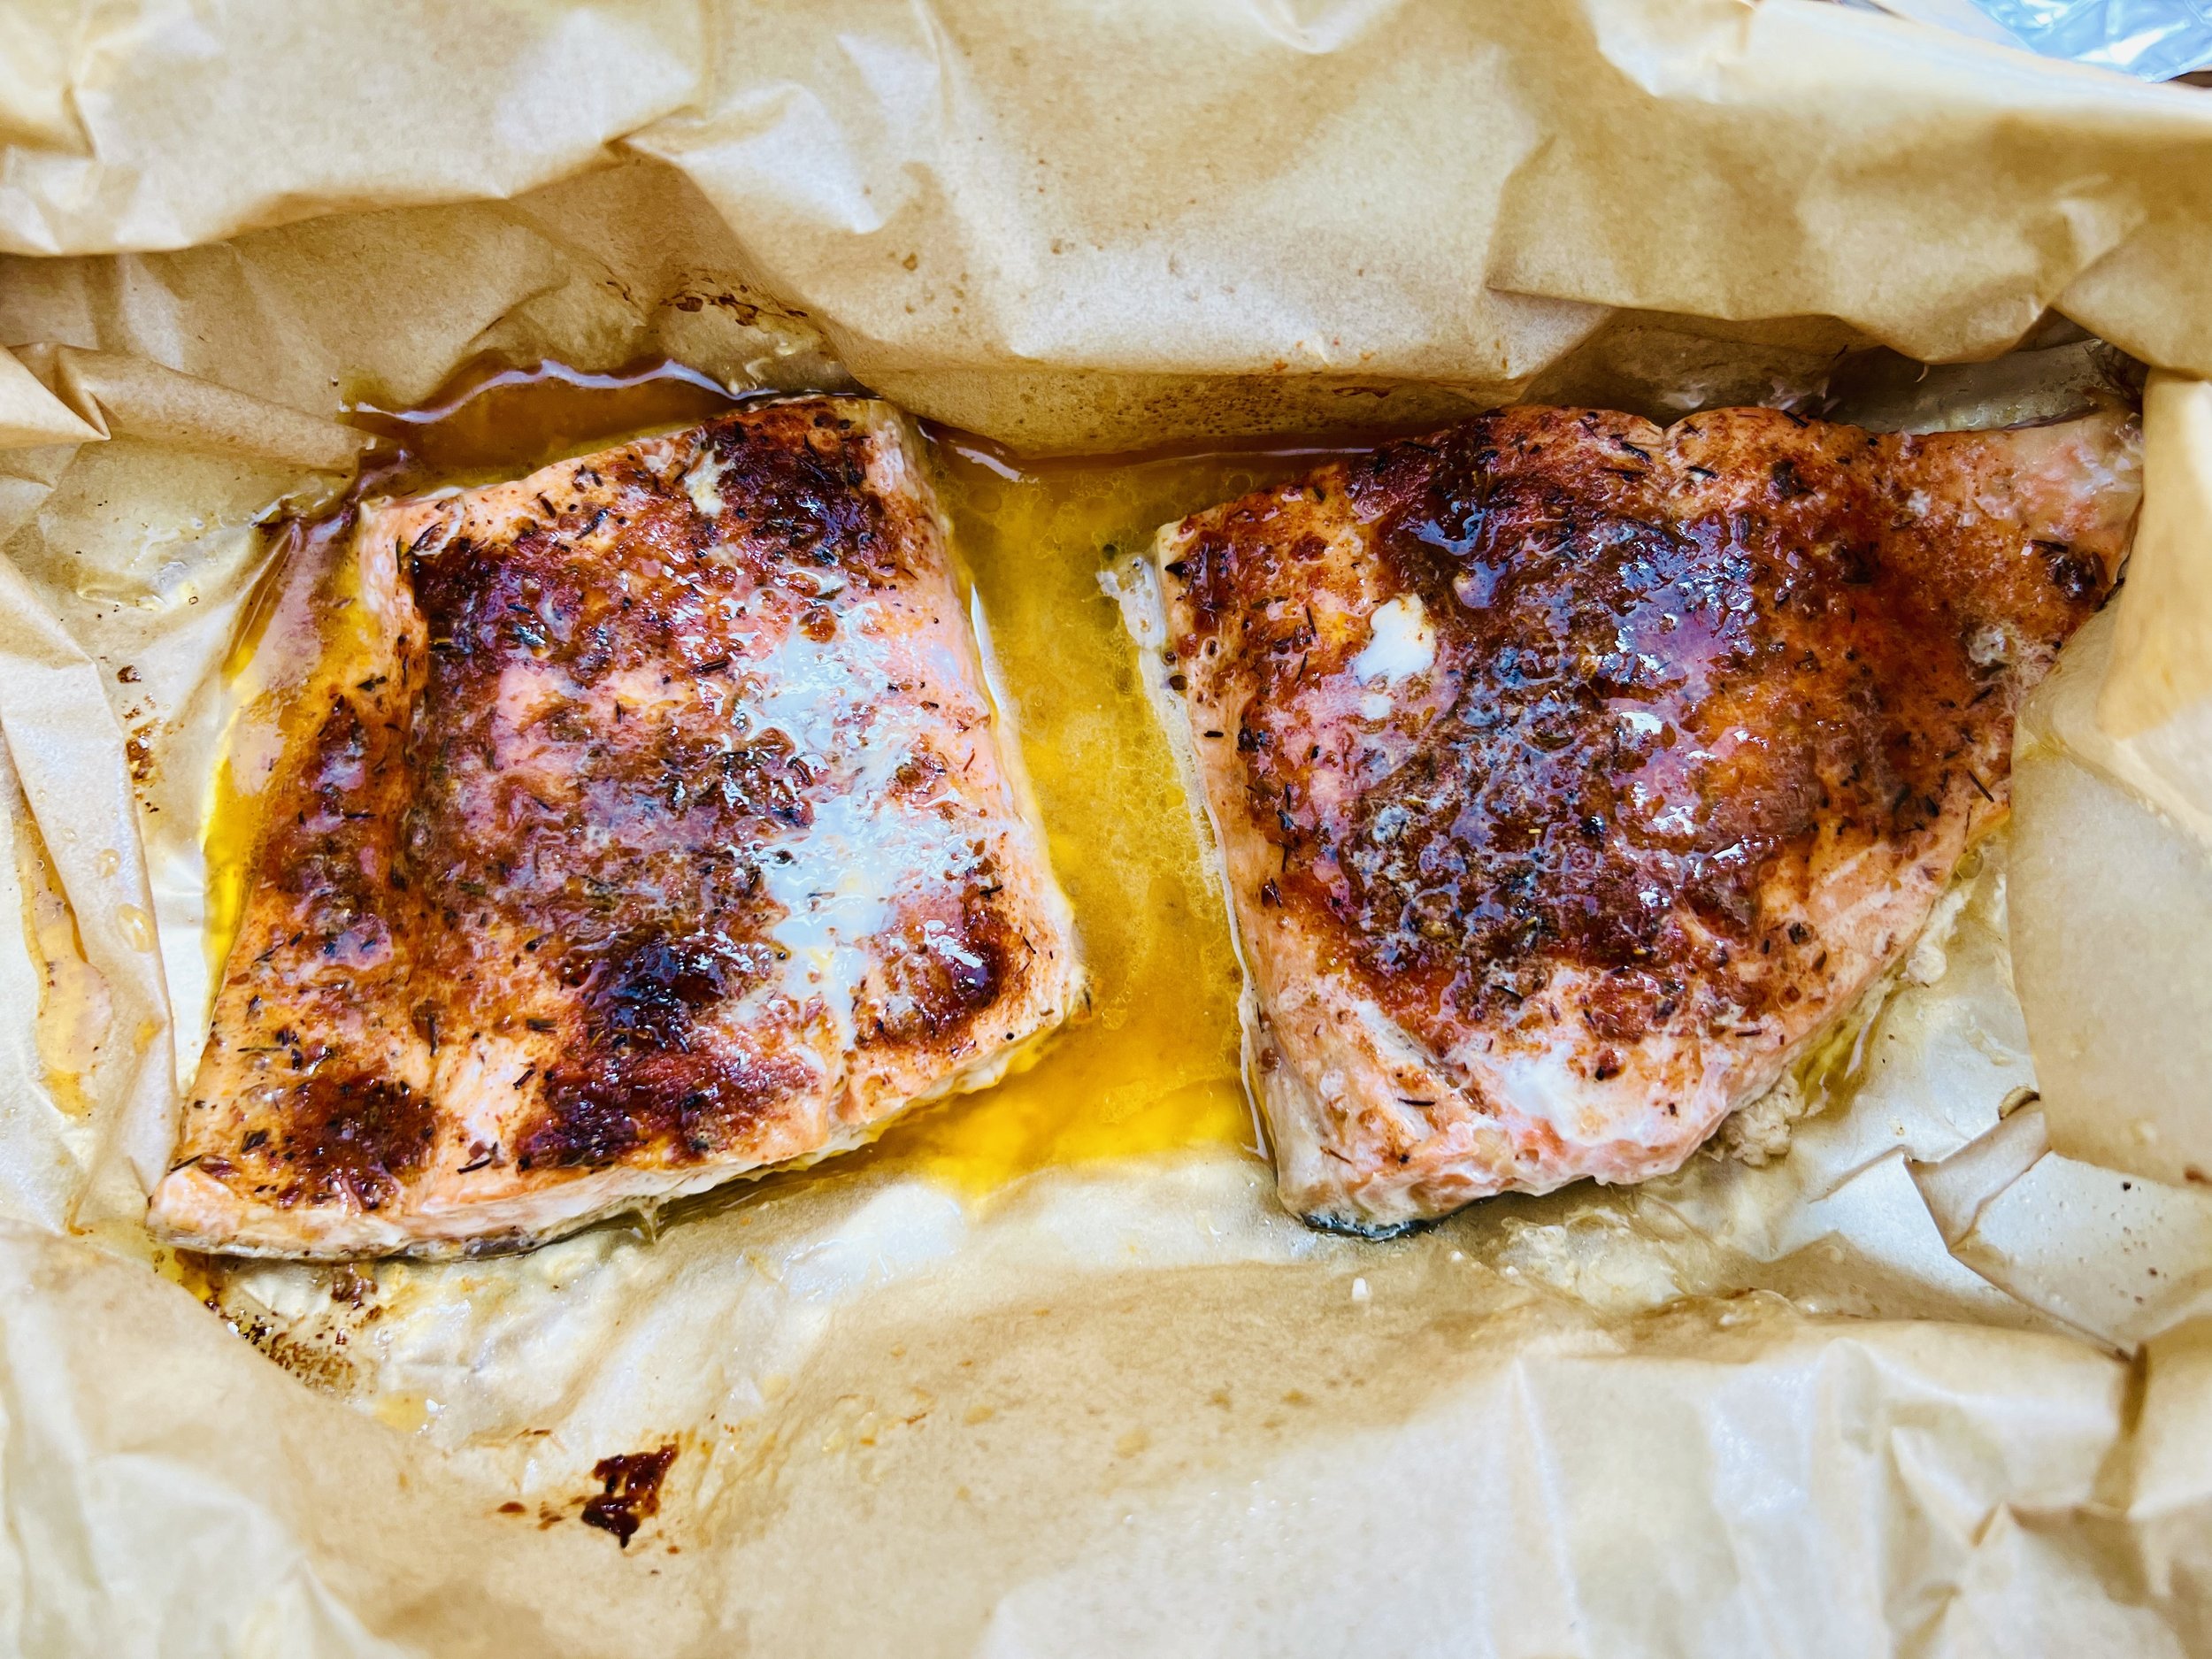
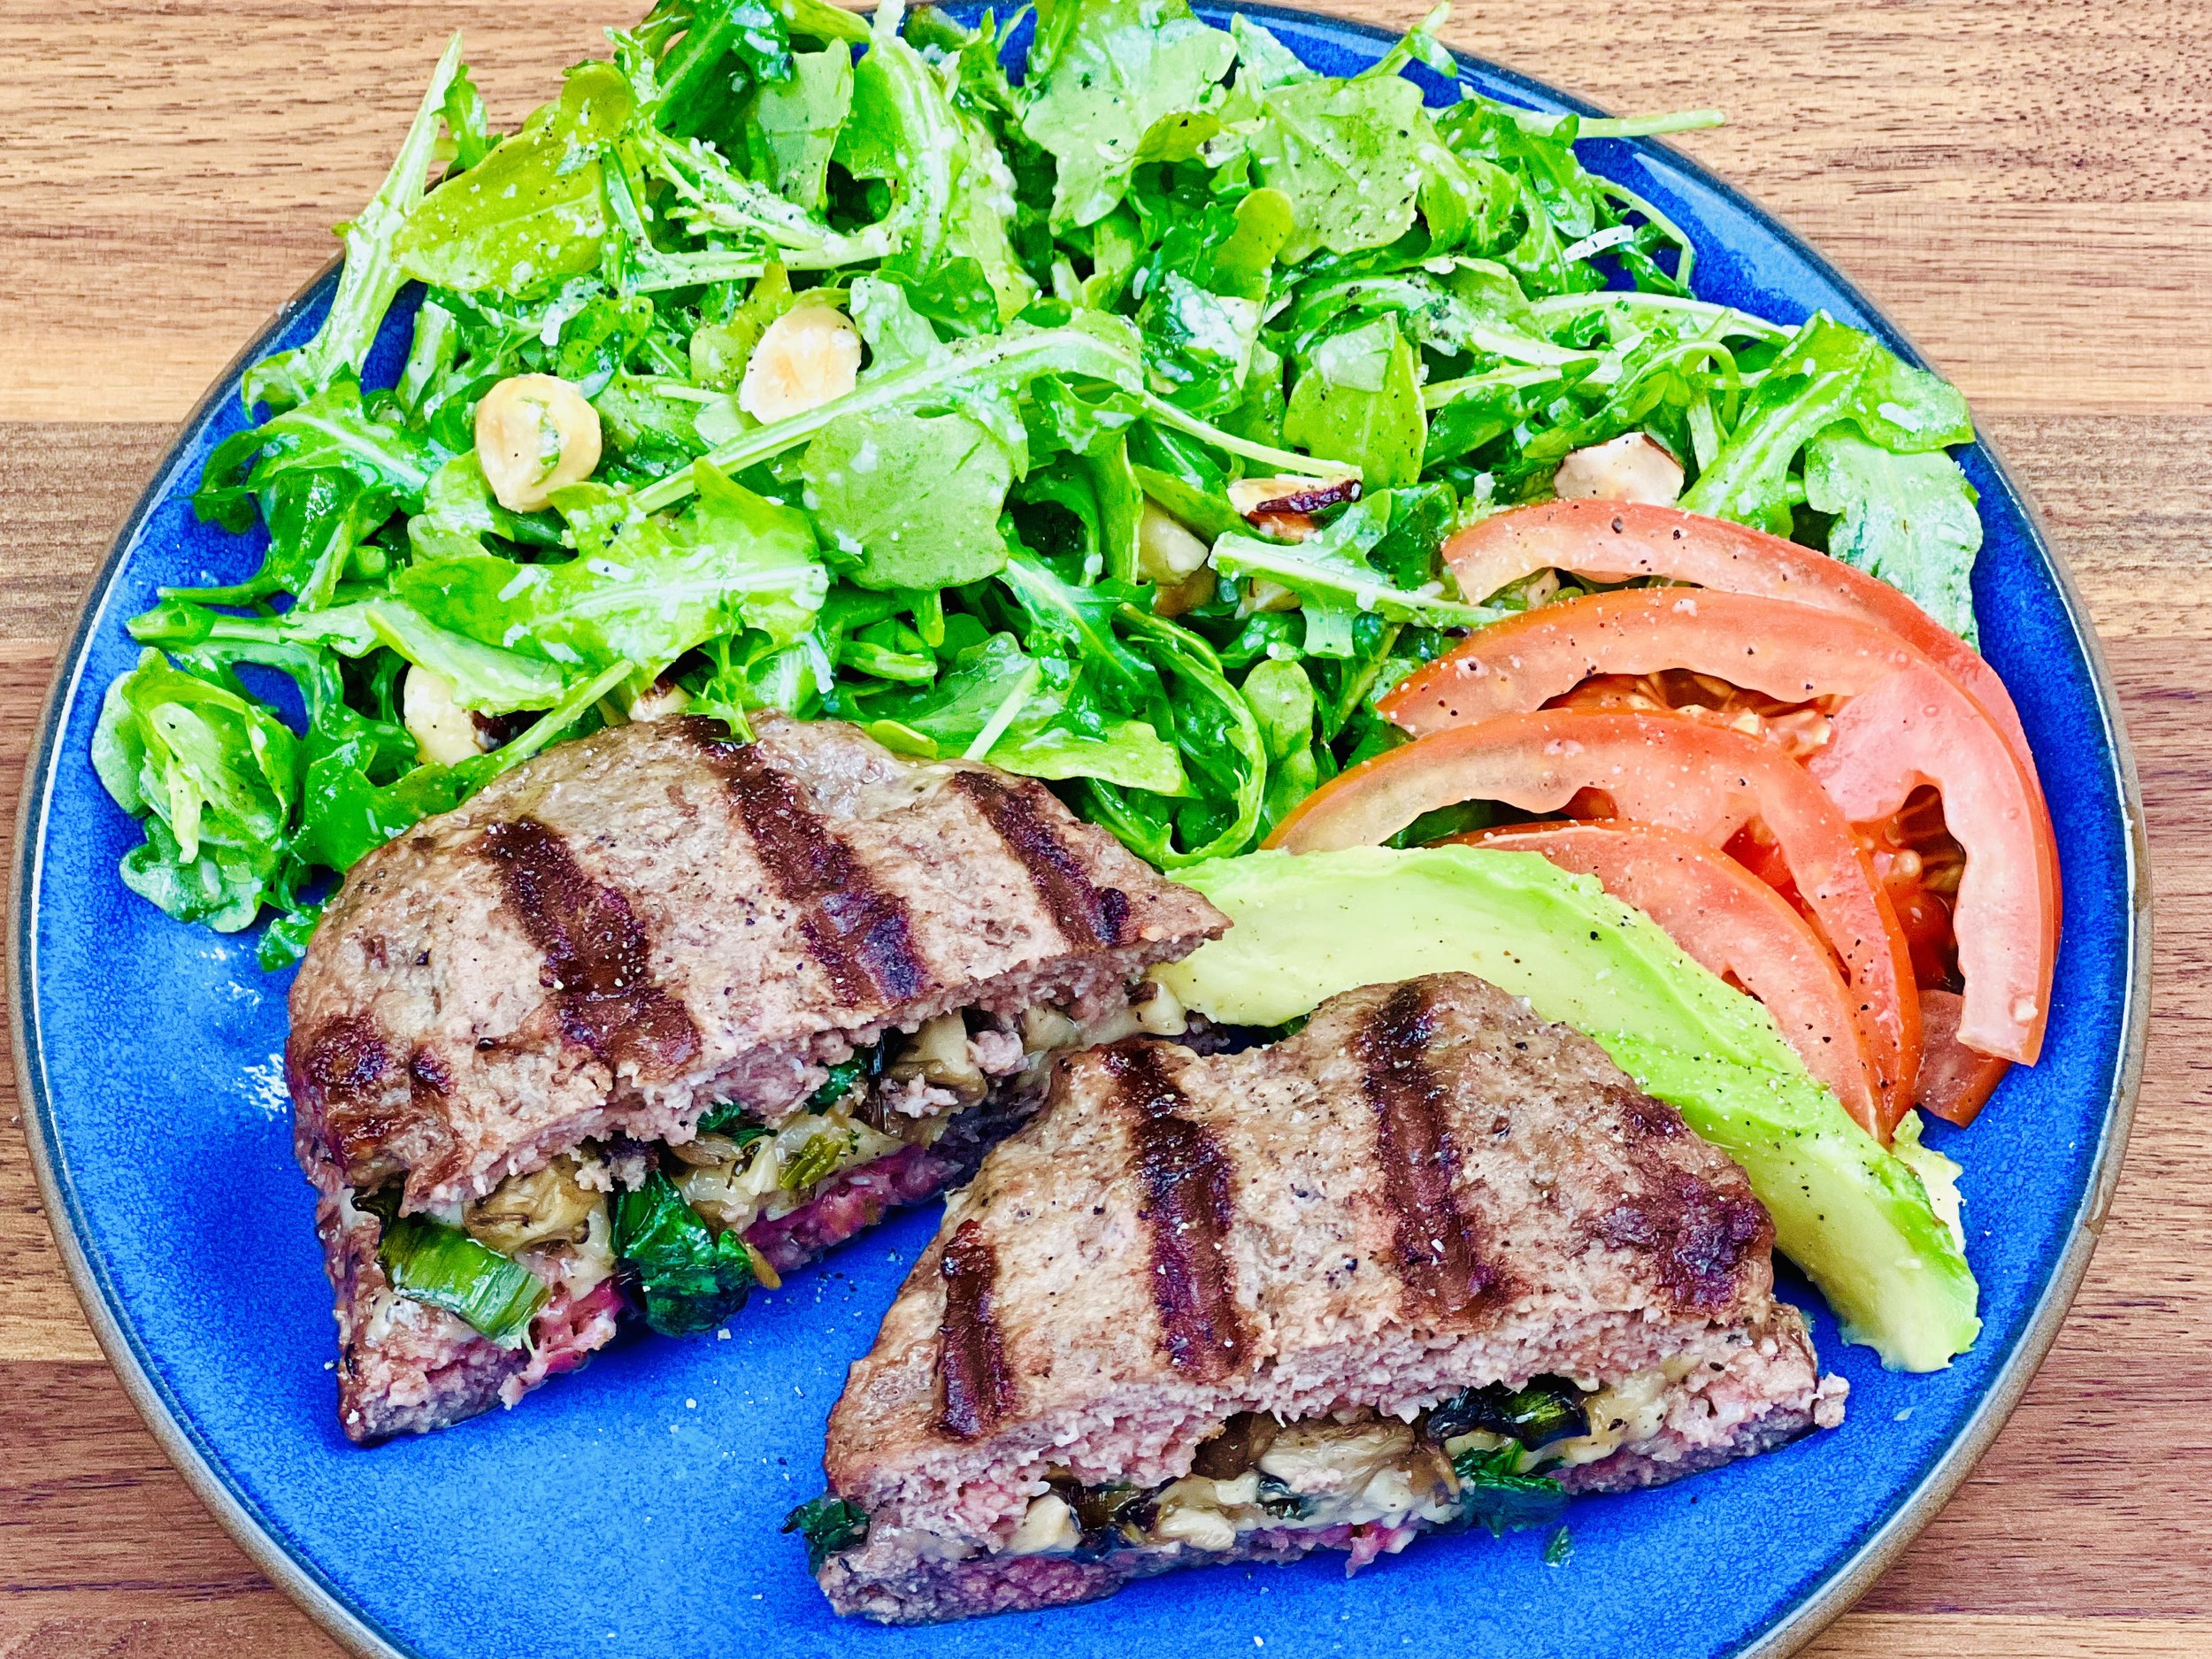
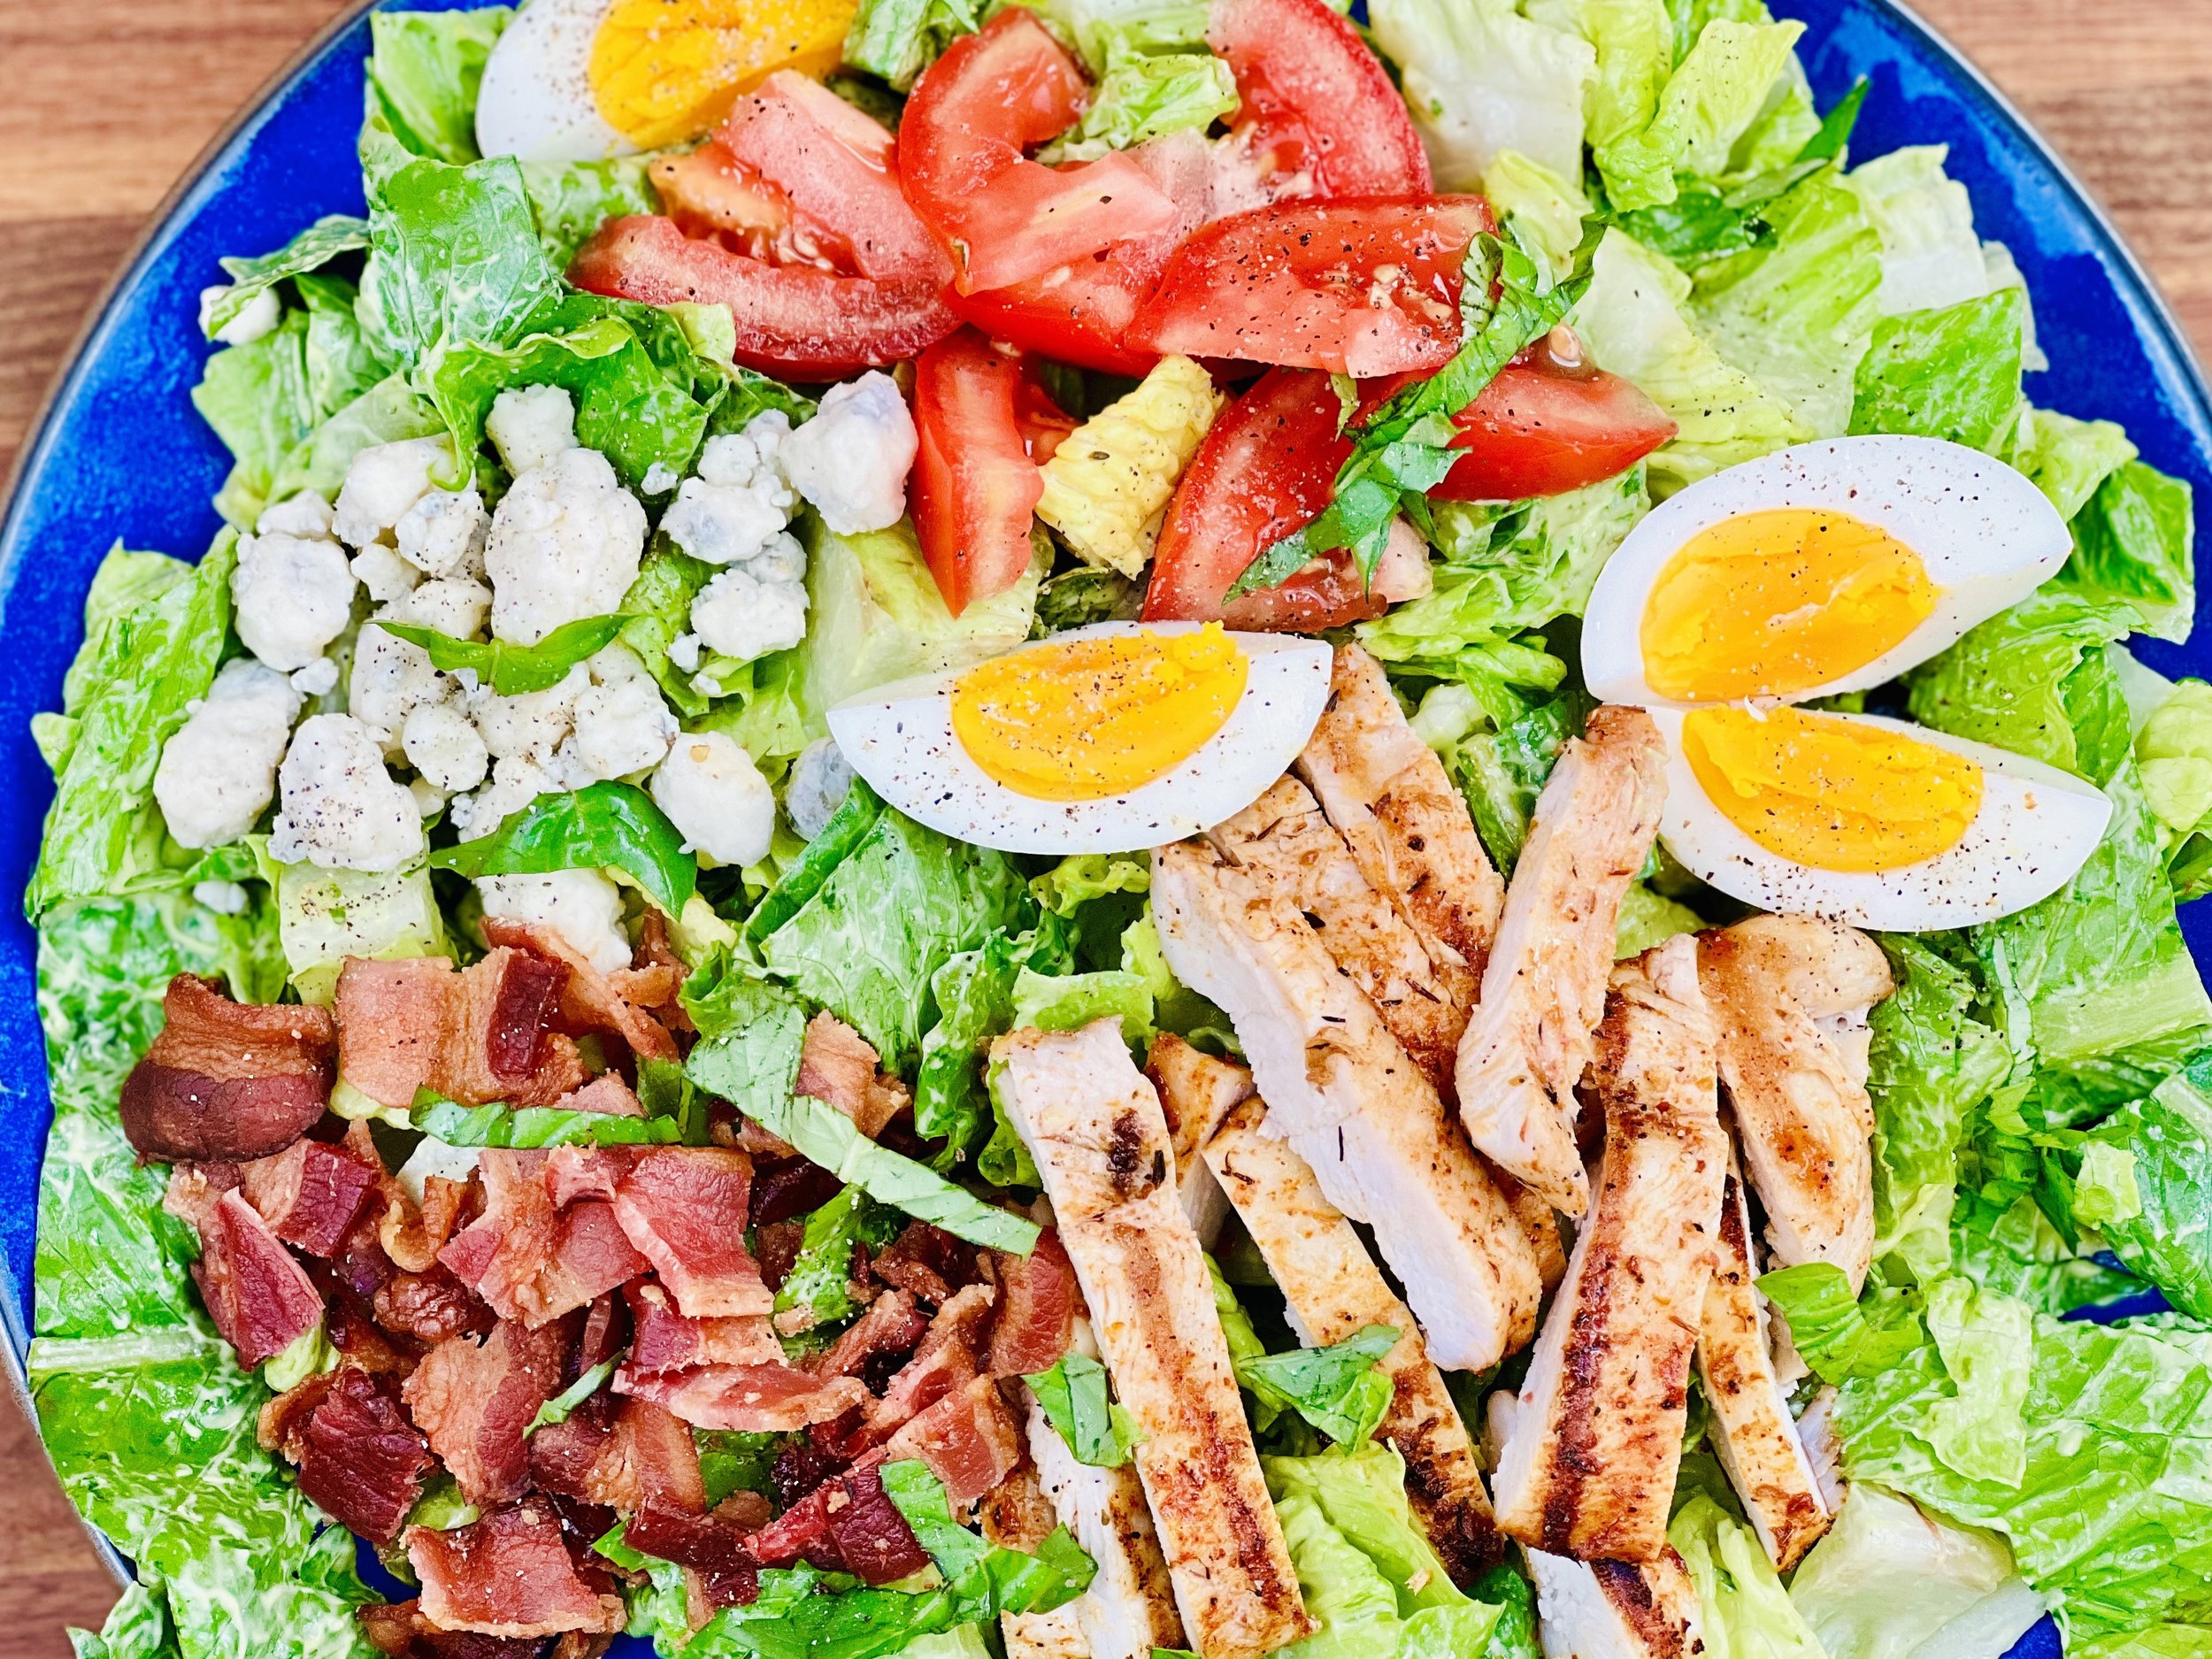
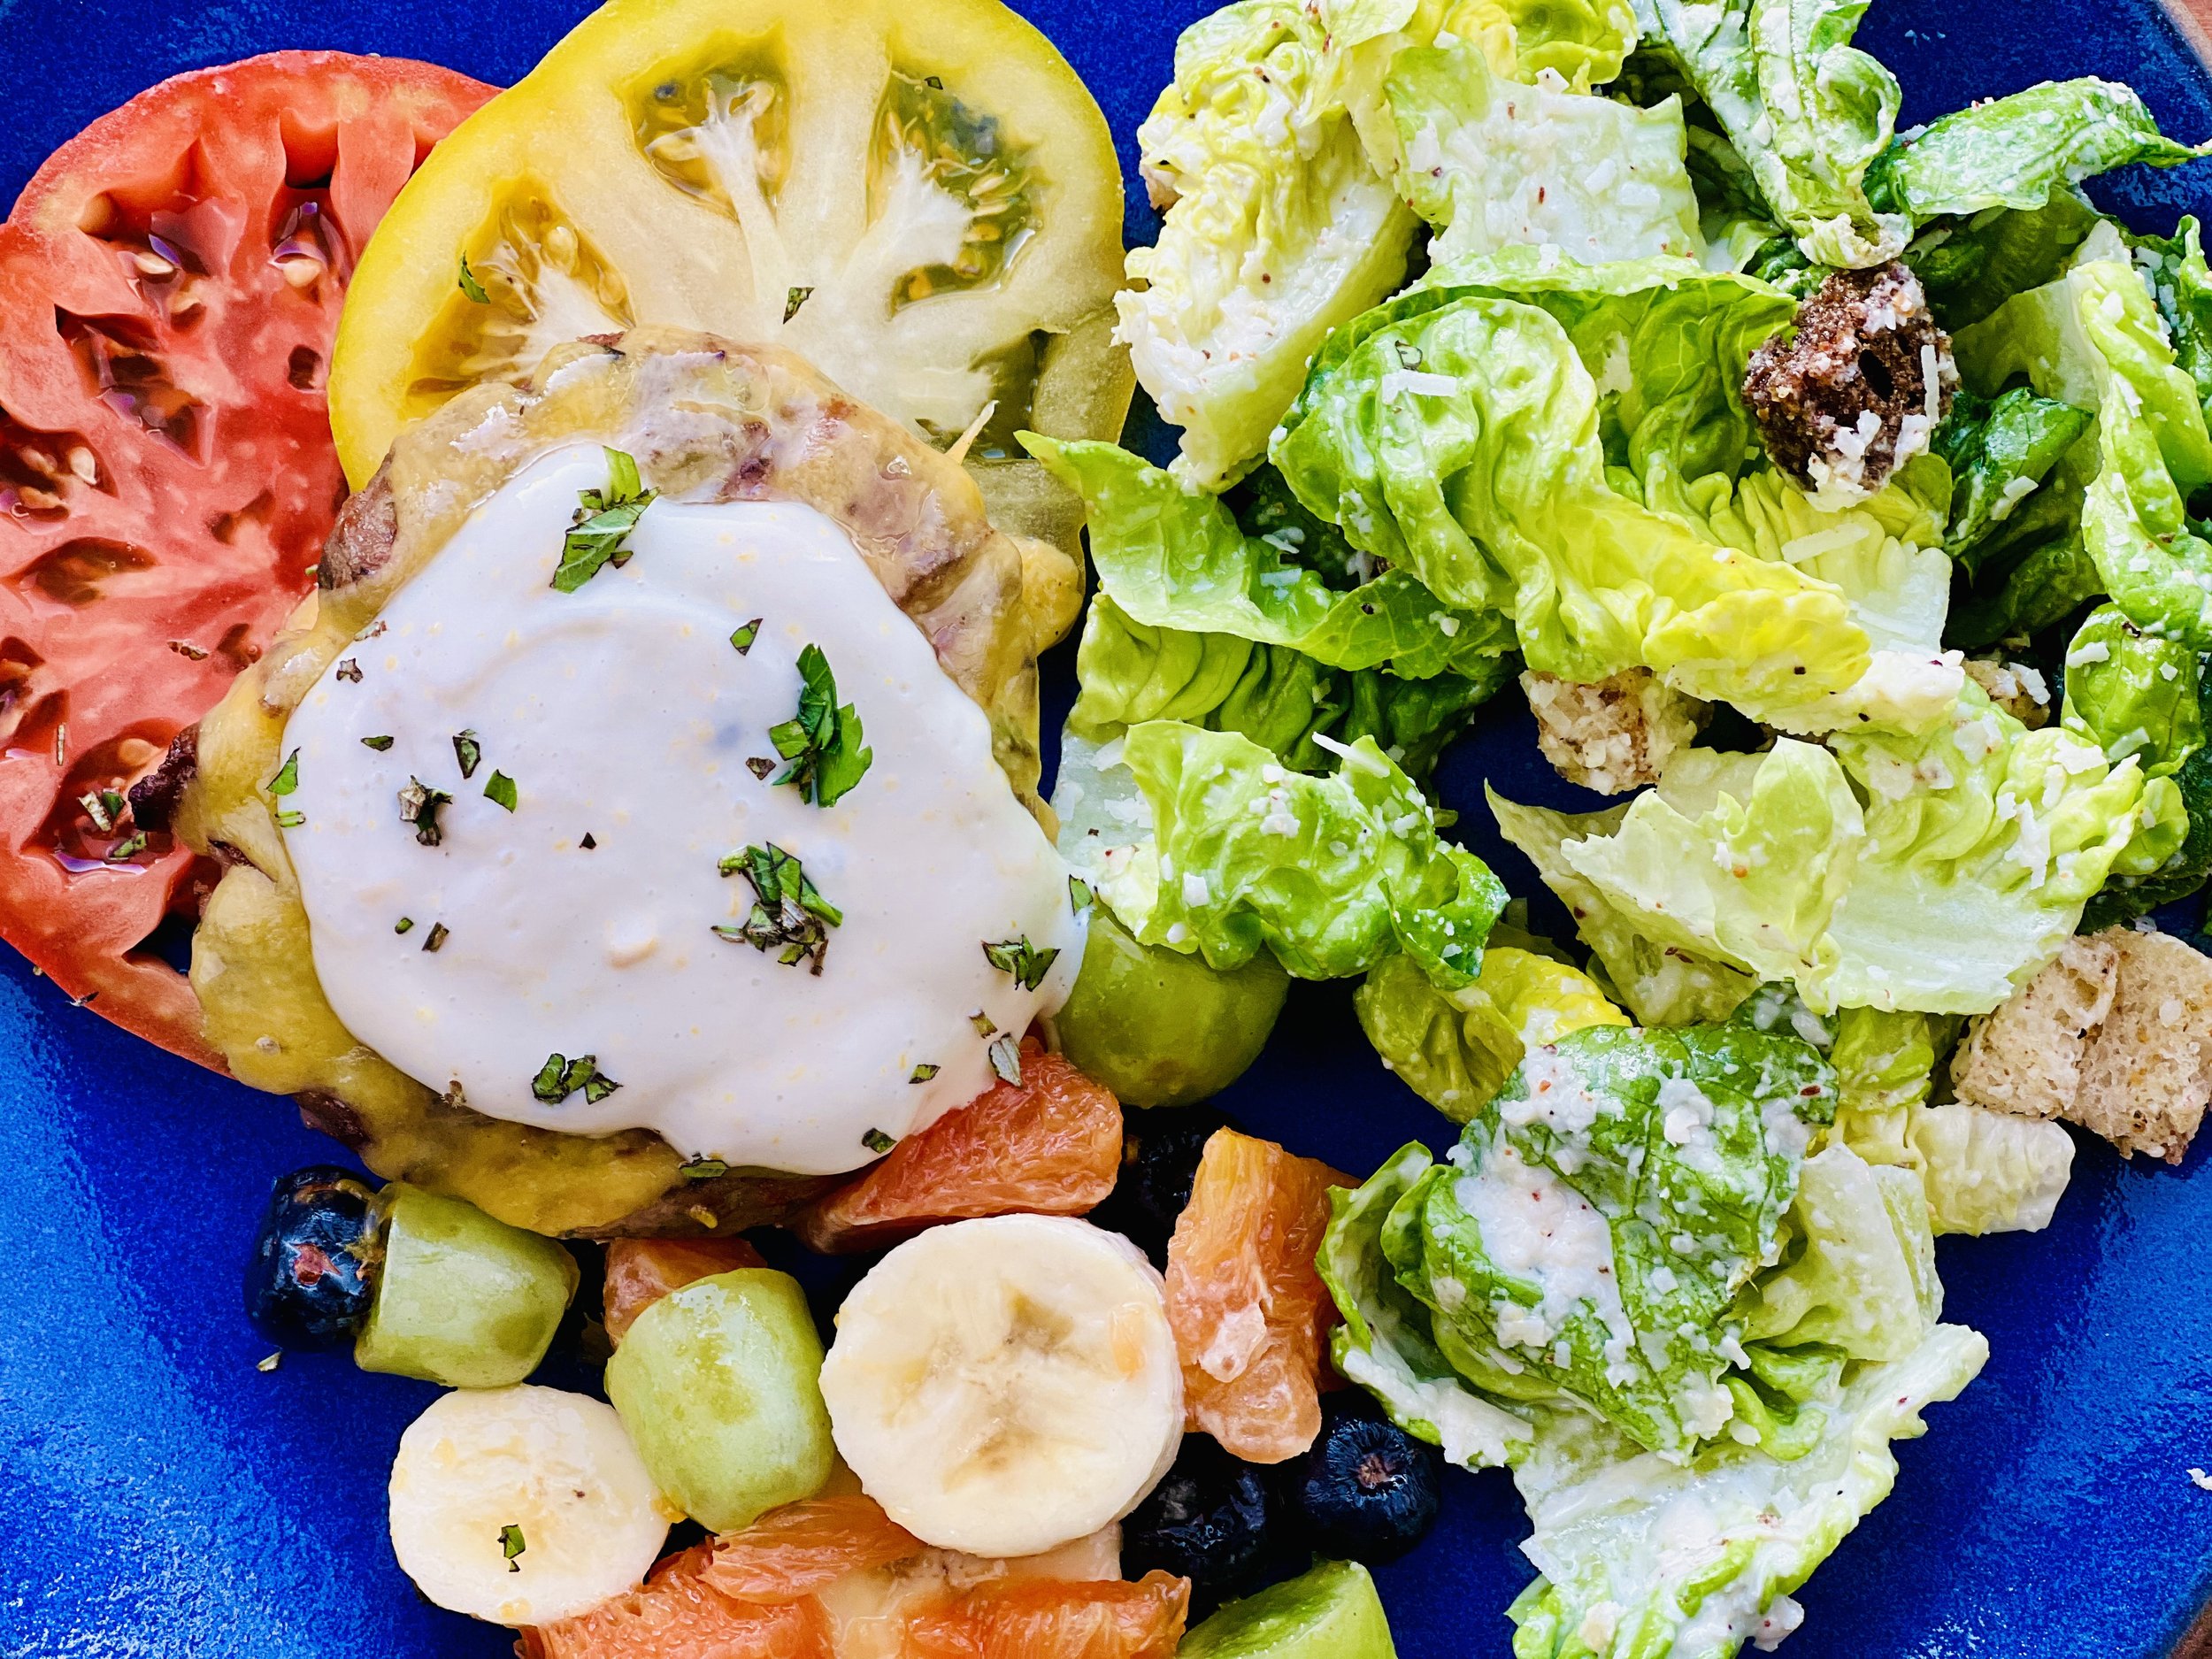
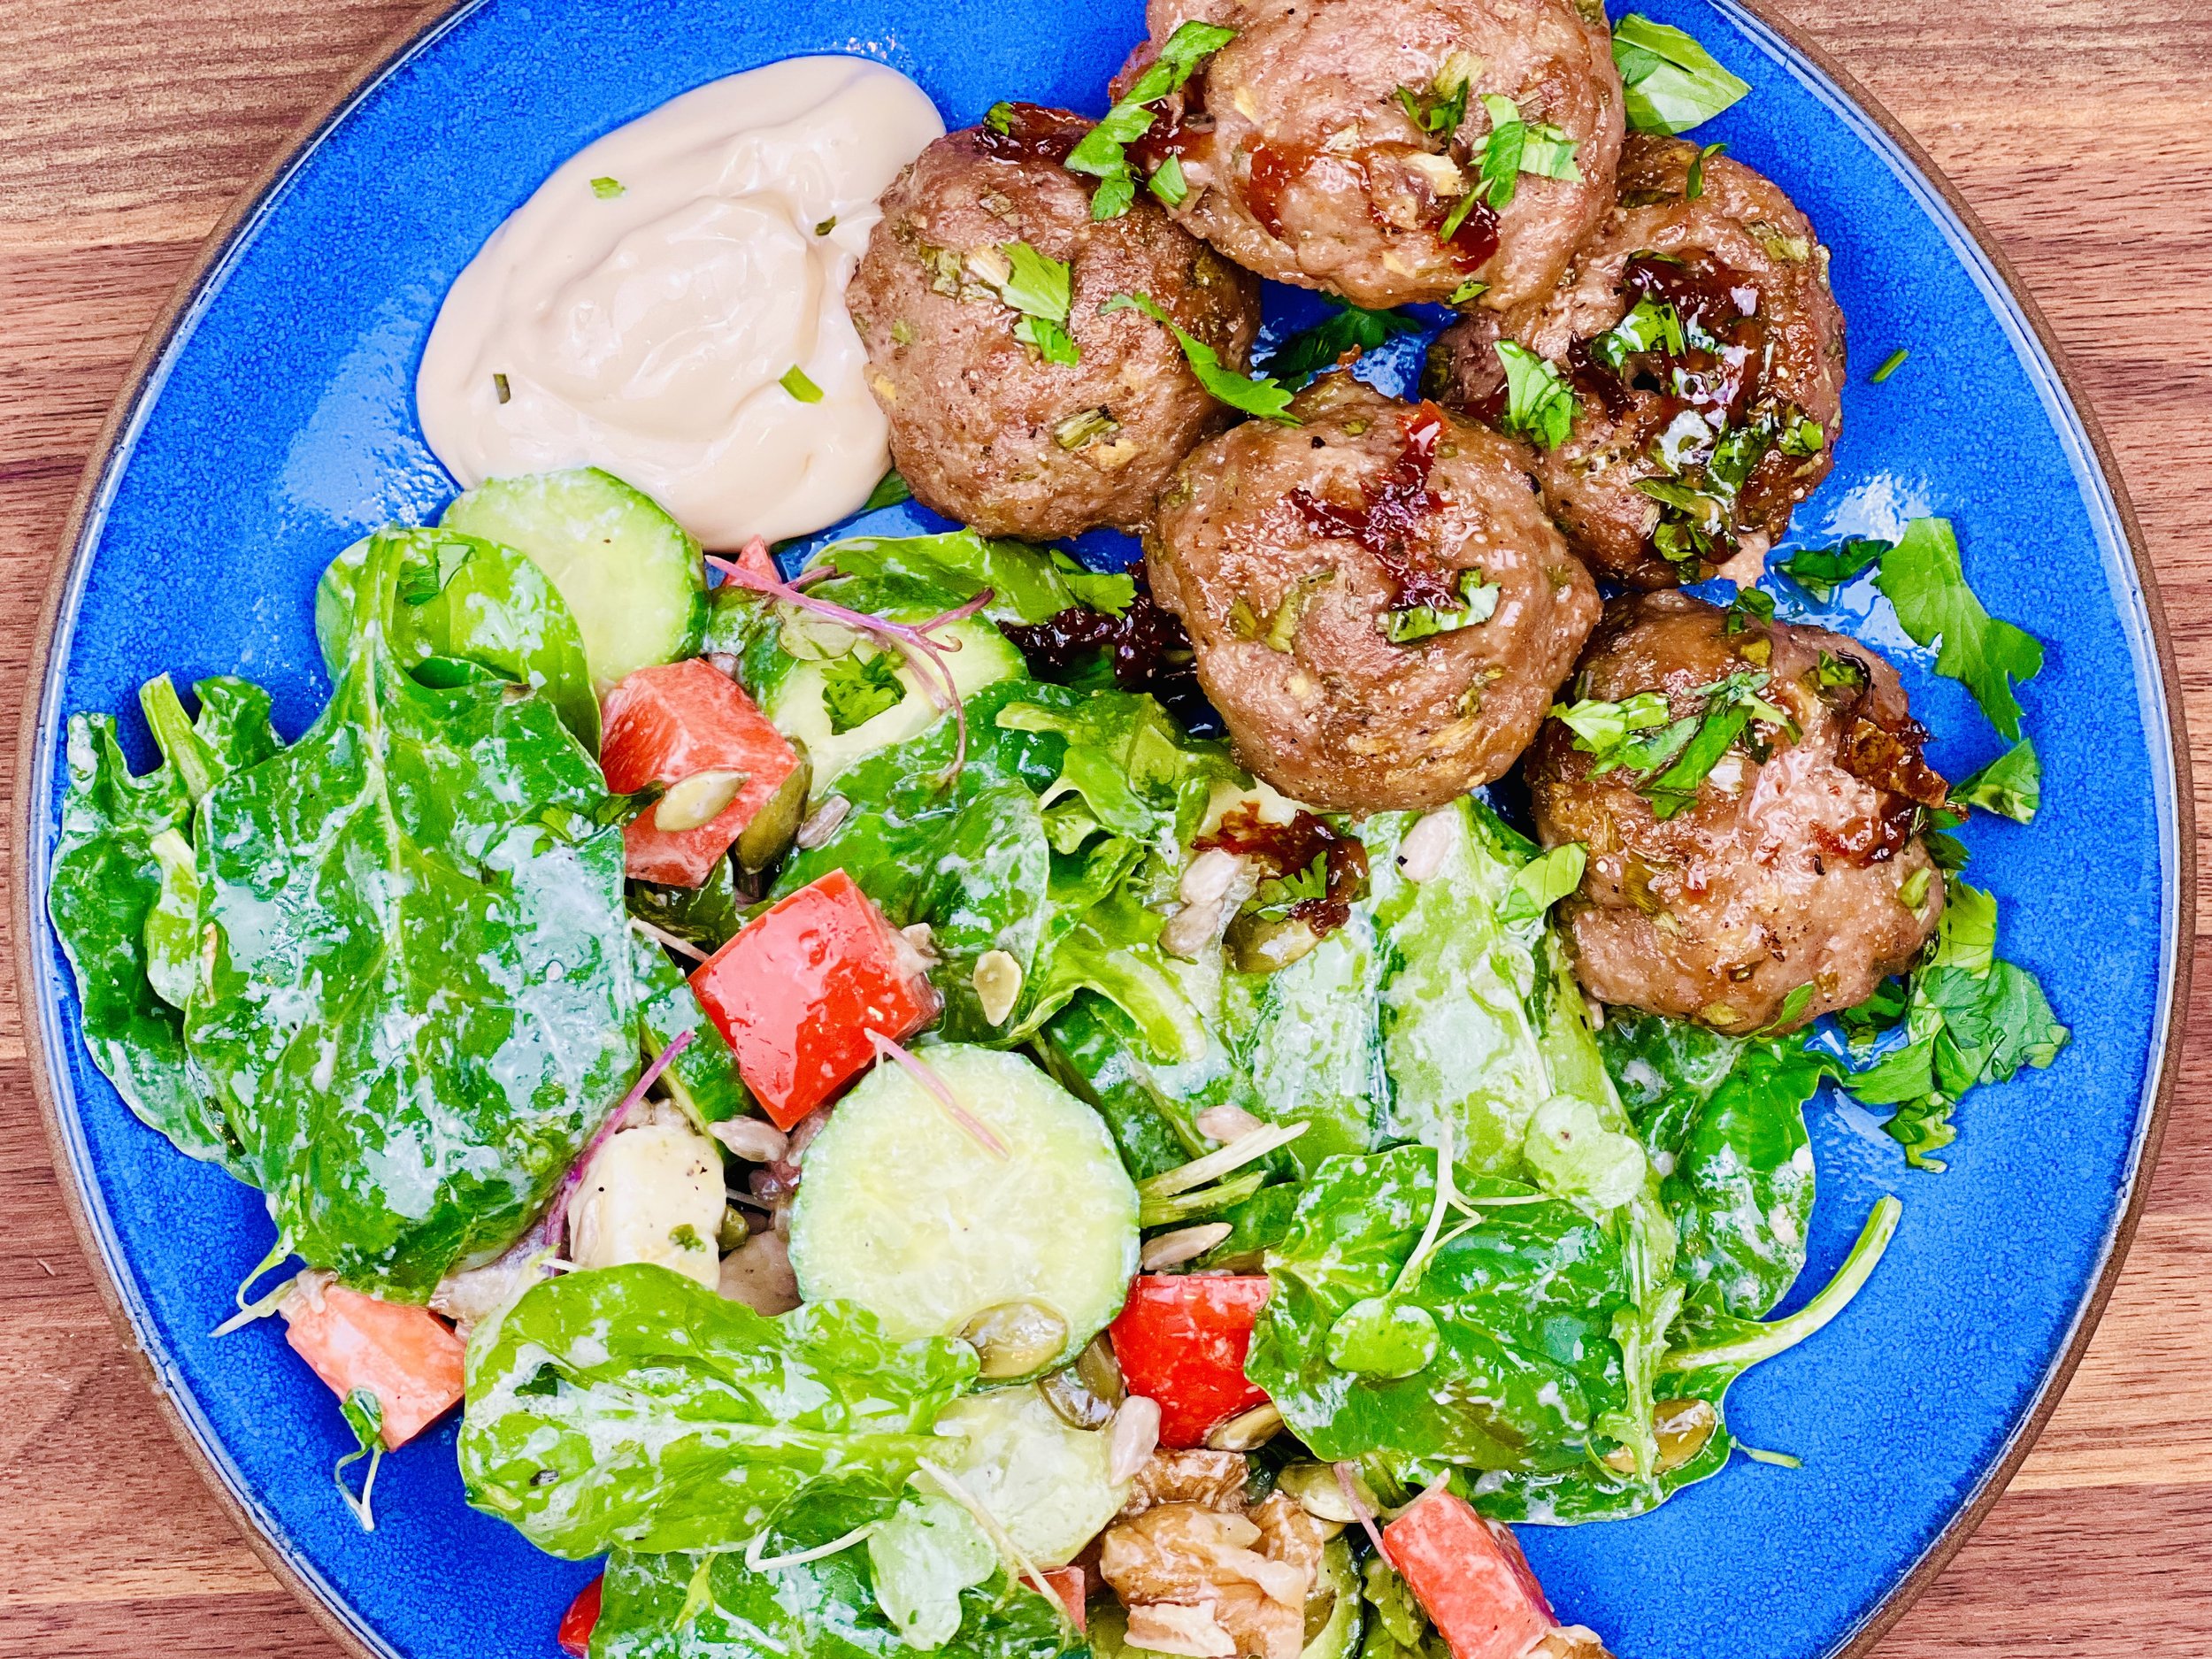
Herbed Turkey Burgers with Lemon Aioli (low FODMAP)
20 Minutes prep • 20 Minutes cook • Low FODMAP • Gluten-free • Serves 4
20 Minutes prep • 20 Minutes cook • Low FODMAP • Gluten-free • Serves 4 • Ok to make-ahead: Steps 1-4
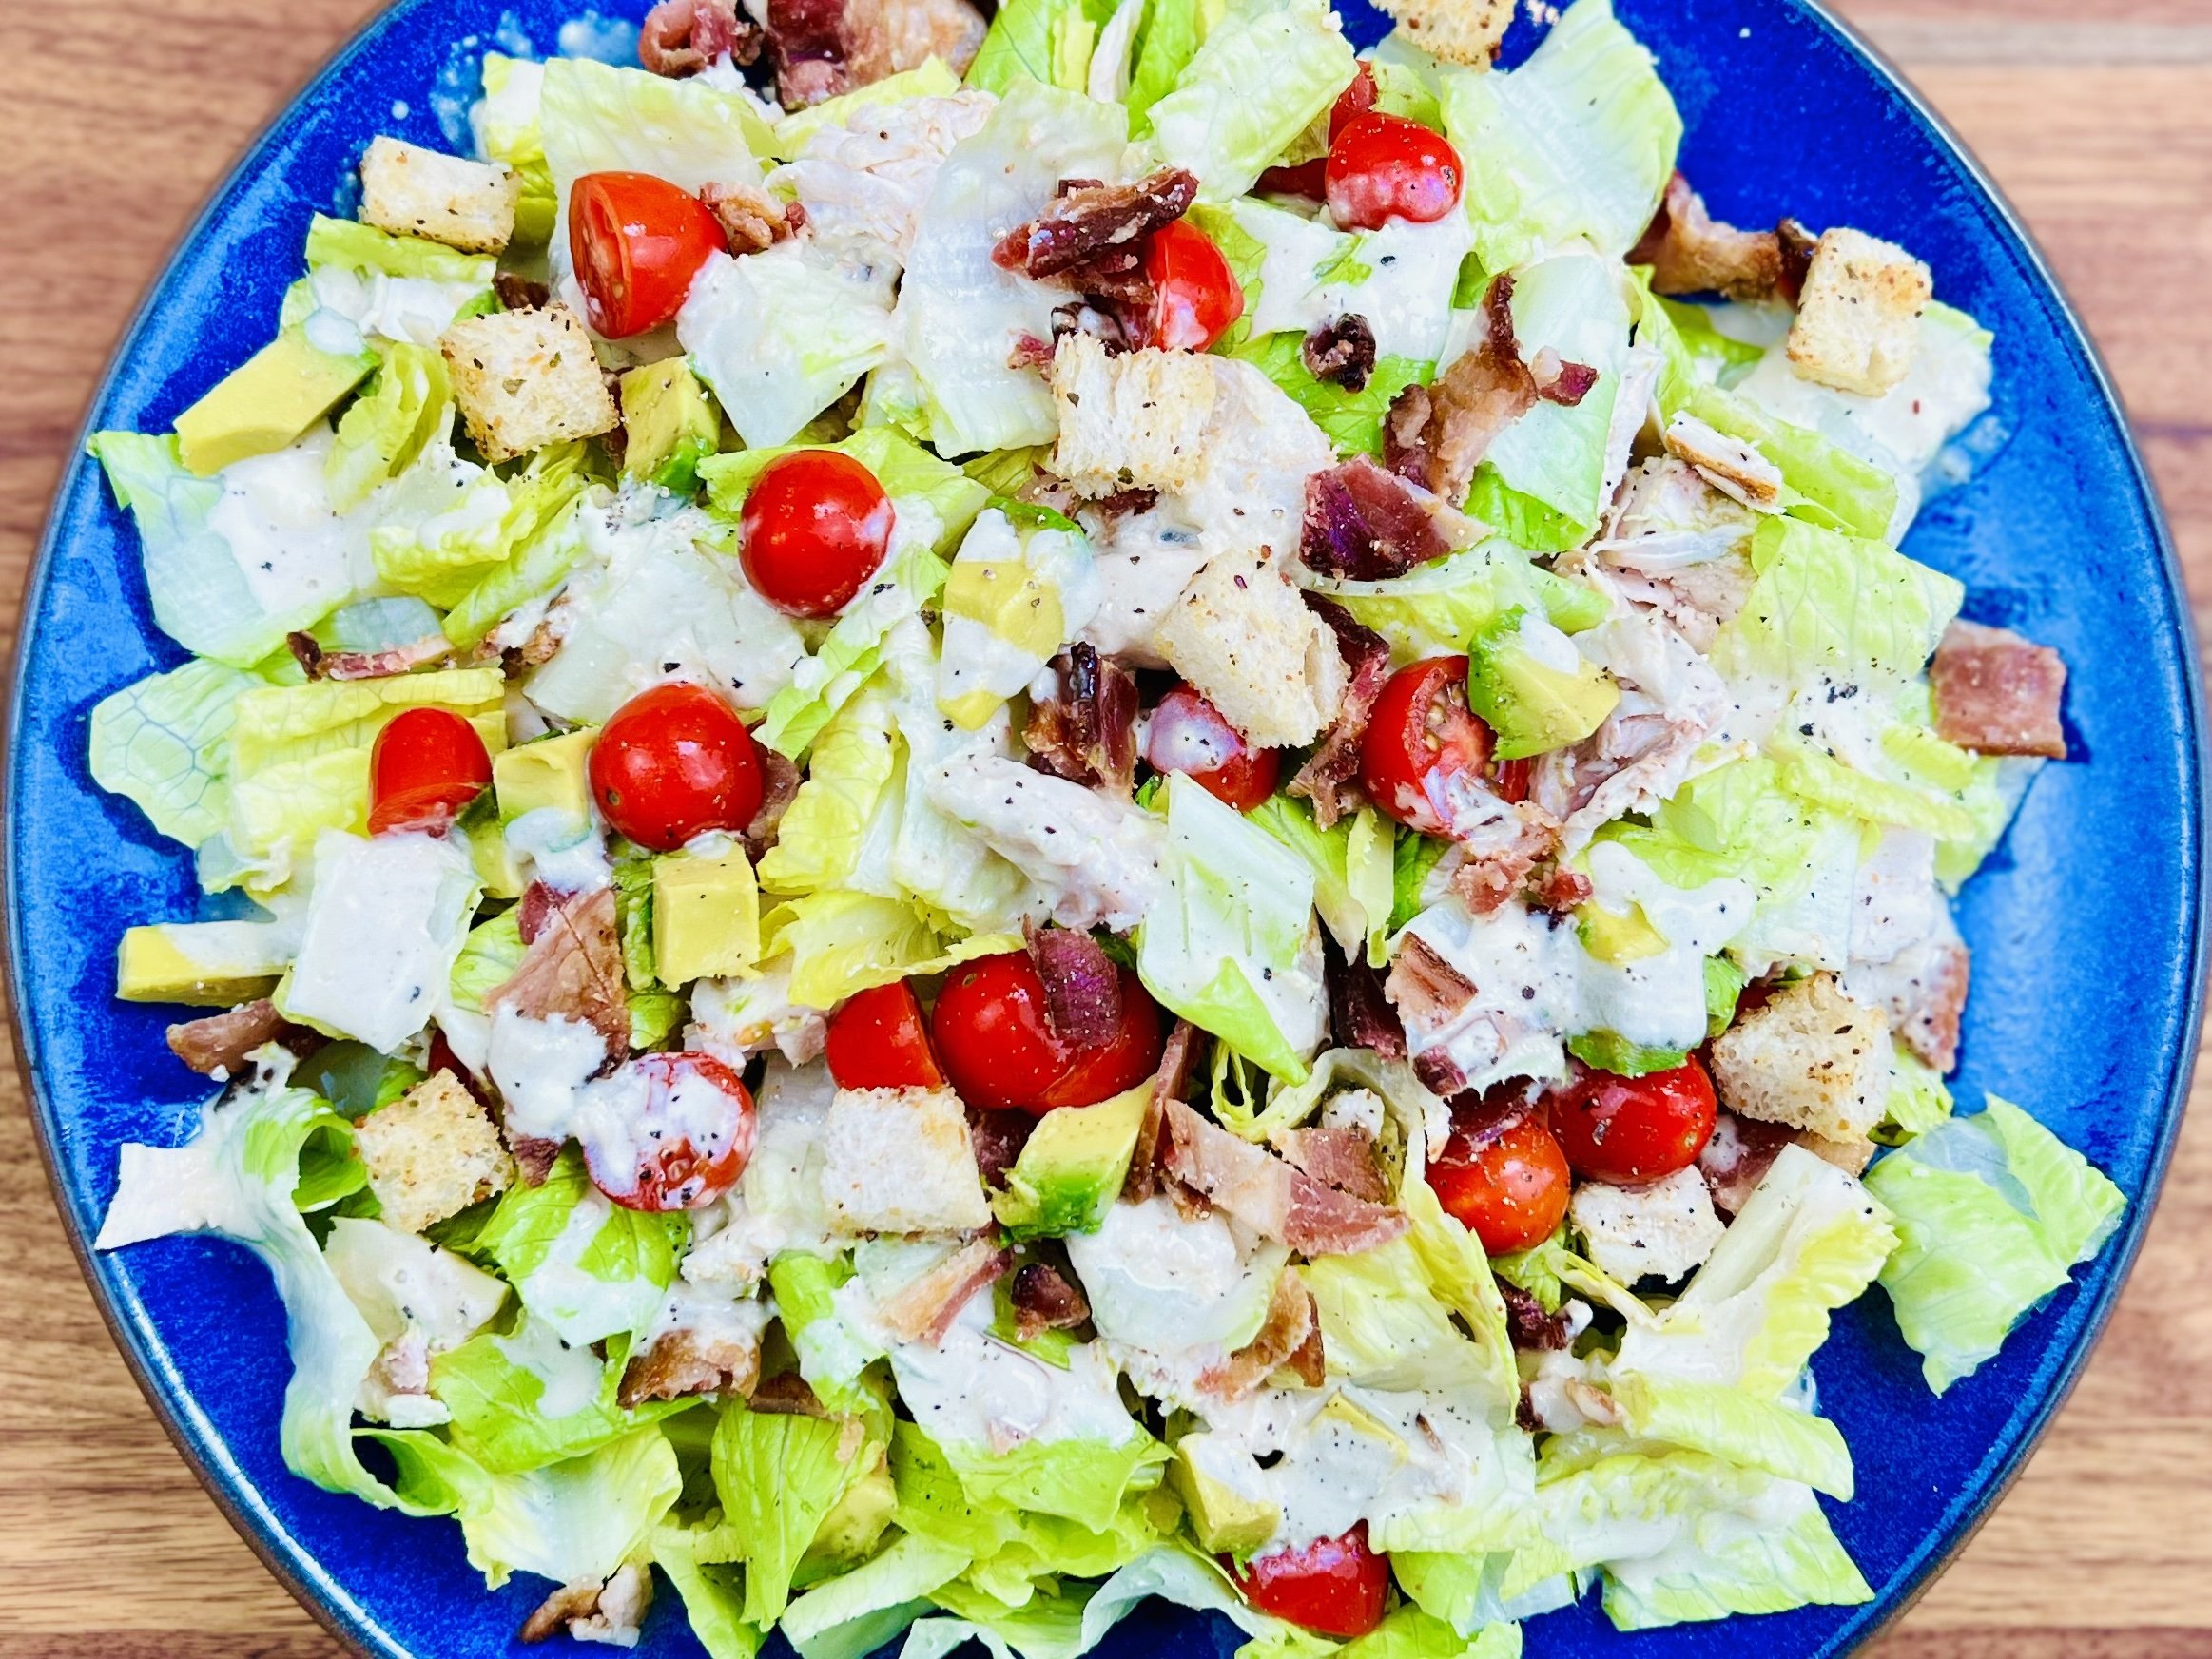
Best turkey burgers ever! I tucked some cooked bacon in with the turkey meat to add some extra pizzazz and, combined with the flavorful herbs and a slice of extra sharp cheddar, these burgers are delicious. Serve with plenty of lemon aioli, sliced tomatoes, and a crisp salad on the side, such as my Classic Caesar salad, and you’ll have a delicious meal. Gluten-free buns are optional and really not needed at all.
Ingredients: Turkey Burgers
1 pound bacon
2 pounds ground turkey
1 bunch green onions, green part only (finely chopped)
1 jalapeno pepper, seeded and finely chopped
3 tablespoons garlic-infused olive oil, plus more for brushing burgers before grilling
1 tablespoon flat-leaf parsley, finely chopped
1 tablespoon fresh oregano, finely chopped
1 tablespoon fresh rosemary, finely chopped
1/2 teaspoon Kosher salt and 1/2 teaspoon black pepper (or to your preference)
8 slices extra sharp cheddar cheese
Ingredients: Lemon Aioli
1 cup mayonnaise
1 tablespoon lemon zest
2 tablespoons fresh-squeezed lemon juice
1/2 teaspoon Kosher salt
1/2 teaspoon Smoke N Sanity Essence of Garlic Salt (use code IBSGC10 for 10% discount)
Directions: Lemon Aioli
(1) Make the lemon aioli: Combine all ingredients in a small mixing bowl. Whisk until smooth. Transfer the aioli to a small serving bowl and keep chilled in the refrigerator until ready to serve.
Directions: Turkey Burgers
(2) Cook the bacon: Preheat the oven to 400 degrees F. Put the bacon on a rimmed baking sheet lined with foil. Put the bacon in the hot oven and cook for 10 minutes. Turn off the oven and leave the bacon in the oven with the door closed for another 10 minutes. Remove from the oven, drain on paper towels. Chop the cooked bacon and set it aside to cool.
(3) Prepare the turkey meat: Combine ground turkey with the cooked and chopped bacon, green onions, fresh herbs, salt, and pepper. Add 2 tablespoons of garlic-infused olive oil and blend well (I use my hands to blend the meat as it ensures you really blend everything together evenly).
(4) Make the patties: Dip your fingers in olive oil to prevent the meat from sticking to your hands and form into 8 equally-sized patties. Brush the top of each patty with olive oil.
Make-ahead note: At this point, you may keep the formed patties on a plate in the refrigerator until you’re ready to cook them.
(5) Cook the burgers: Preheat your BBQ grill to medium-high (about 400 degrees F). Once the grill is preheated (about 15 minutes), put the burgers, oil side down, on the hot grill. Brush the second side of each burger quickly with olive oil, then cook for 5 - 7 minutes. Flip the burgers and cook on the other side until almost done (about 3 minutes). Then add the slice of cheese and cook another minute or two until the cheese is melted.
(6) Plate and serve: Serve with plenty of lemon aioli, sliced tomatoes, and a crisp salad on the side, such as my Classic Caesar salad. Gluten-free buns are optional and really not needed at all—especially if you make the sourdough croutons in with my Caesar salad.
Eat and enjoy every bite because you can!
Recipe note: I use Diamond Crystal Kosher salt in all my recipes because it has a wonderful flat and crisp flake that tastes delicious. It is also the least salty salt available so you can use it more liberally as a seasoning than you can table salt or sea salt. If you use another type of salt, you may need to reduce the amount so it is not over-salted.
Link note: This post contains links for you to easily purchase items listed on the page. In some cases, we have provided a special discount code for IBS Game Changers so be sure to use it when you purchase an item to get the discount that has been arranged just for you! As an Amazon Associate, I earn a commission from qualifying Amazon purchases.
More Deliciously Low FODMAP™ BBQ recipes you might enjoy


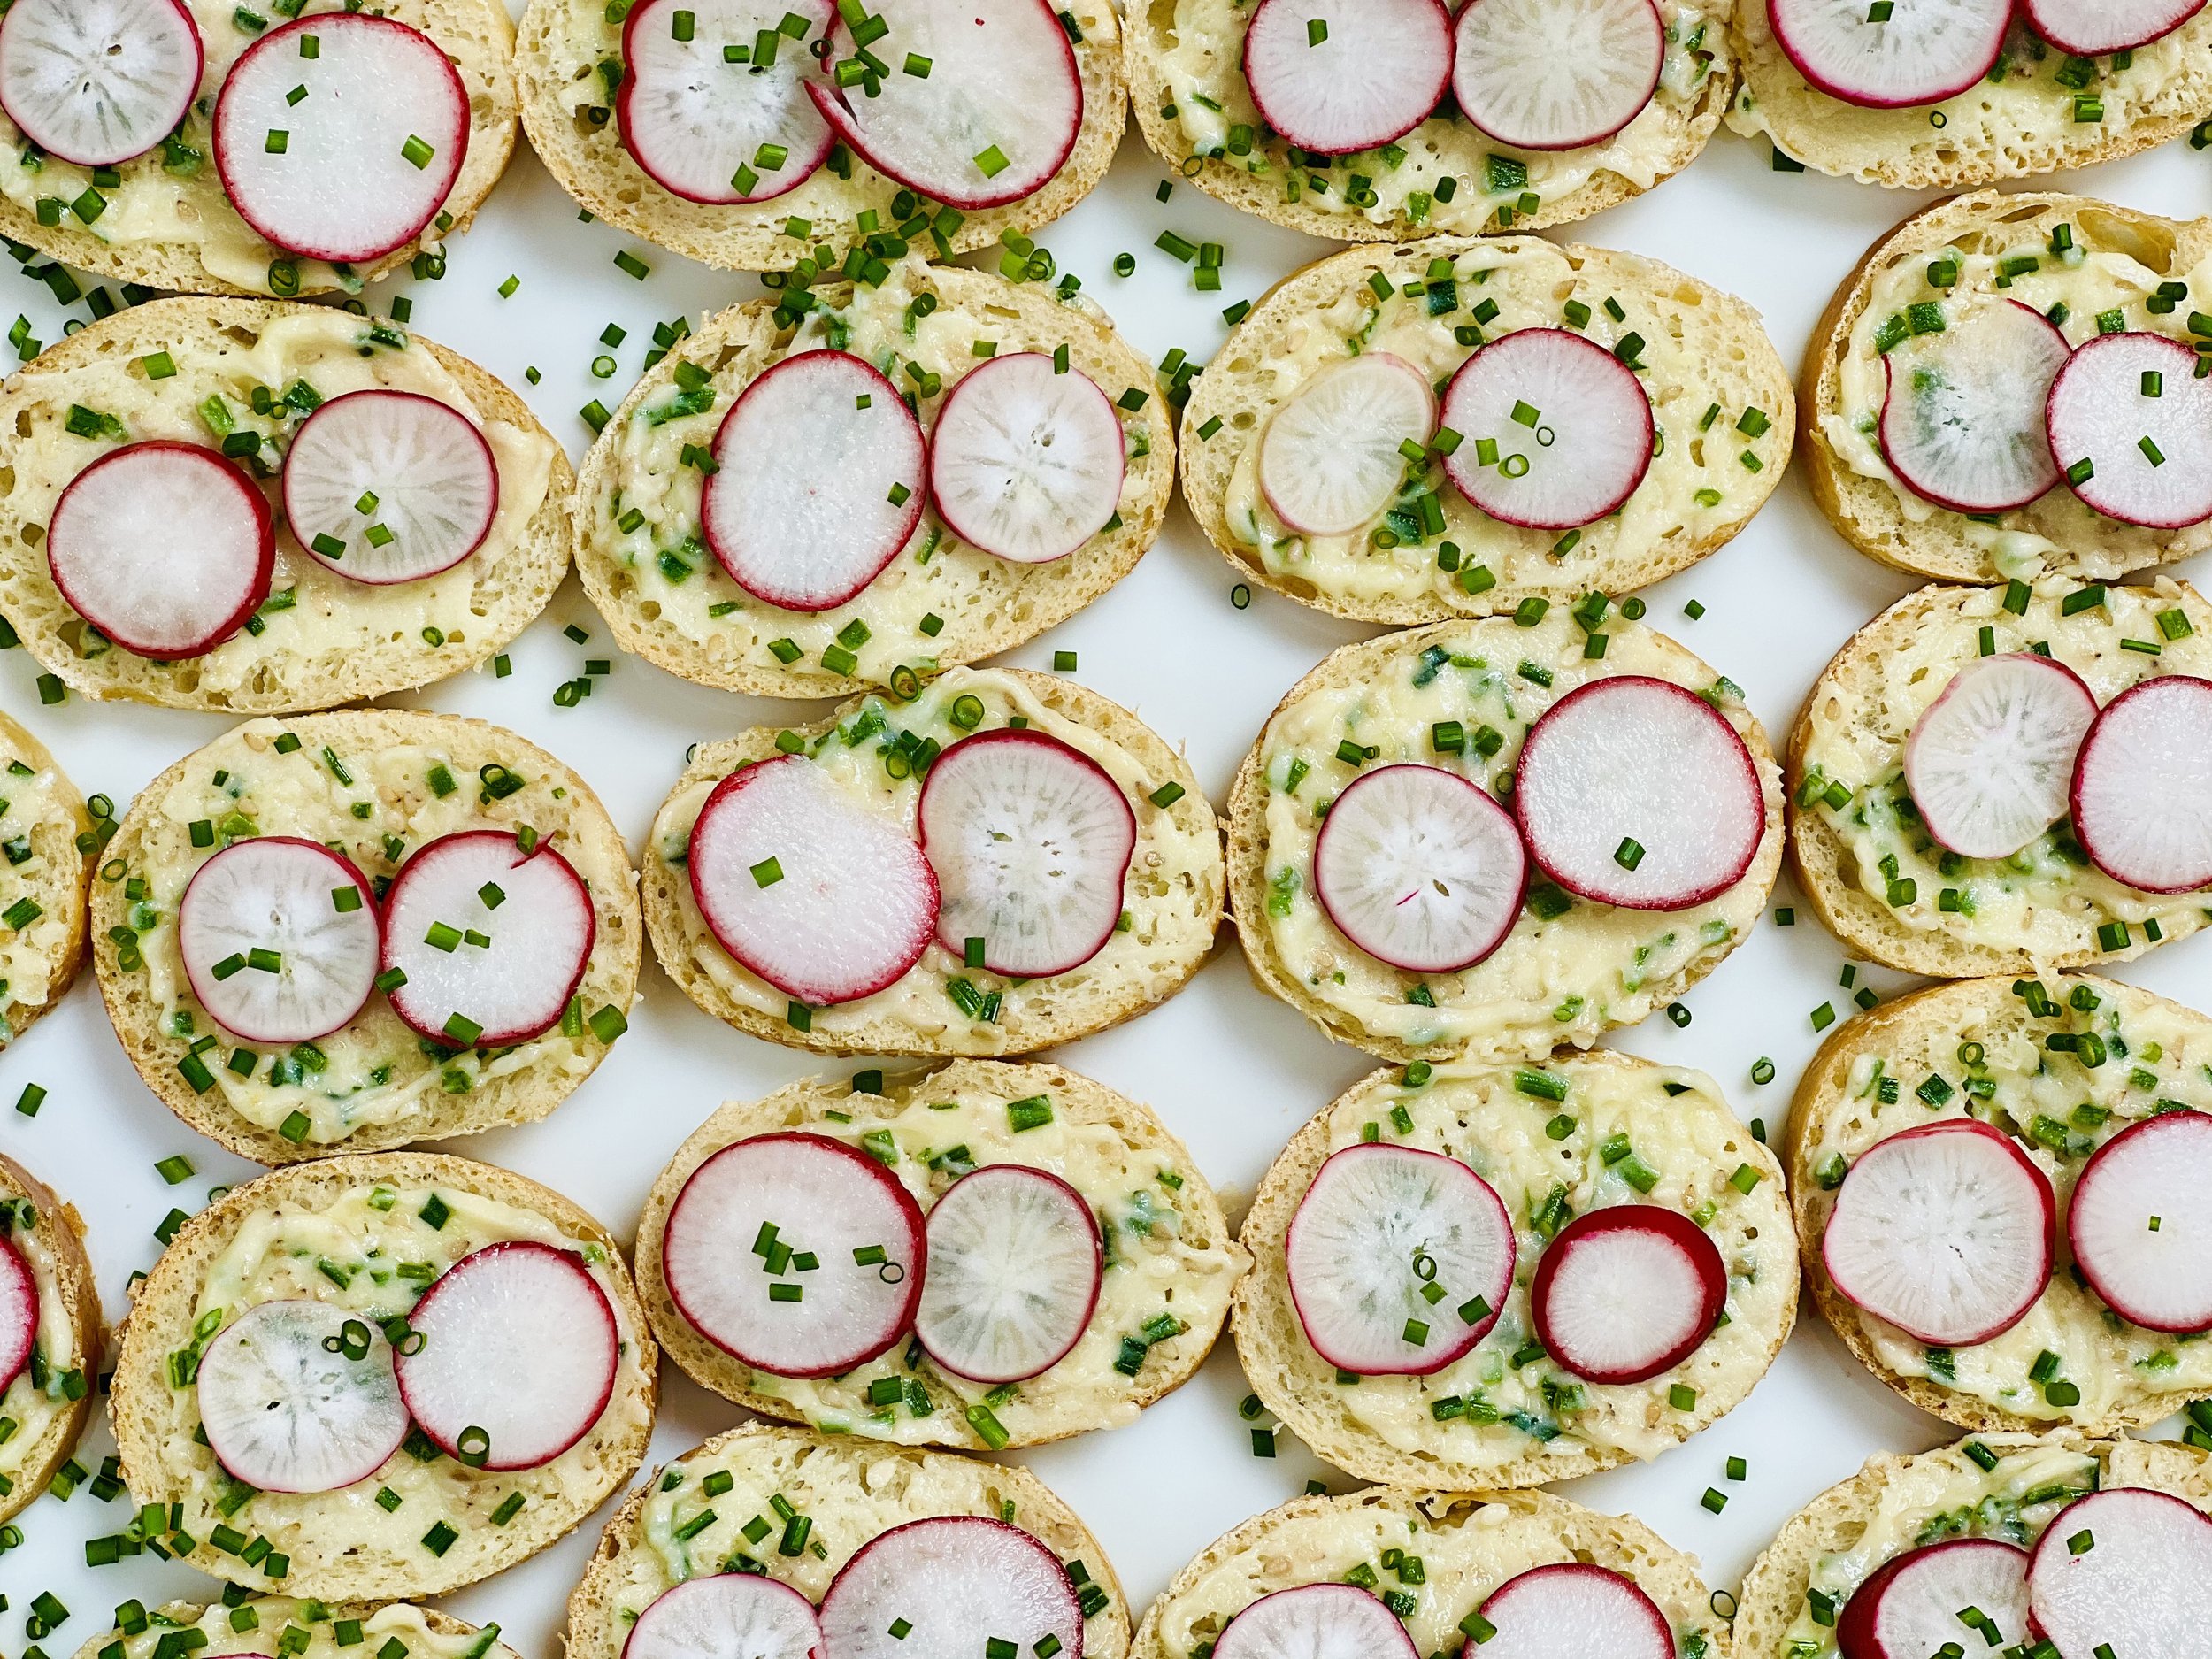
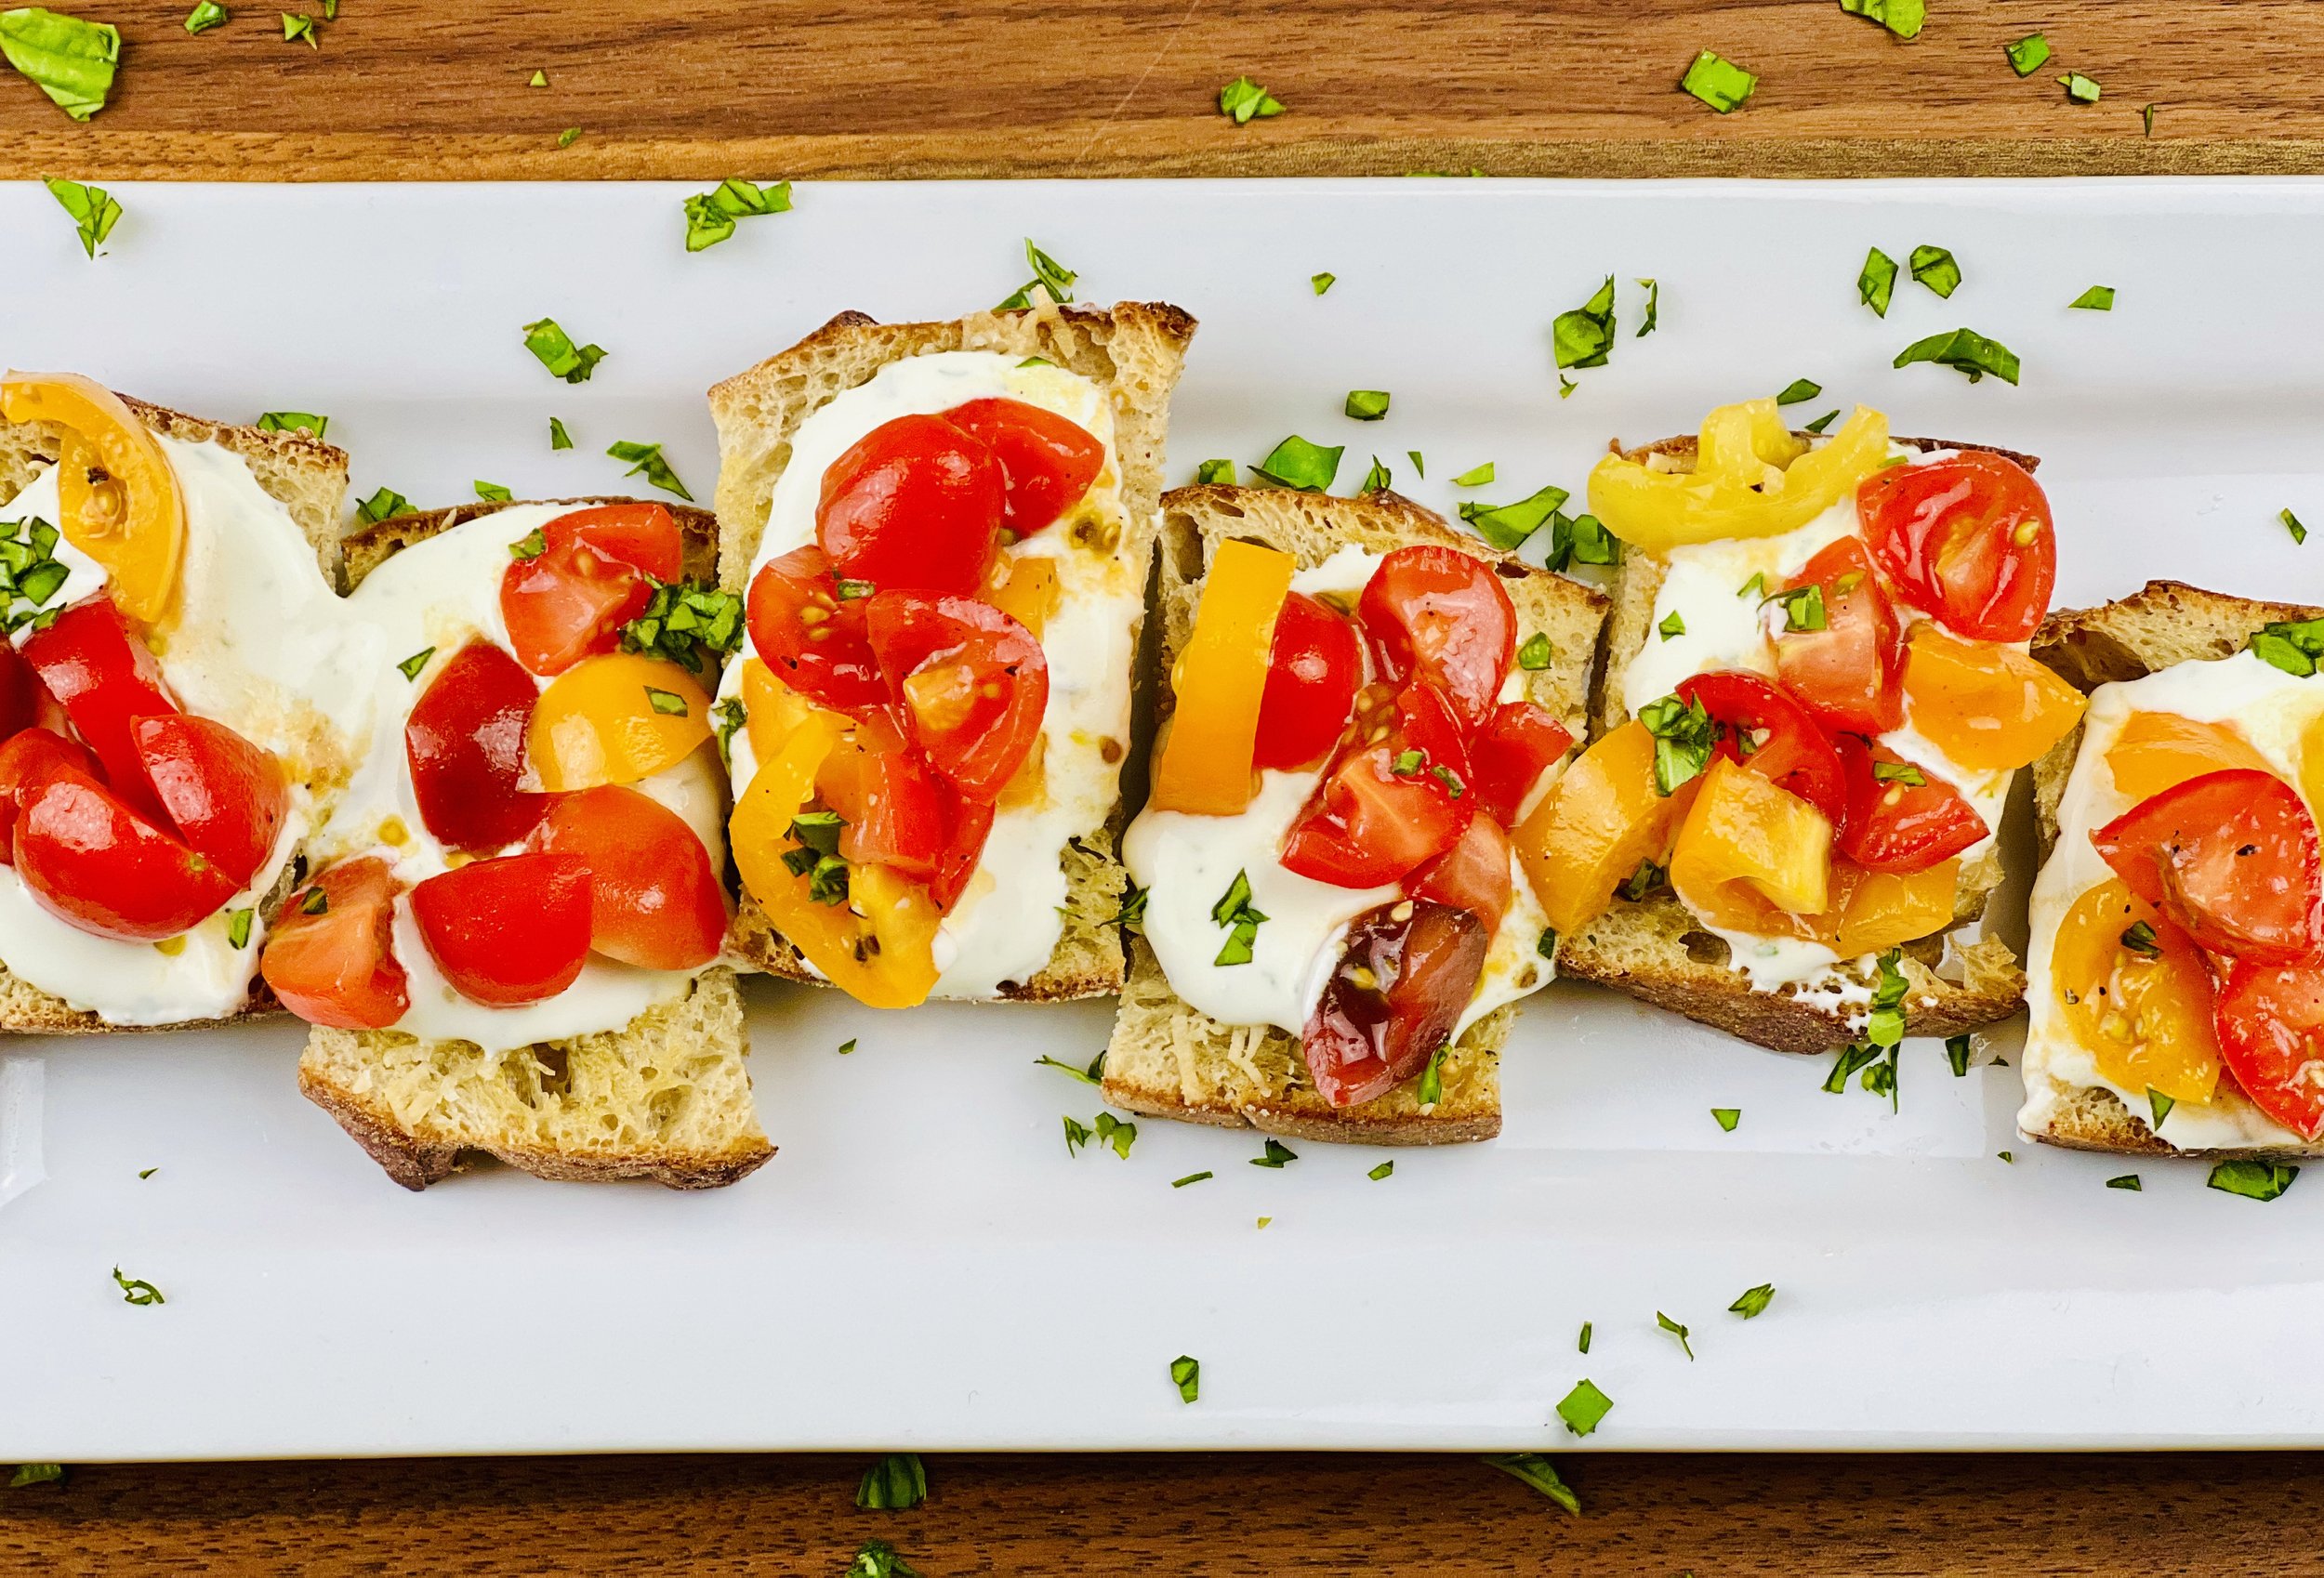
Sourdough Bruschetta with Herbed Ricotta Cream (low FODMAP)
20 Minutes prep • 16 Minutes cook • Low FODMAP • Vegetarian • Serves 8 • Ok to make-ahead: Steps 1-5
20 Minutes prep • 16 Minutes cook • Low FODMAP • Vegetarian • Serves 8 • Ok to make-ahead: Steps 1-5
Perfect for your next family gathering, this delicious bruschetta is crisp, creamy, beautiful, and low FODMAP too! My recipe for a lactose-free ricotta equivalent will make you certain you’re eating the real thing. And, you will swear there is garlic in this flavorful combination of herbs and spices, but no. It’s free of FODMAPs so you can eat and enjoy every bite.
This is an exclusive recipe just for recipe club members.
In addition to the two free recipes I create each week I am creating and delivering one very special recipe just for my recipe club members. If you’re not yet a member, I encourage you to join! Membership in the club includes access to the complete archive of recipes with filters so it can become your virtual low FODMAP cookbook plus, I am creating and delivering one special NEW recipe every week ONLY for recipe club members. And, for my true fans, I’ll be sharing behind-the-scenes content, and updates on the progress of the new cookbook.
Your membership in the club helps me continue creating new, delicious, easy-to-make, low FODMAP recipes just for you.
As always, all recipes will emphasize simple ingredients, easy preparation, and delicious low FODMAP results. Recipes will be for everything from main courses, salads, soups, side dishes, appetizers, desserts, sauces, breakfast and lunch, and even mocktails and cocktails. Everything you need to prepare fantastic low FODMAP meals everyone will love.
Join the club. Become a Patron. Let’s keep making delicious Low FODMAP meals together.
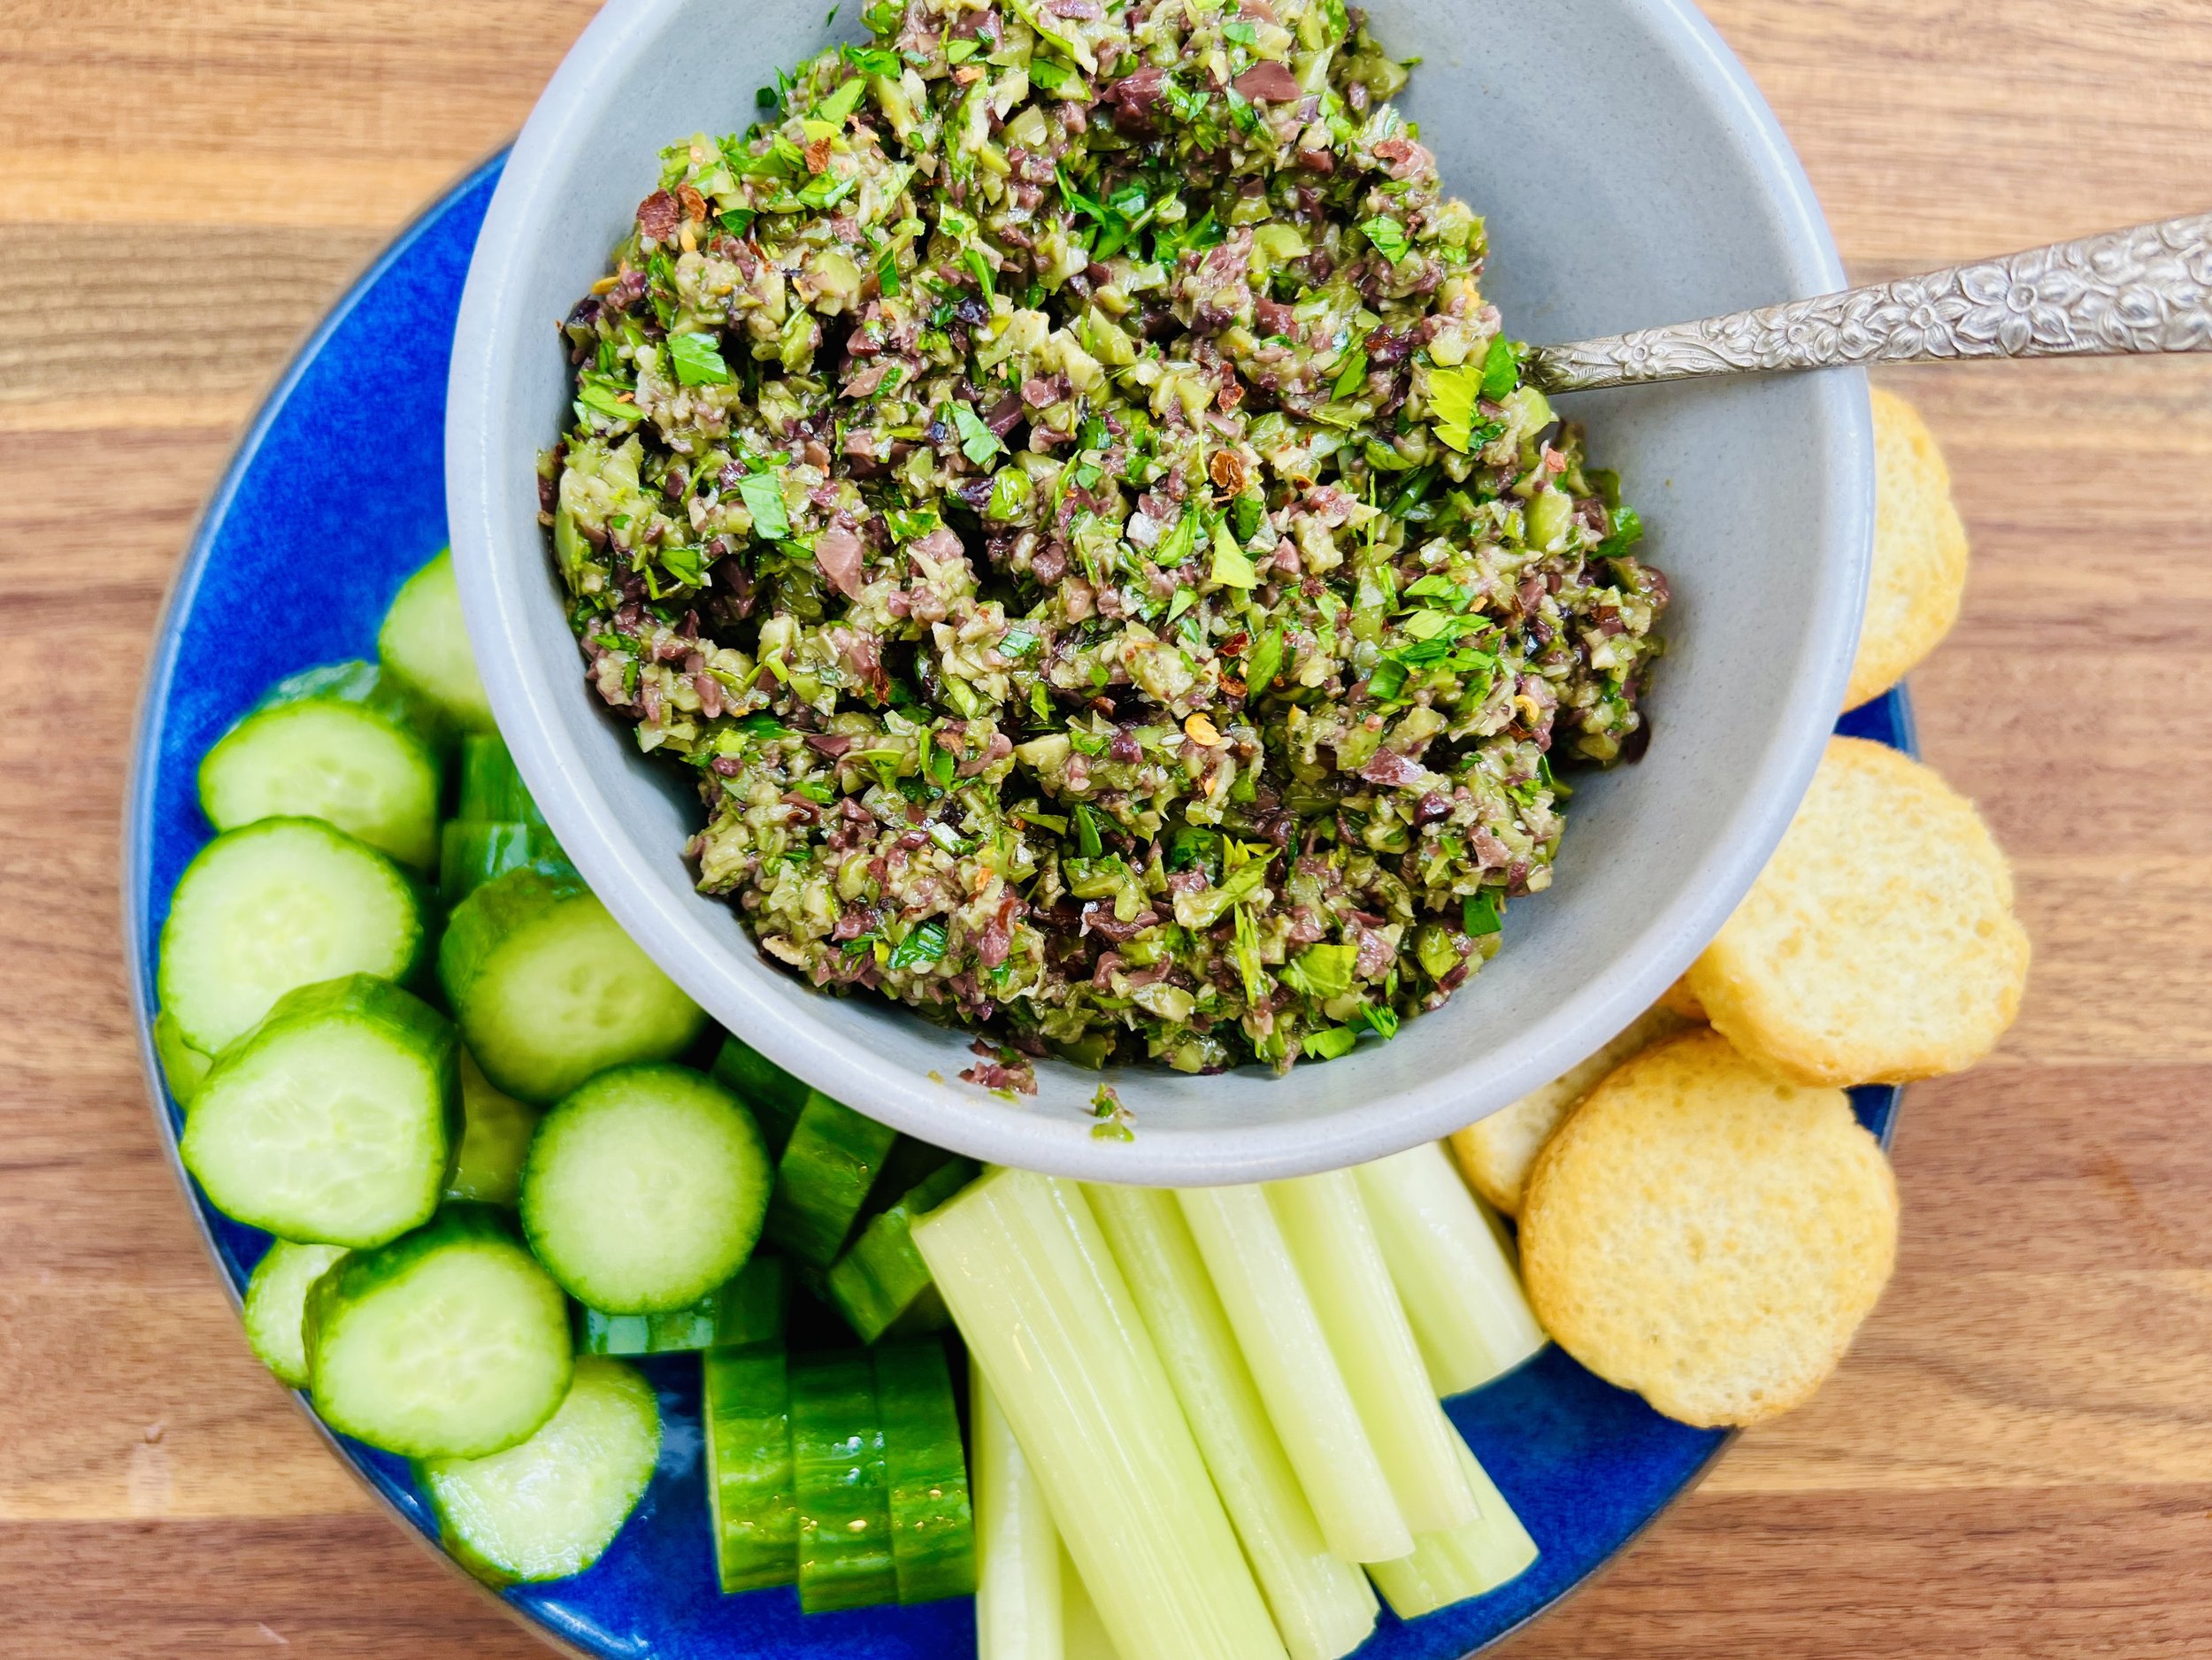
More Deliciously Low FODMAP™ appetizer recipes you might enjoy


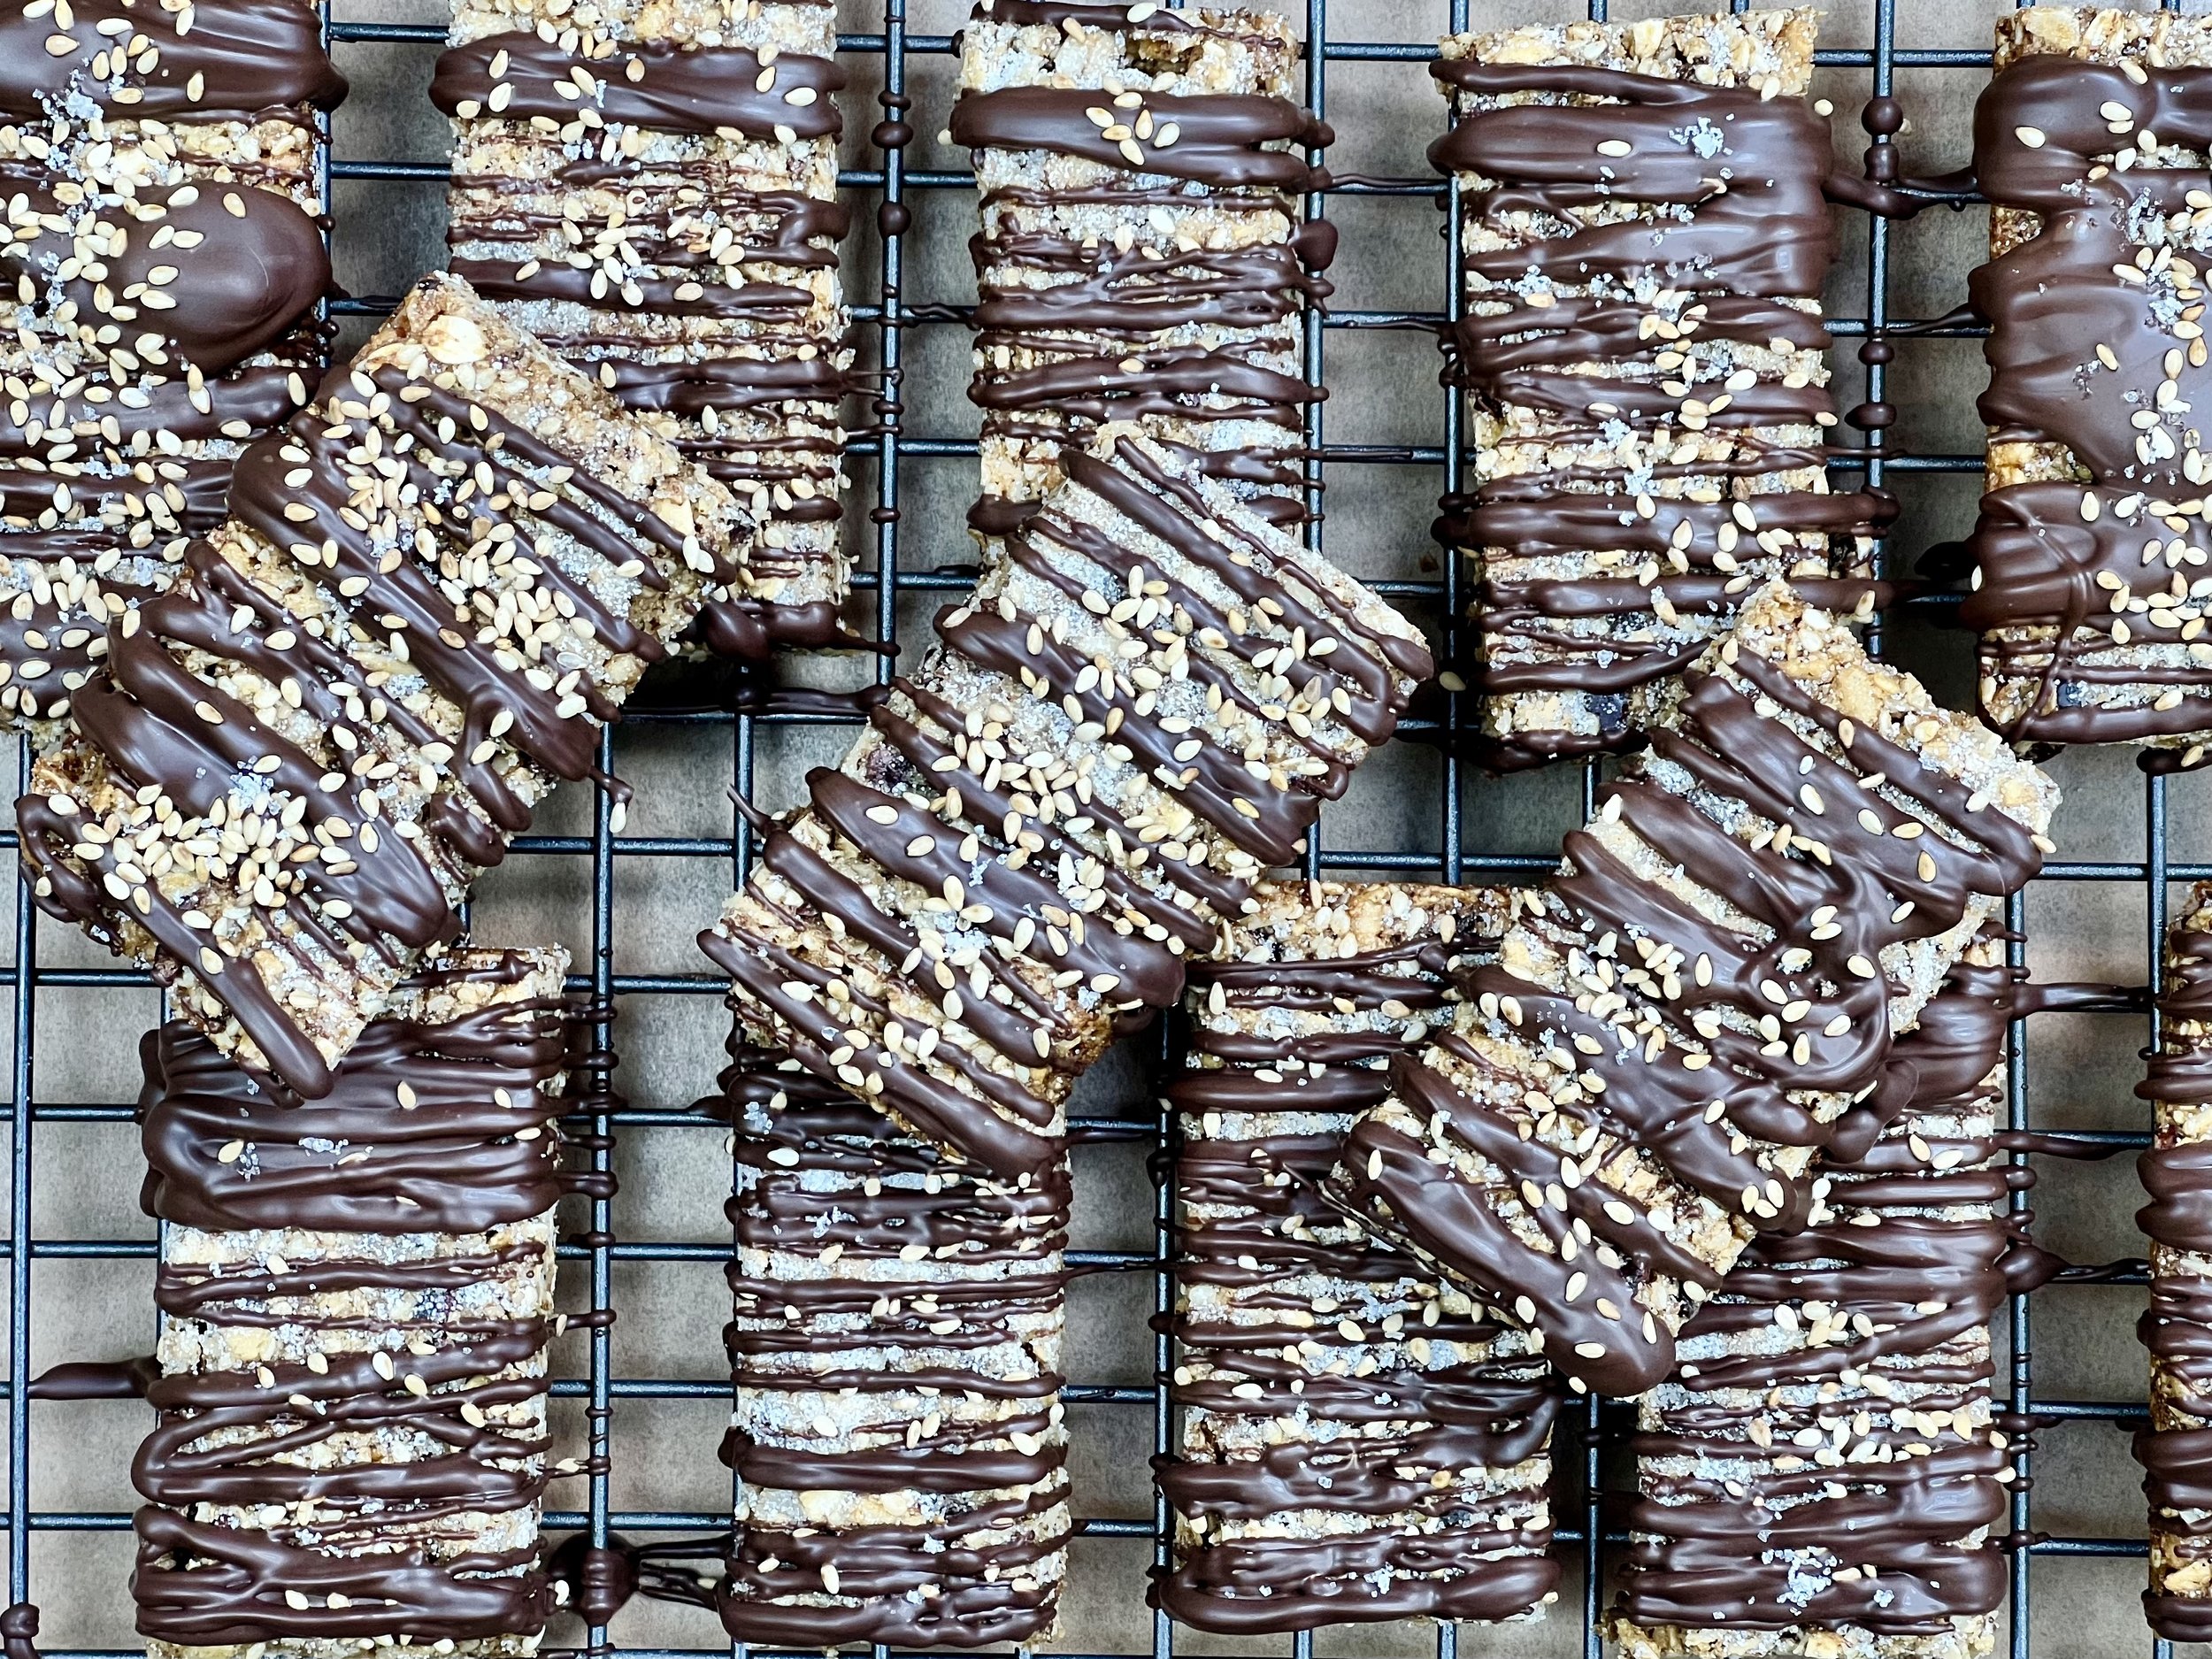
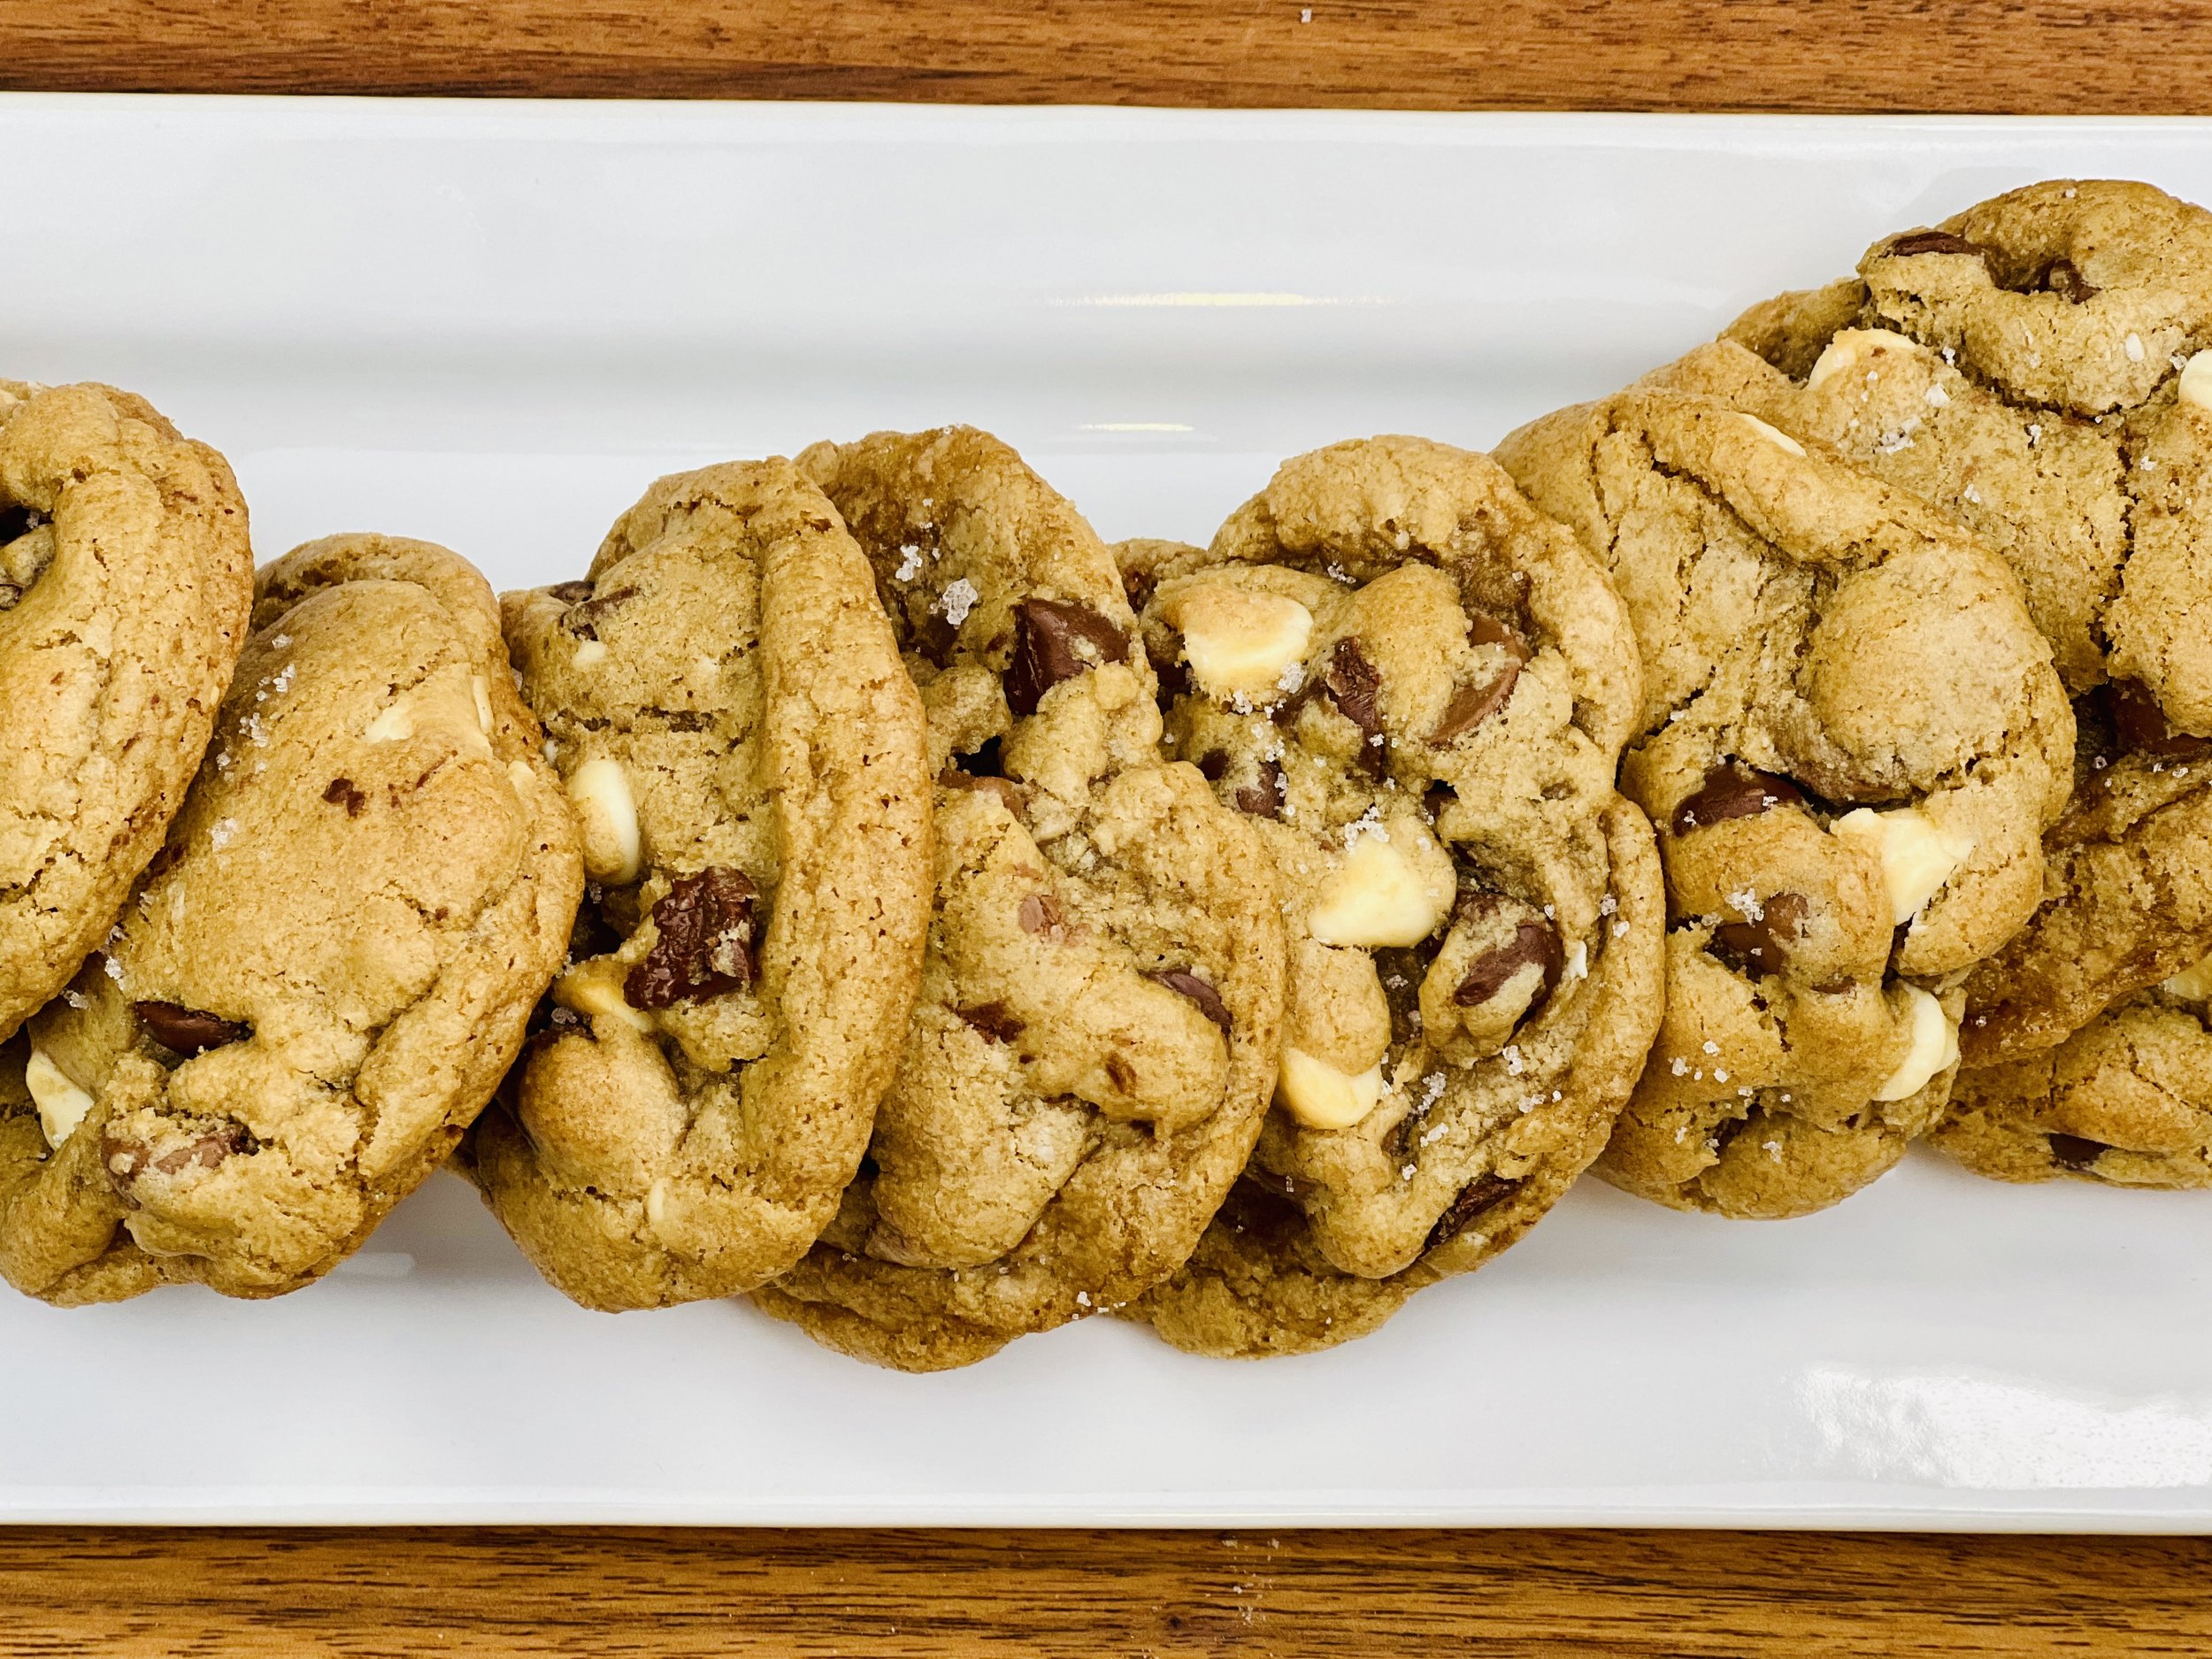
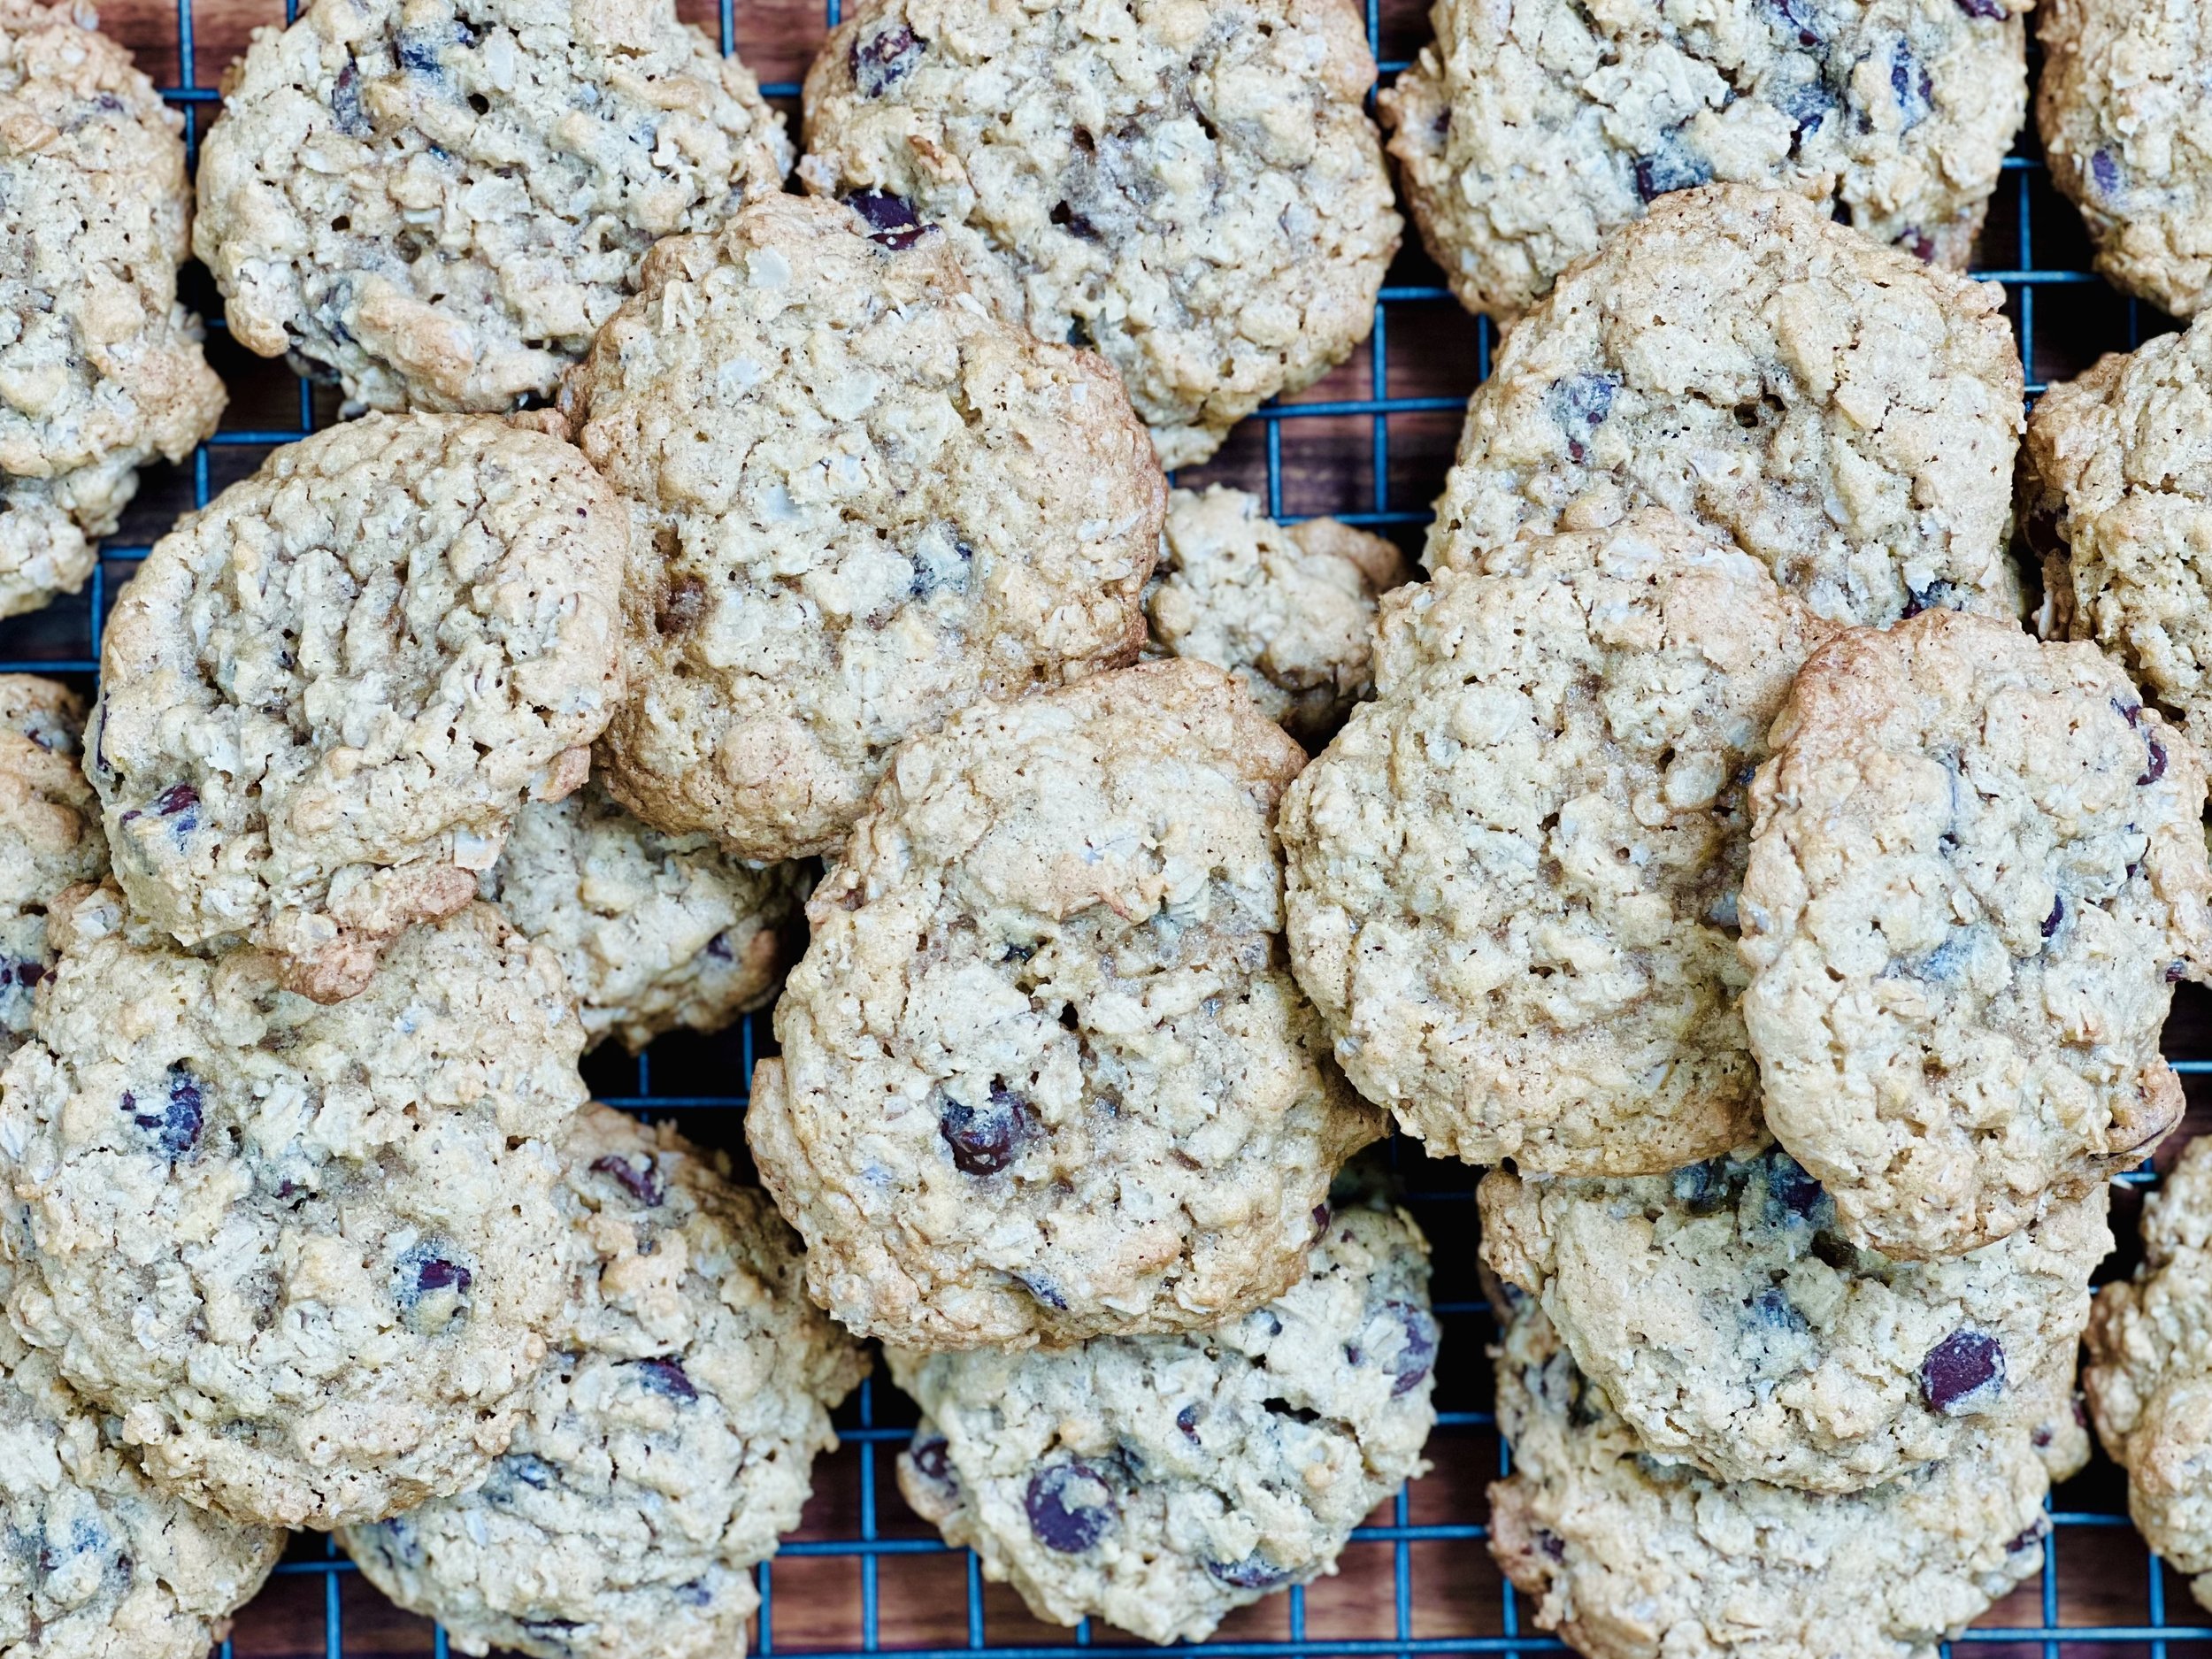
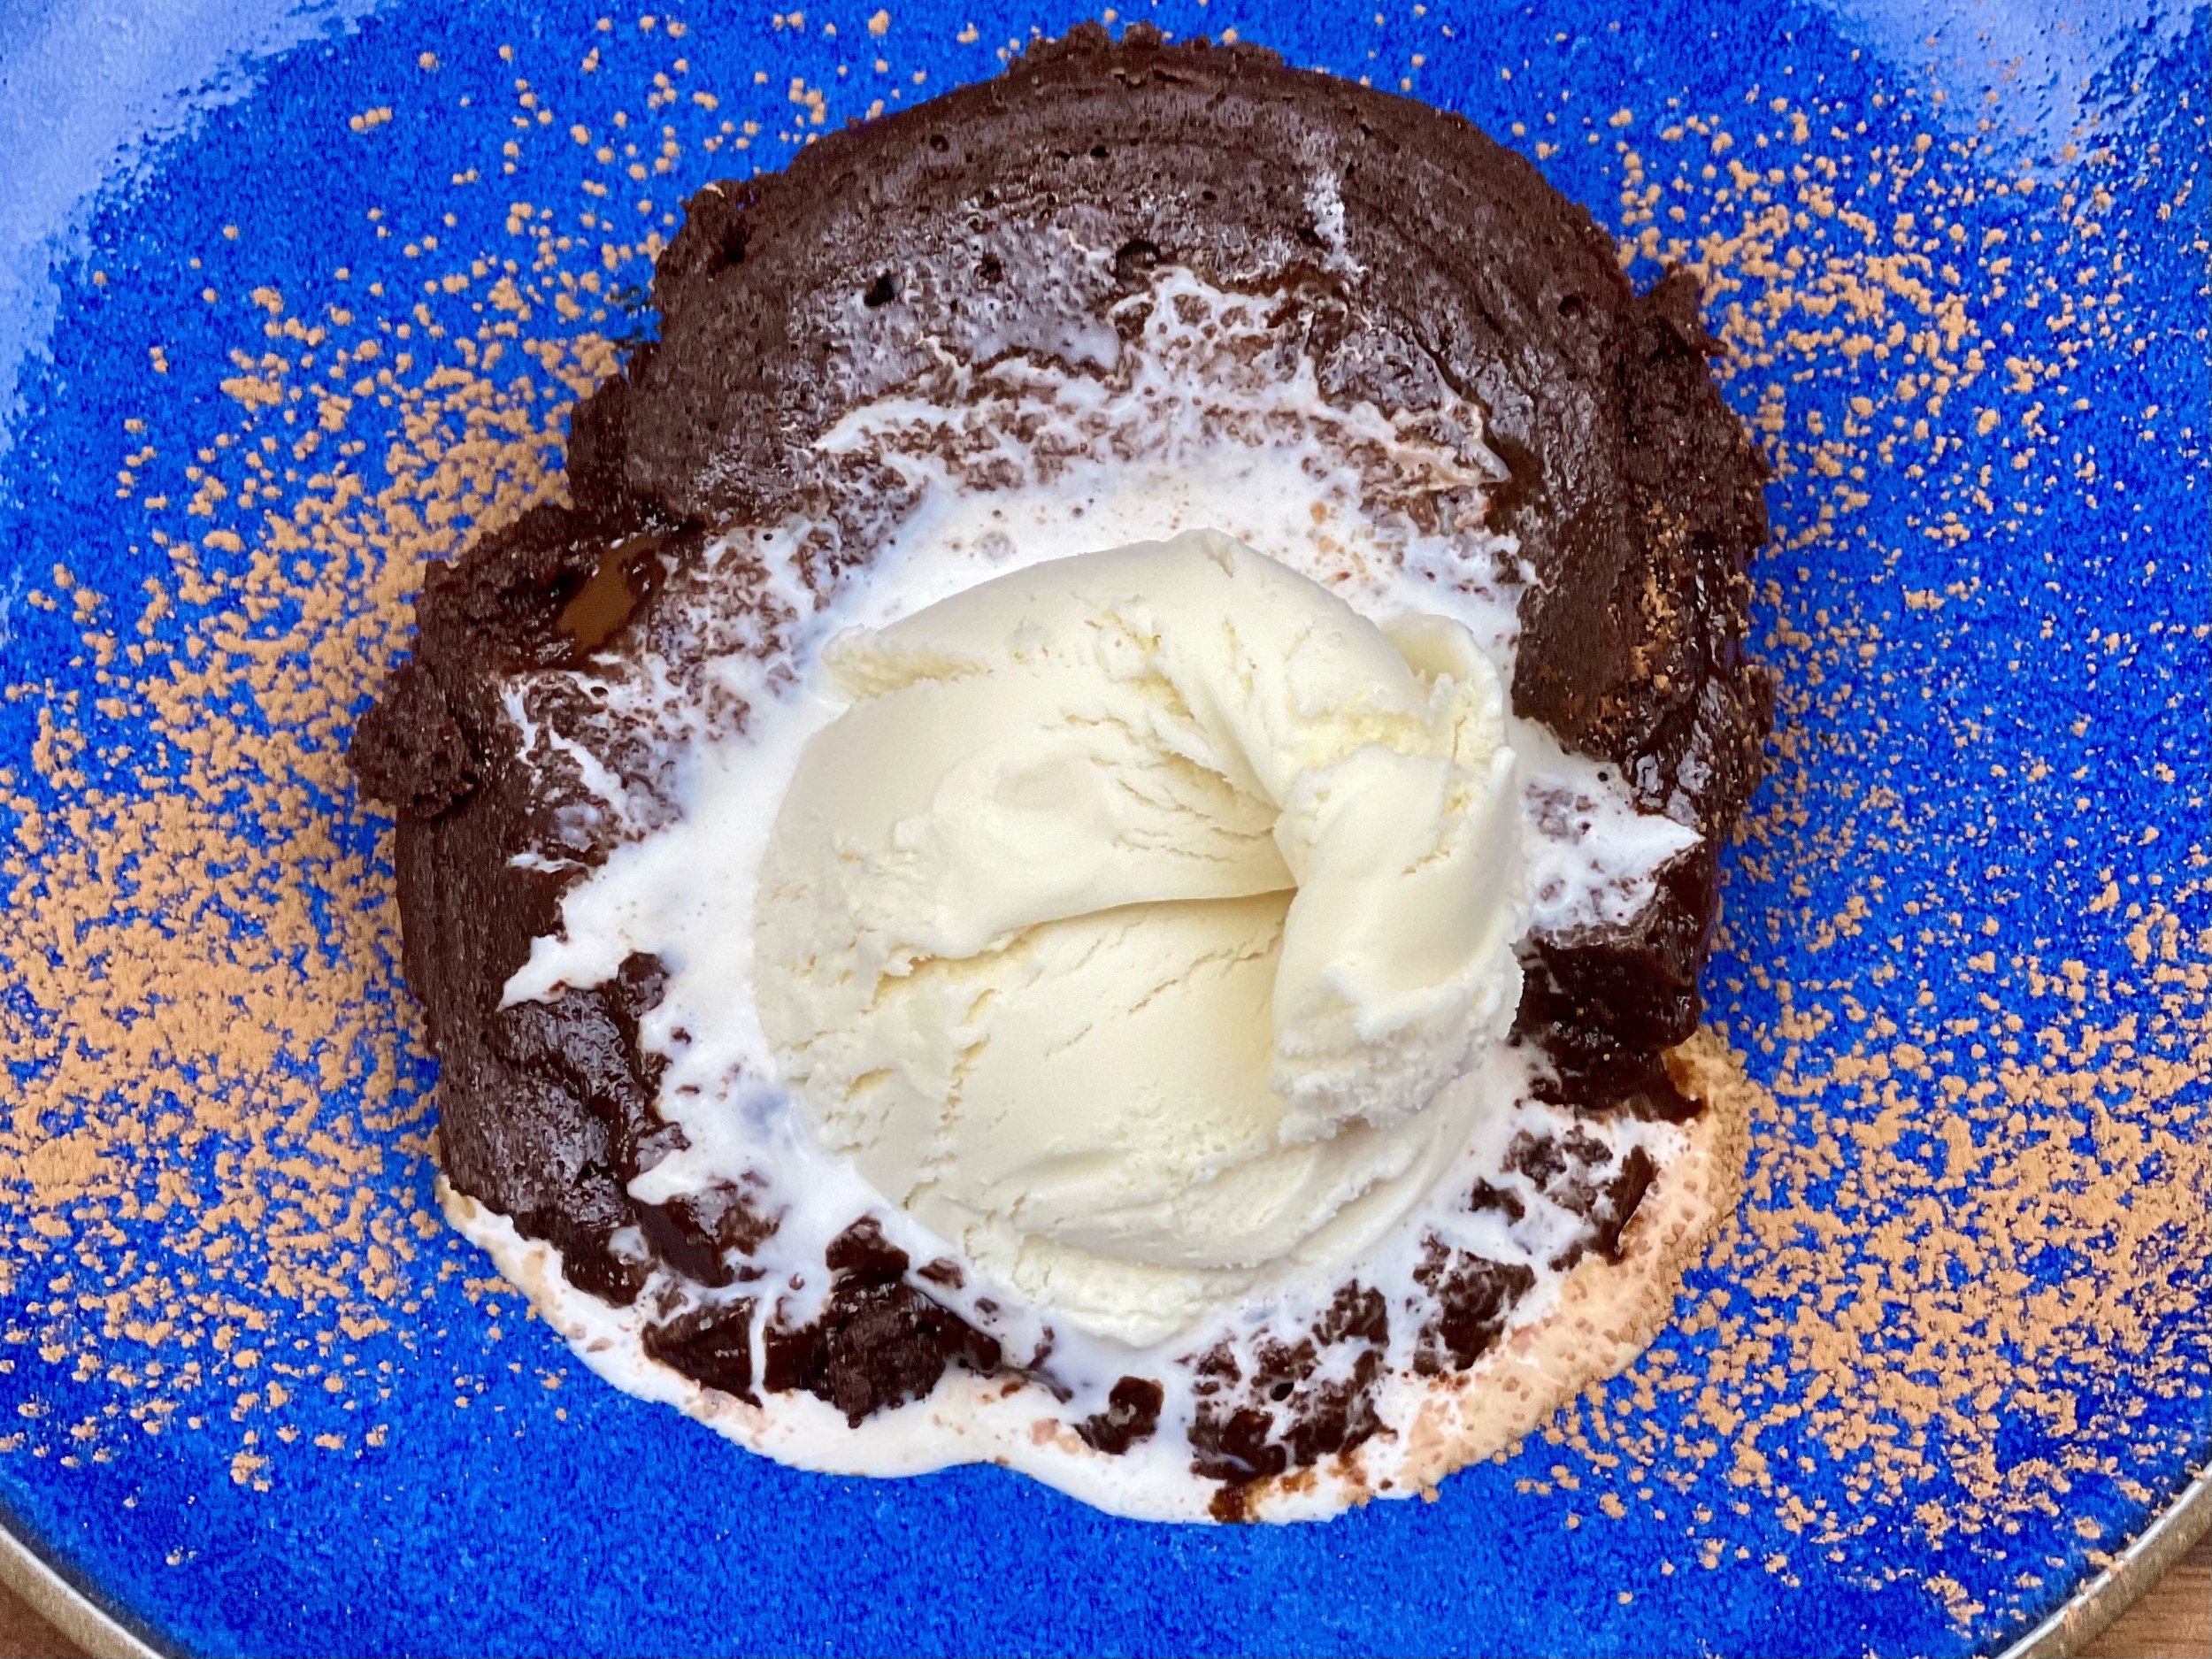
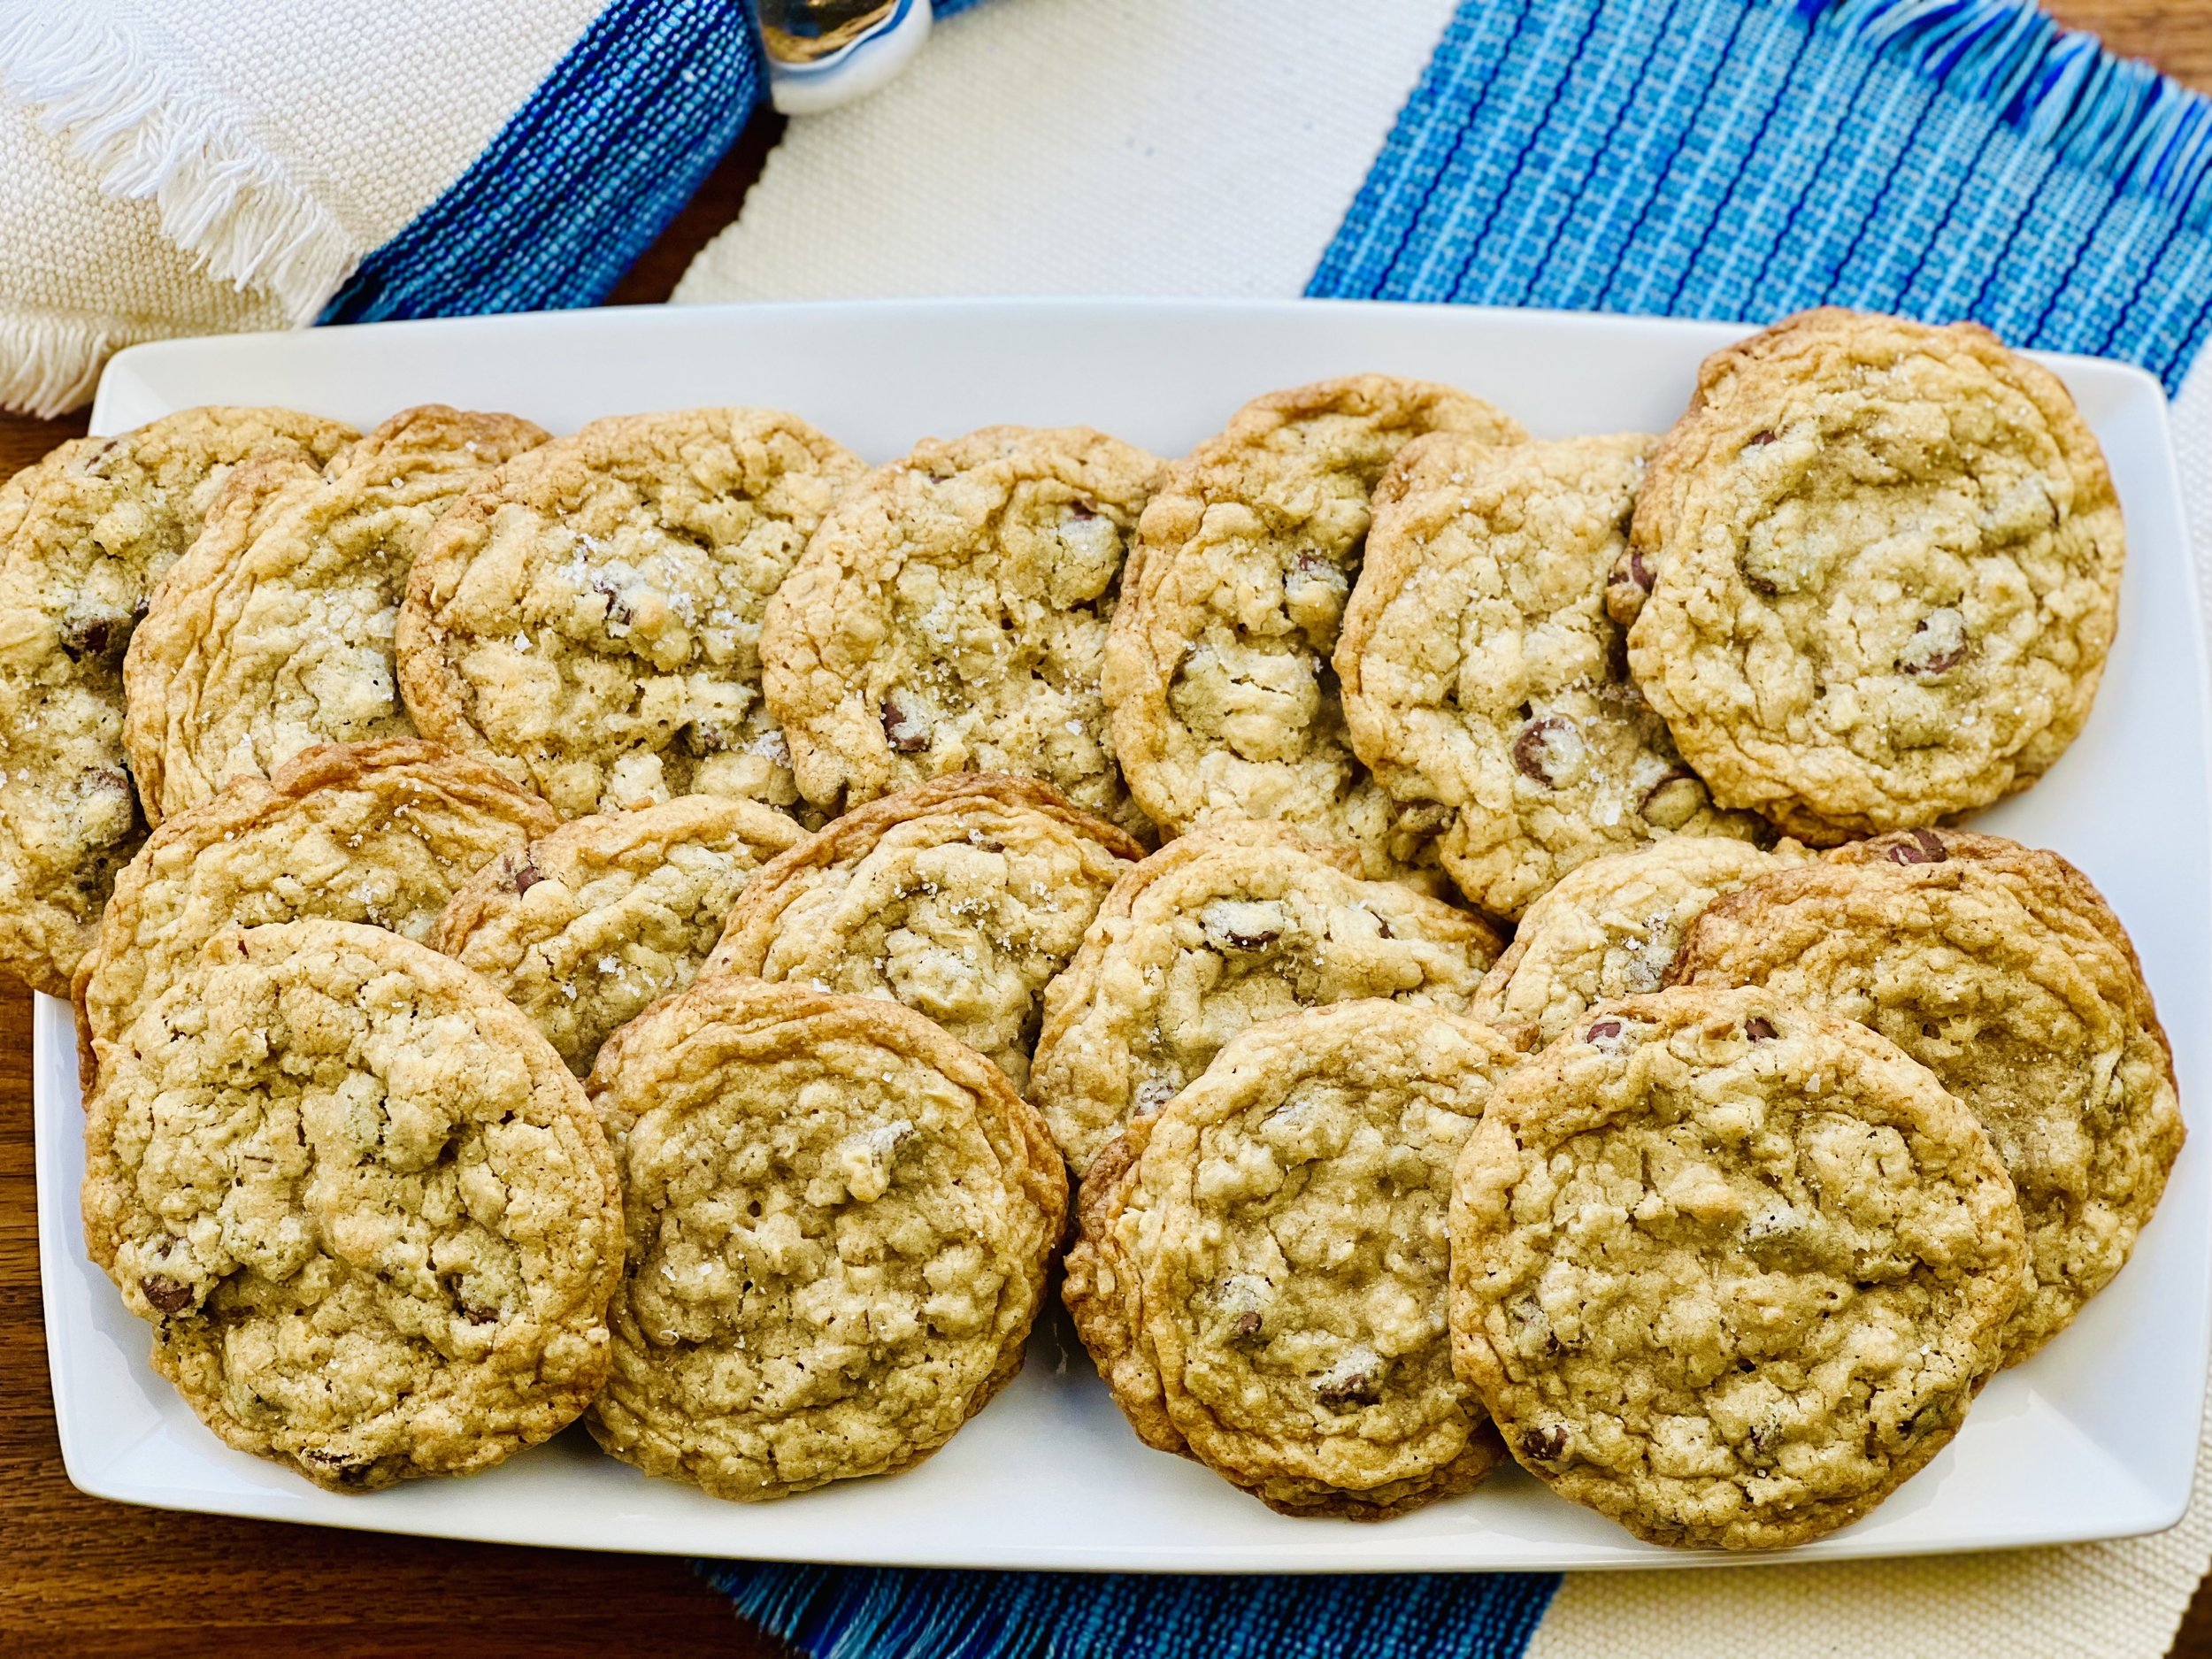
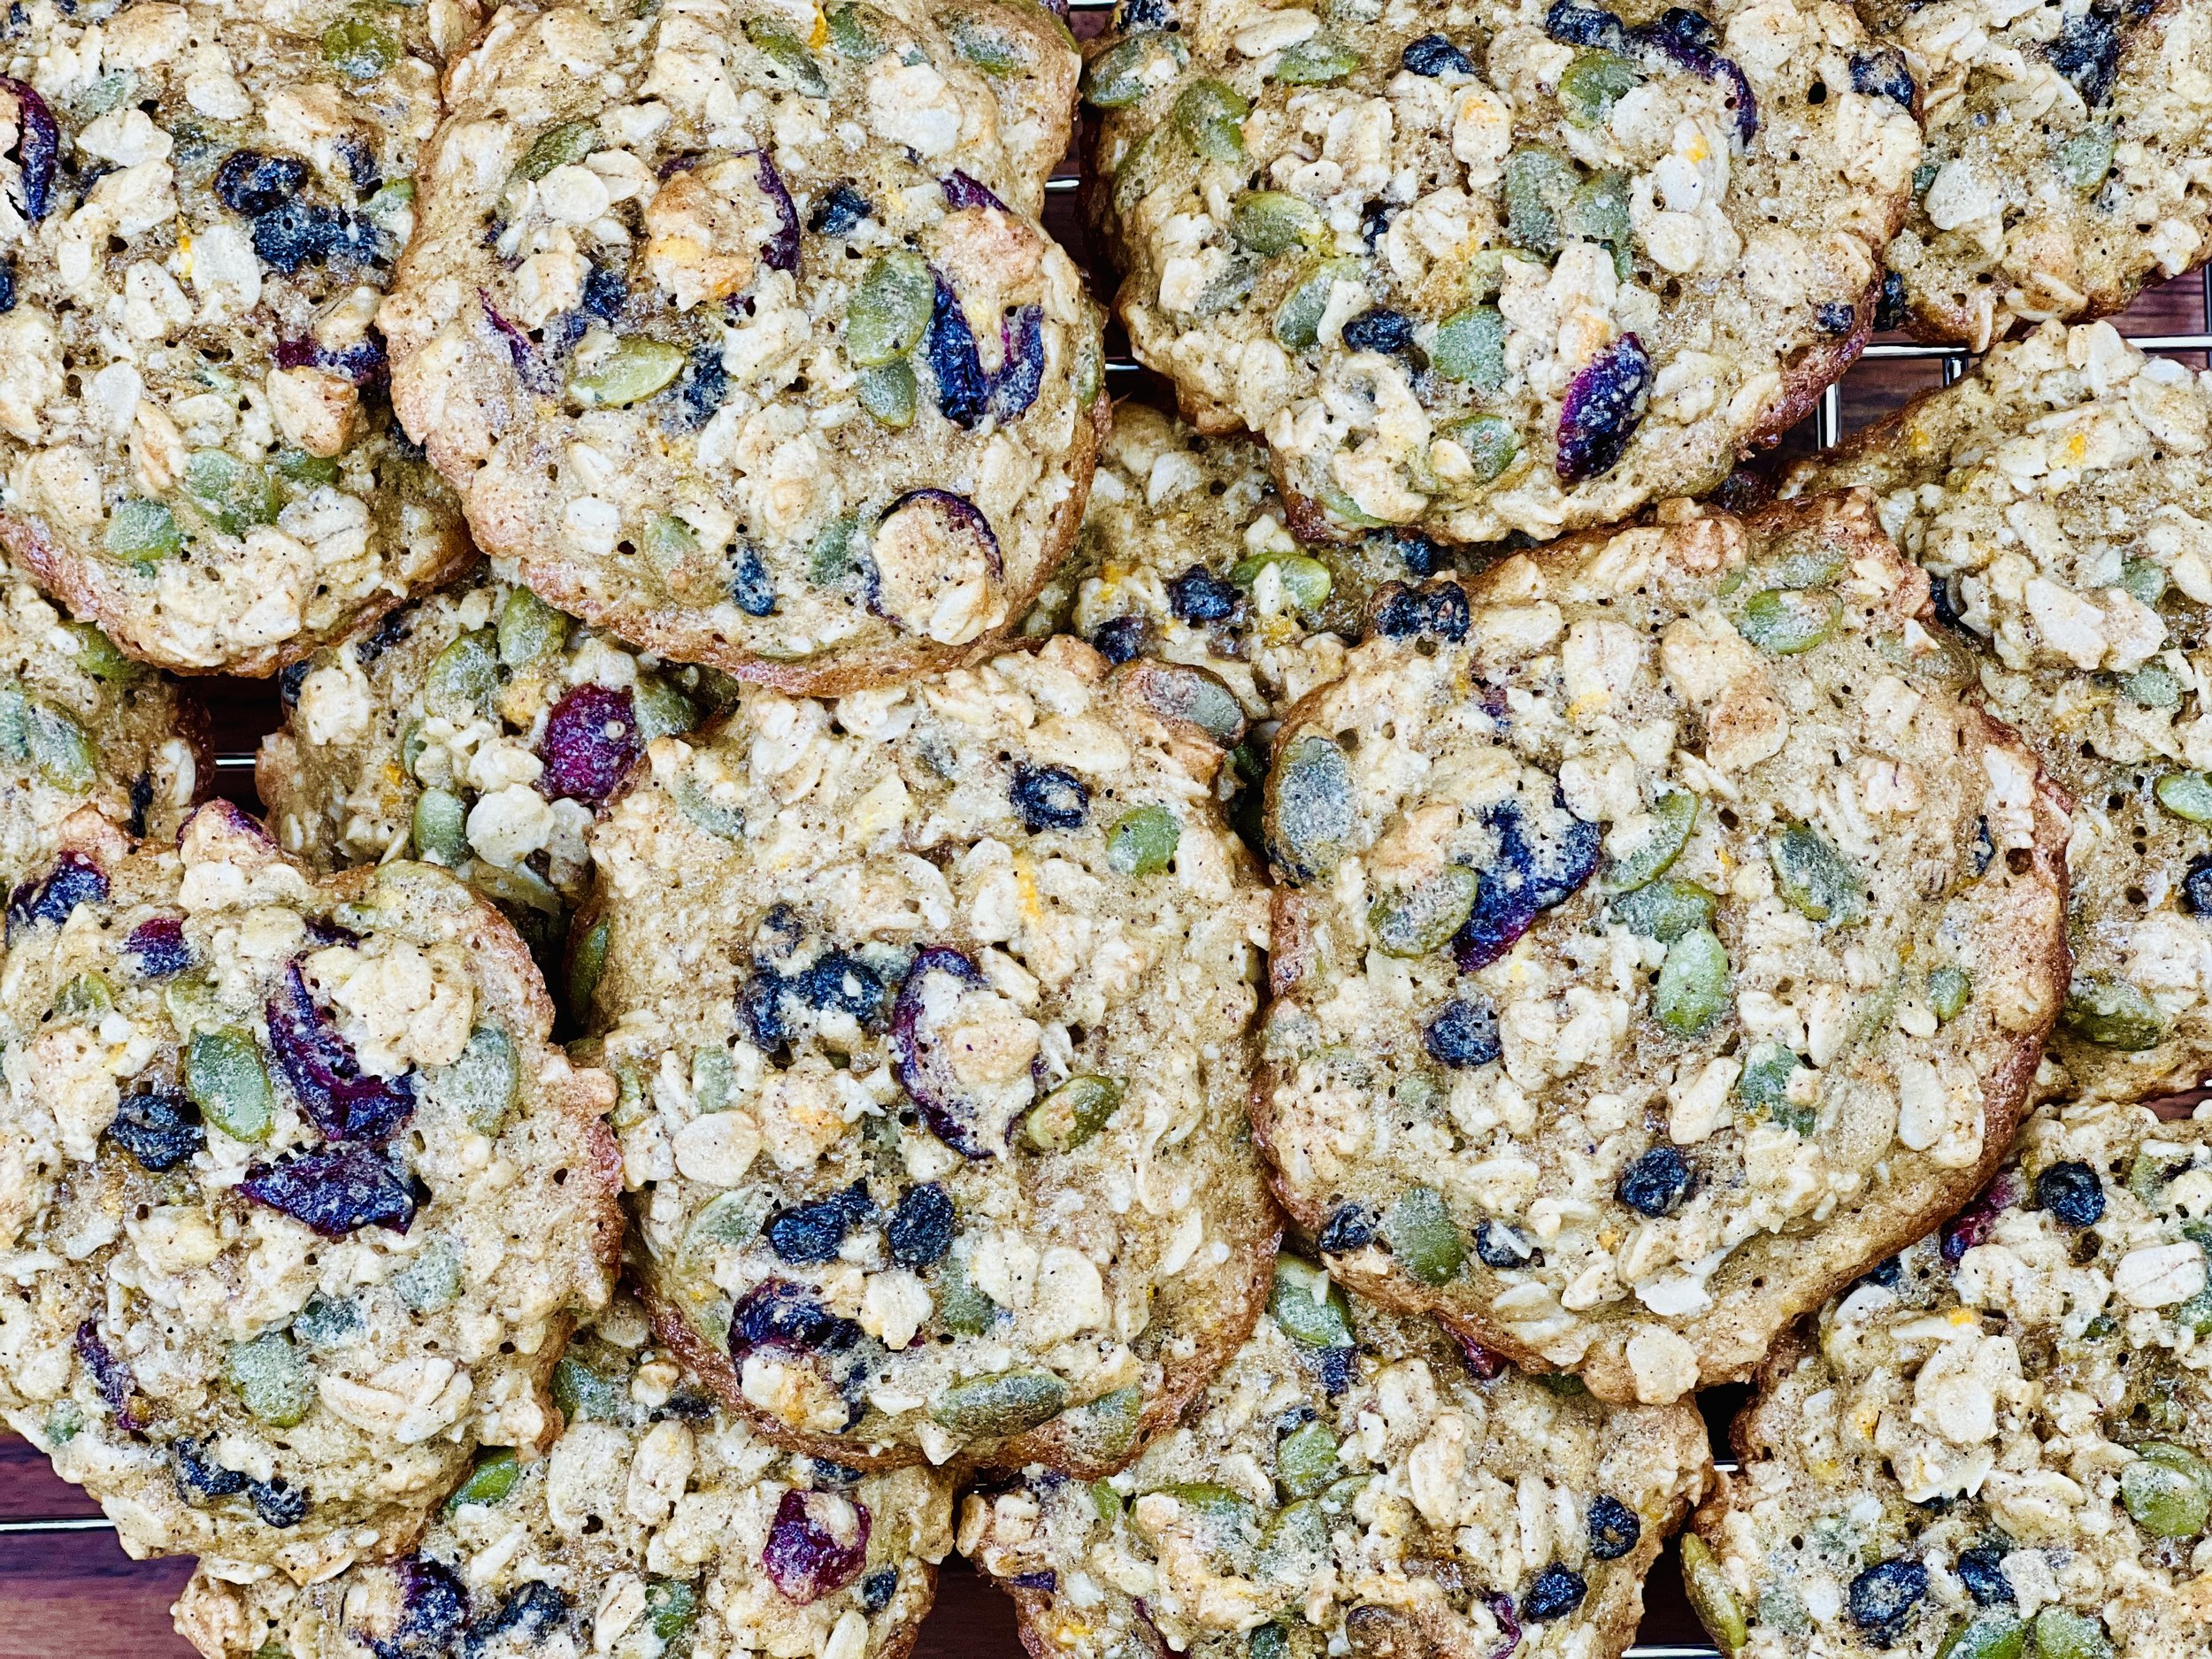
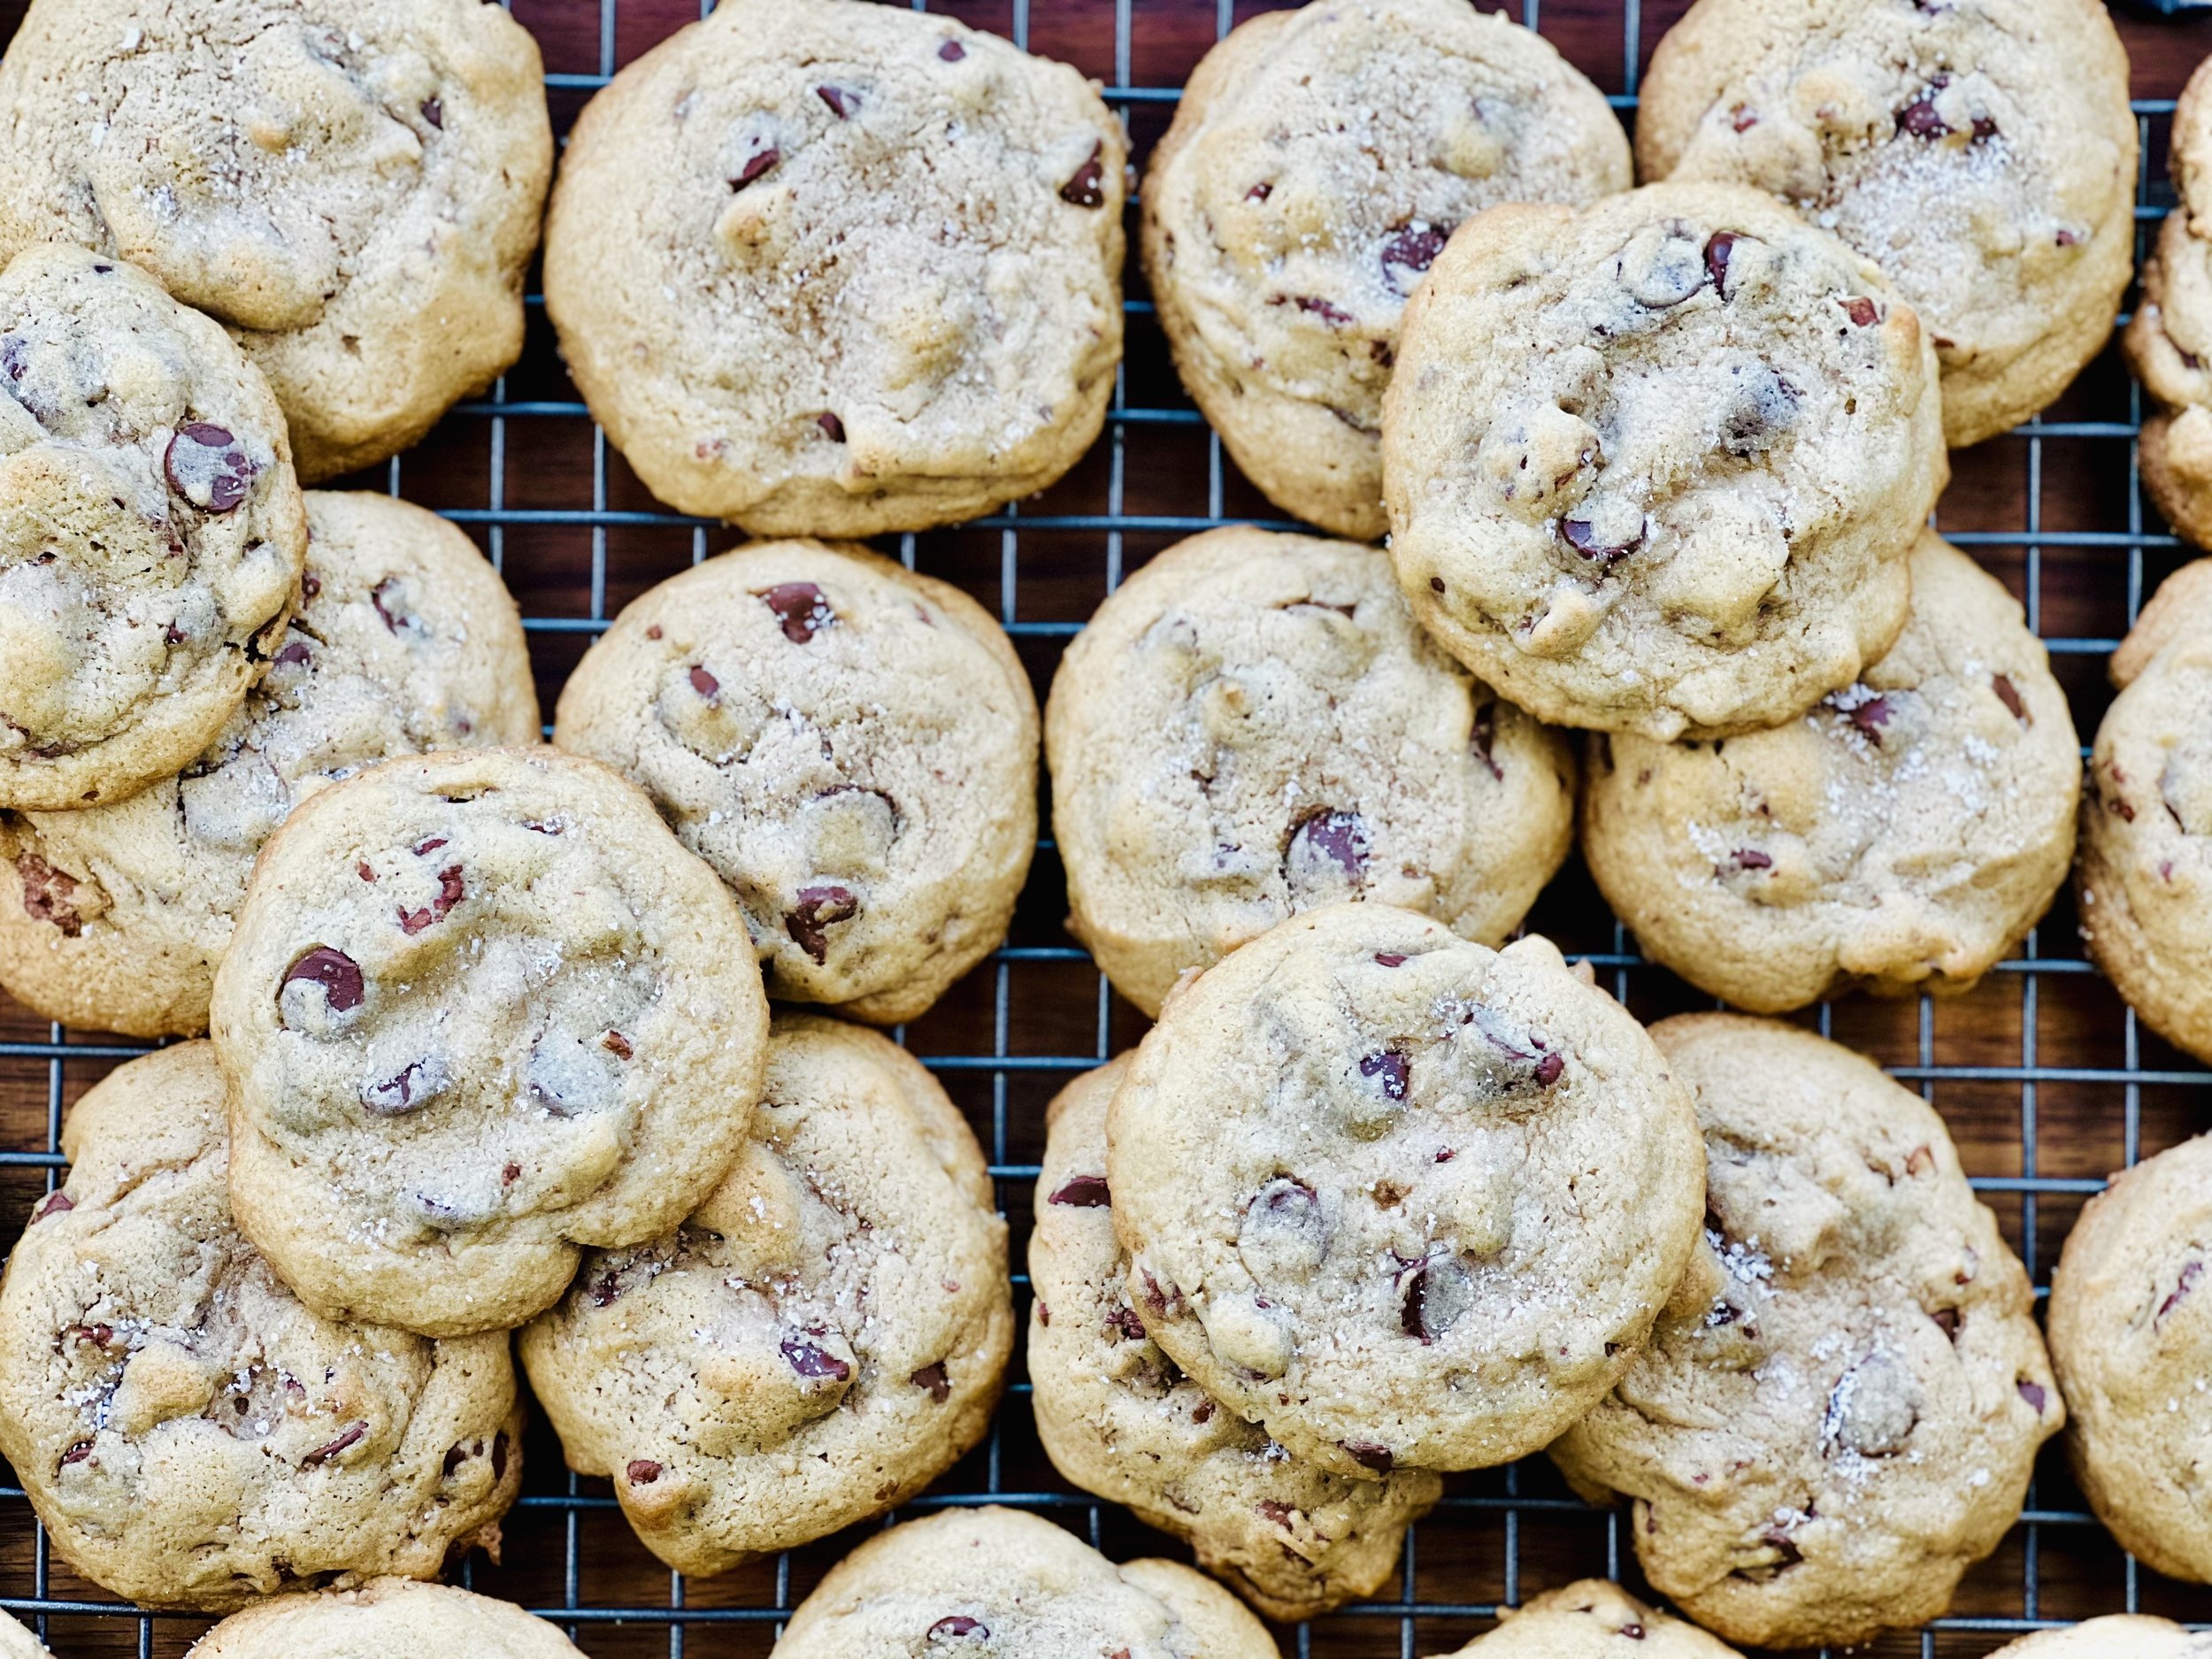
Salted Brown Butter Oatmeal Chocolate Chip Cookies (low FODMAP)
25 Minutes prep • 15 Minutes cook • Low FODMAP • Gluten-free • Makes 24 • Serving size 2
25 Minutes prep • 15 Minutes cook • Low FODMAP • Gluten-free • Makes 24 • Serving size 2
Another chocolate chip cookie recipe? Yup. And this one’s a keeper! These cookies have got it all. Brown butter. Oatmeal. Chocolate. And a dusting of flaky salt to finish them off. They’re chewy, and buttery, and the whole family will love them. Planning a potluck or picnic? These cookies should have a place on the menu!
Ingredients
2 sticks (1 cup) salted butter, at room temperature
3/4 cup light brown sugar
3/4 cup white sugar
1/4 cup lactose-free sour cream
1 egg, at room temperature
2 teaspoons vanilla extract
2 cups gluten-free flour
1 1/2 cups gluten-free rolled oats
1 teaspoon baking soda
1/2 teaspoon kosher salt
1 cup semi-sweet chocolate chips
Flaky salt to sprinkle on top
Directions
(1) Brown the butter: Add 1 stick (8 tablespoons) butter to a skillet set over medium heat, cooking until the butter begins to brown, about 3-4 minutes. Remove from the heat and transfer to the bowl of your stand mixer. If you’re in a hurry to cool it off, put it in the freezer to chill, 10 minutes, but no longer. You don’t want it to freeze.
(2) Prepare: Preheat the oven to 350 degrees F. Line a baking sheet with parchment paper. Combine flour, oats, baking soda, and salt in a bowl and whisk to combine. Then set aside.
(3) Make the dough: In the bowl of your stand mixer, beat together the remaining 1 stick of butter, the cooled browned butter, and the sugar on medium-high speed until light and fluffy (2 - 3 minutes). Beat in the sour cream, egg, and vanilla, until well combined. Add the flour, oatmeal, baking soda, and salt mixture in two parts, beating on medium-high for 1 minute and scraping down the sides of the bowl in between. Fold in the chocolate chips.
(4) Shape the dough: Use a large cookie scoop or spoon and roll the dough into 2 tablespoon size balls and place them 3 inches apart on the prepared baking sheet. No more than 6 cookies per sheet as they spread.
(5) Bake: Bake for 7 minutes, then rotate the pan and bake another 3-5 minutes, the cookies will begin to brown around the edges, but still be doughy in the center.
(6) Finish: Remove from the oven and let the cookies cool on the baking sheet (they will continue to cook slightly as they sit on the baking sheet). Sprinkle with flaky salt if desired while they are still hot.
(7) Serve: Eat warm or let them cool first. Store in an airtight container for up to 3 days if they last that long!
Eat and enjoy every bite because you can!
Recipe note: I use Diamond Crystal Kosher salt in all my recipes because it has a wonderful flat and crisp flake that tastes delicious. It is also the least salty salt available so you can use it more liberally as a seasoning than you can table salt or sea salt. If you use another type of salt, you may need to reduce the amount so it is not over-salted.
Link note: This post contains links for you to easily purchase items listed on the page. In some cases, we have provided a special discount code for IBS Game Changers so be sure to use it when you purchase an item to get the discount that has been arranged just for you! As an Amazon Associate, I earn a commission from qualifying Amazon purchases.
More Deliciously Low FODMAP™ dessert recipes
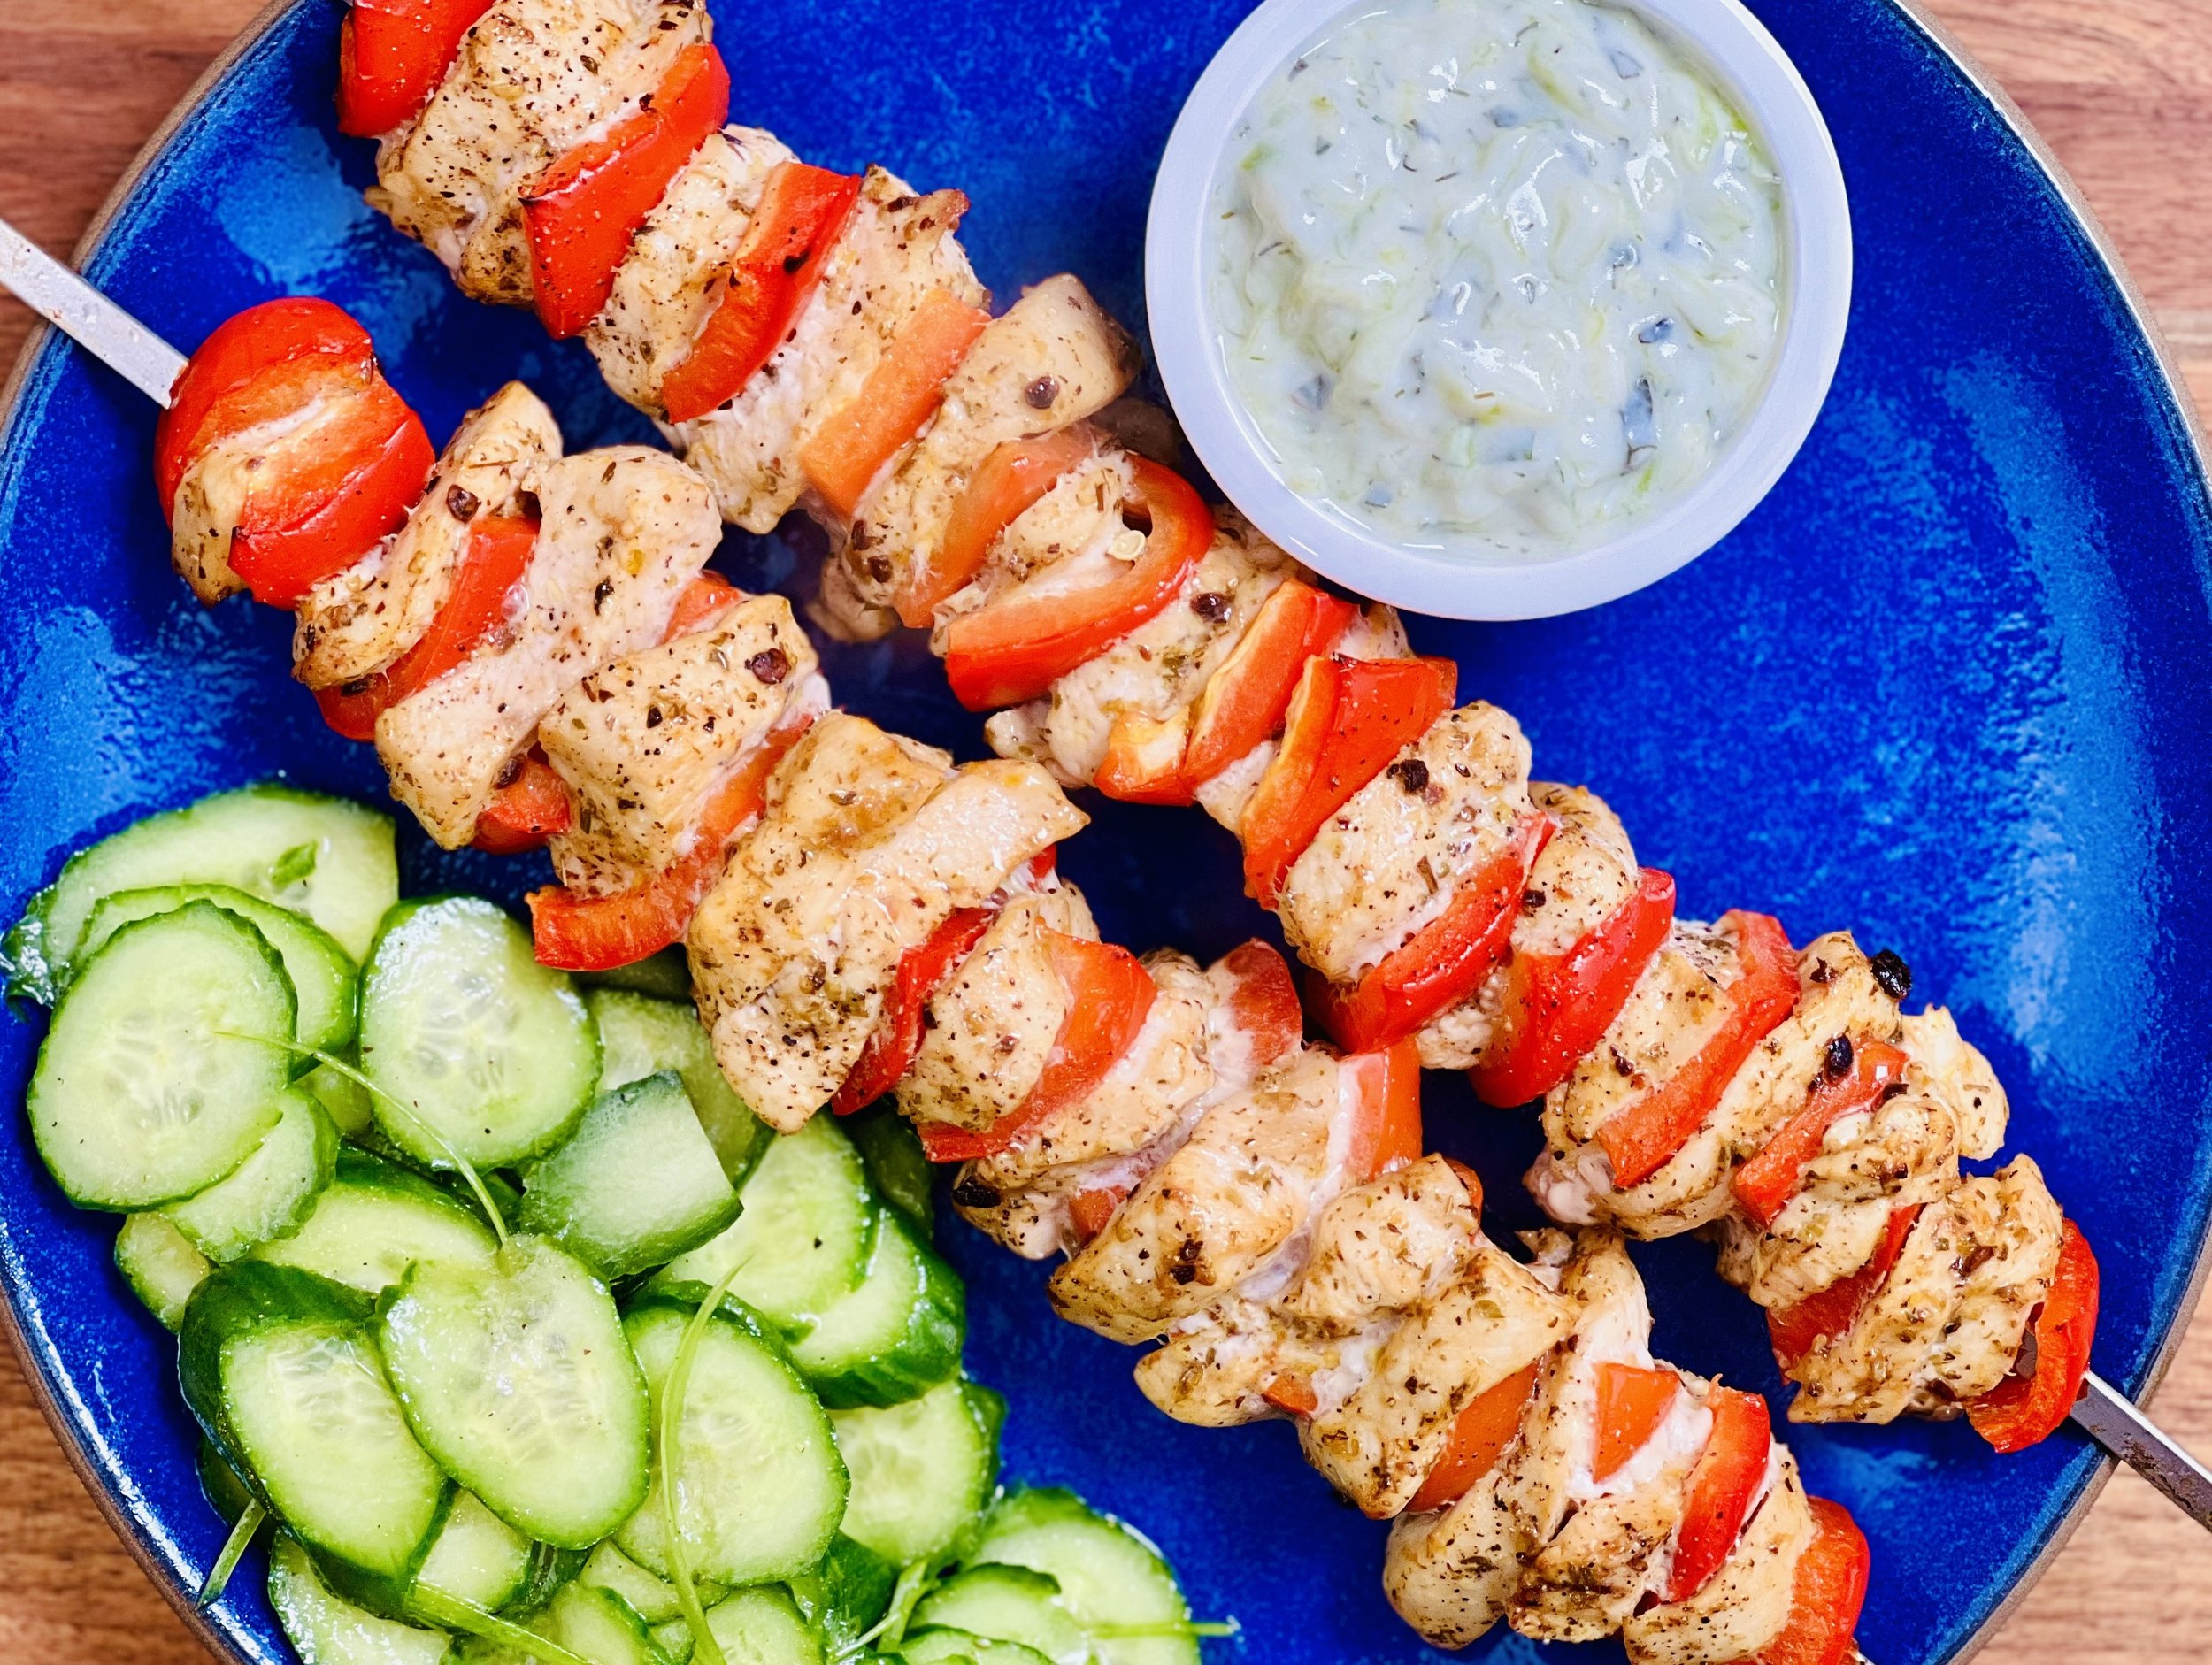
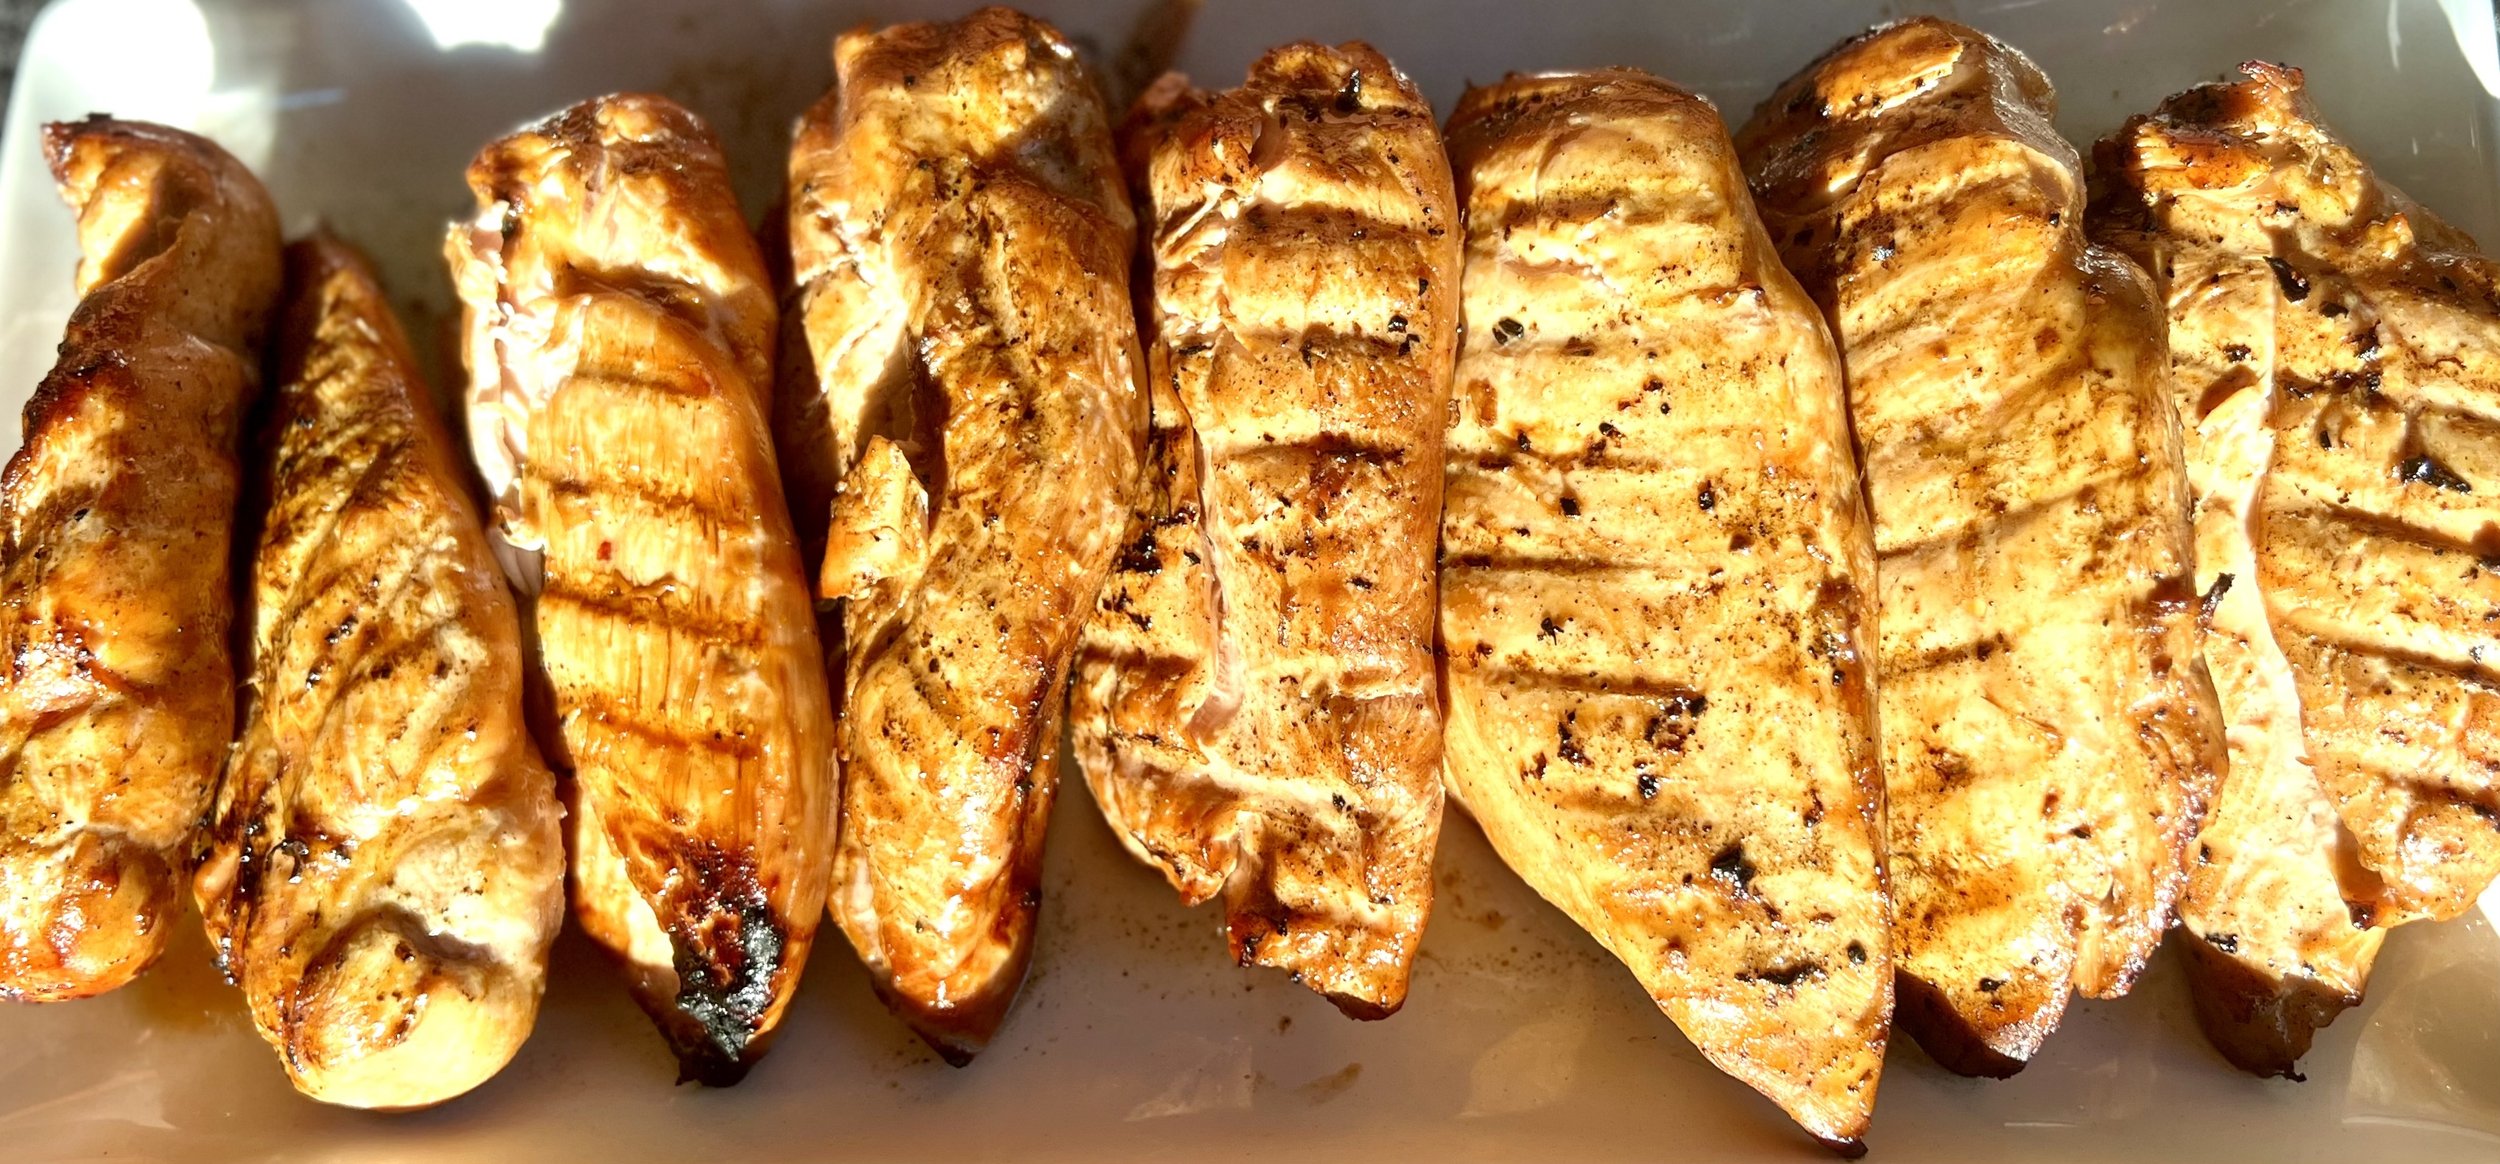
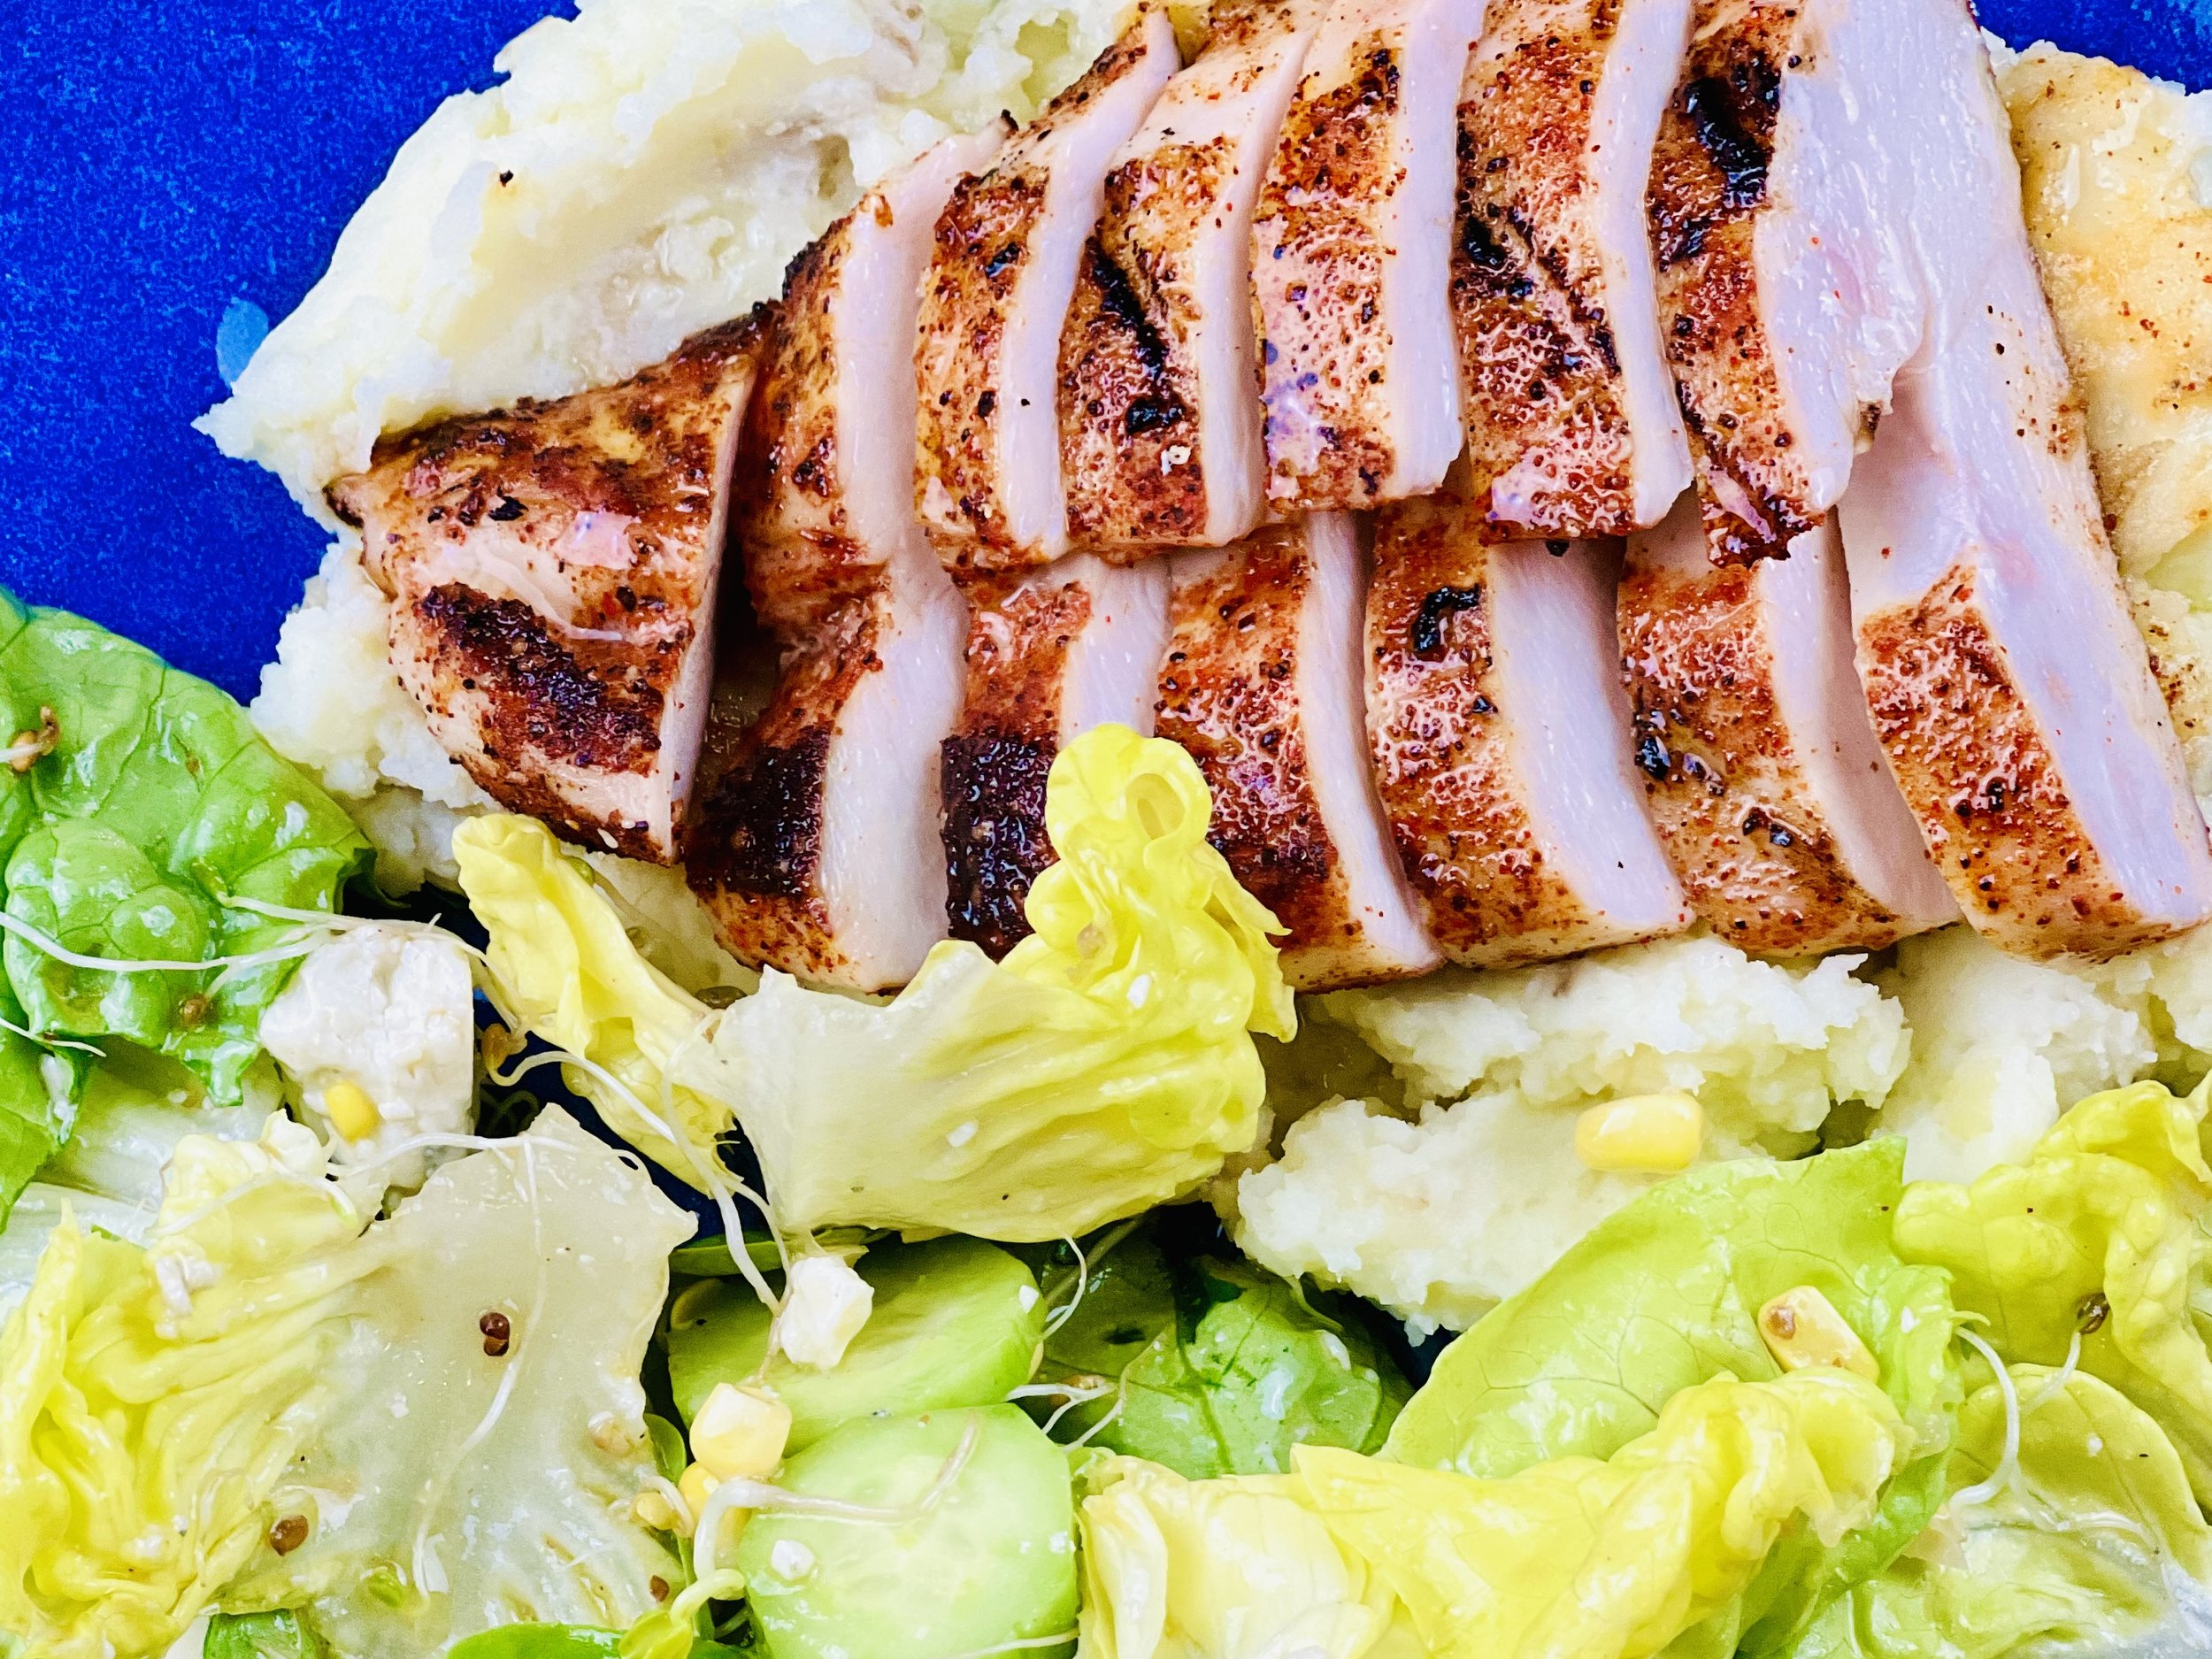
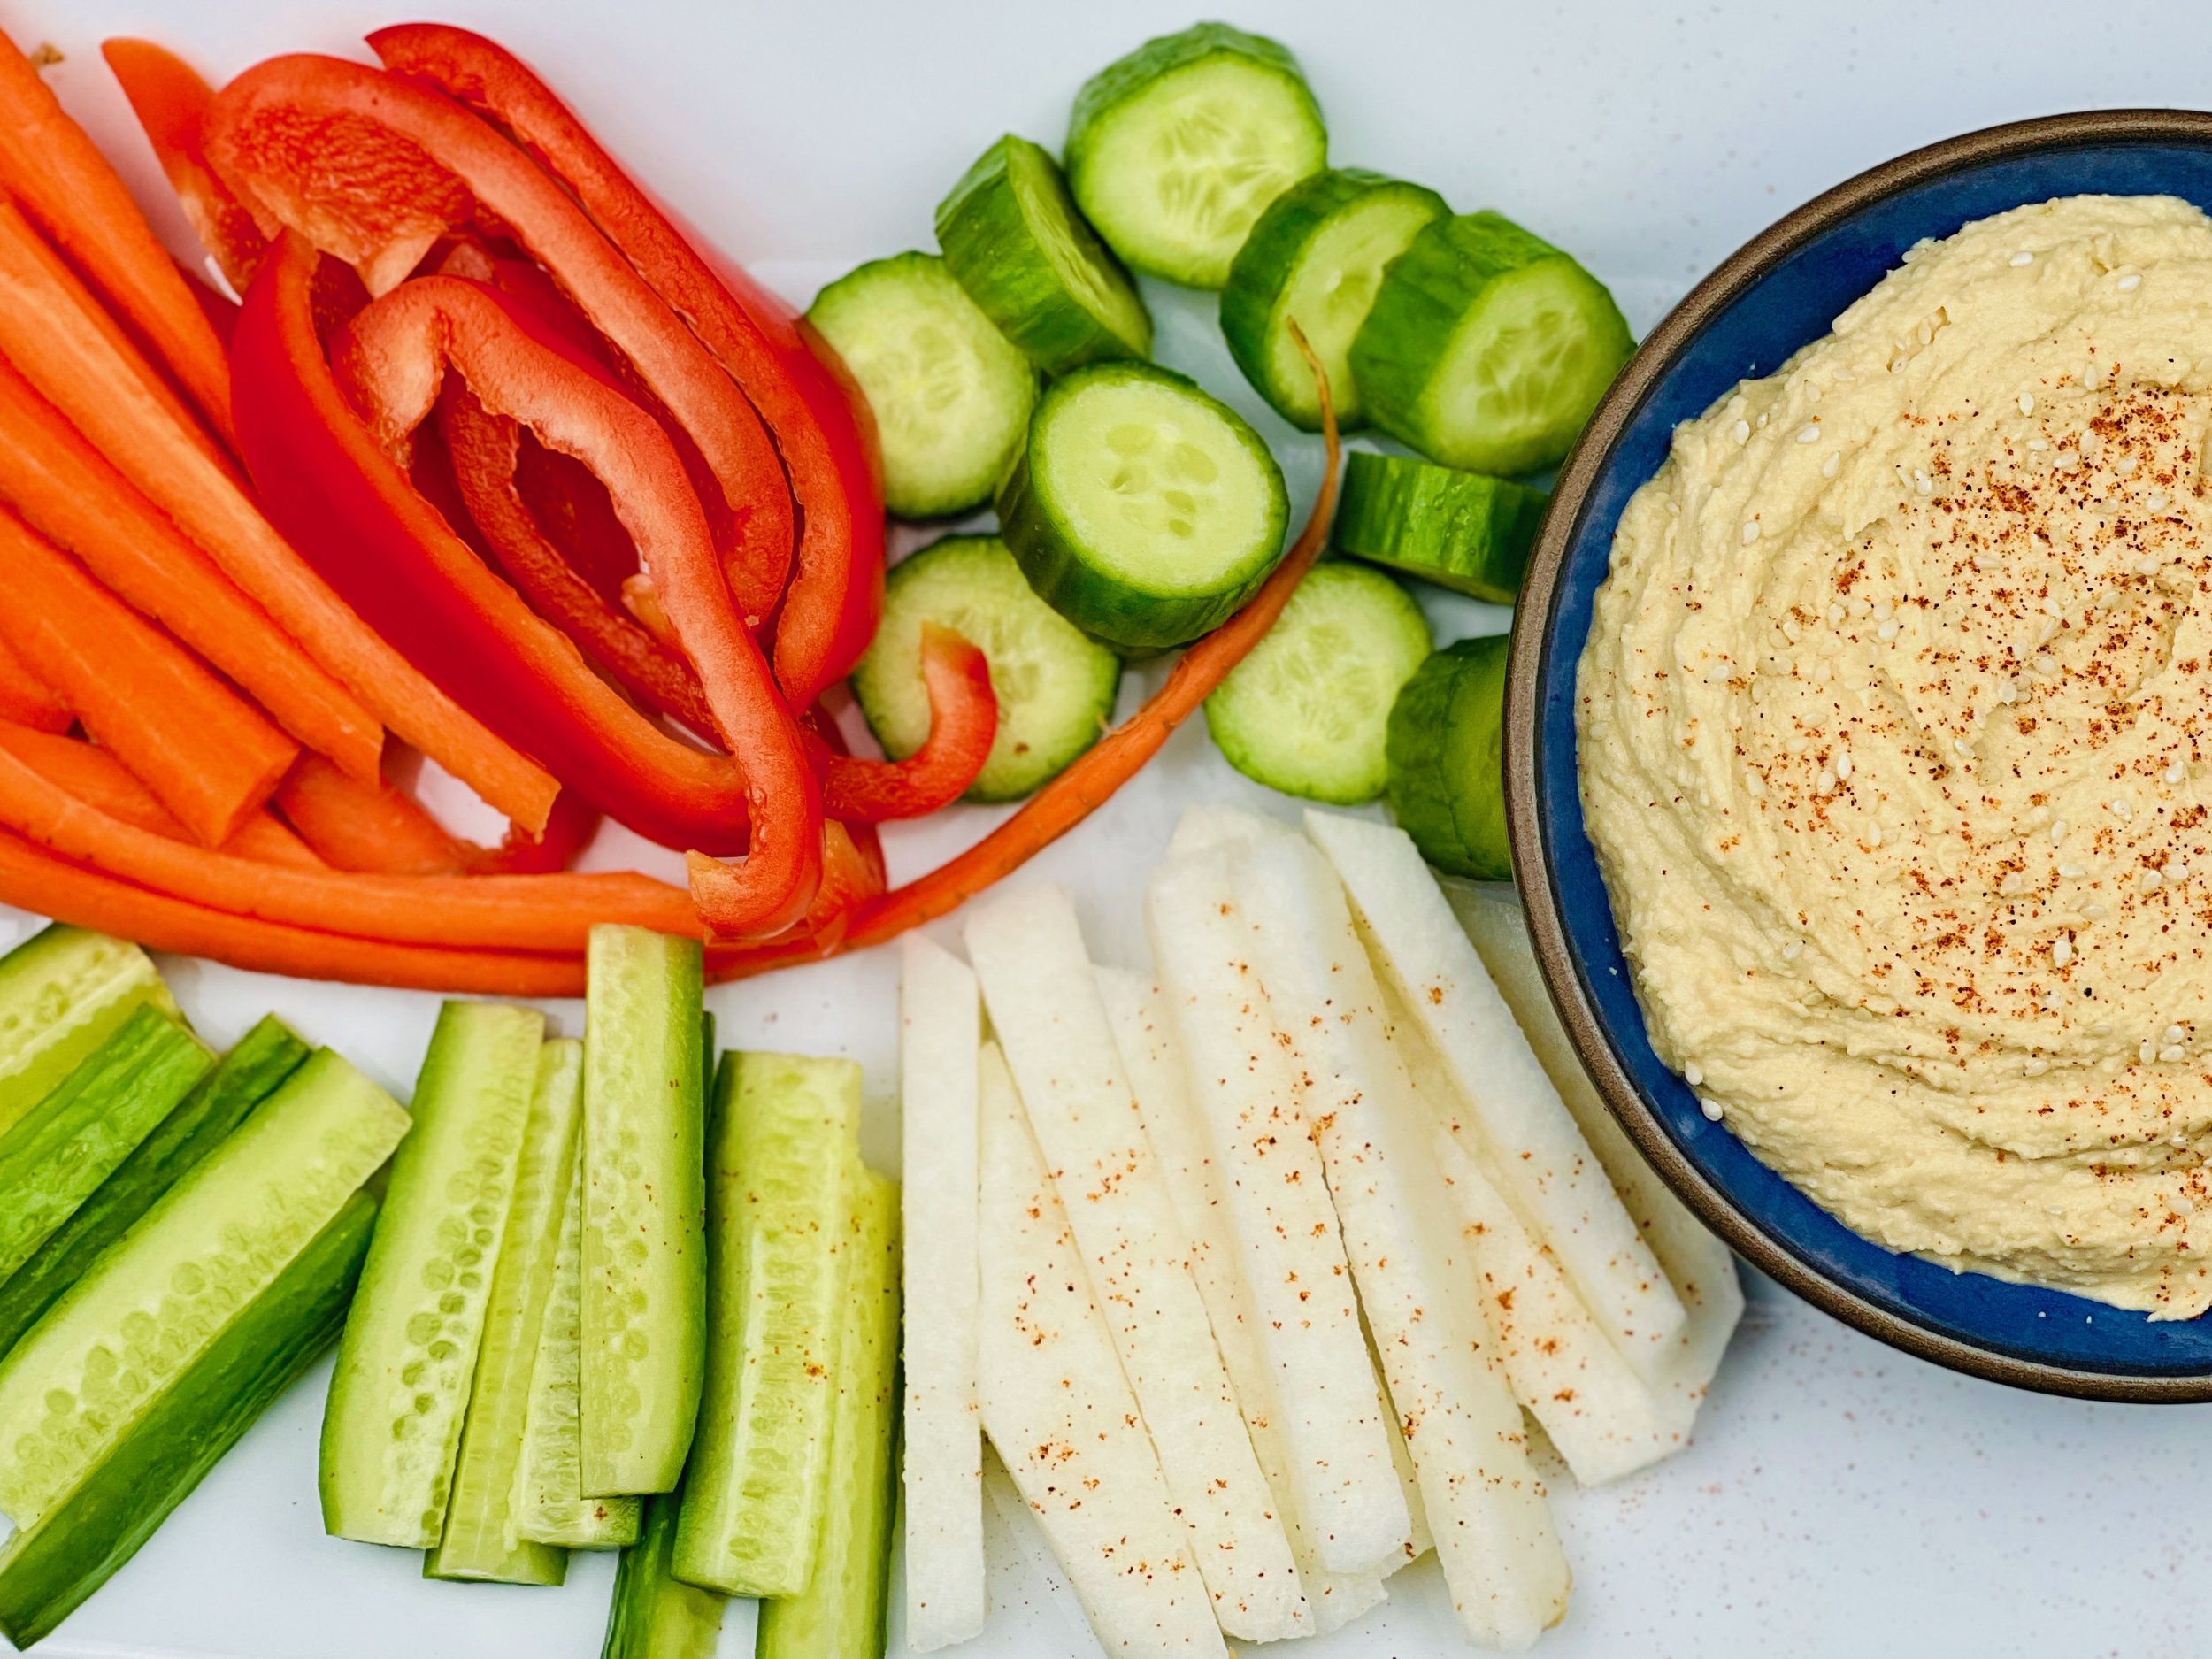
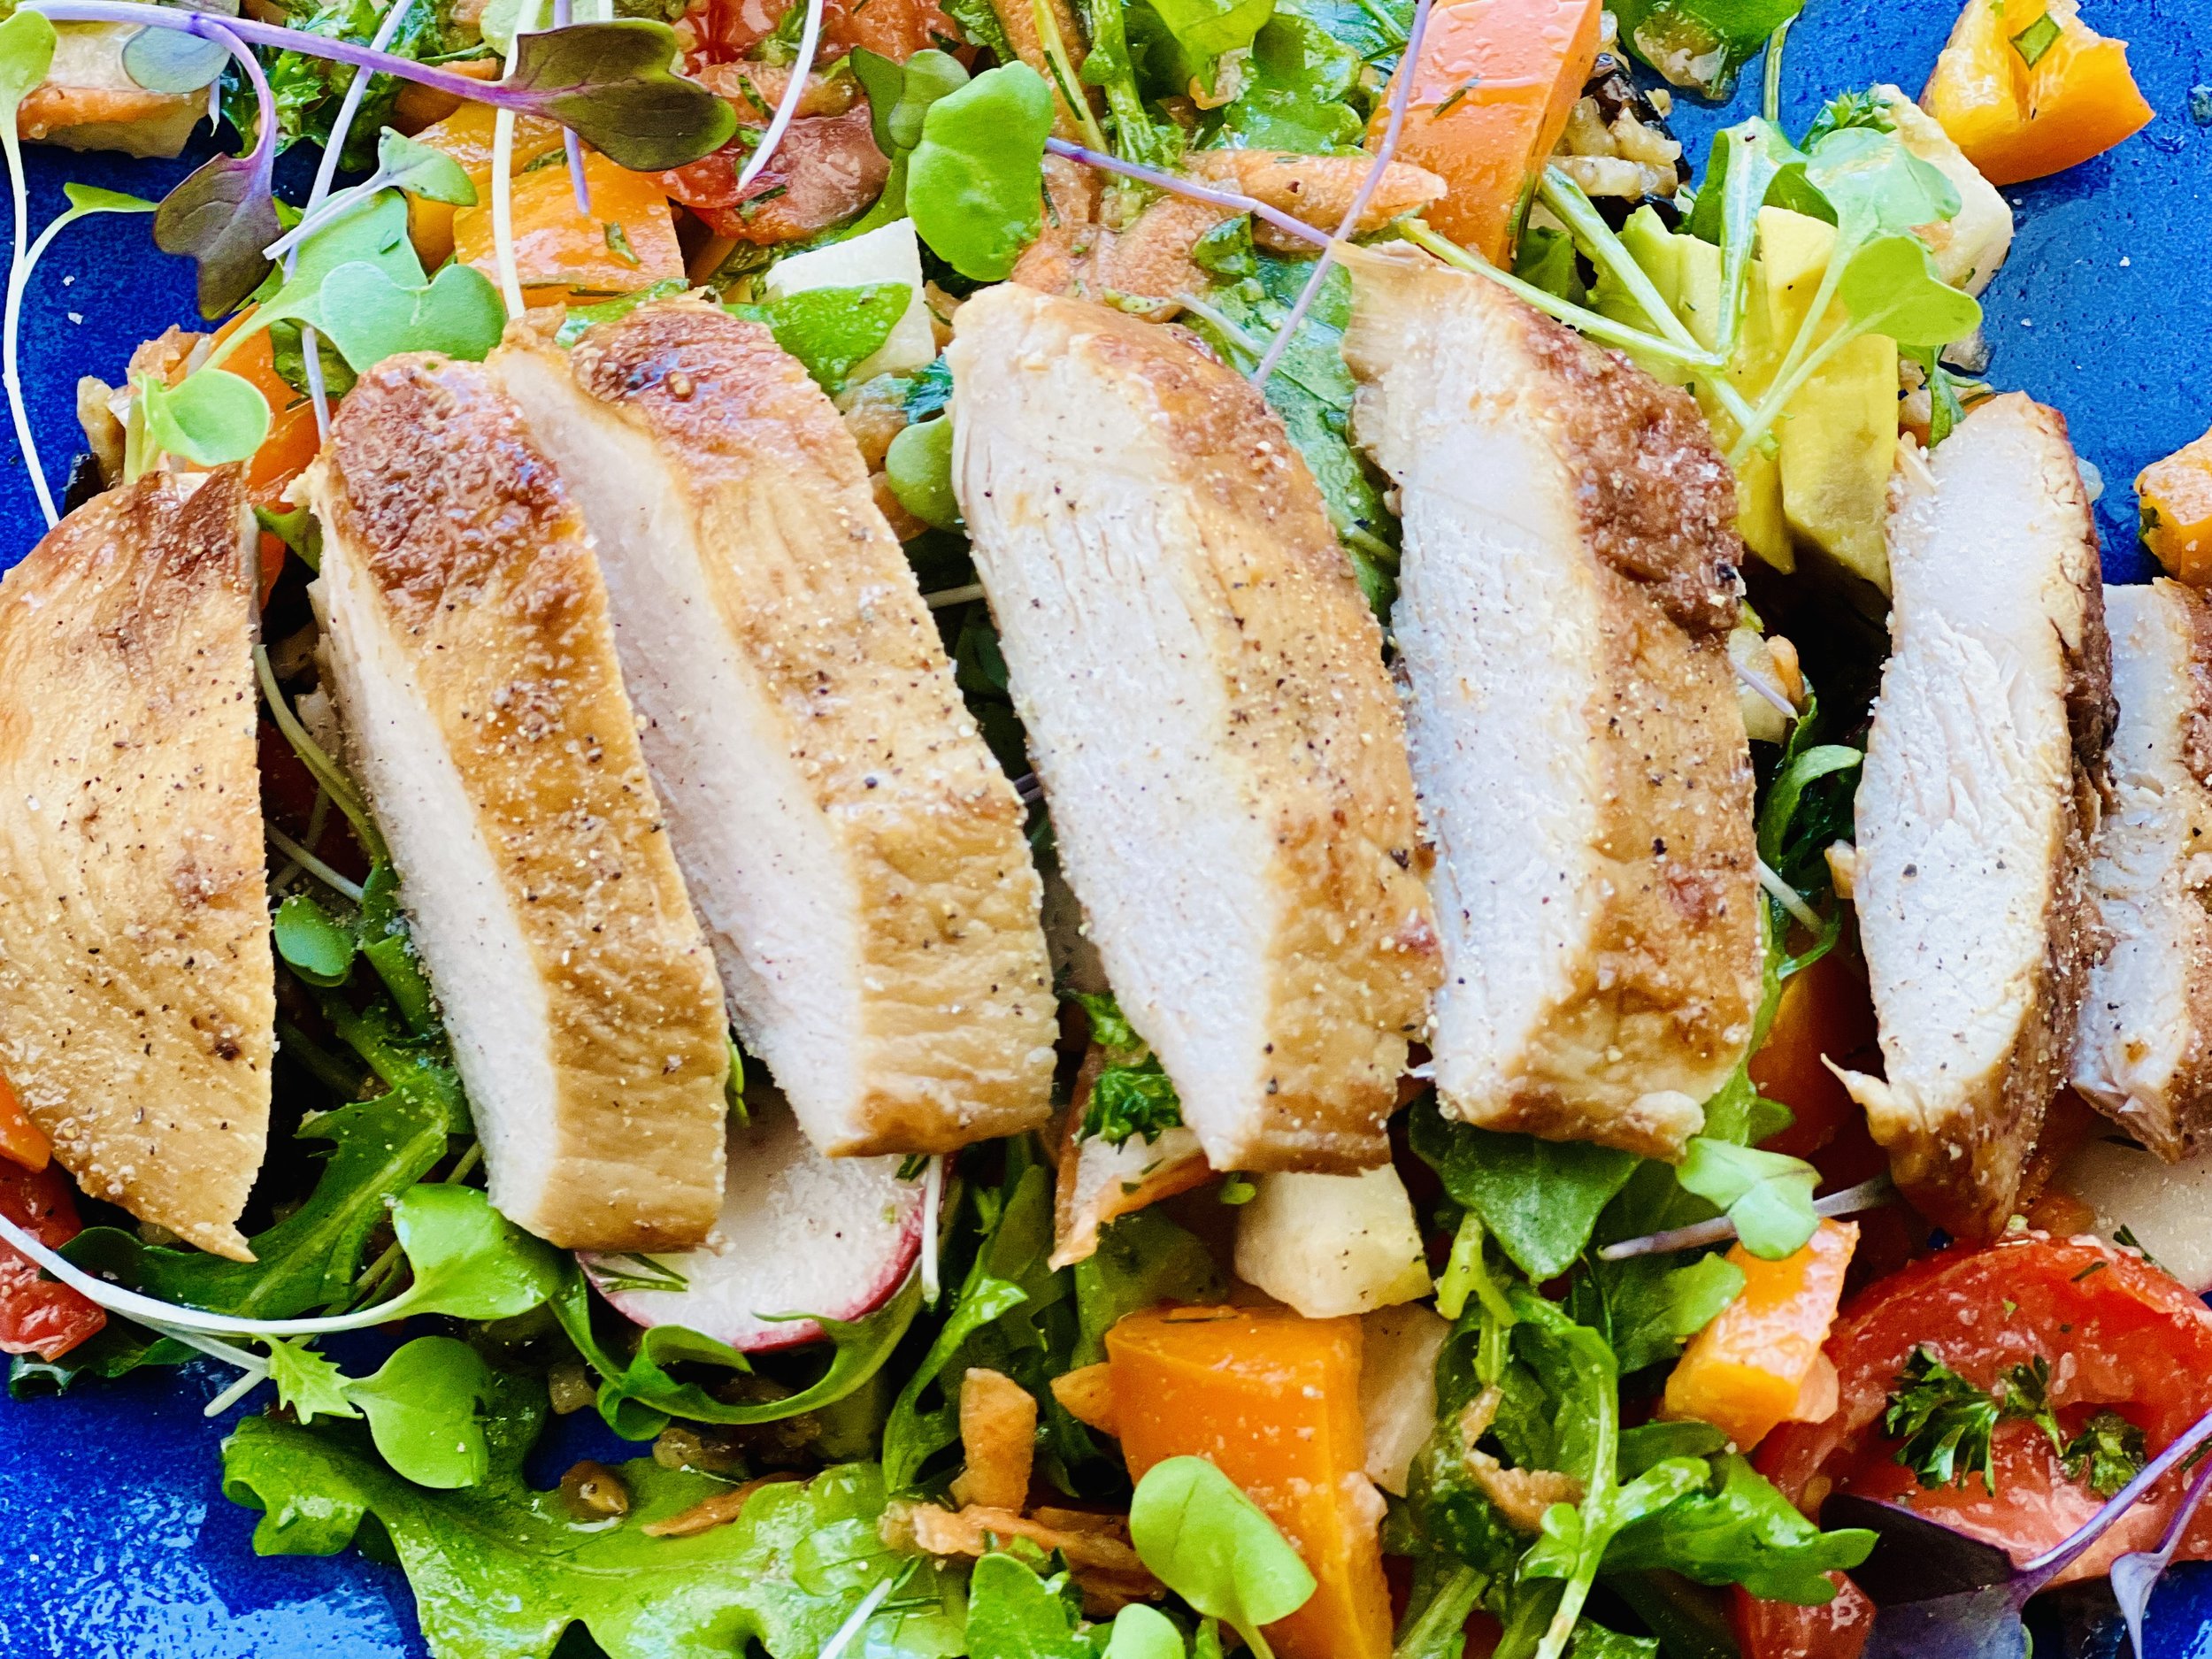
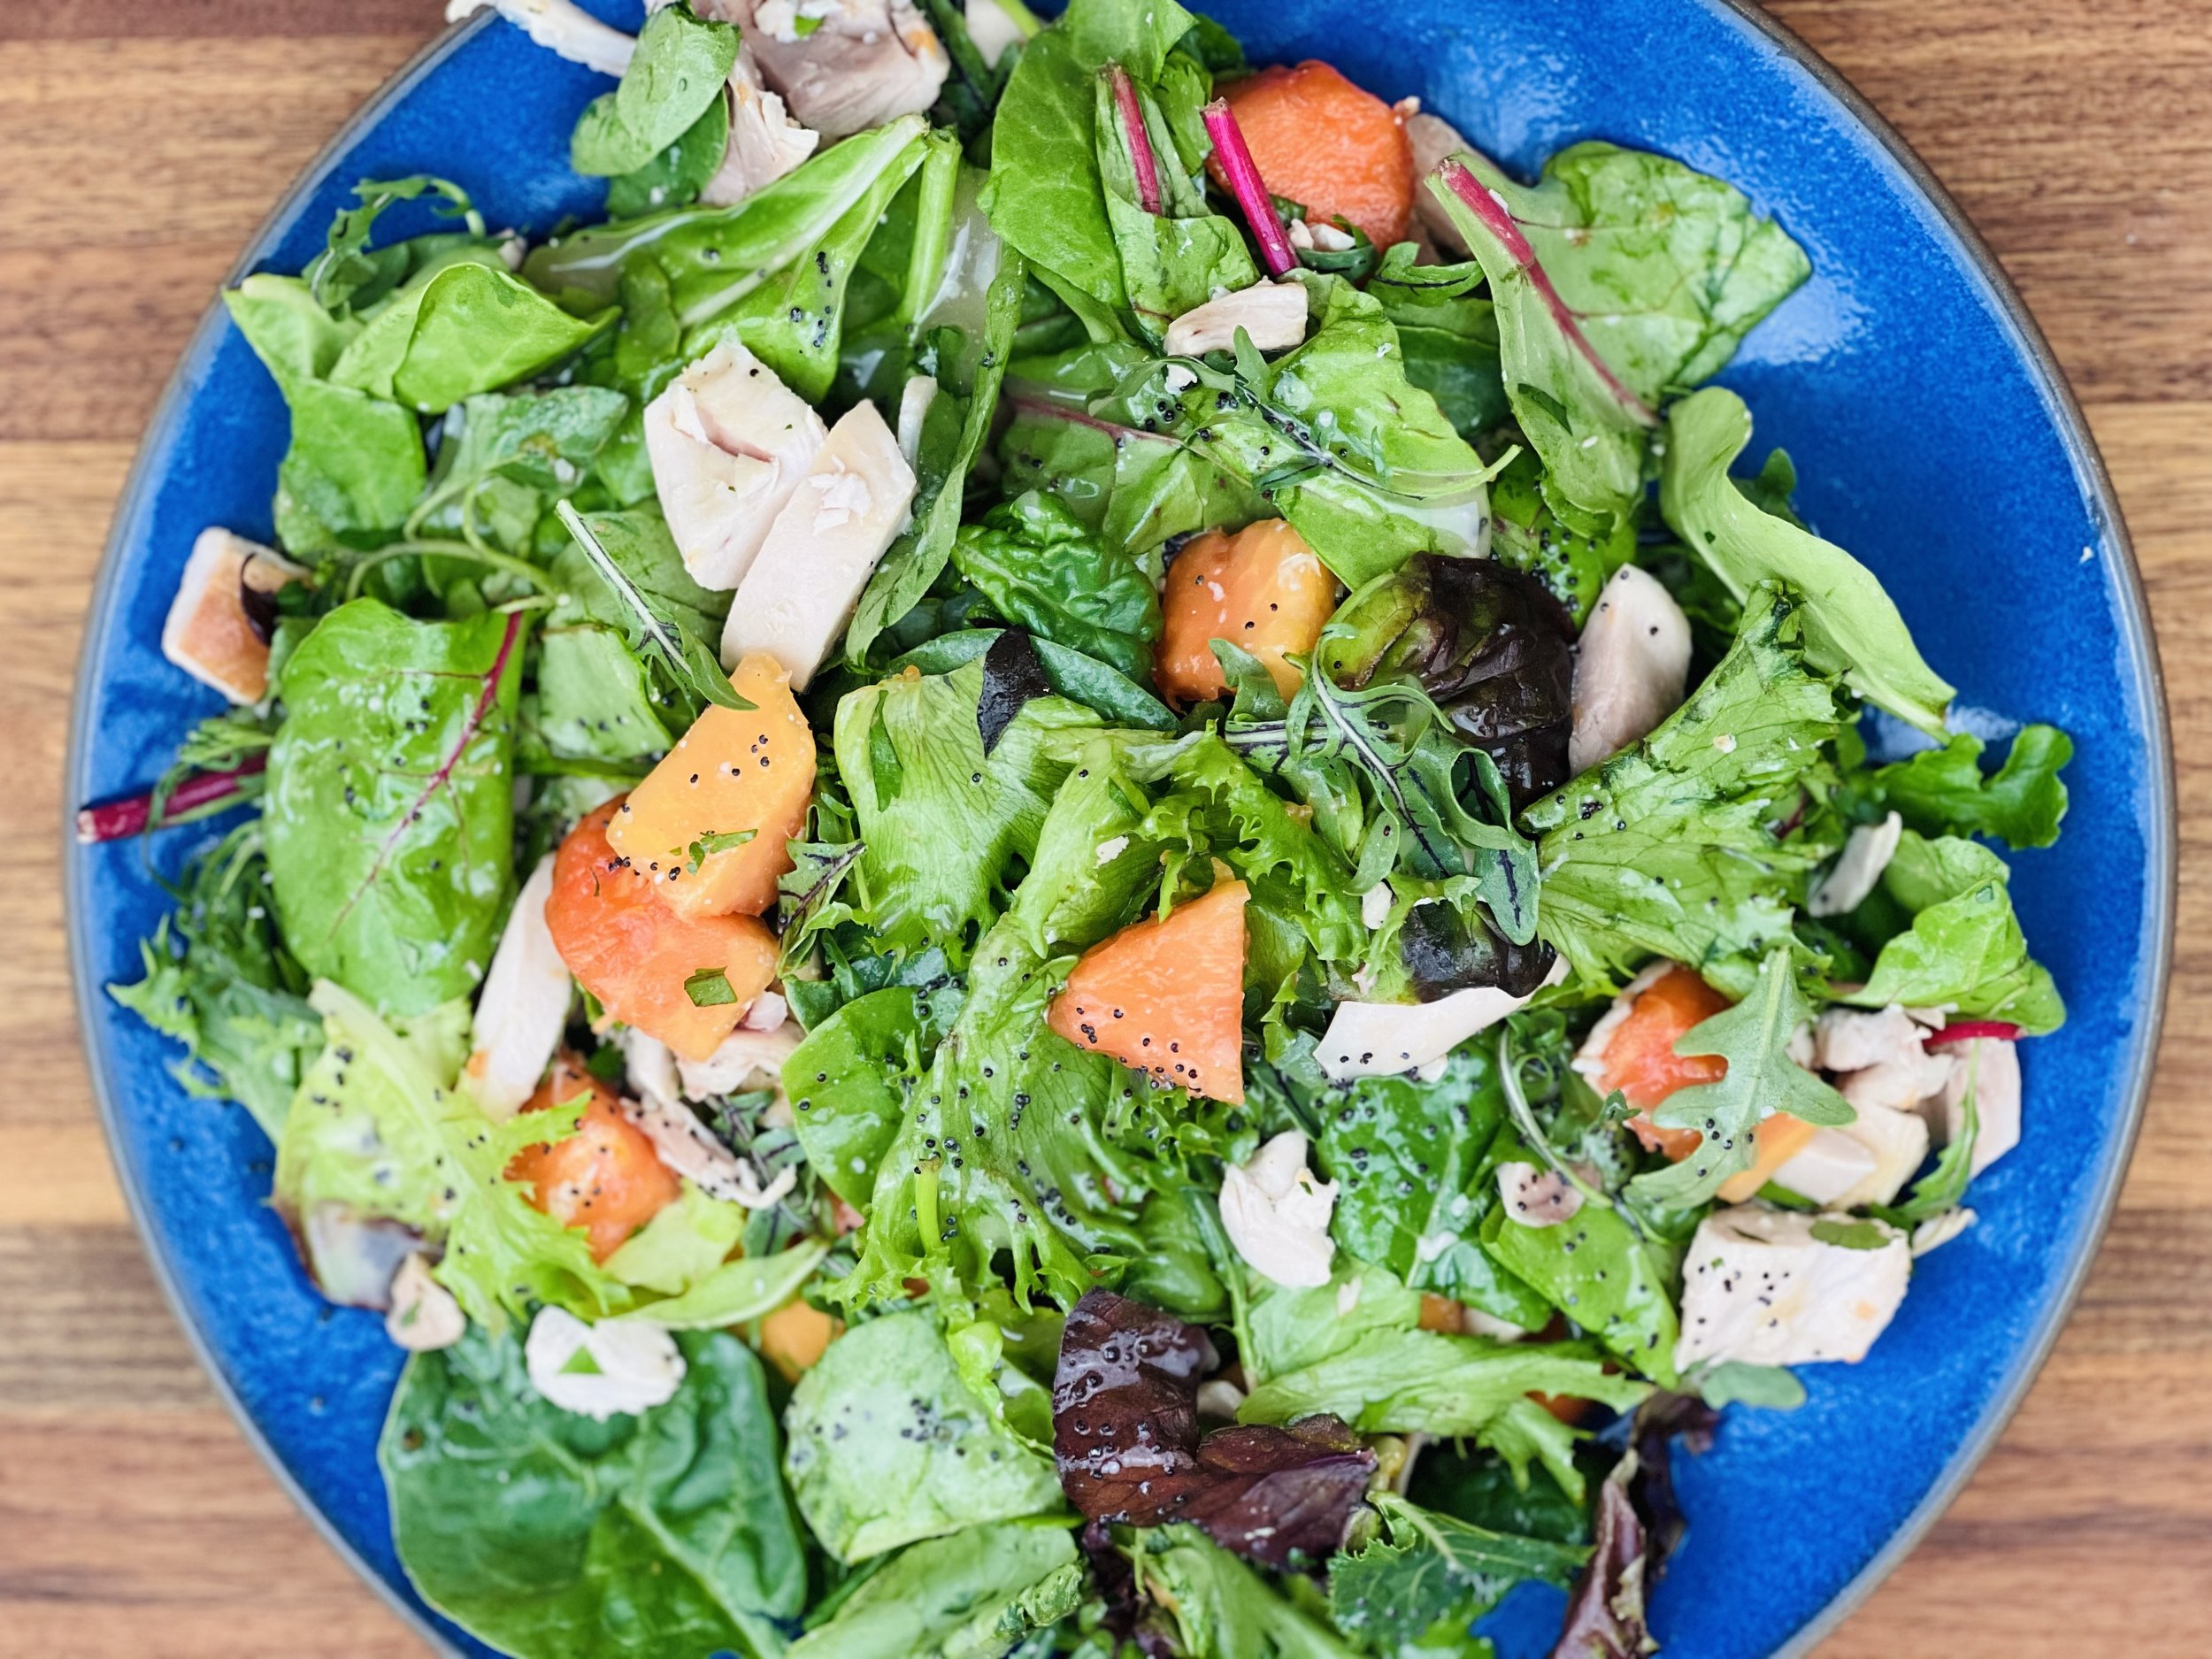
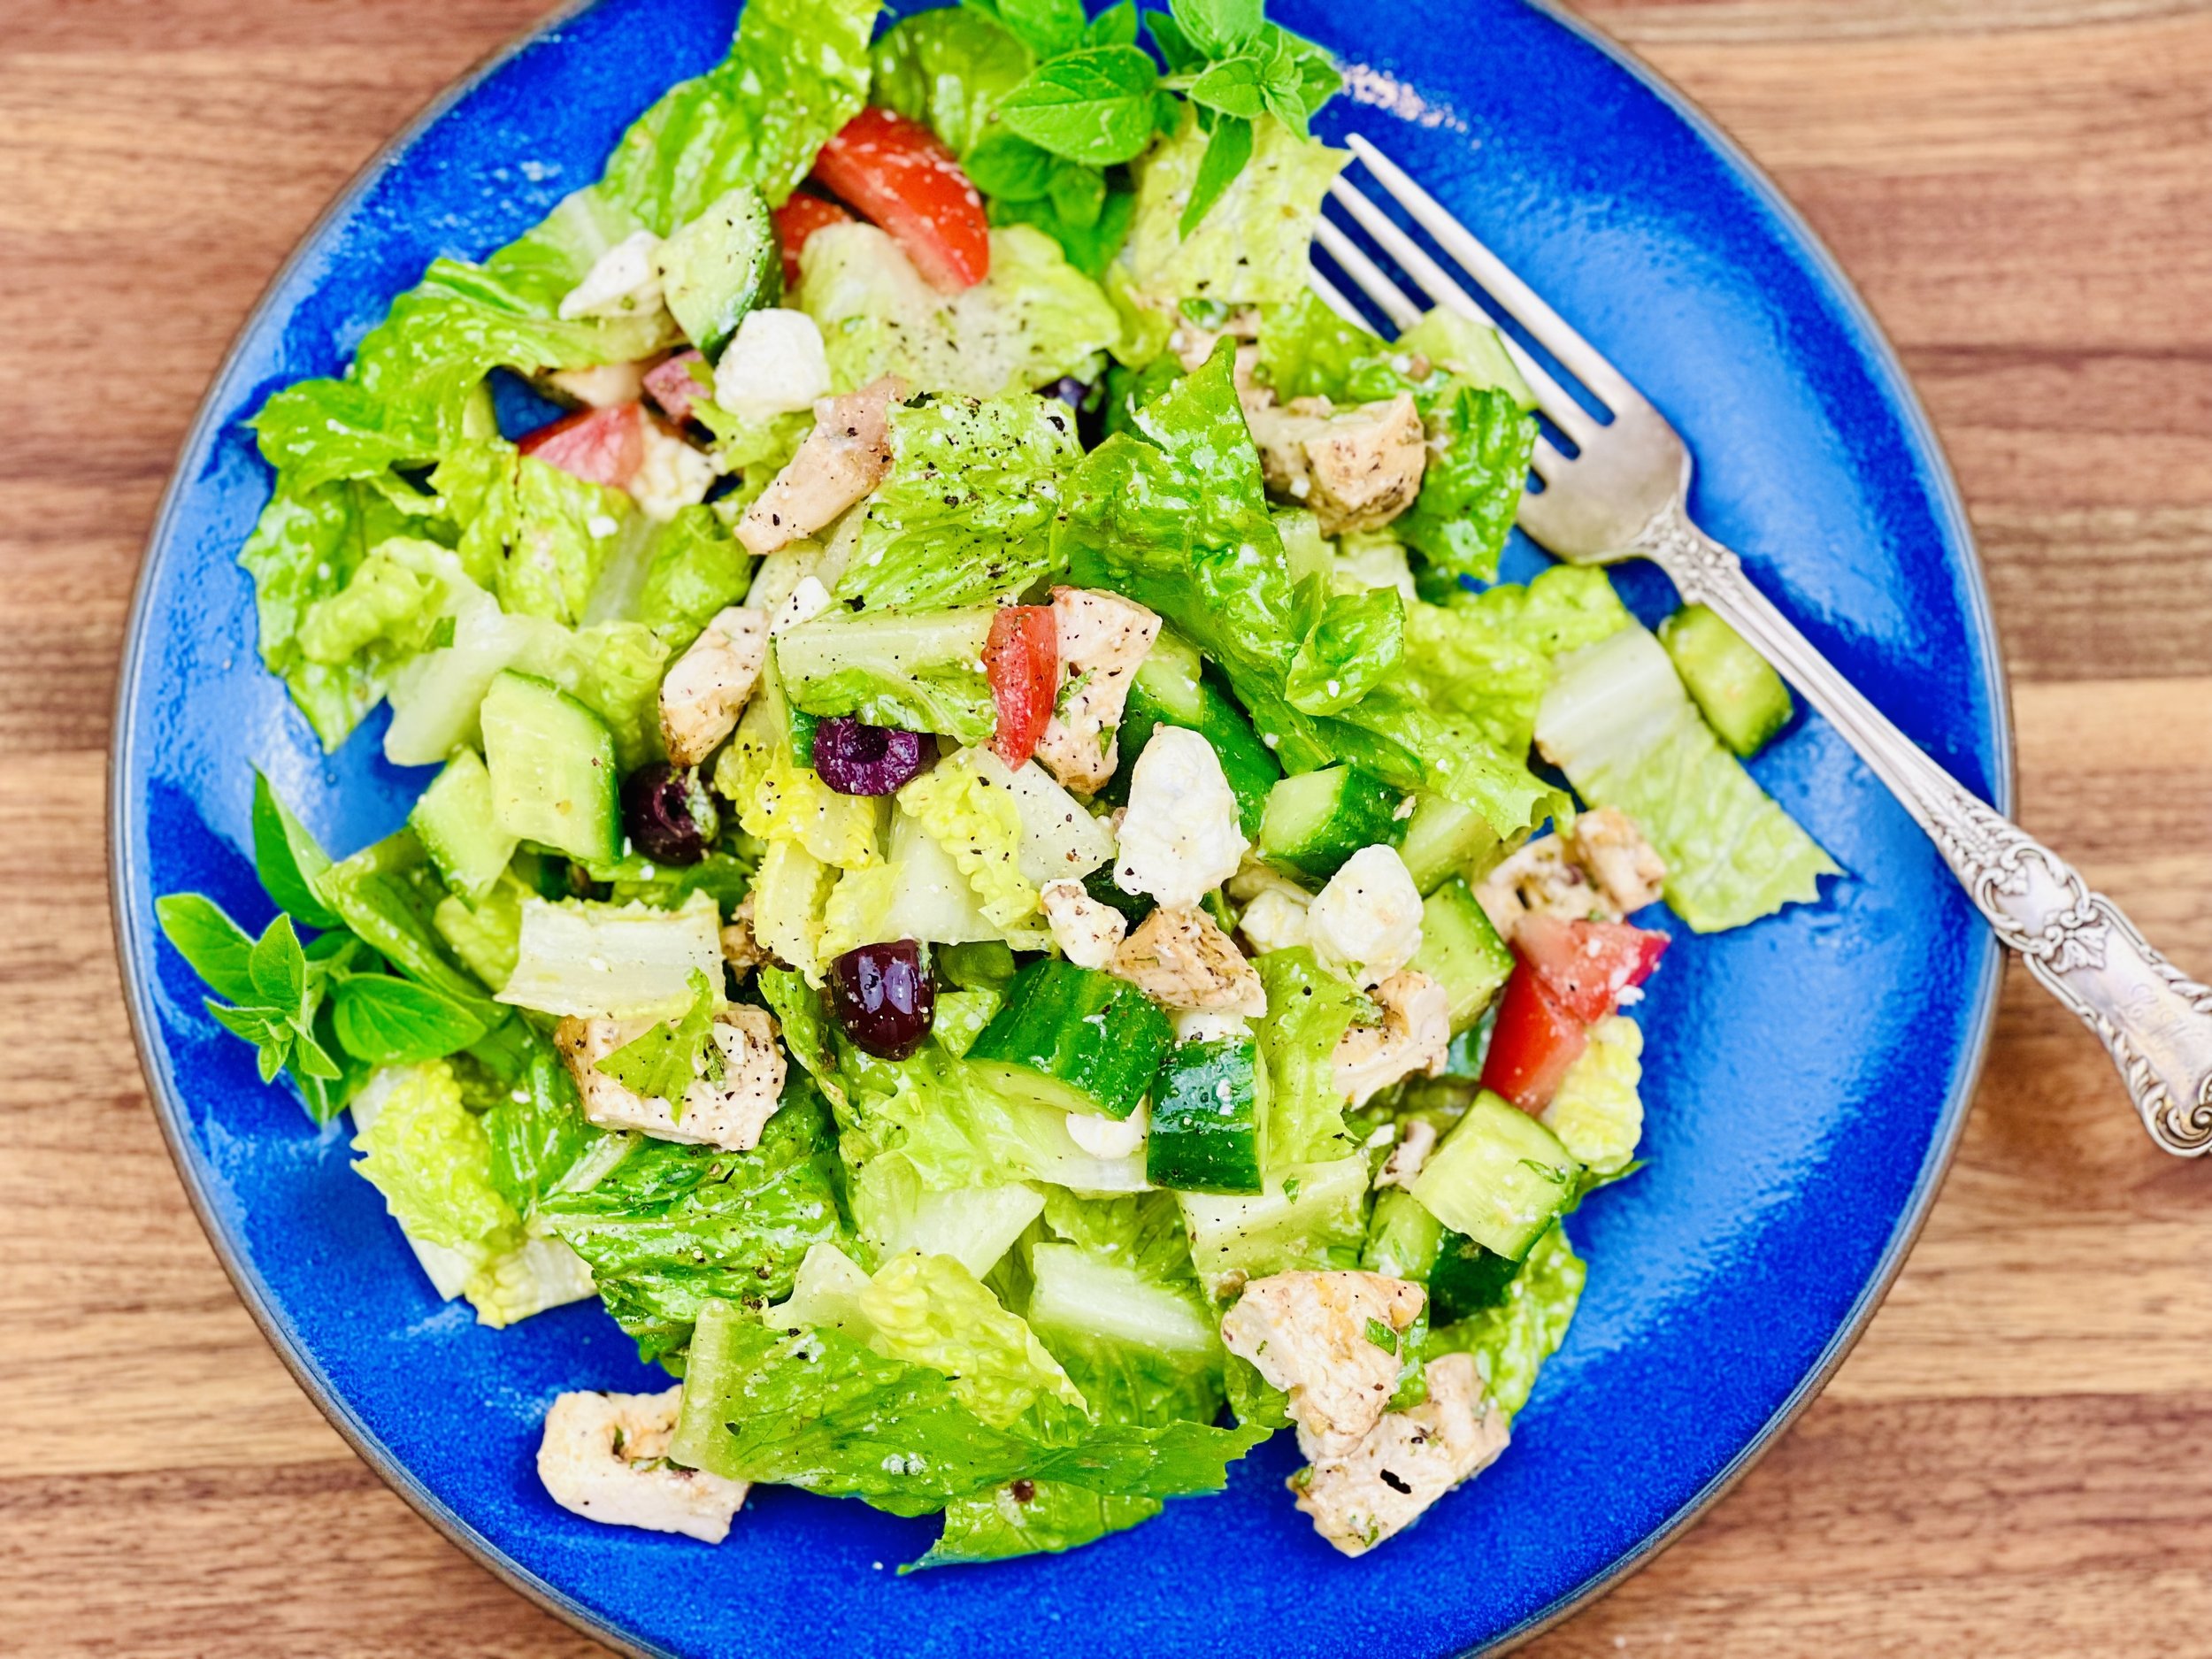
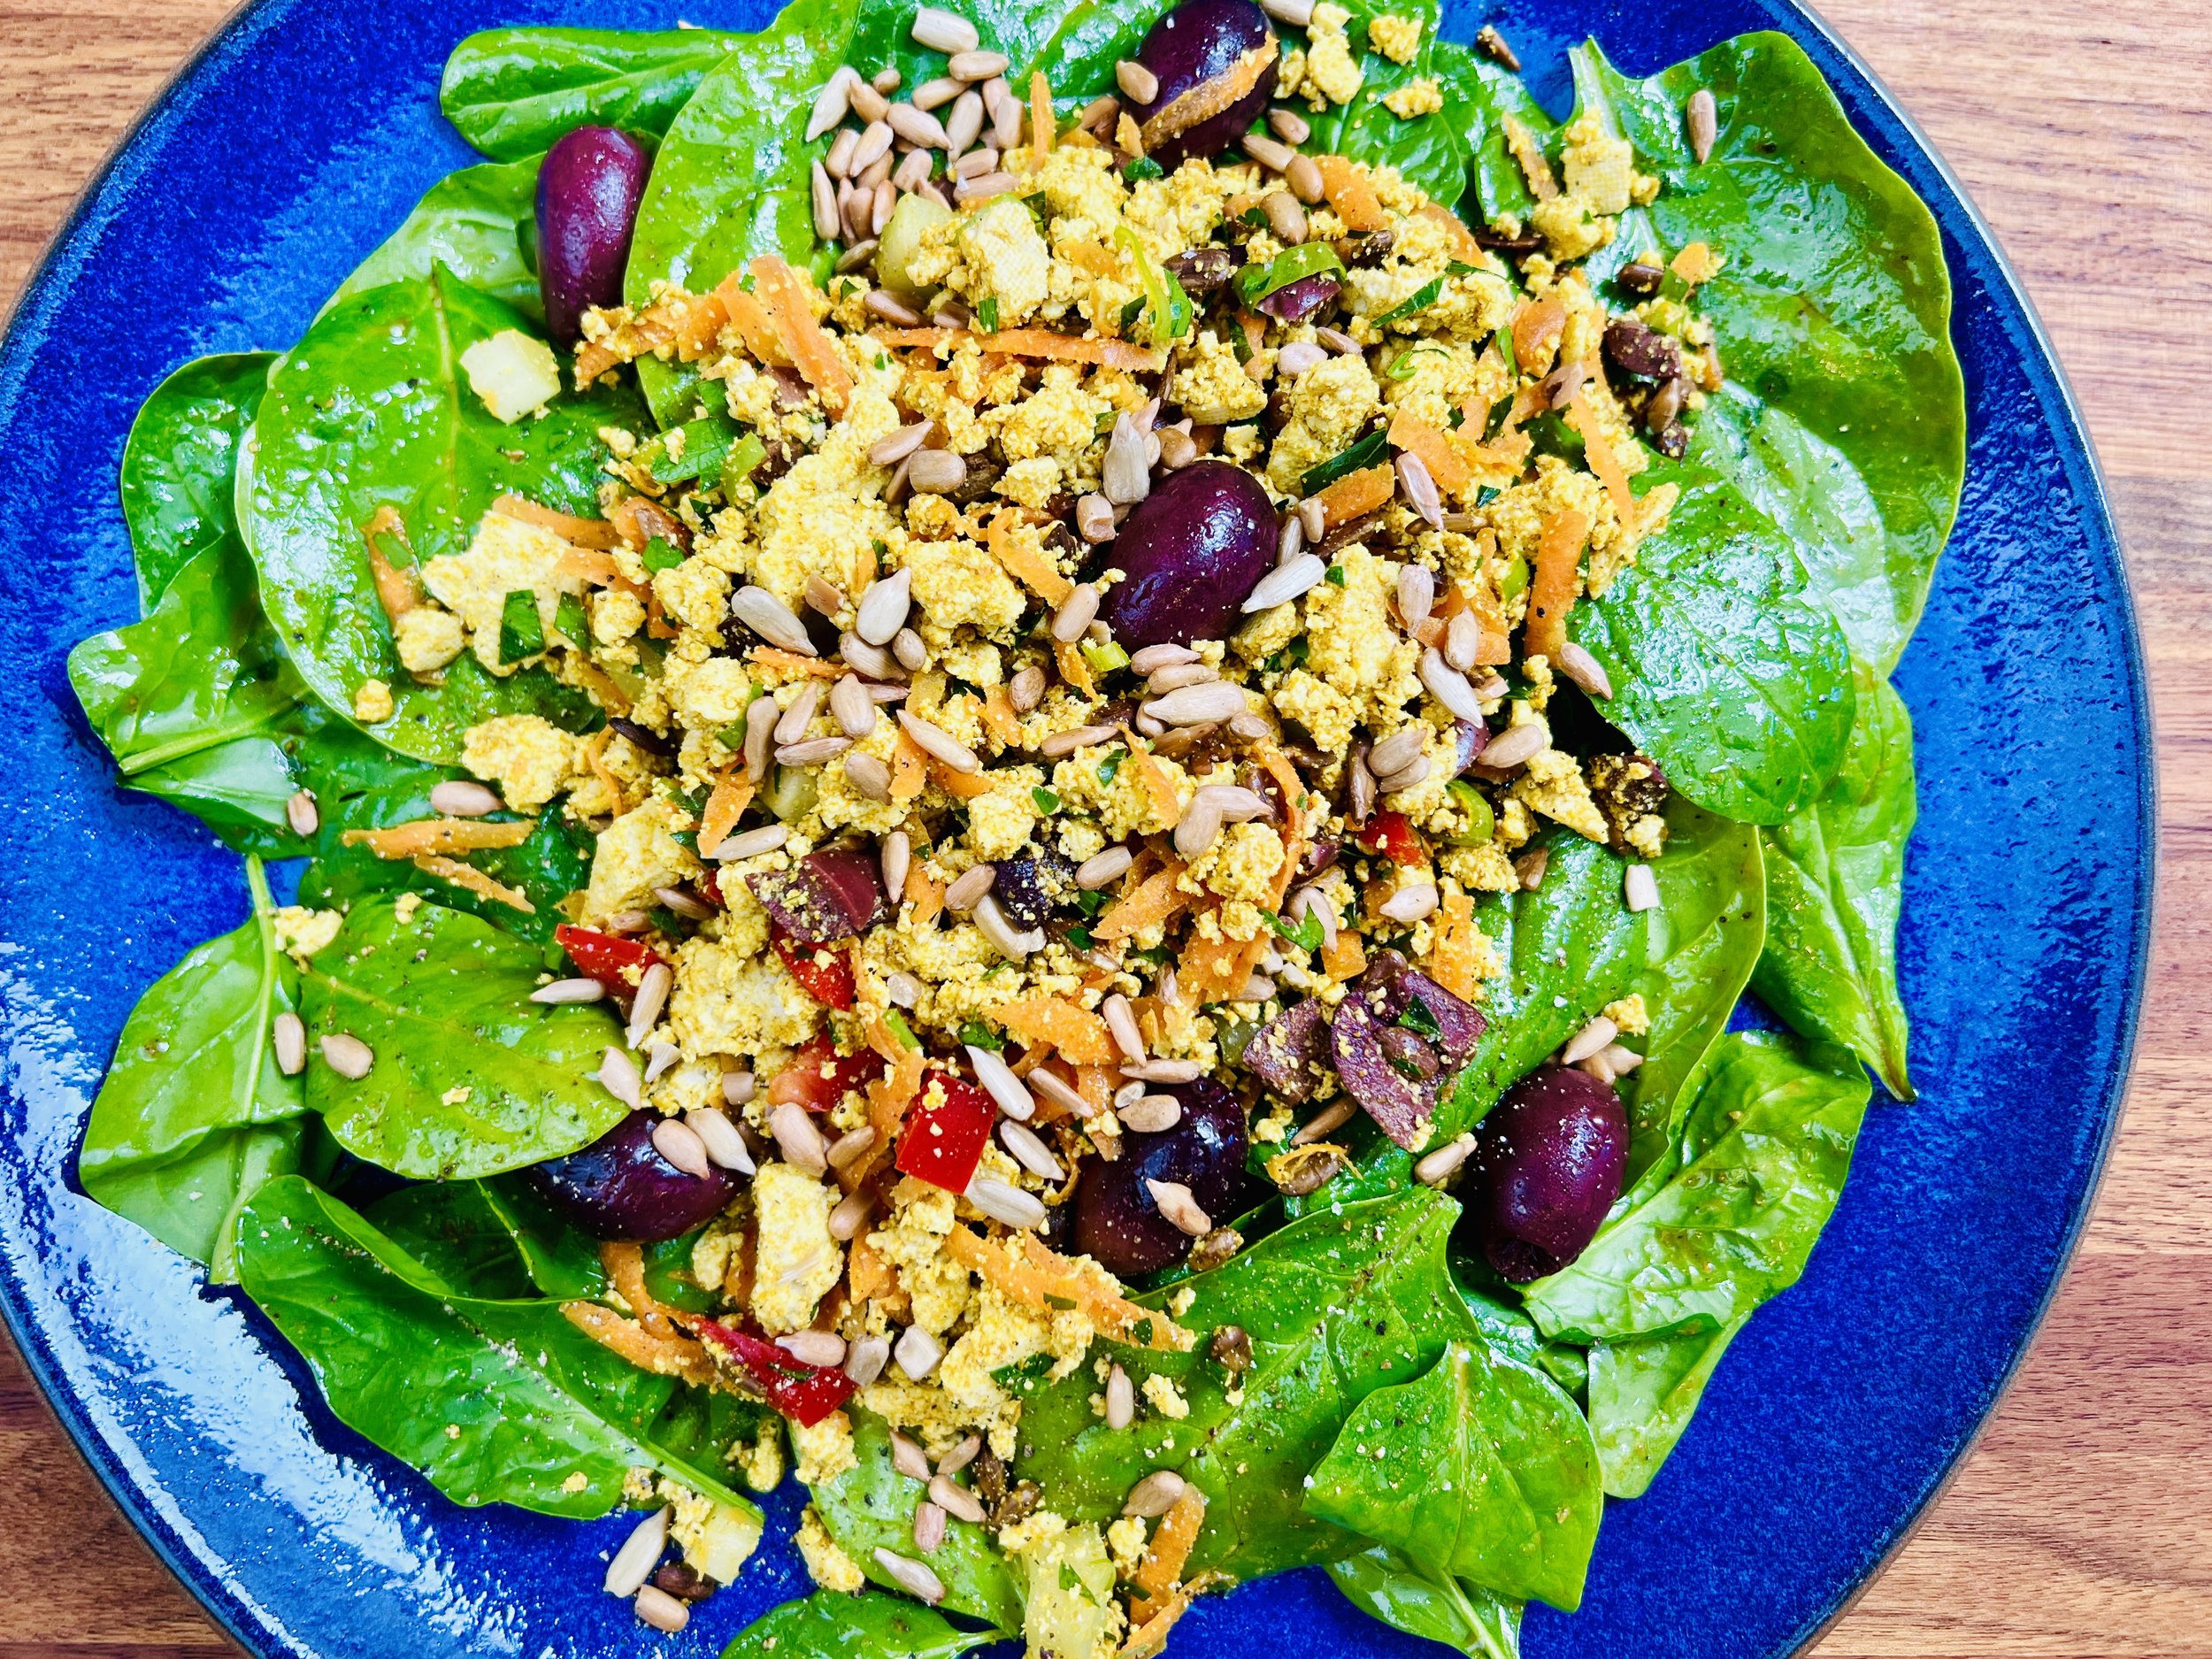
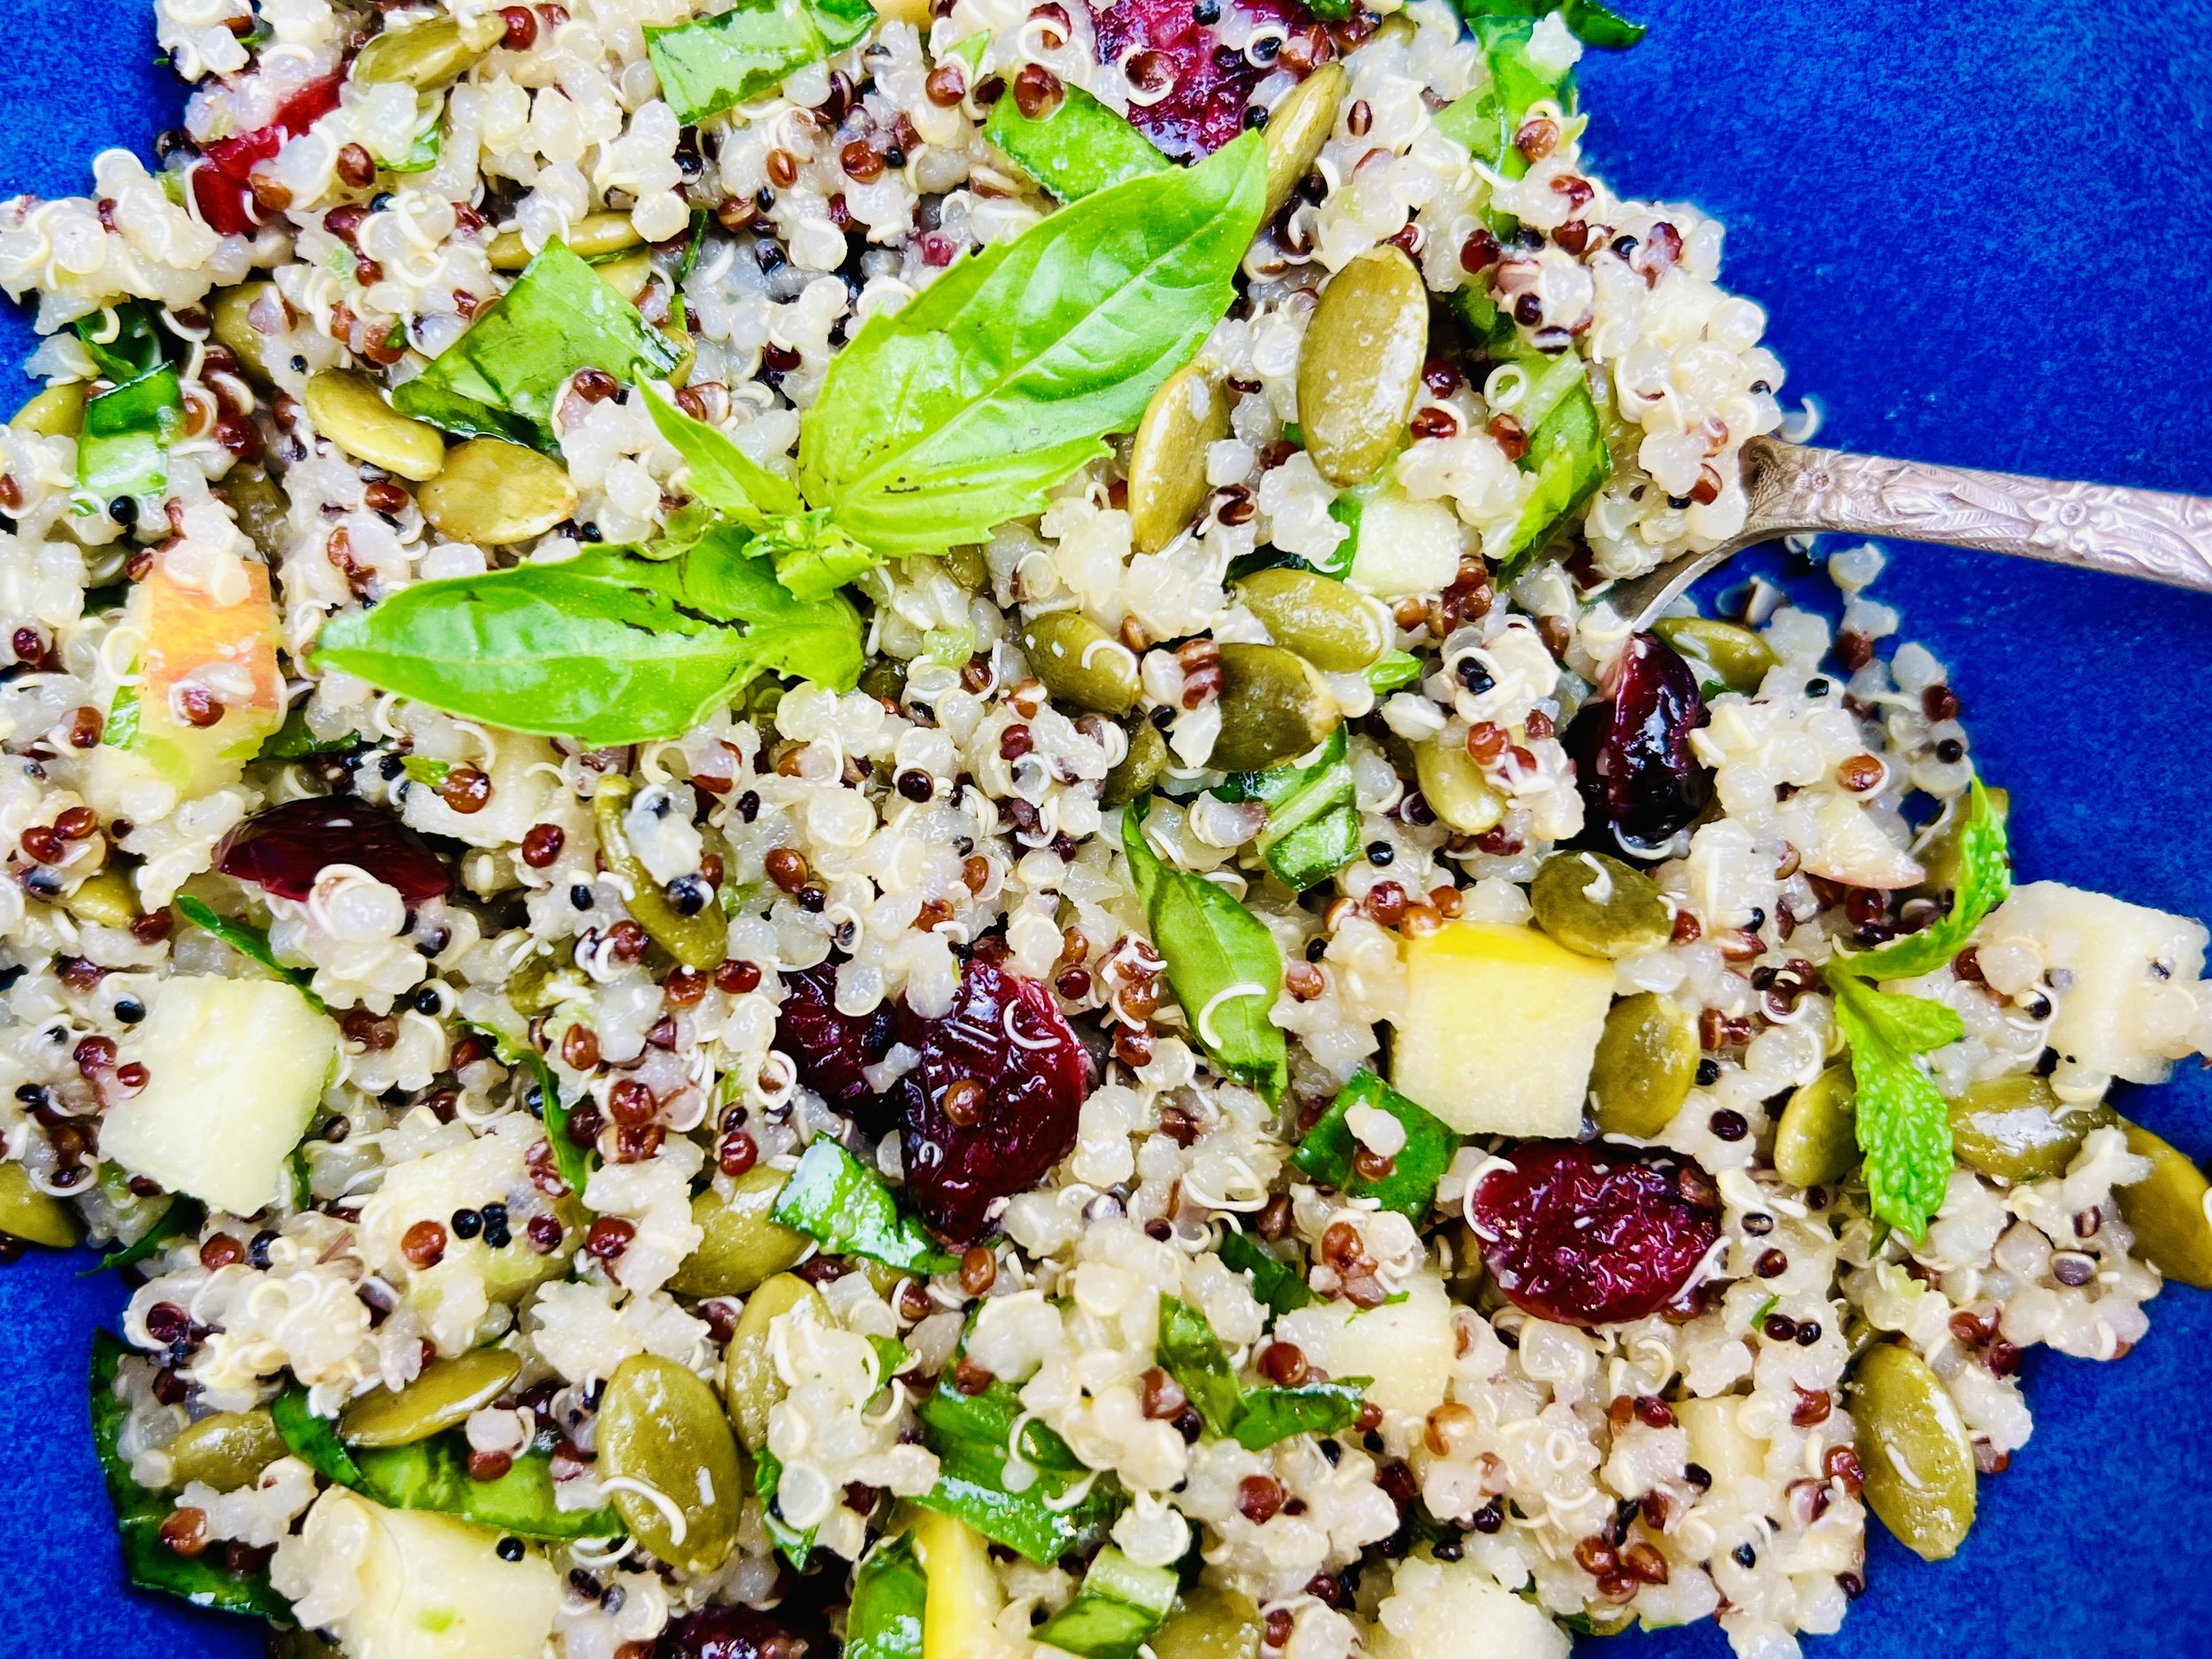
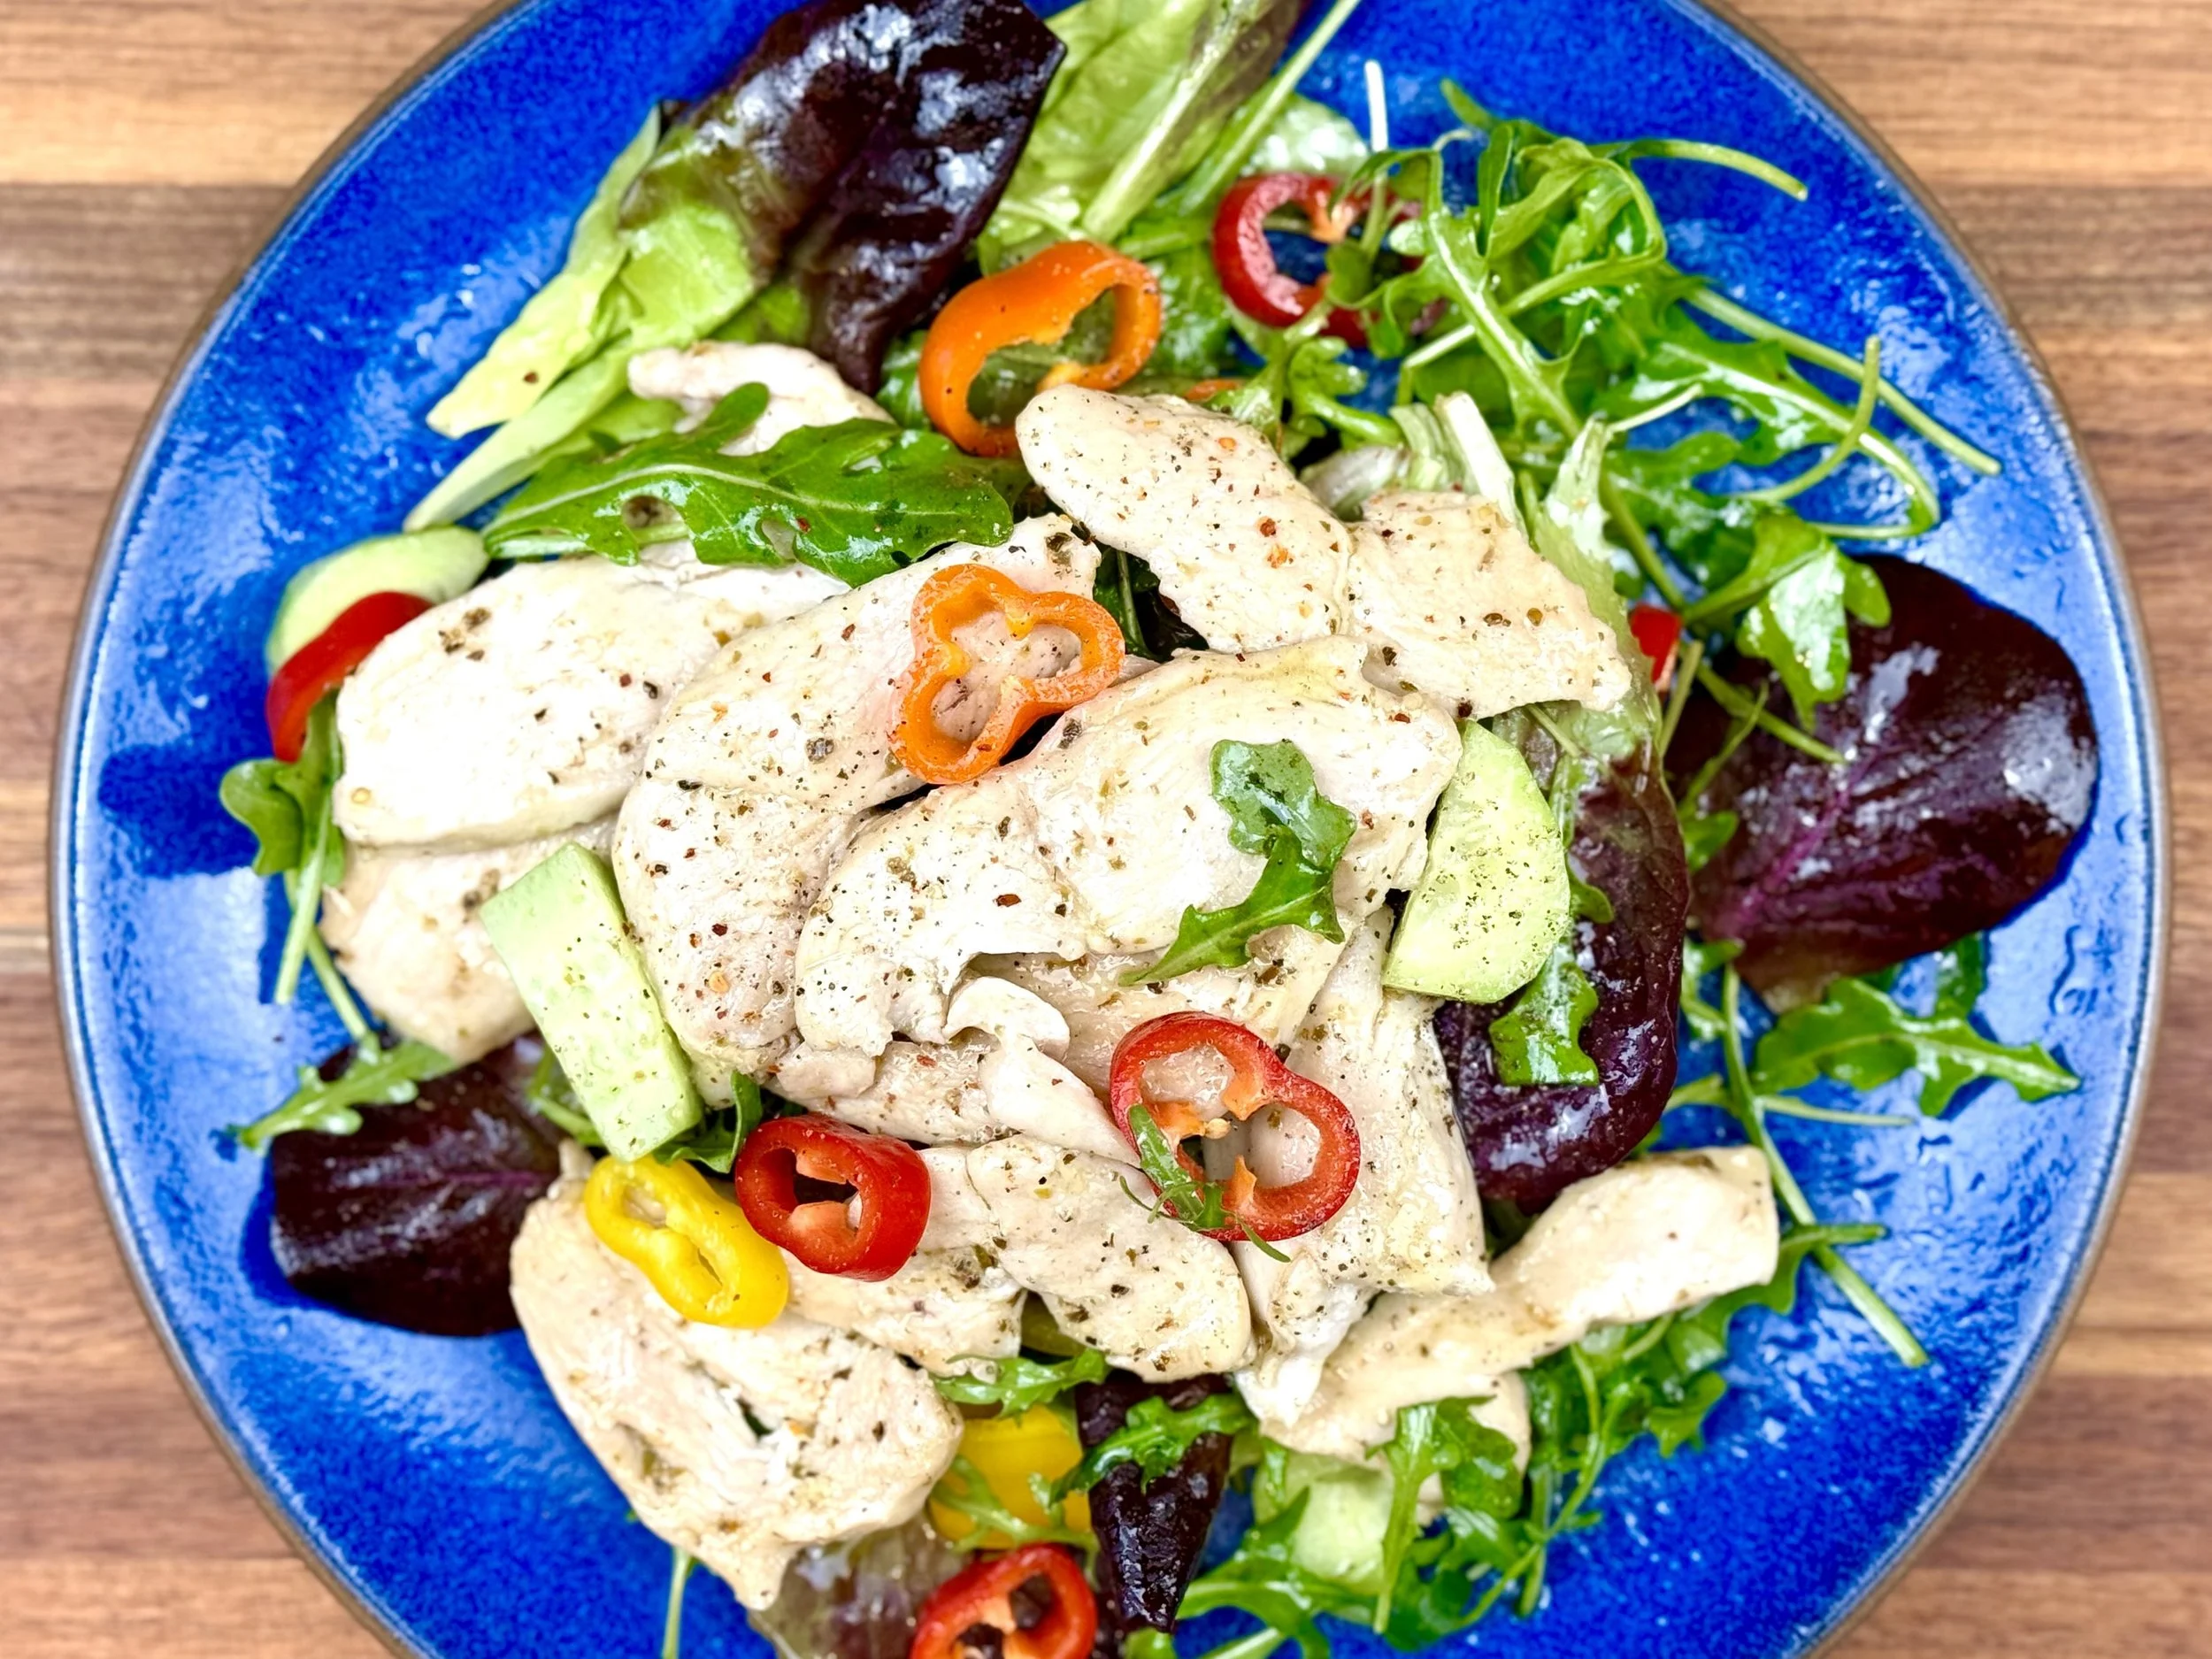
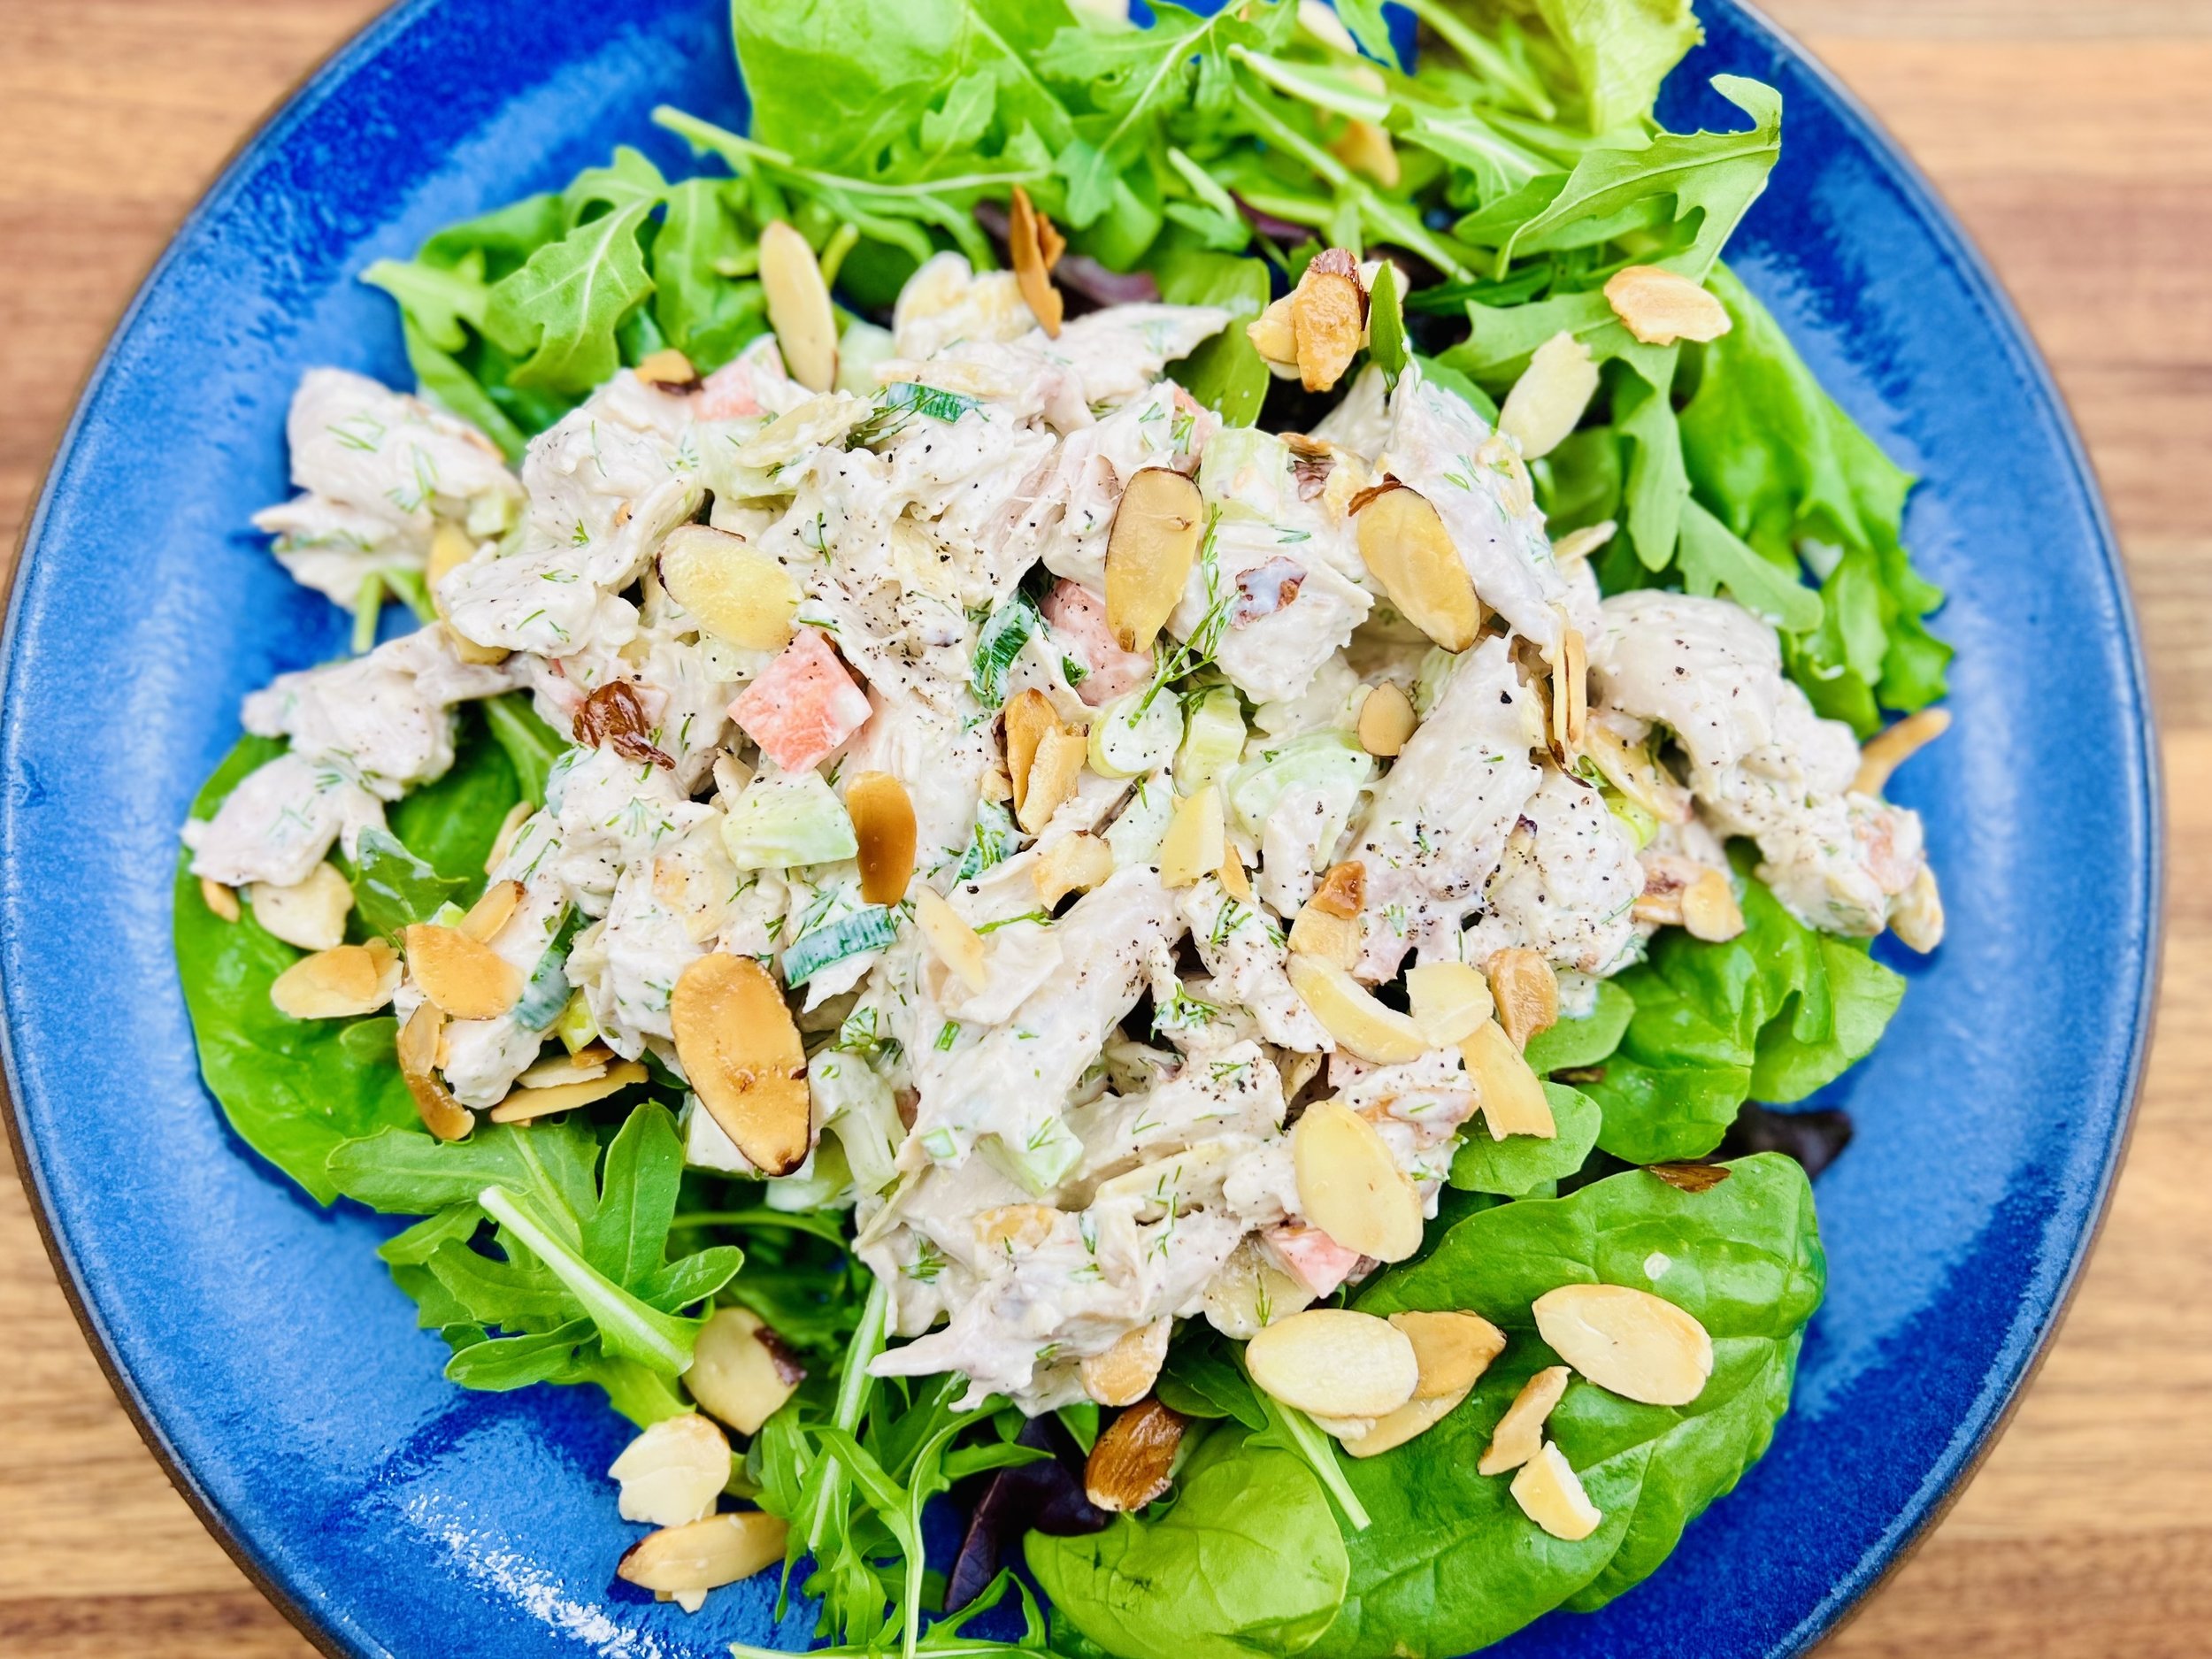
Easy Teriyaki Chicken Salad (low FODMAP)
15 Minutes prep • 15 Minutes cook • Low FODMAP • Gluten-Free • Lactose-Free • Serves 4
15 Minutes prep • 15 Minutes cook • Low FODMAP • Gluten-Free • Lactose-Free • Serves 4 • Ok to make ahead: Steps 1-2
This super simple salad is a great one to serve for a picnic, potluck, or when you have a variety of preferences at the table. The salad is hearty and full of variety so your gut biome will thank you, and the chicken is quick to fix and can be added separately so your veggie family/friends with thank you. It’s a win-win. And, it’s delicious!
Ingredients: Salad
4 cups mixed salad greens of your choice
2 Persian cucumbers, sliced
1 red or orange bell pepper, seeded and chopped
2 carrots grated
1 heirloom tomato or 3/4 cup cherry tomatoes, sliced
1/2 cup jicama, peeled and chopped (optional)
1/2 cup blueberries, washed (optional)
1/2 cup microgreens (optional)
2 tablespoons parsley, chopped (optional)
Ingredients: Dressing
1/3 cup olive oil
1/4 cup balsamic vinegar
2 tablespoons white balsamic vinegar
1/2 teaspoon Kosher salt and 1/4 teaspoon black pepper (or to taste)
Ingredients: Chicken
4 small or 2 large chicken breasts, boneless, skinless
2 tablespoons garlic-infused olive oil
2 tablespoons Smoke N Sanity Teriyaki seasoning (this seasoning is low FODMAP and very low sodium)
2 tablespoons of parsley, chopped
Directions
(1) Salt the chicken: This step is optional but results in more flavorful and tender meat. Remove the chicken from the packaging and lay the meat on a rimmed plate or baking dish. If the breasts are very thick, slice them in half horizontally. Season both sides of each piece of chicken lightly and evenly with Kosher salt. Cover with plastic wrap and refrigerate for 4 hours, overnight, or until ready to cook. (I like to salt meat when I bring it home from the market then carefully re-wrap it and keep it in the refrigerator for a day or two until I’m ready to do something with it.)
(2) Cook the chicken: Put the oil in the frying pan and warm over medium-high heat. Sprinkle the chicken on one side with 1 tablespoon Smoke N Sanity Teriyaki seasoning and, once the oil is hot in the frying pan, lay the chicken breasts seasoned side down in one layer in the pan. Cook them in two batches if needed to prevent crowding (adding a bit more oil before adding the second batch). The oil should sizzle but not smoke when you put the chicken in.
Sprinkle the top side of the chicken with 1 tablespoon Smoke N Sanity Teriyaki seasoning as it cooks. Cook for about 5 minutes until it’s nicely browned on the bottom. Flip the chicken and cook for another 3 - 5 minutes until nicely browned and just done in the middle. When the chicken is cooked, remove it to a plate and let cool, or keep it warm if you like, until ready to serve. Let the chicken rest at least 5 minutes before cutting it into thick slices before adding it to the salad. If there’s any juice from the cooked chicken on the plate, drizzle it over the chicken so you don’t miss a drop of flavor.
(3) Make the salad: Meanwhile, wash, peel, chop, grate, and combine all the salad ingredients in a bowl. Make the dressing. Toss the dressing with the salad.
(4) Plate and serve: Put a generous helping of salad on each plate and lay the chicken on top of the salad. Sprinkle with chopped parsley. Serve with some fresh (real) sourdough bread.
Eat and enjoy every bite because you can!
Recipe note: I use Diamond Crystal Kosher salt in all my recipes because it has a wonderful flat and crisp flake that tastes delicious. It is also the least salty salt available so you can use it more liberally as a seasoning than you can table salt or sea salt. If you use another type of salt, you may need to reduce the amount so it is not over-salted.
Link note: This post contains links for you to easily purchase items listed on the page. In some cases, we have provided a special discount code for IBS Game Changers so be sure to use it when you purchase an item to get the discount that has been arranged just for you! As an Amazon Associate, I earn a commission from qualifying Amazon purchases.
More Deliciously Low FODMAP™ salad recipes

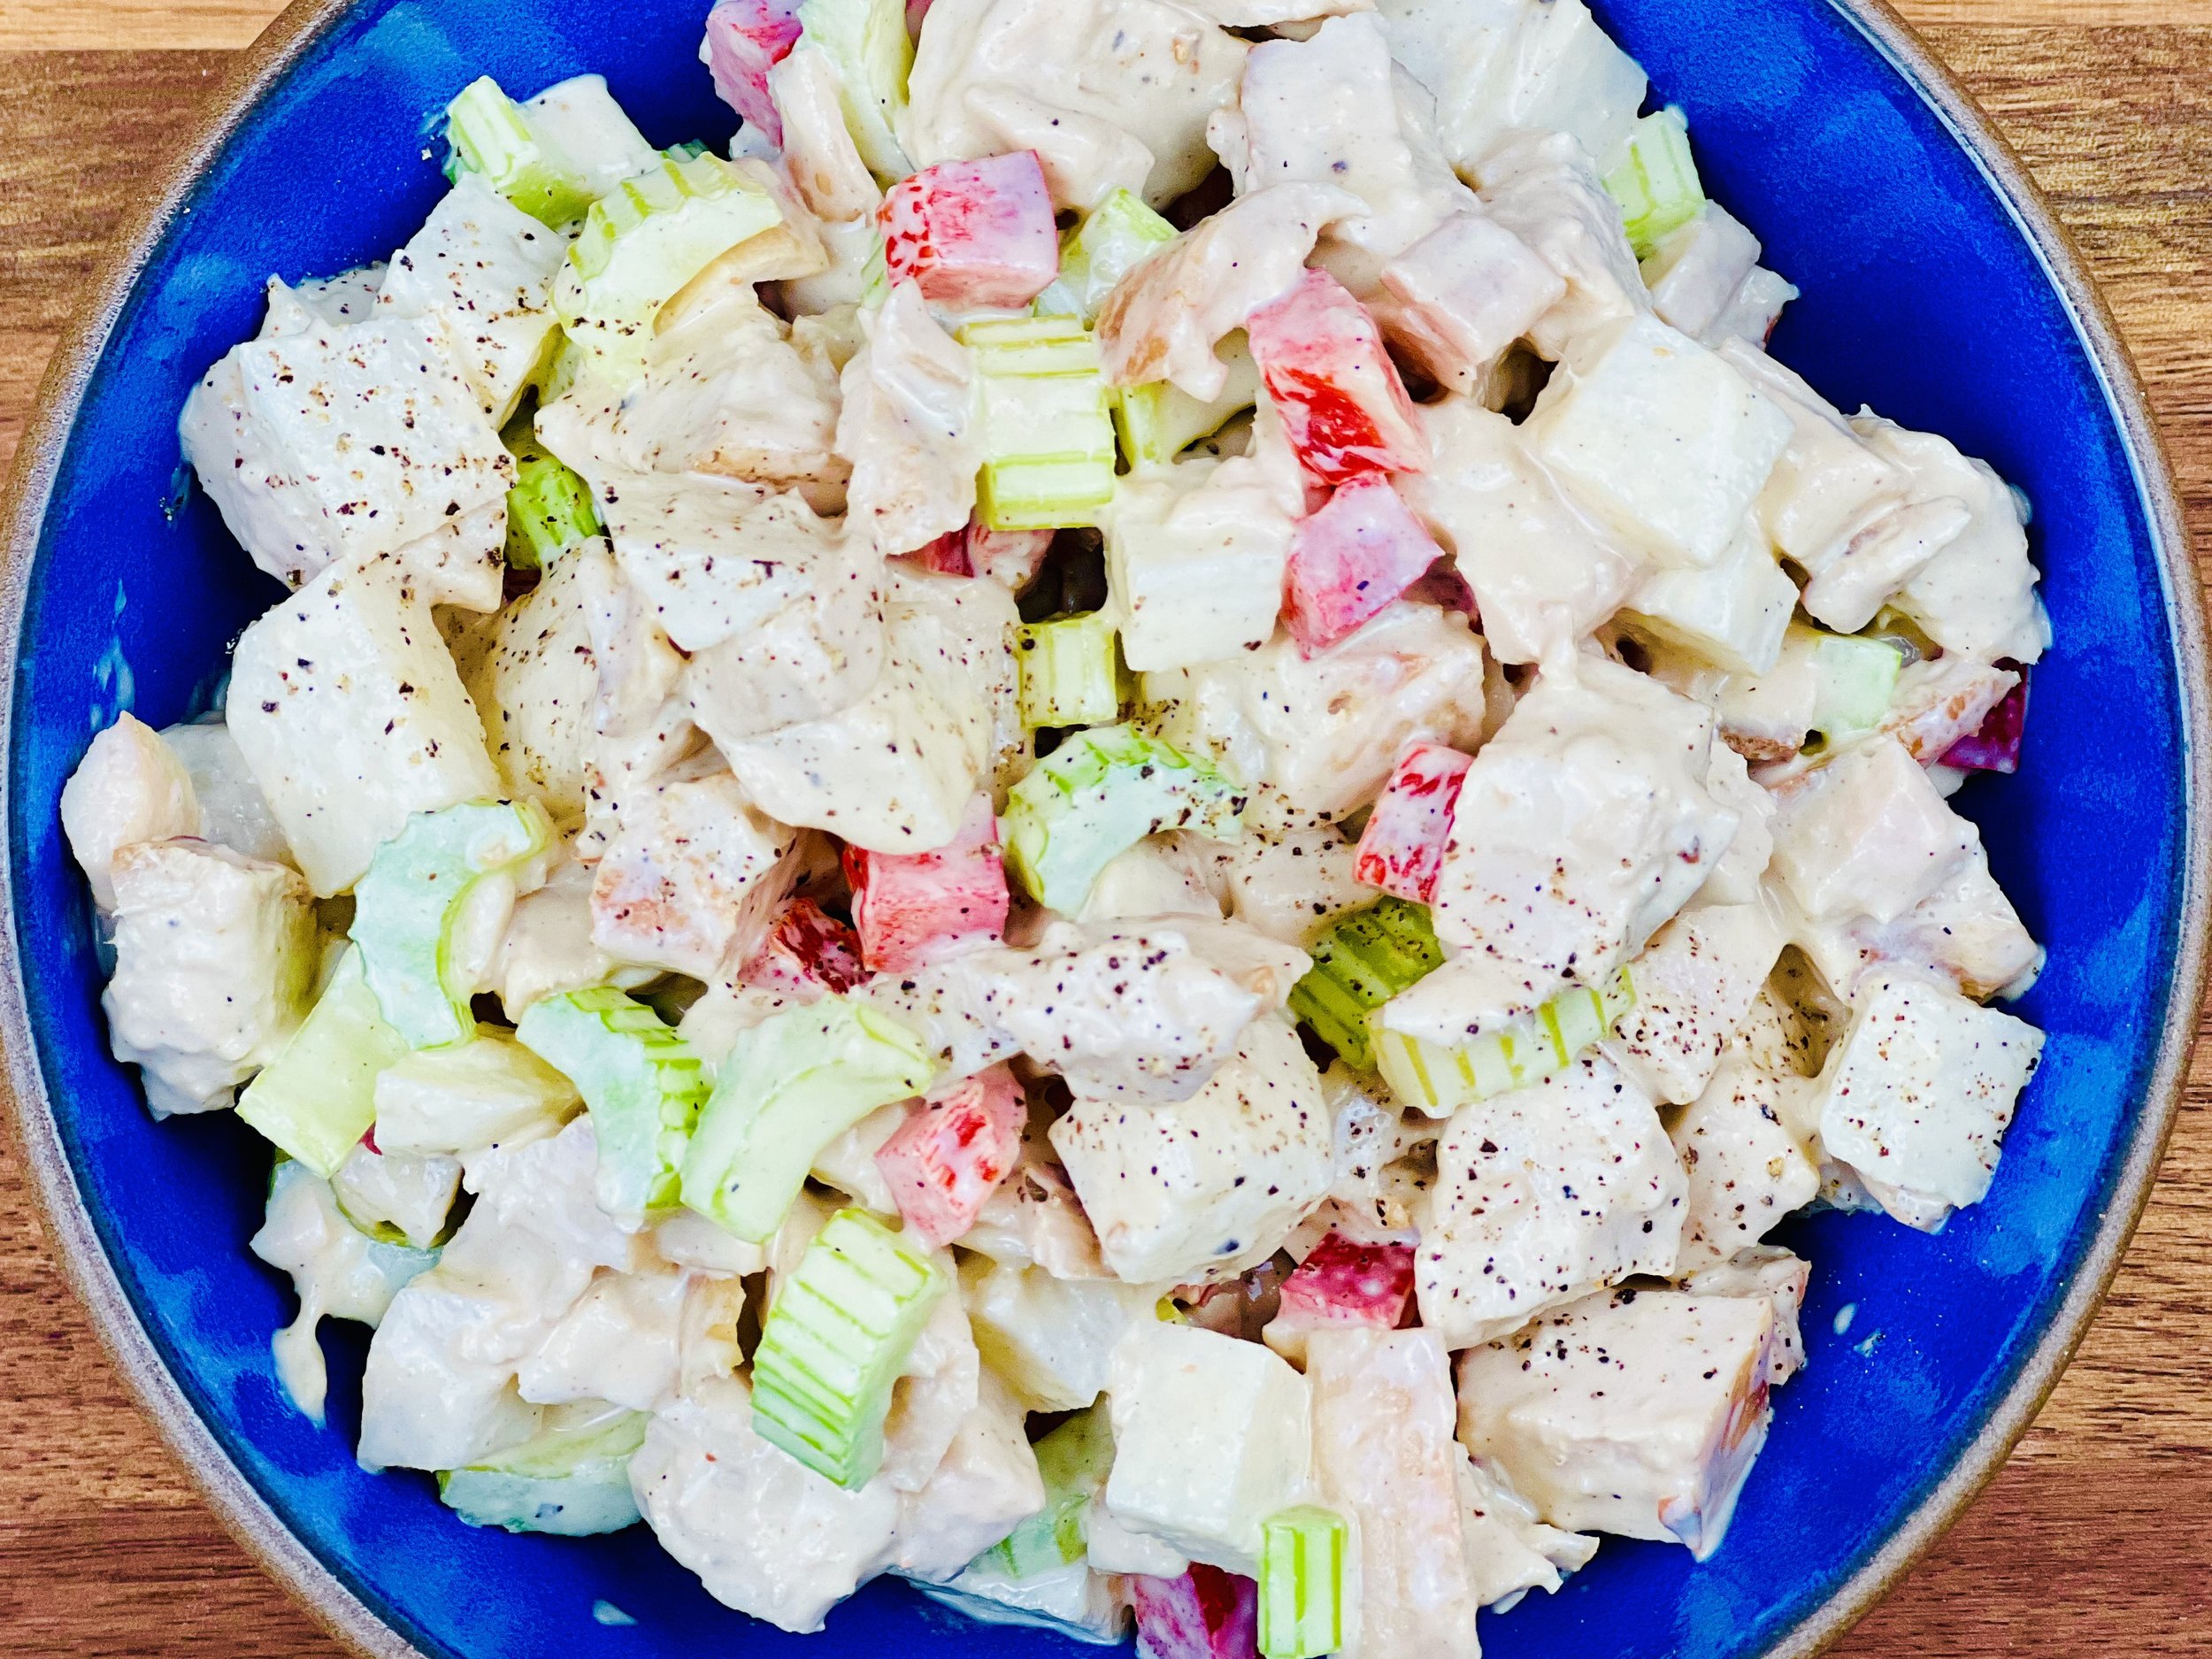

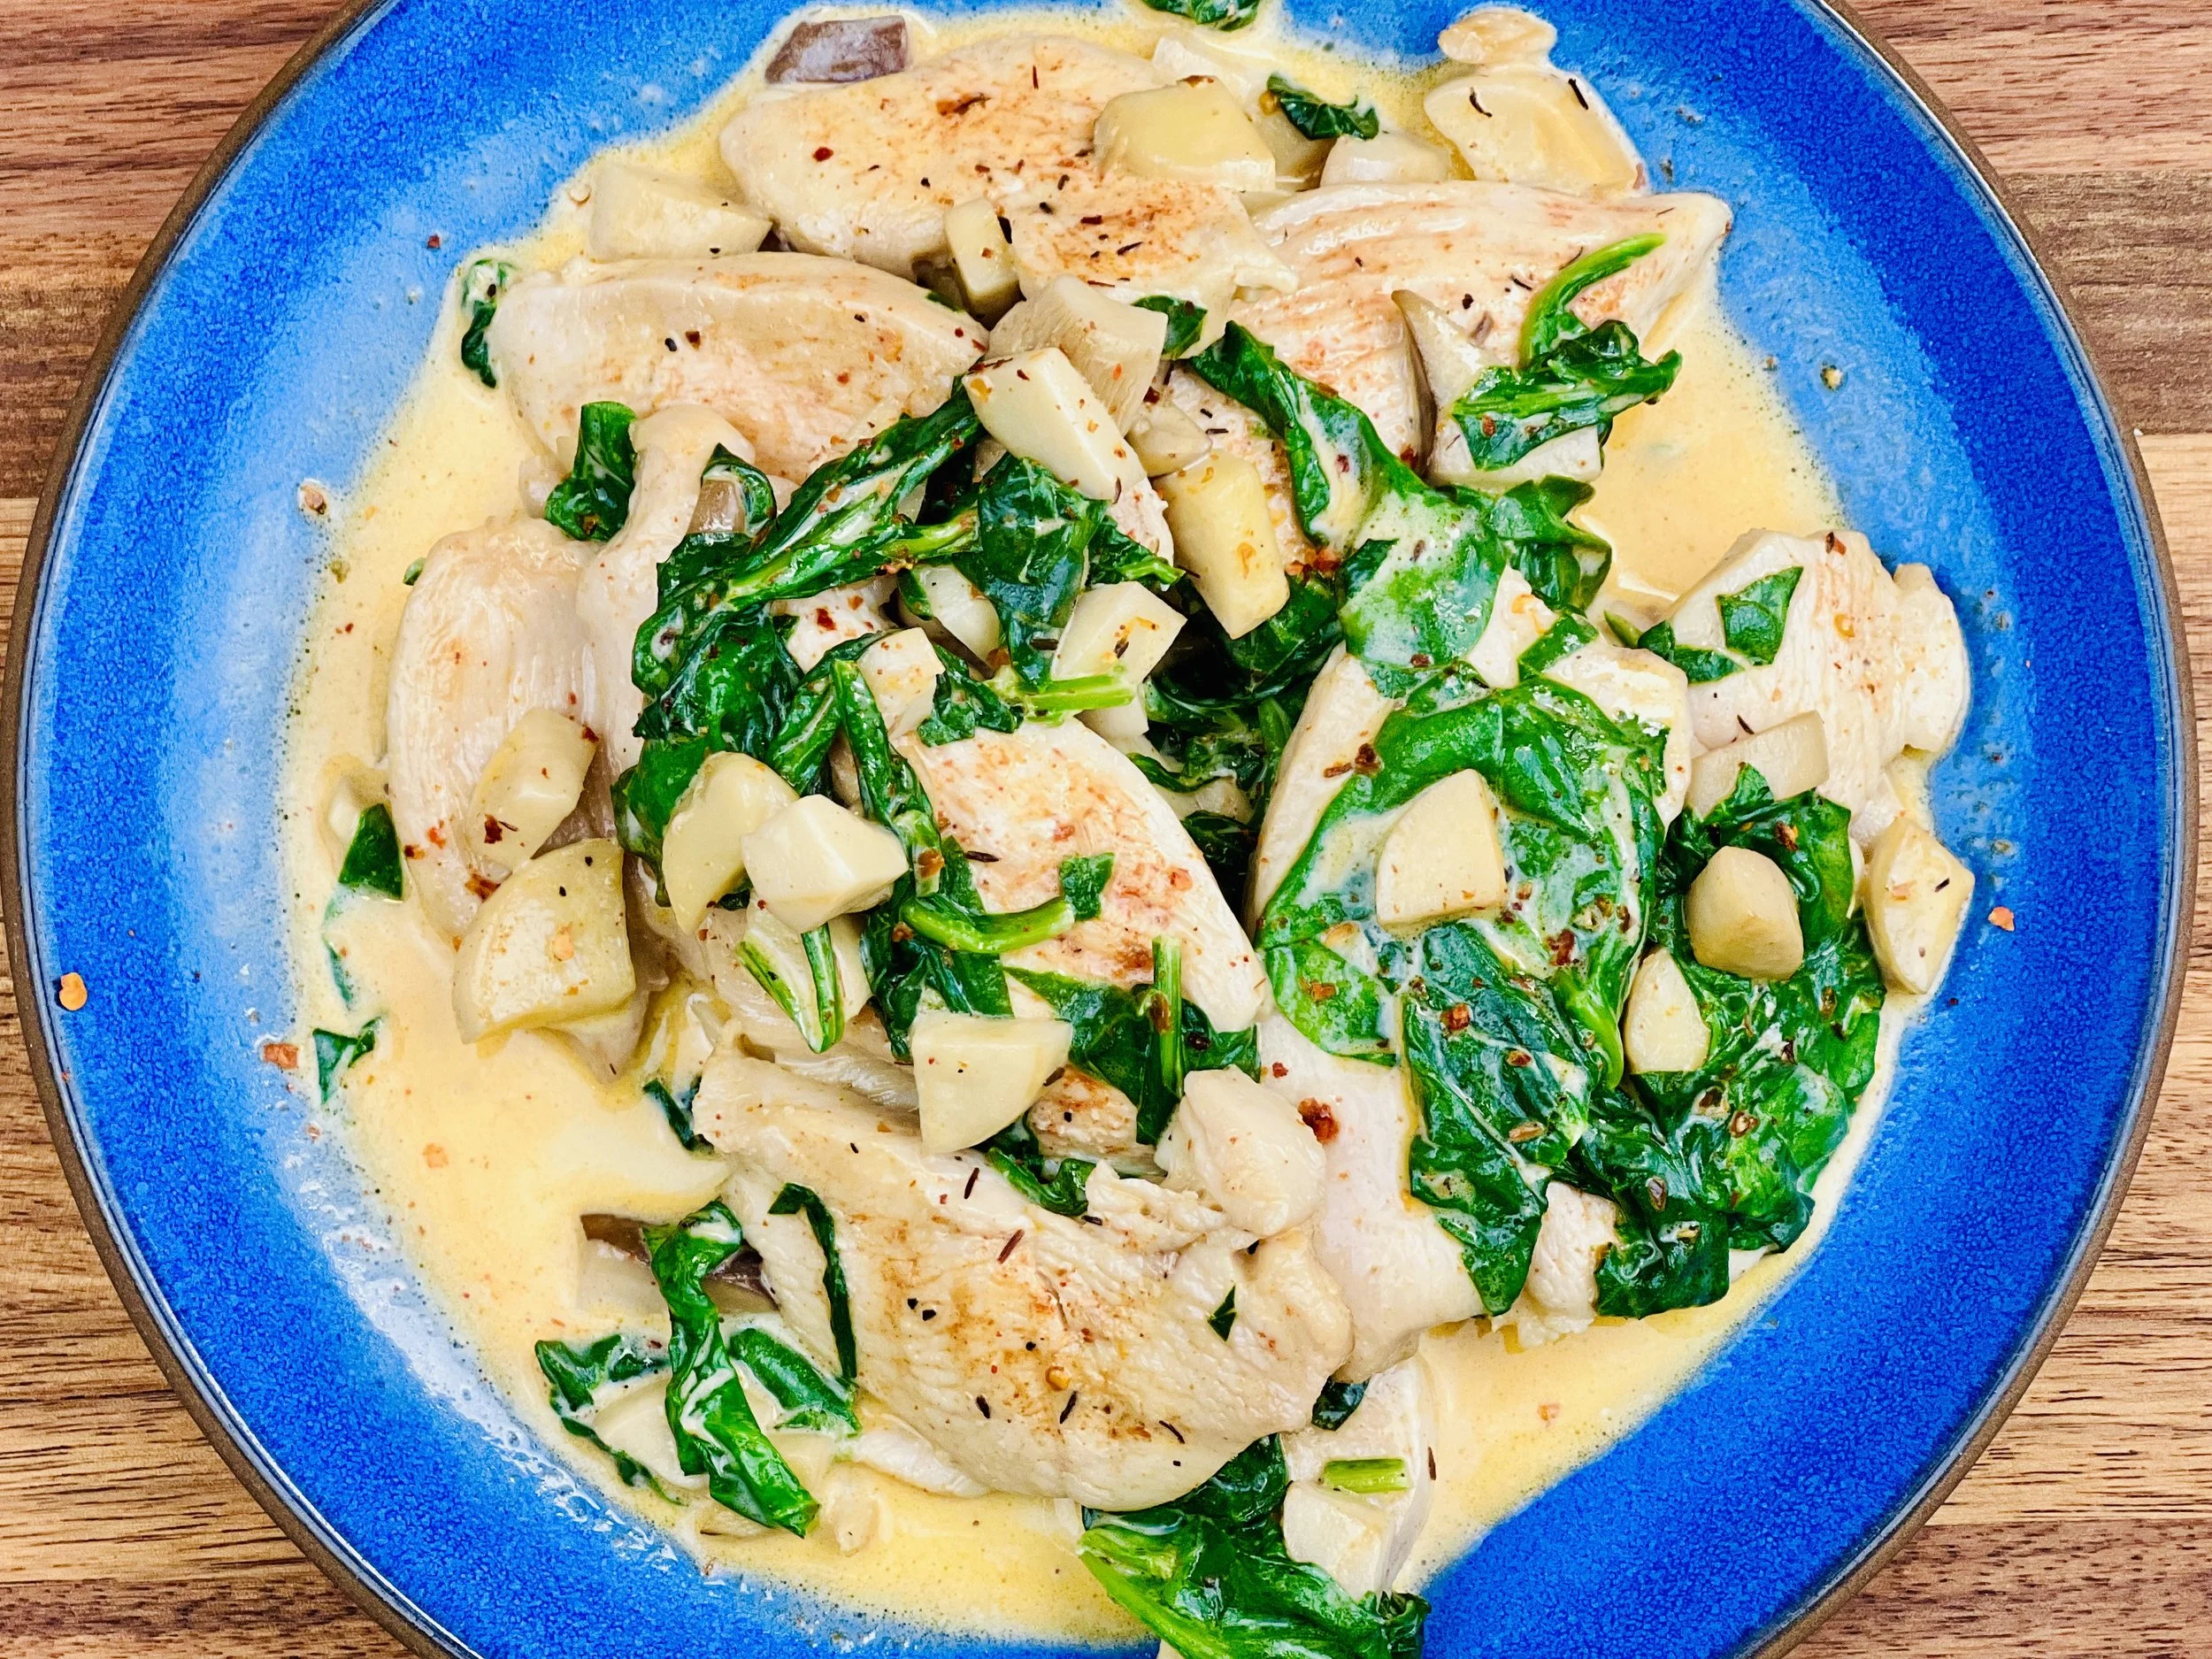
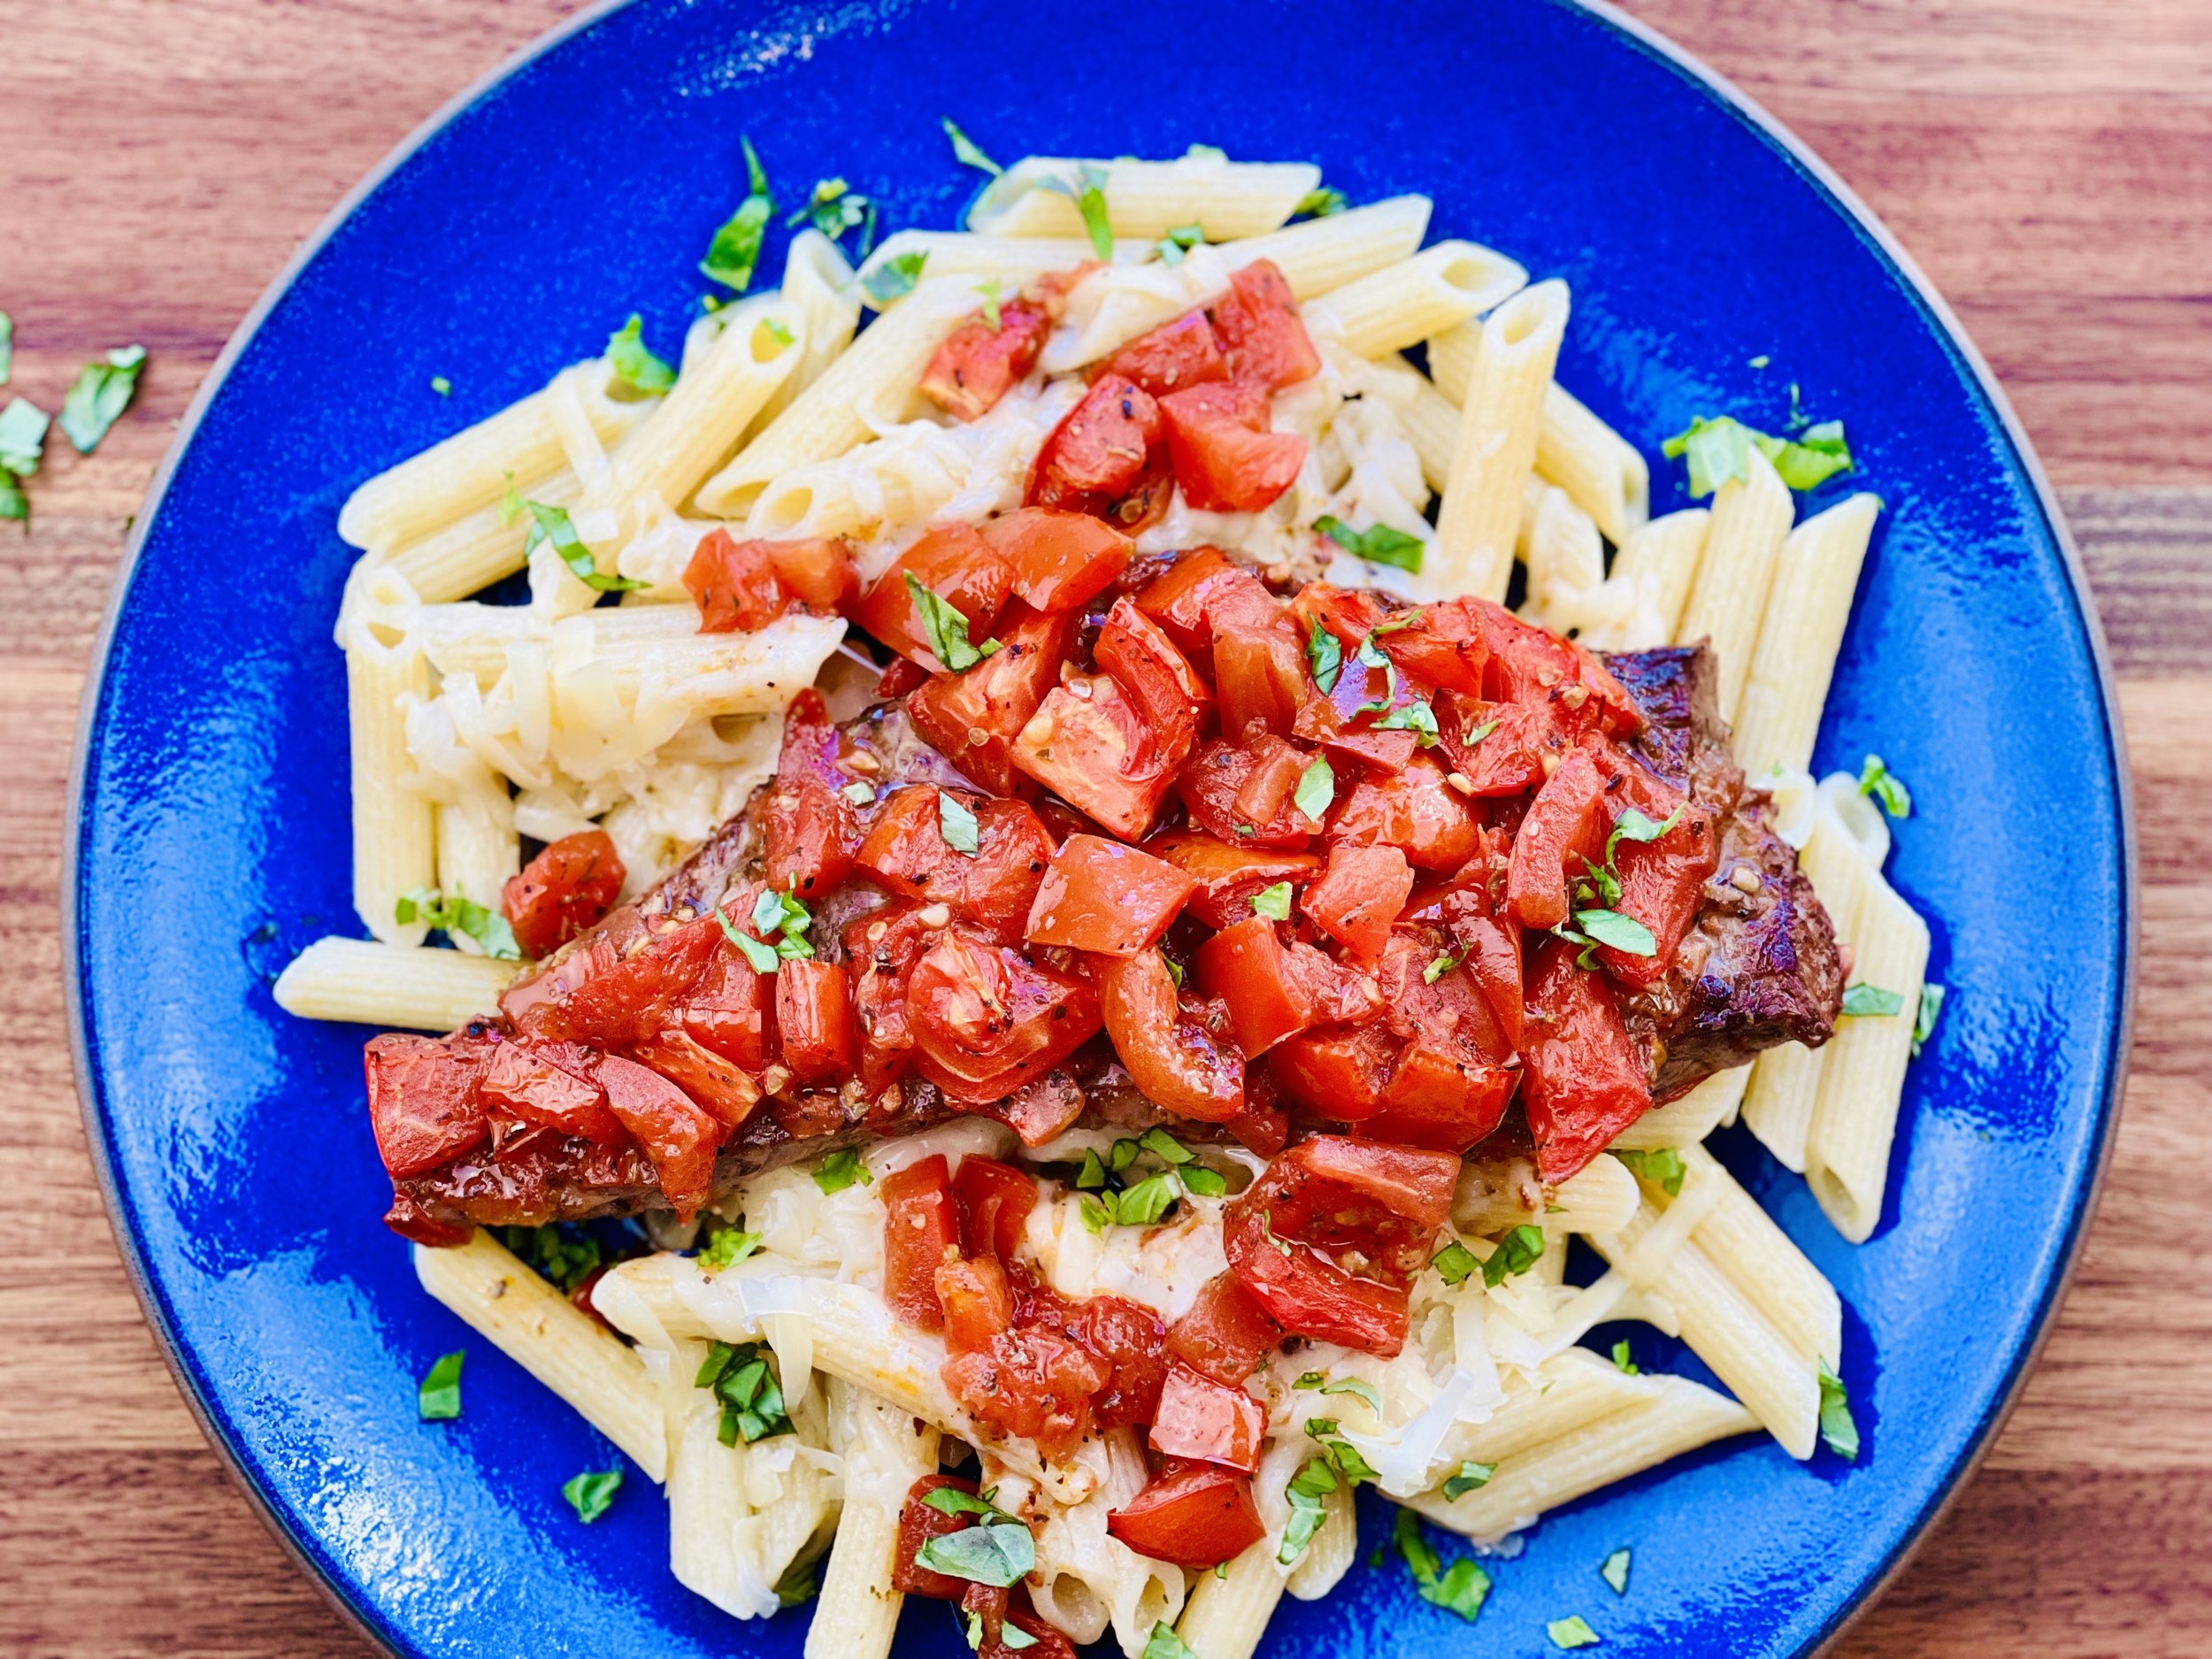
Creamy Cajun Creole Chicken and Sweet Peppers (low FODMAP)
10 Minutes prep • 20 Minutes cook • Low FODMAP • Gluten-free • Serves 4
10 Minutes prep • 20 Minutes cook • Low FODMAP • Gluten-free • Serves 4 • Ok to make ahead: Step 1
This is one of those recipes you can prepare in the time it takes to cook the rice. This means it’s quick and simple and perfect for a weeknight dinner. Best of all, it’s delicious! The creamy sauce poured over the chicken and rice is a perfect combination. The seared peppers that cook in the same pan as the chicken, stay crisp and colorful and complement the chicken and rice perfectly.
This is an exclusive recipe just for recipe club members.
In addition to the two free recipes I create each week I am creating and delivering one very special recipe just for my recipe club members. If you’re not yet a member, I encourage you to join! Membership in the club includes access to the complete archive of recipes with filters so it can become your virtual low FODMAP cookbook plus, I am creating and delivering one special NEW recipe every week ONLY for recipe club members. And, for my true fans, I’ll be sharing behind-the-scenes content, and updates on the progress of the new cookbook.
Your membership in the club helps me continue creating new, delicious, easy-to-make, low FODMAP recipes just for you.
As always, all recipes will emphasize simple ingredients, easy preparation, and delicious low FODMAP results. Recipes will be for everything from main courses, salads, soups, side dishes, appetizers, desserts, sauces, breakfast and lunch, and even mocktails and cocktails. Everything you need to prepare fantastic low FODMAP meals everyone will love.
Join the club. Become a Patron. Let’s keep making delicious Low FODMAP meals together.
More Deliciously Low FODMAP™ main course recipes


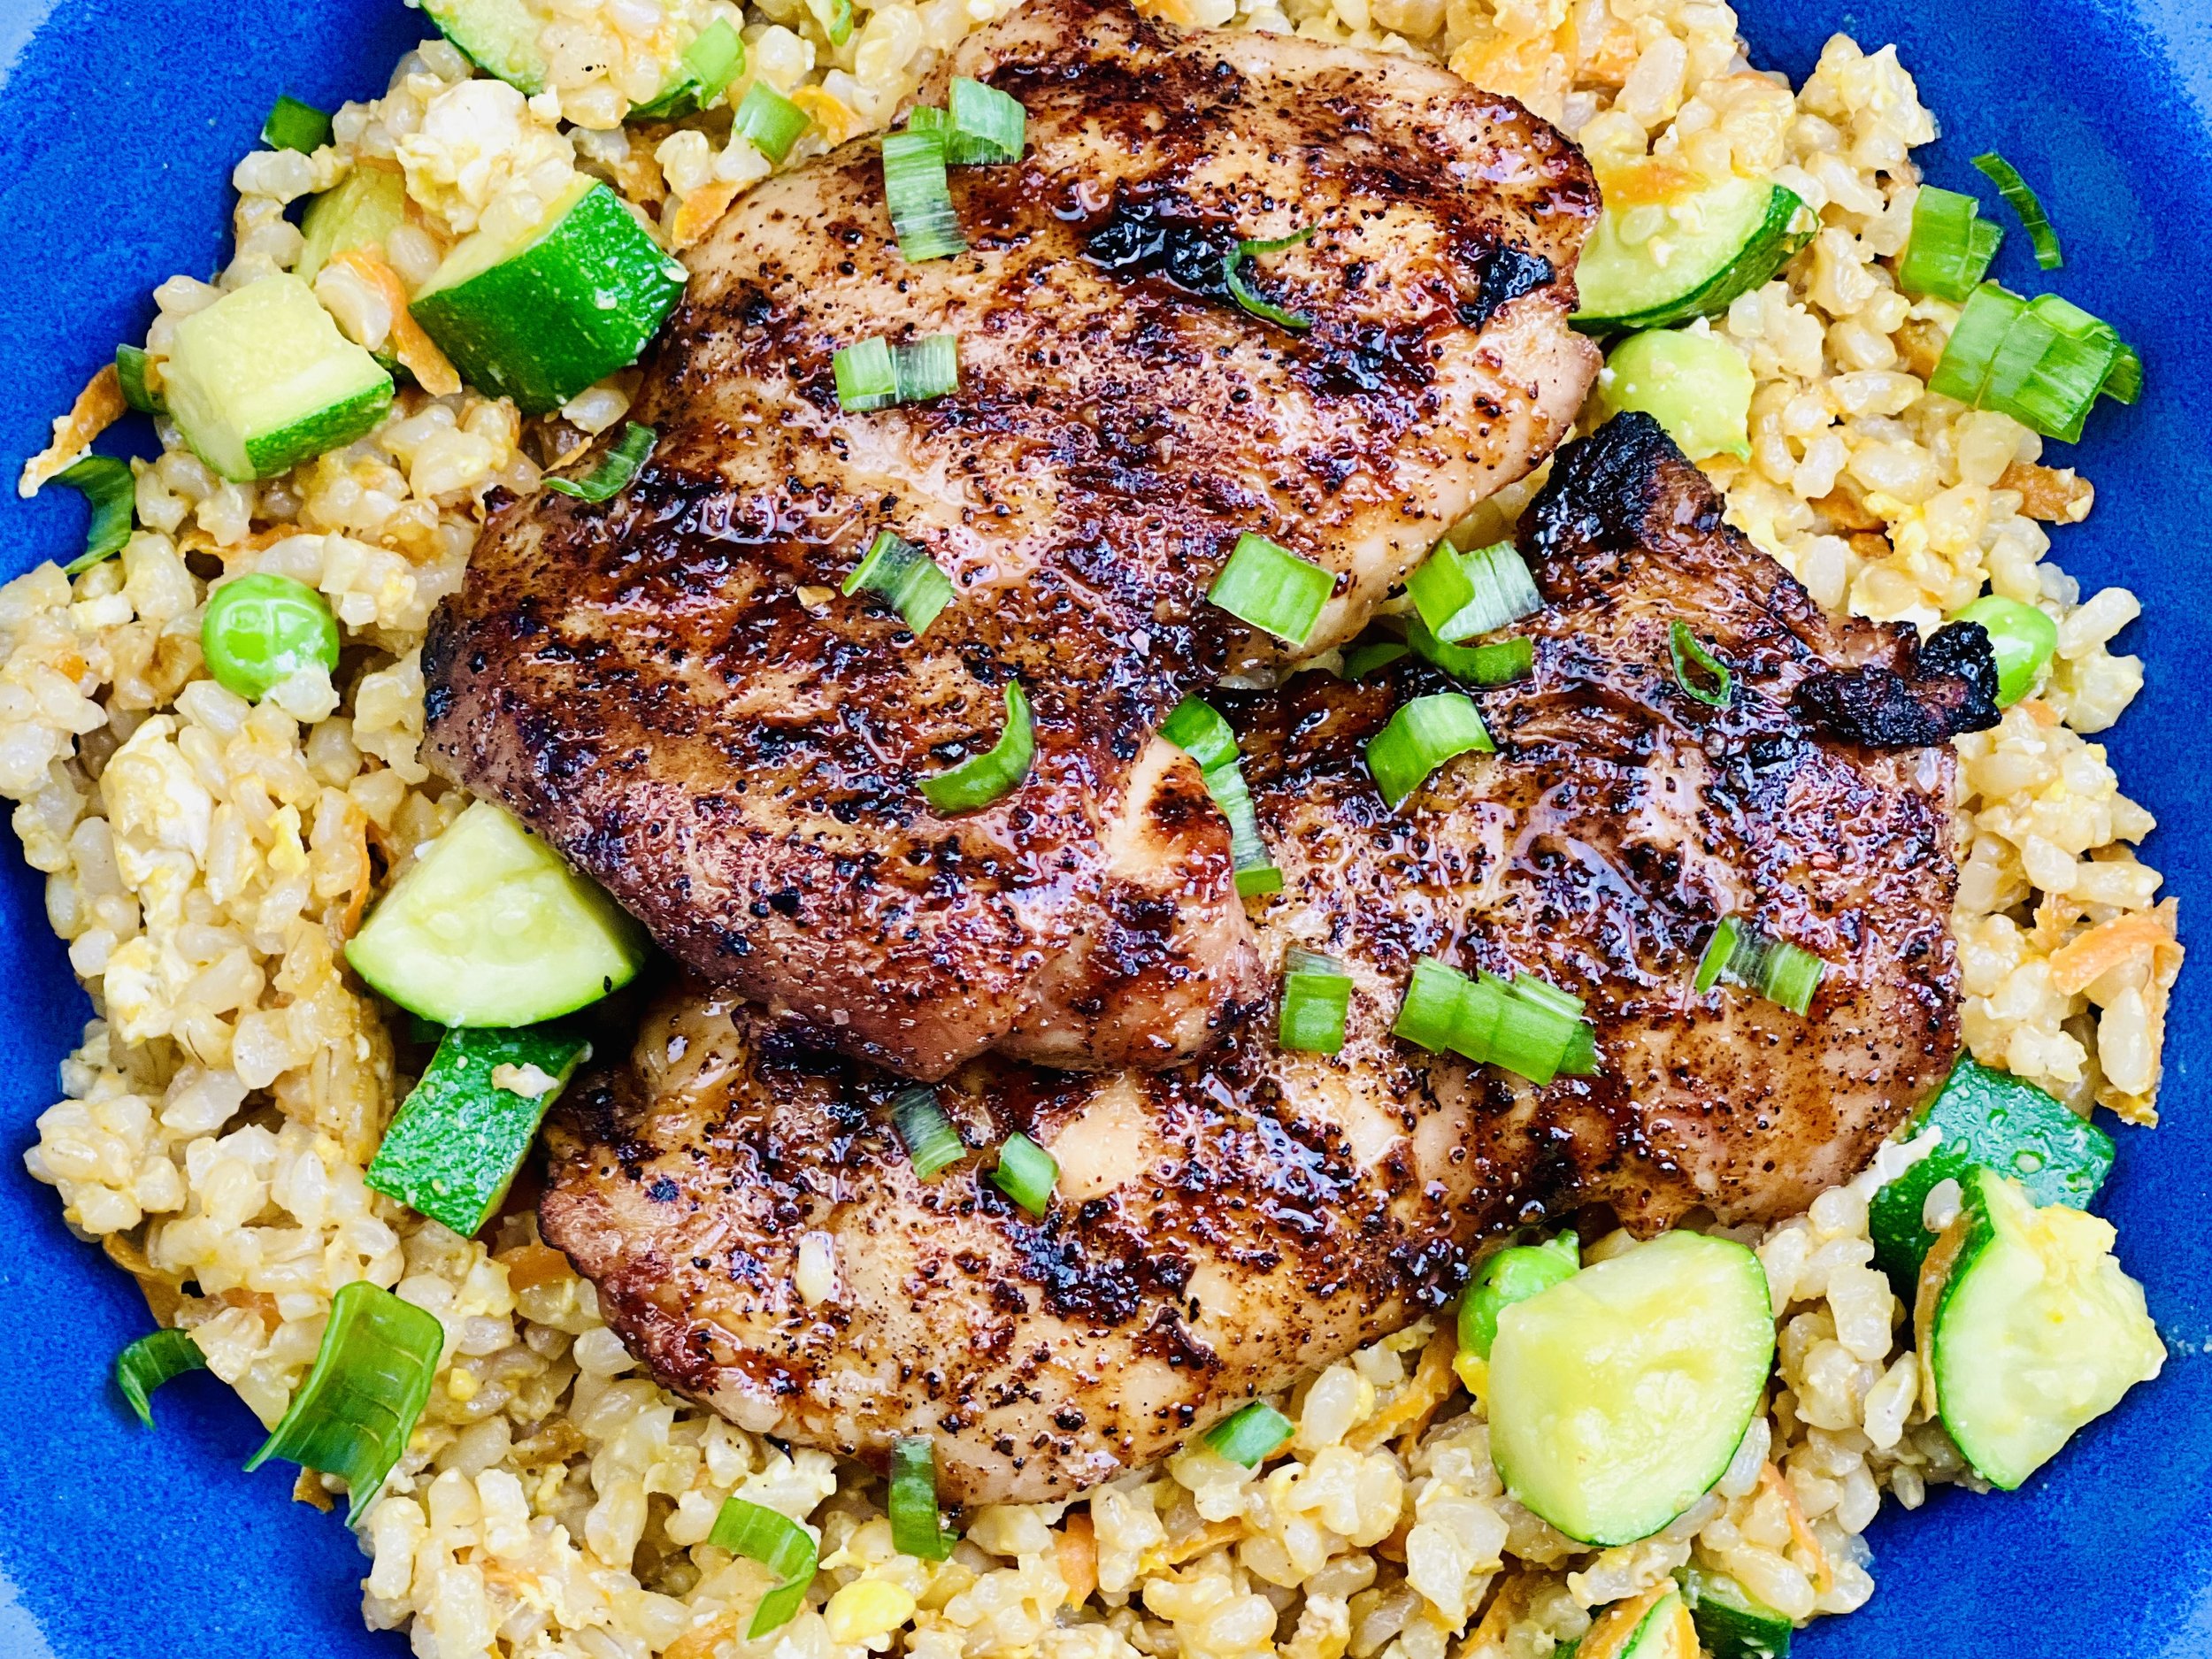
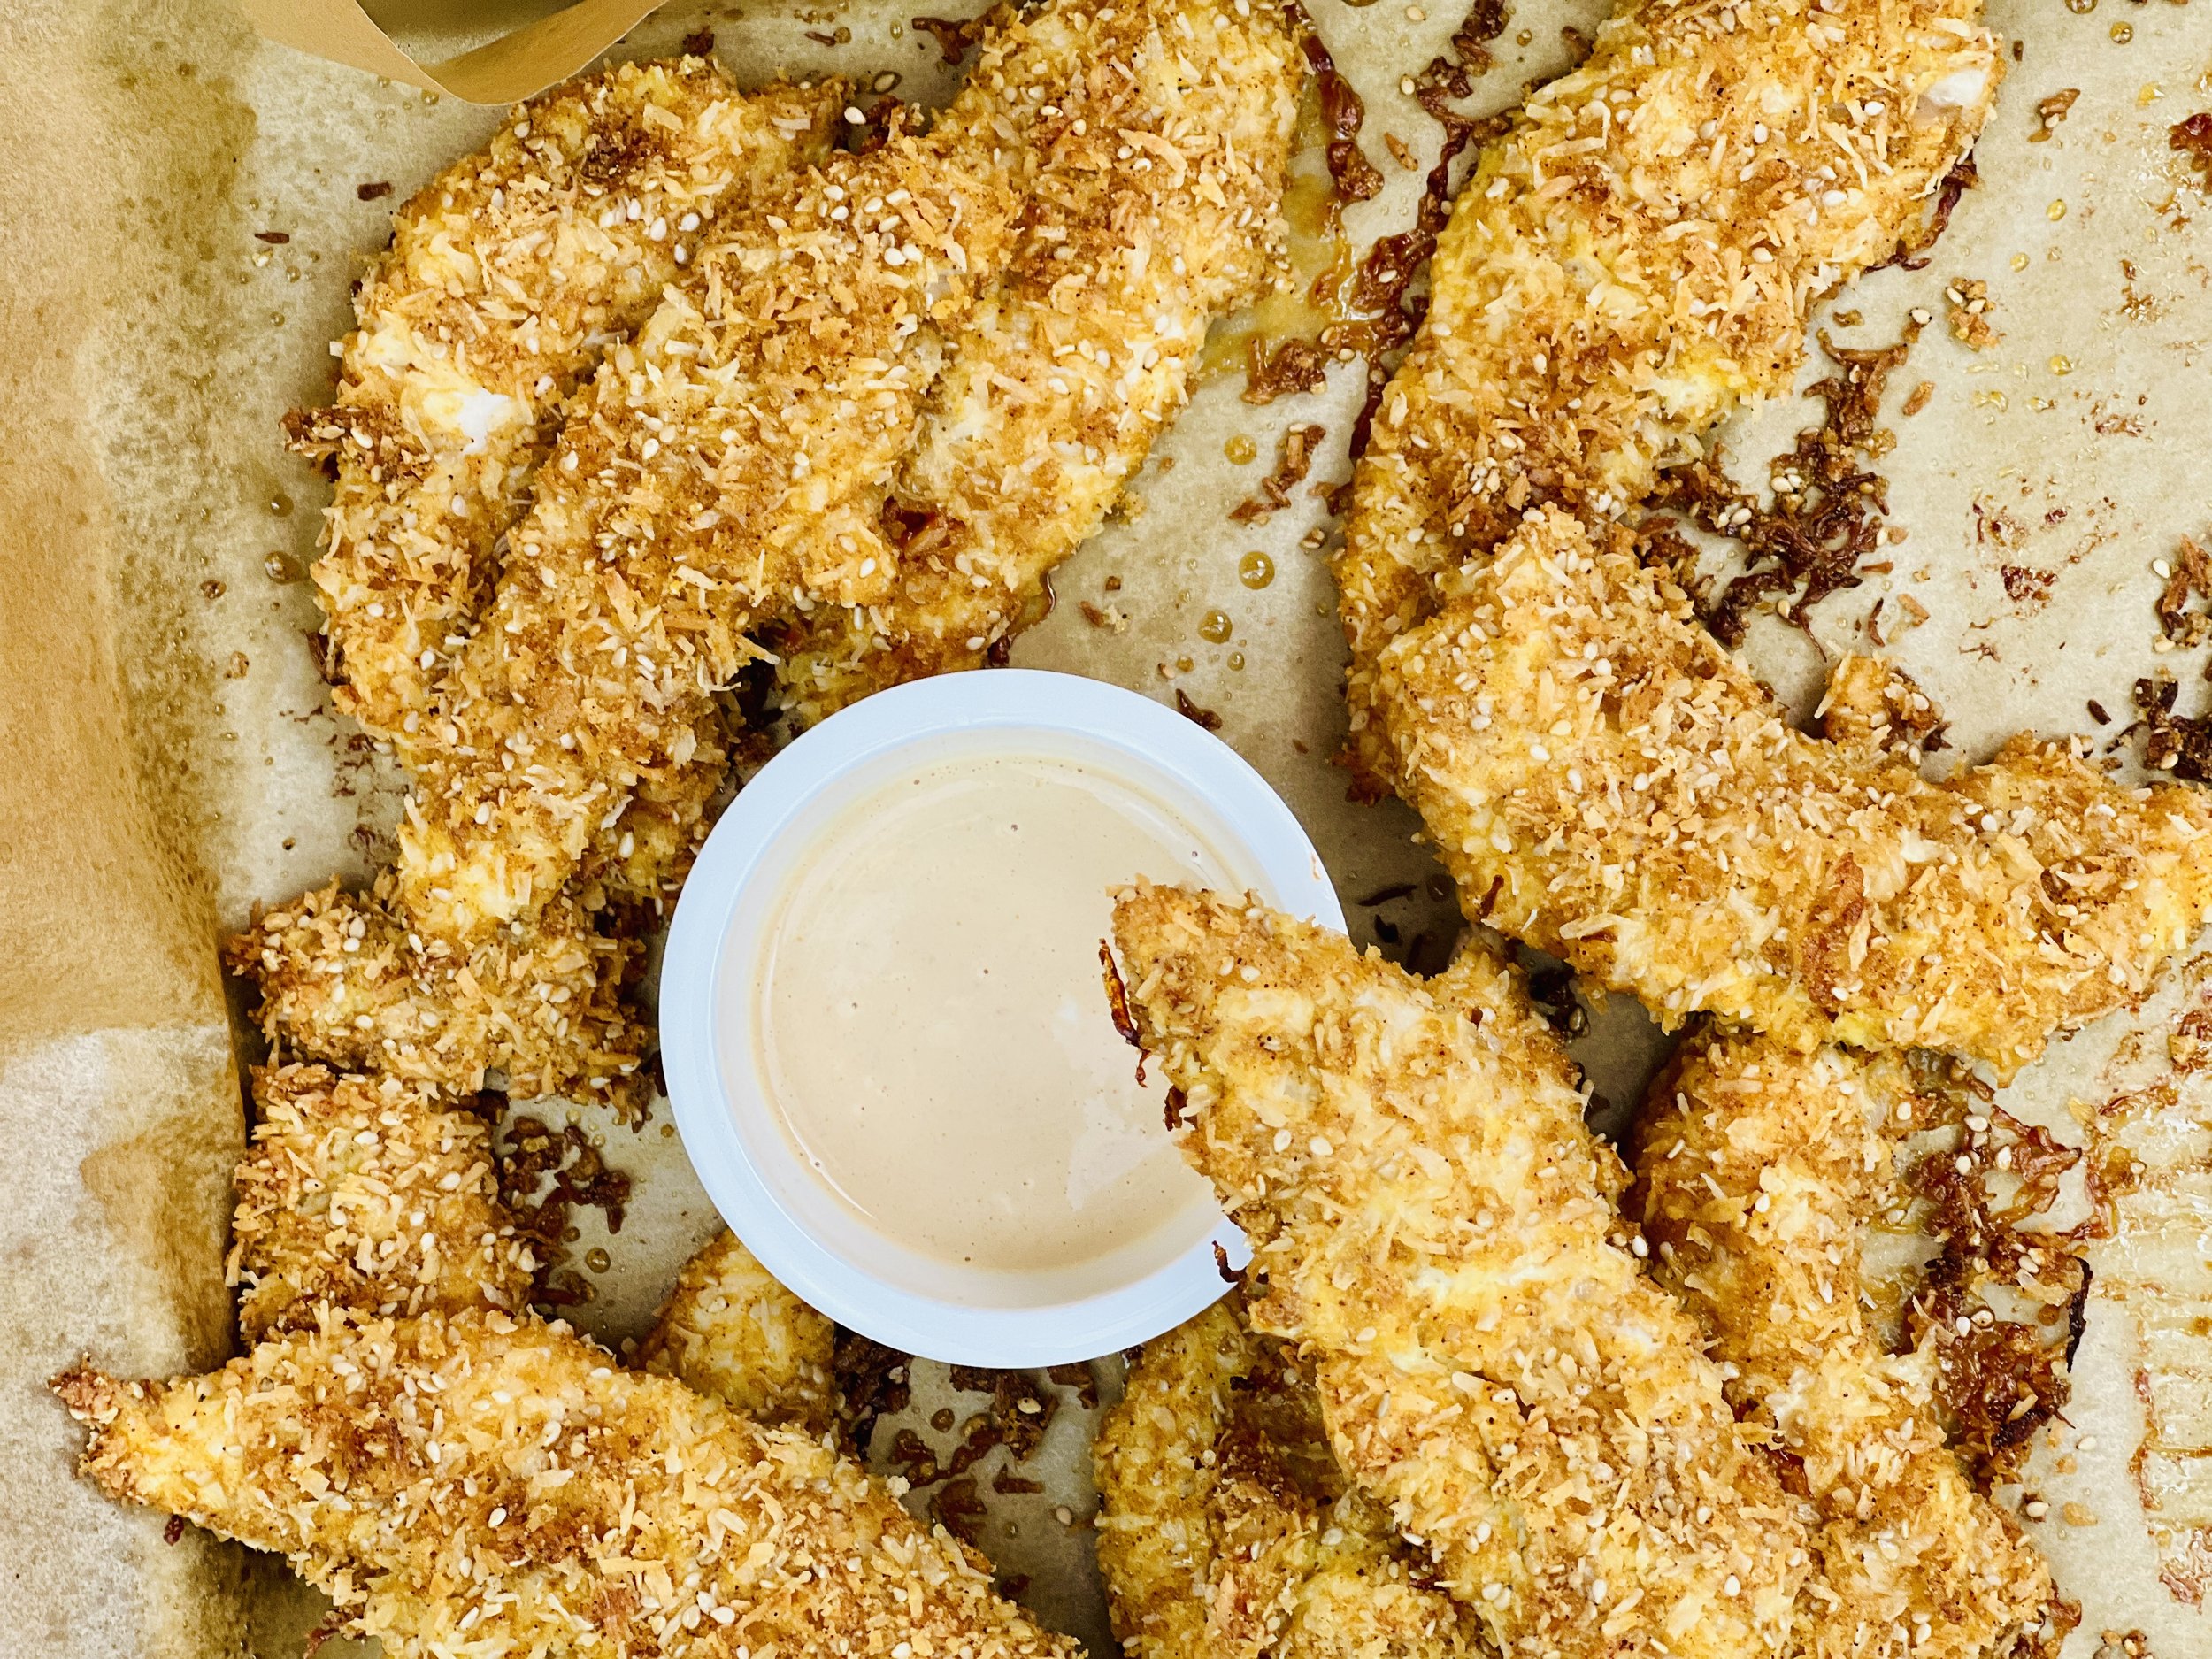
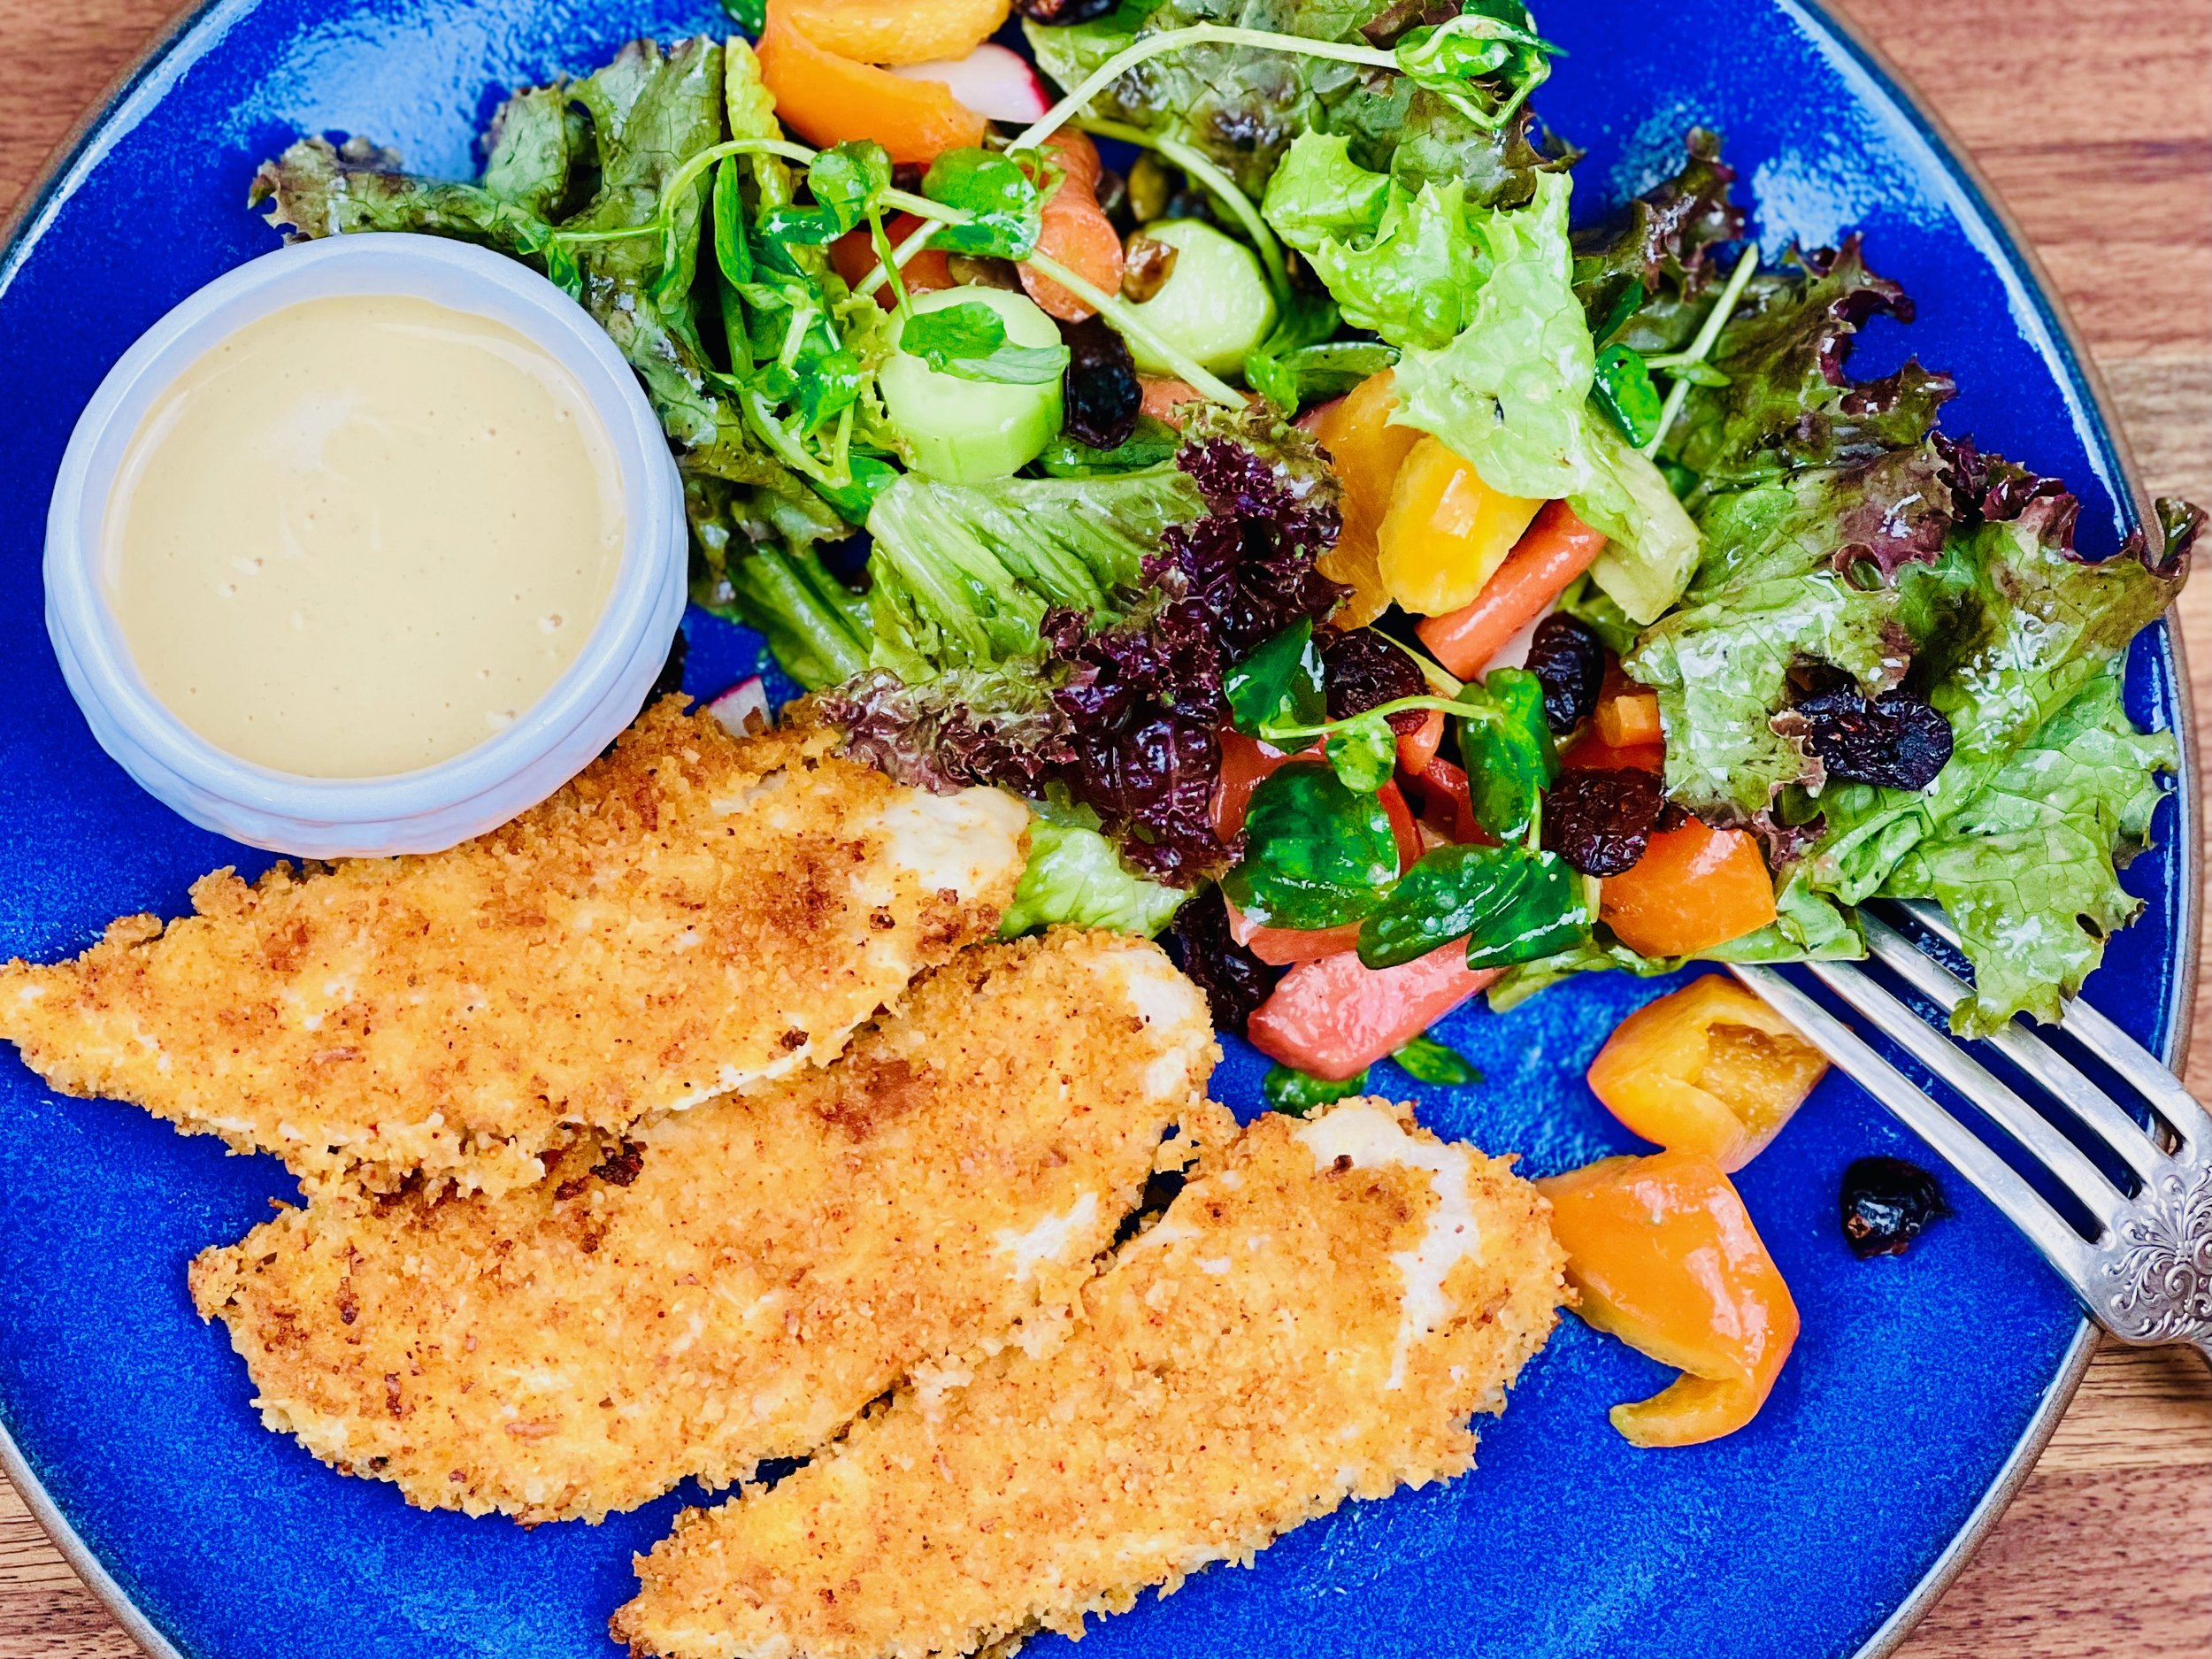
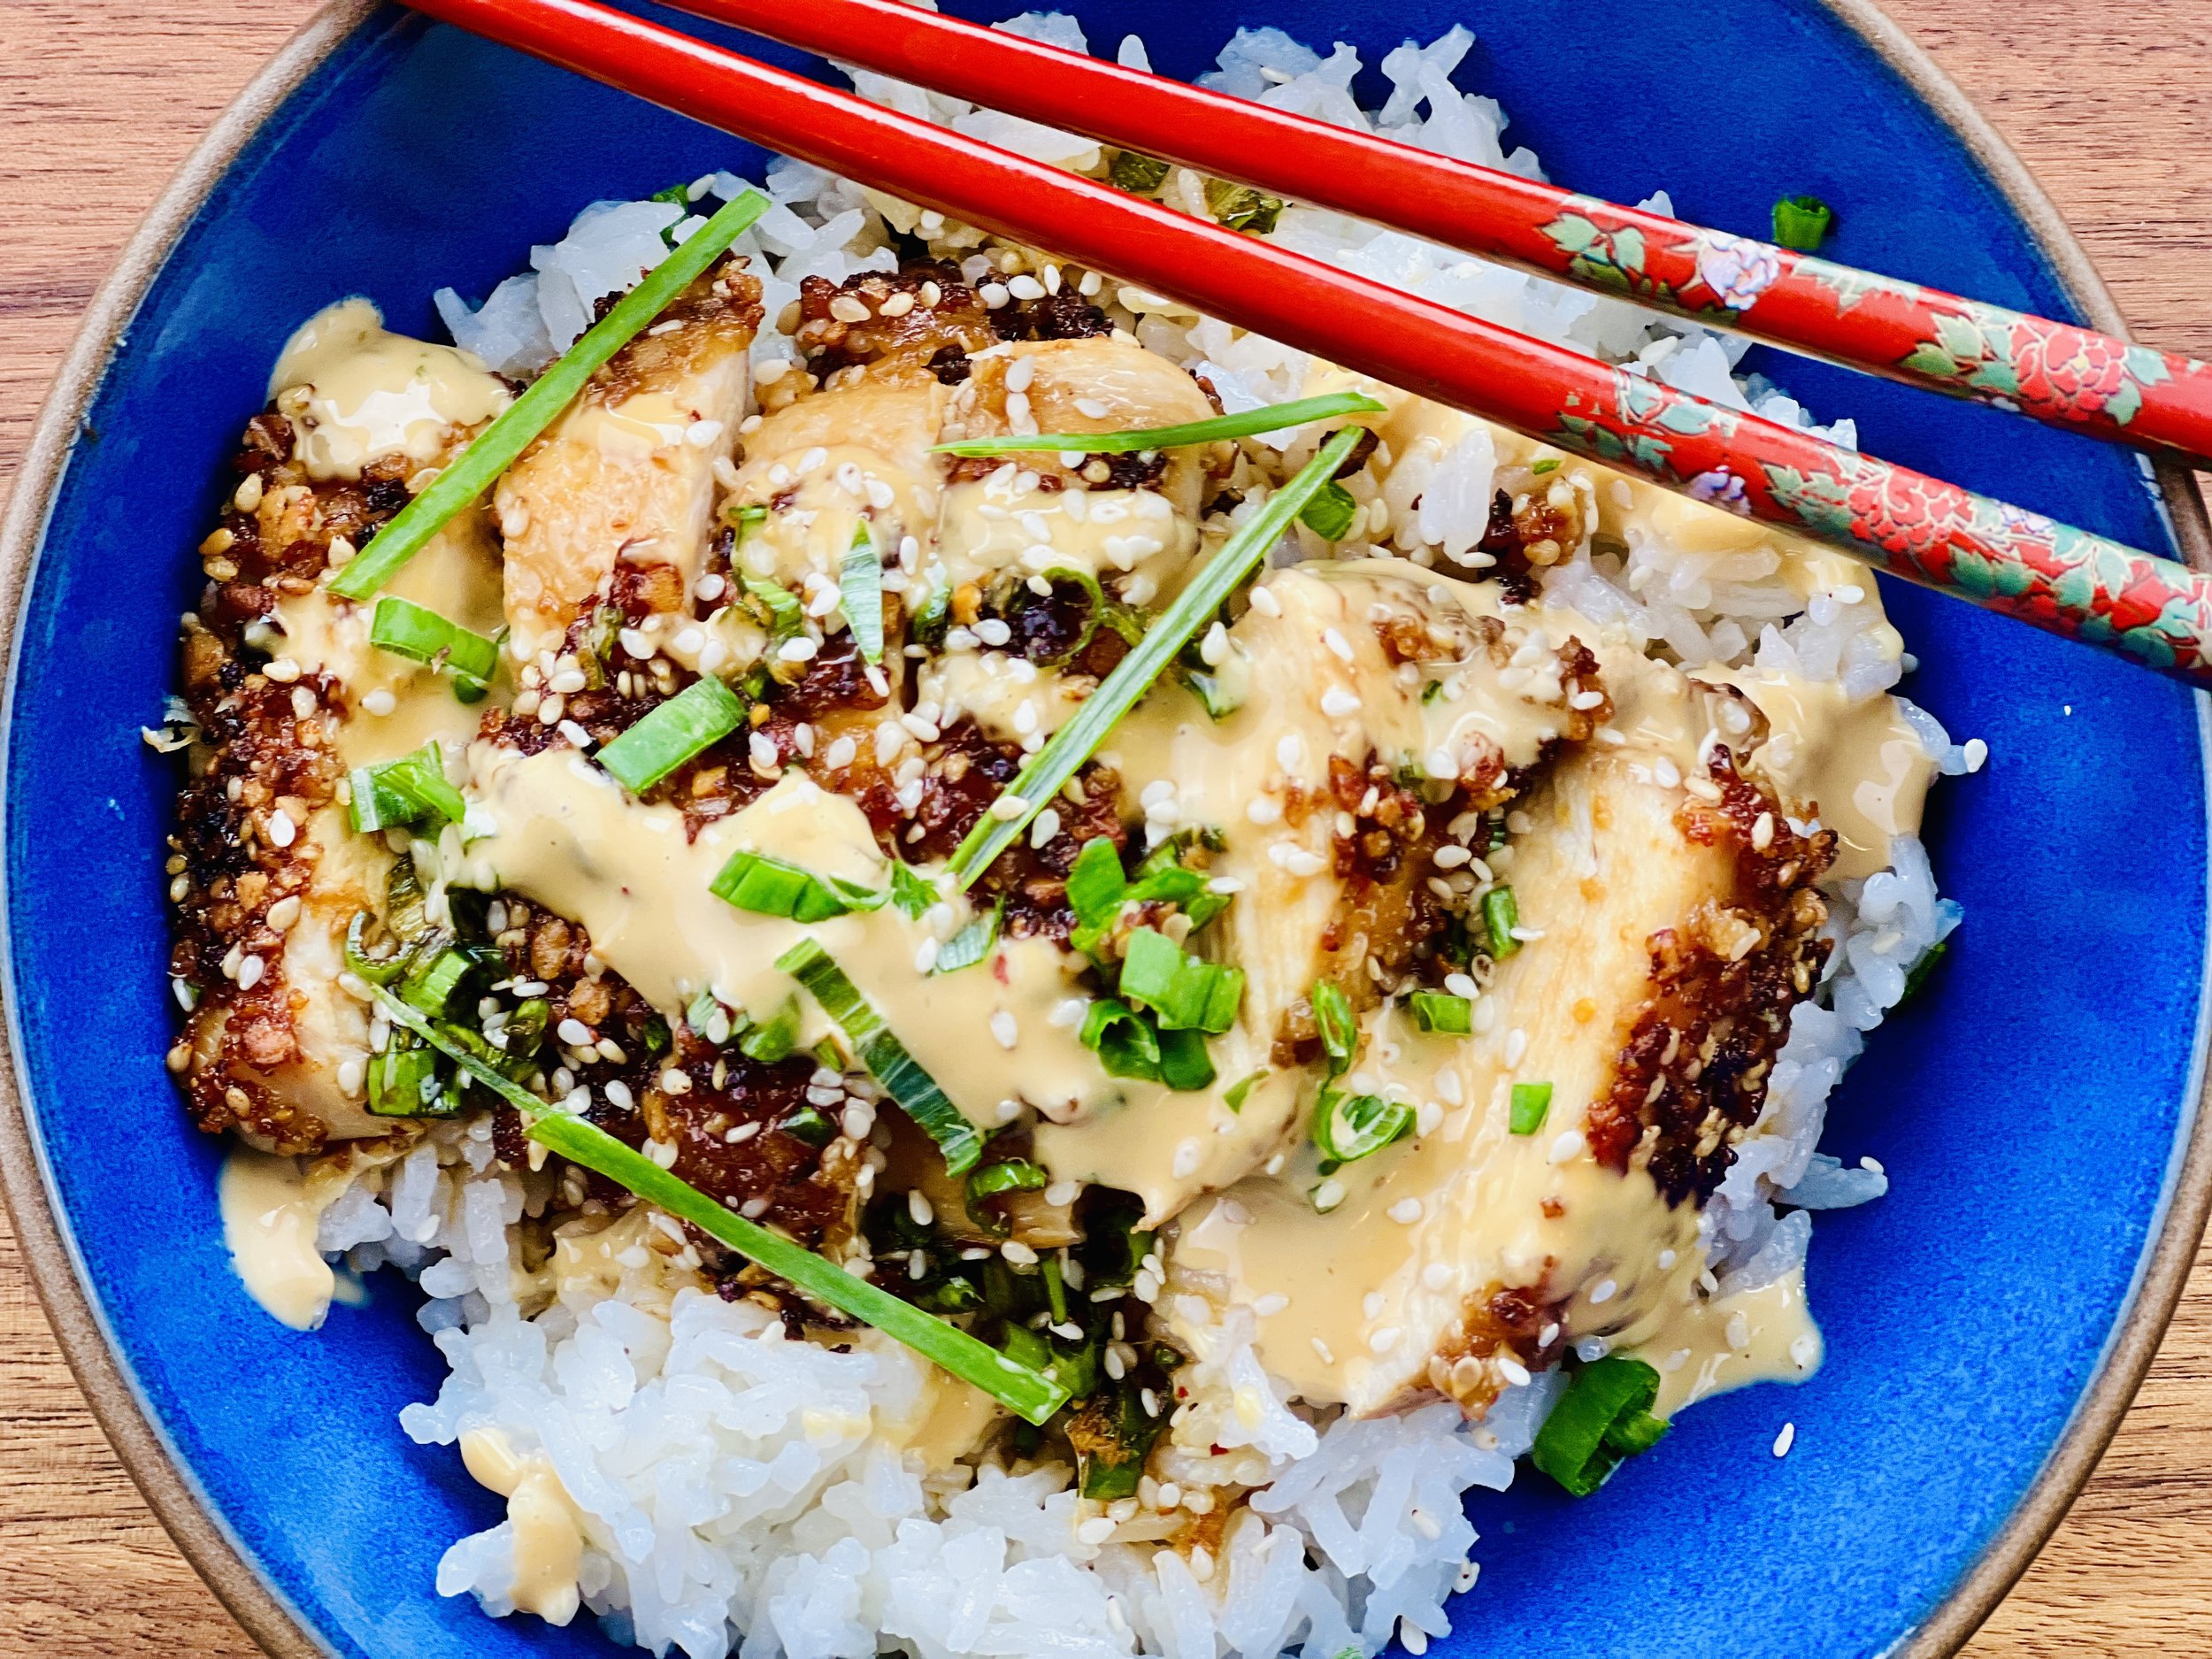
Chicken Katsu and Coconut Rice (low FODMAP)
20 Minutes prep • 20 Minutes cook • Low FODMAP • Gluten-Free • Lactose-Free • Serves 4
20 Minutes prep • 20 Minutes cook • Low FODMAP • Gluten-Free • Lactose-Free • Serves 4 • Ok to make ahead: Steps 1-5
A wonderful blend of creamy rice and crispy chicken, this bowl is simple, satisfying, and delicious. Adding coconut milk instead of water when cooking rice is one of my favorite ways to give plain rice a new flavor and texture. Toasting the rice in sesame oil before cooking it adds yet another delightful element of flavor. In this recipe, the smooth creaminess of the coconut rice offsets the crisp saltiness of the chicken Katsu very nicely.
Ingredients: Chicken Katsu
2/3 cup, plus 2 tablespoons gluten-free low sodium soy sauce
2 tablespoons toasted sesame oil, divided
1 tablespoon maple syrup
1 tablespoon fresh ginger, grated
2 tablespoons green onions (green part only), chopped
1 teaspoon, plus 3 tablespoons sesame seeds, plus more for serving
2 boneless chicken breasts, sliced in half horizontally
3/4 cup gluten-free Panko crumbs
Green onions, green part only, chopped, for serving
Ingredients: Coconut Rice
1 1/2 cups jasmine rice
1 tablespoon toasted sesame oil
1 (14 ounce) can (1 3/4 cup) unsweetened coconut milk
1 1/4 cup water (or you can use all coconut milk if you prefer)
1/2 teaspoon Kosher salt
Ingredients: Soy Mayonnaise
1/3 cup mayonnaise
1 tablespoon gluten-free soy sauce
1 teaspoon rice vinegar
Red pepper flakes (to taste)
Directions
(1) Salt the chicken: This step is optional but results in more flavorful and tender meat. Cut chicken breasts horizontally and trim off any fat or skin. Season both sides of each piece of chicken evenly with Kosher salt and lay the meat on a rimmed plate or baking dish. Cover with plastic wrap and refrigerate 4 hours, overnight, or until ready to cook. (I like to salt meat when I bring it home from the market then re-wrap it and keep it in the refrigerator until I’m ready to do something with it.)
(2) Make the sauce/marinade: In a medium bowl, combine 2/3 cup tamari/soy sauce, sesame oil, maple syrup, ginger, green onion, 1 teaspoon sesame seeds, and chili flakes.
(3) Make the rice: In a saucepan, heat 1 tablespoon of toasted sesame oil until hot but not smoking. Rinse the rice in a sieve until the water runs clear. Drain and add the rice to the hot oil and let it toast for about 2 minutes. Next, add the coconut milk or coconut milk and water plus the salt. Stir to blend. Cover, bring to a gentle boil, then reduce the heat to low and keep covered while simmering for 20 minutes. Turn the heat off and let sit for another 5 - 10 minutes.
(4) Marinate the chicken: Place the chicken in a bowl and pour about 1/2 cup of the sauce over the chicken, save the rest for serving. Let the chicken sit 10 minutes or more until ready to cook.
(5) Make the soy mayonnaise: Combine all ingredients in a small bowl and stir with a fork or whisk to combine. Taste and add red pepper flakes to your liking.
Make-ahead note: At this point, you may set everything aside in the refrigerator until you are ready to cook the chicken.
(6) Dredge the chicken: Place the Panko and 3 tablespoons of sesame seeds in a shallow bowl. Dredge both sides of the chicken through the Panko mixture, pressing to adhere. Set the chicken aside on a plate.
(6) Cook the chicken: Heat a few tablespoons of toasted sesame oil in a large skillet over medium-high. Add the chicken and cook until golden brown, 3-4 minutes. Flip the chicken and cook until golden brown on the other side, about 3-4 minutes. Transfer to a cutting board. Let sit for a couple of minutes, then use a sharp knife to cut the meat into strips.
(7) Plate and serve: Add the rice to bowls, top with chicken and green onions. Drizzle with the soy mayonnaise and the reserved soy sauce mixture.
Eat and enjoy every bite because you can!
Recipe note: I use Diamond Crystal Kosher salt in all my recipes because it has a wonderful flat and crisp flake that tastes delicious. It is also the least salty salt available so you can use it more liberally as a seasoning than you can table salt or sea salt. If you use another type of salt, you may need to reduce the amount so it is not over-salted.
Link note: This post contains links for you to easily purchase items listed on the page. In some cases, we have provided a special discount code for IBS Game Changers so be sure to use it when you purchase an item to get the discount that has been arranged just for you! As an Amazon Associate, I earn a commission from qualifying Amazon purchases.
More Deliciously Low FODMAP™ main course recipes
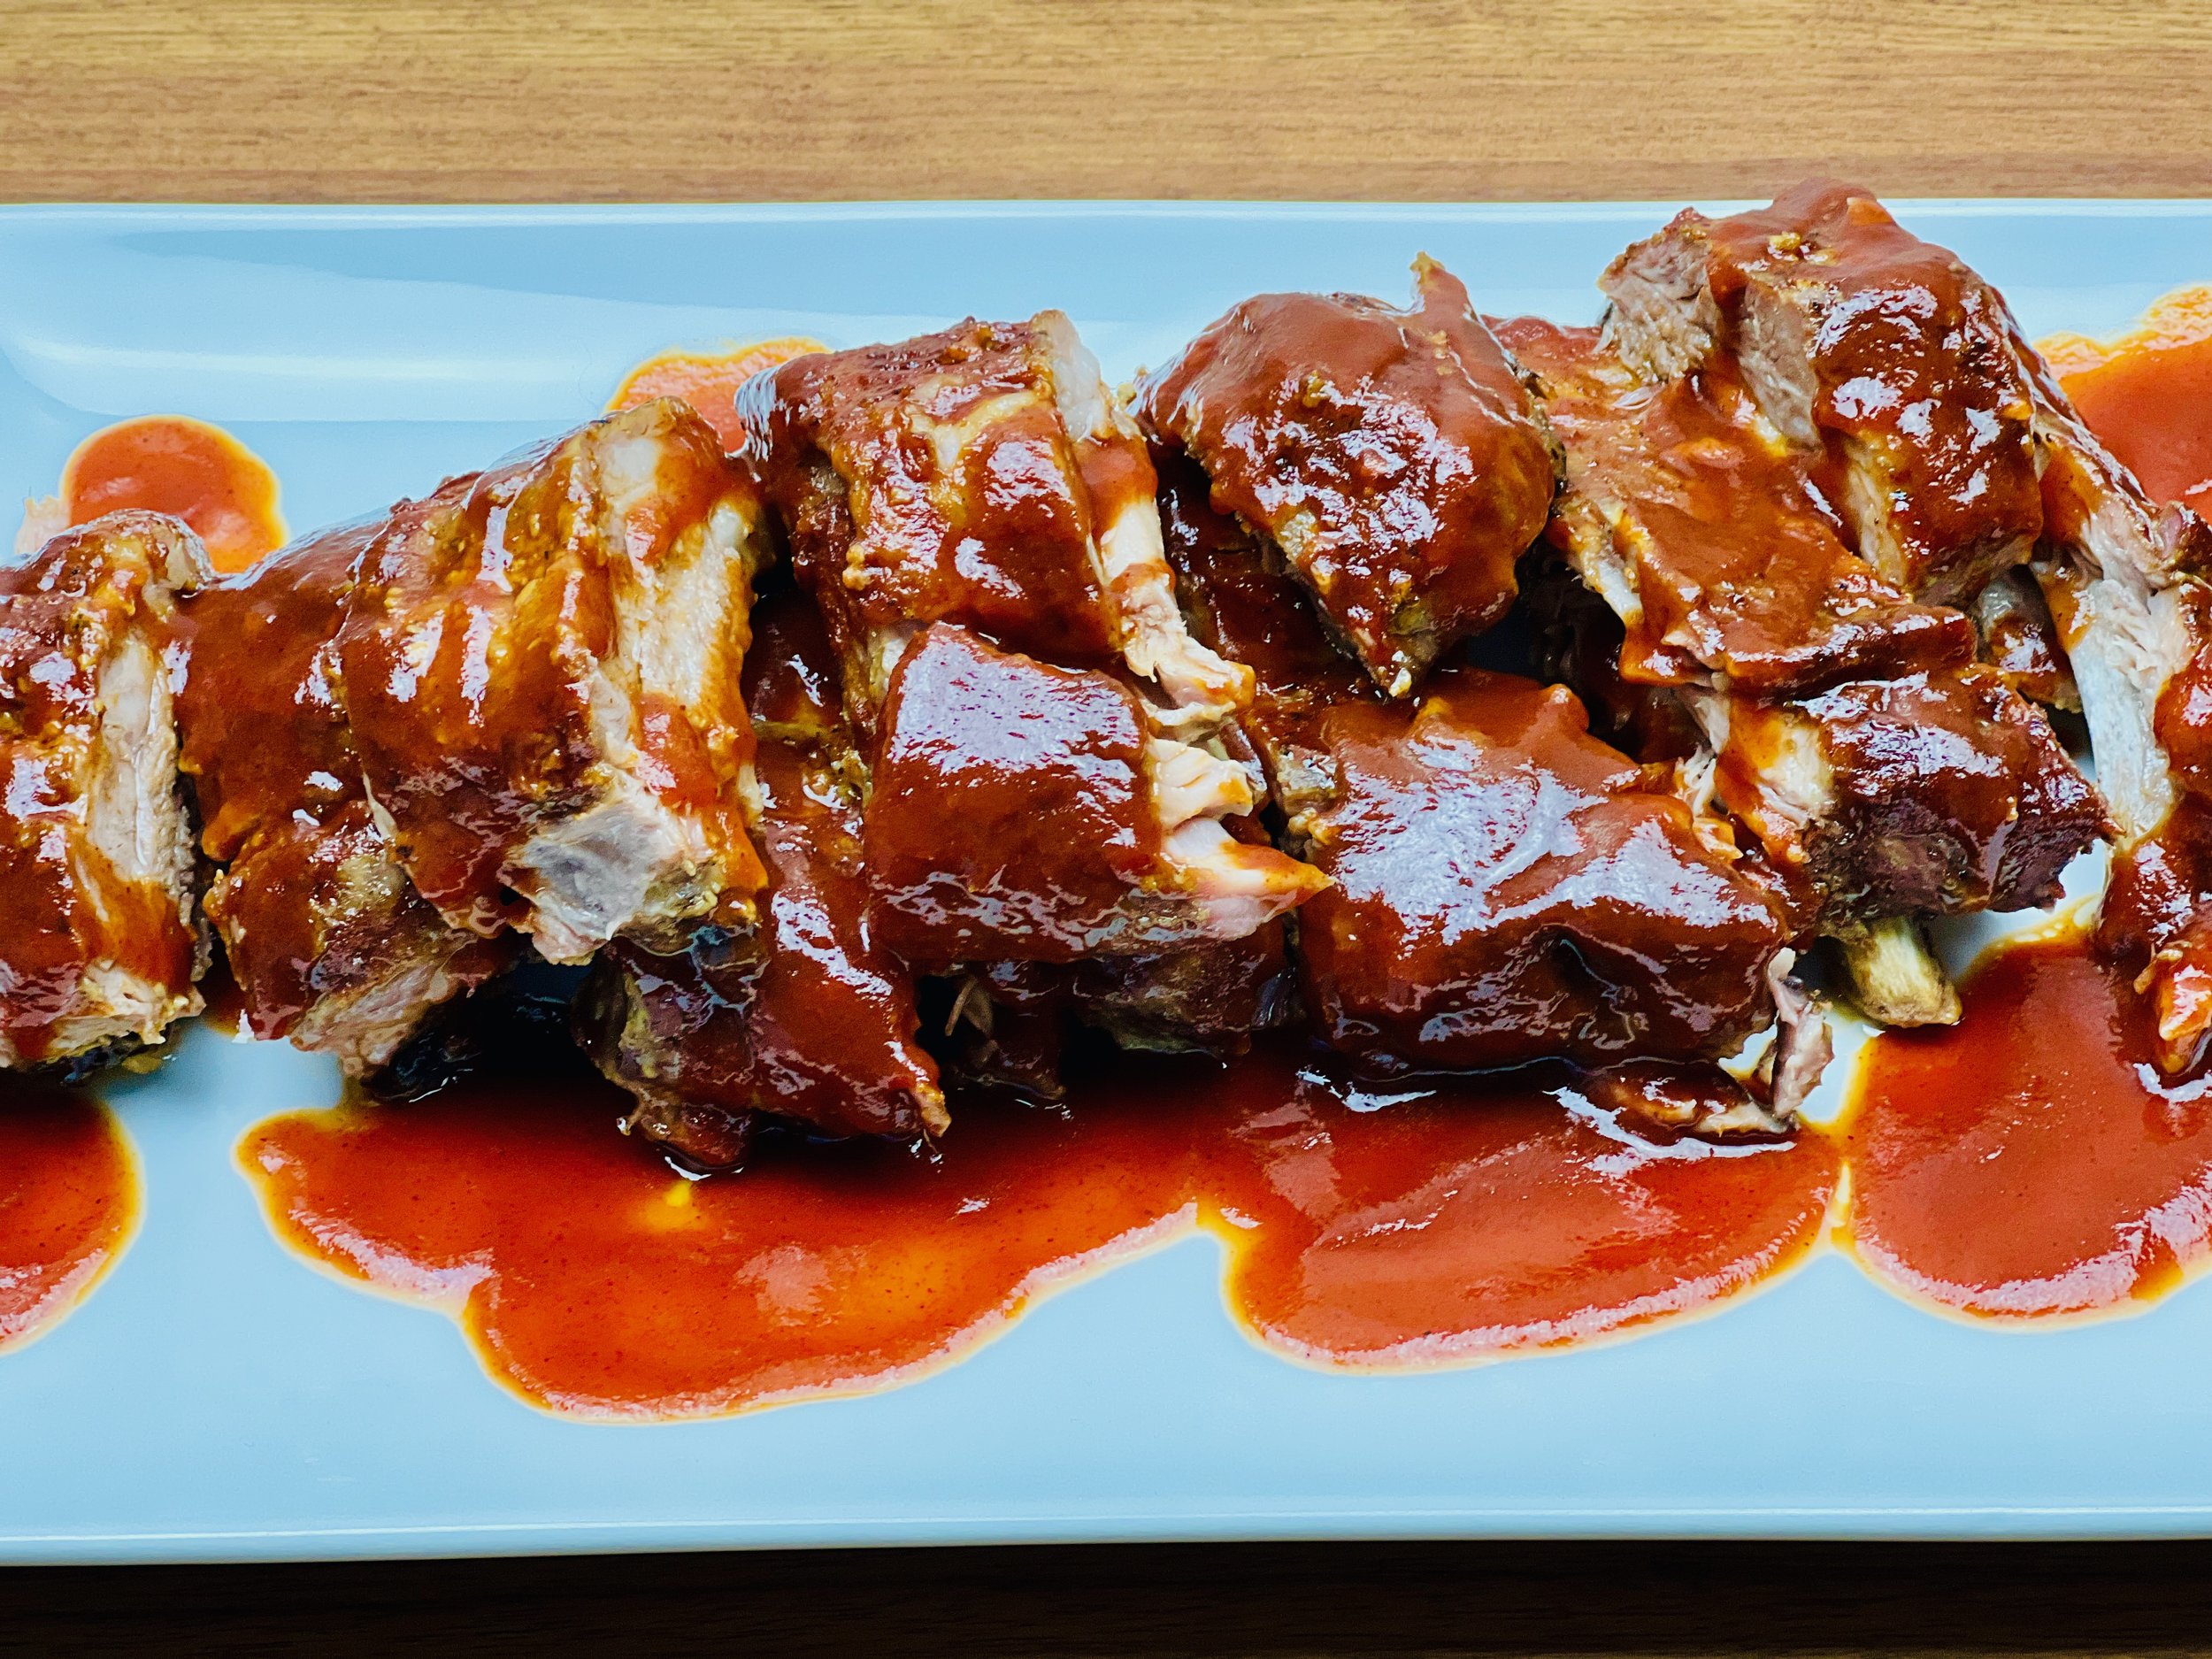
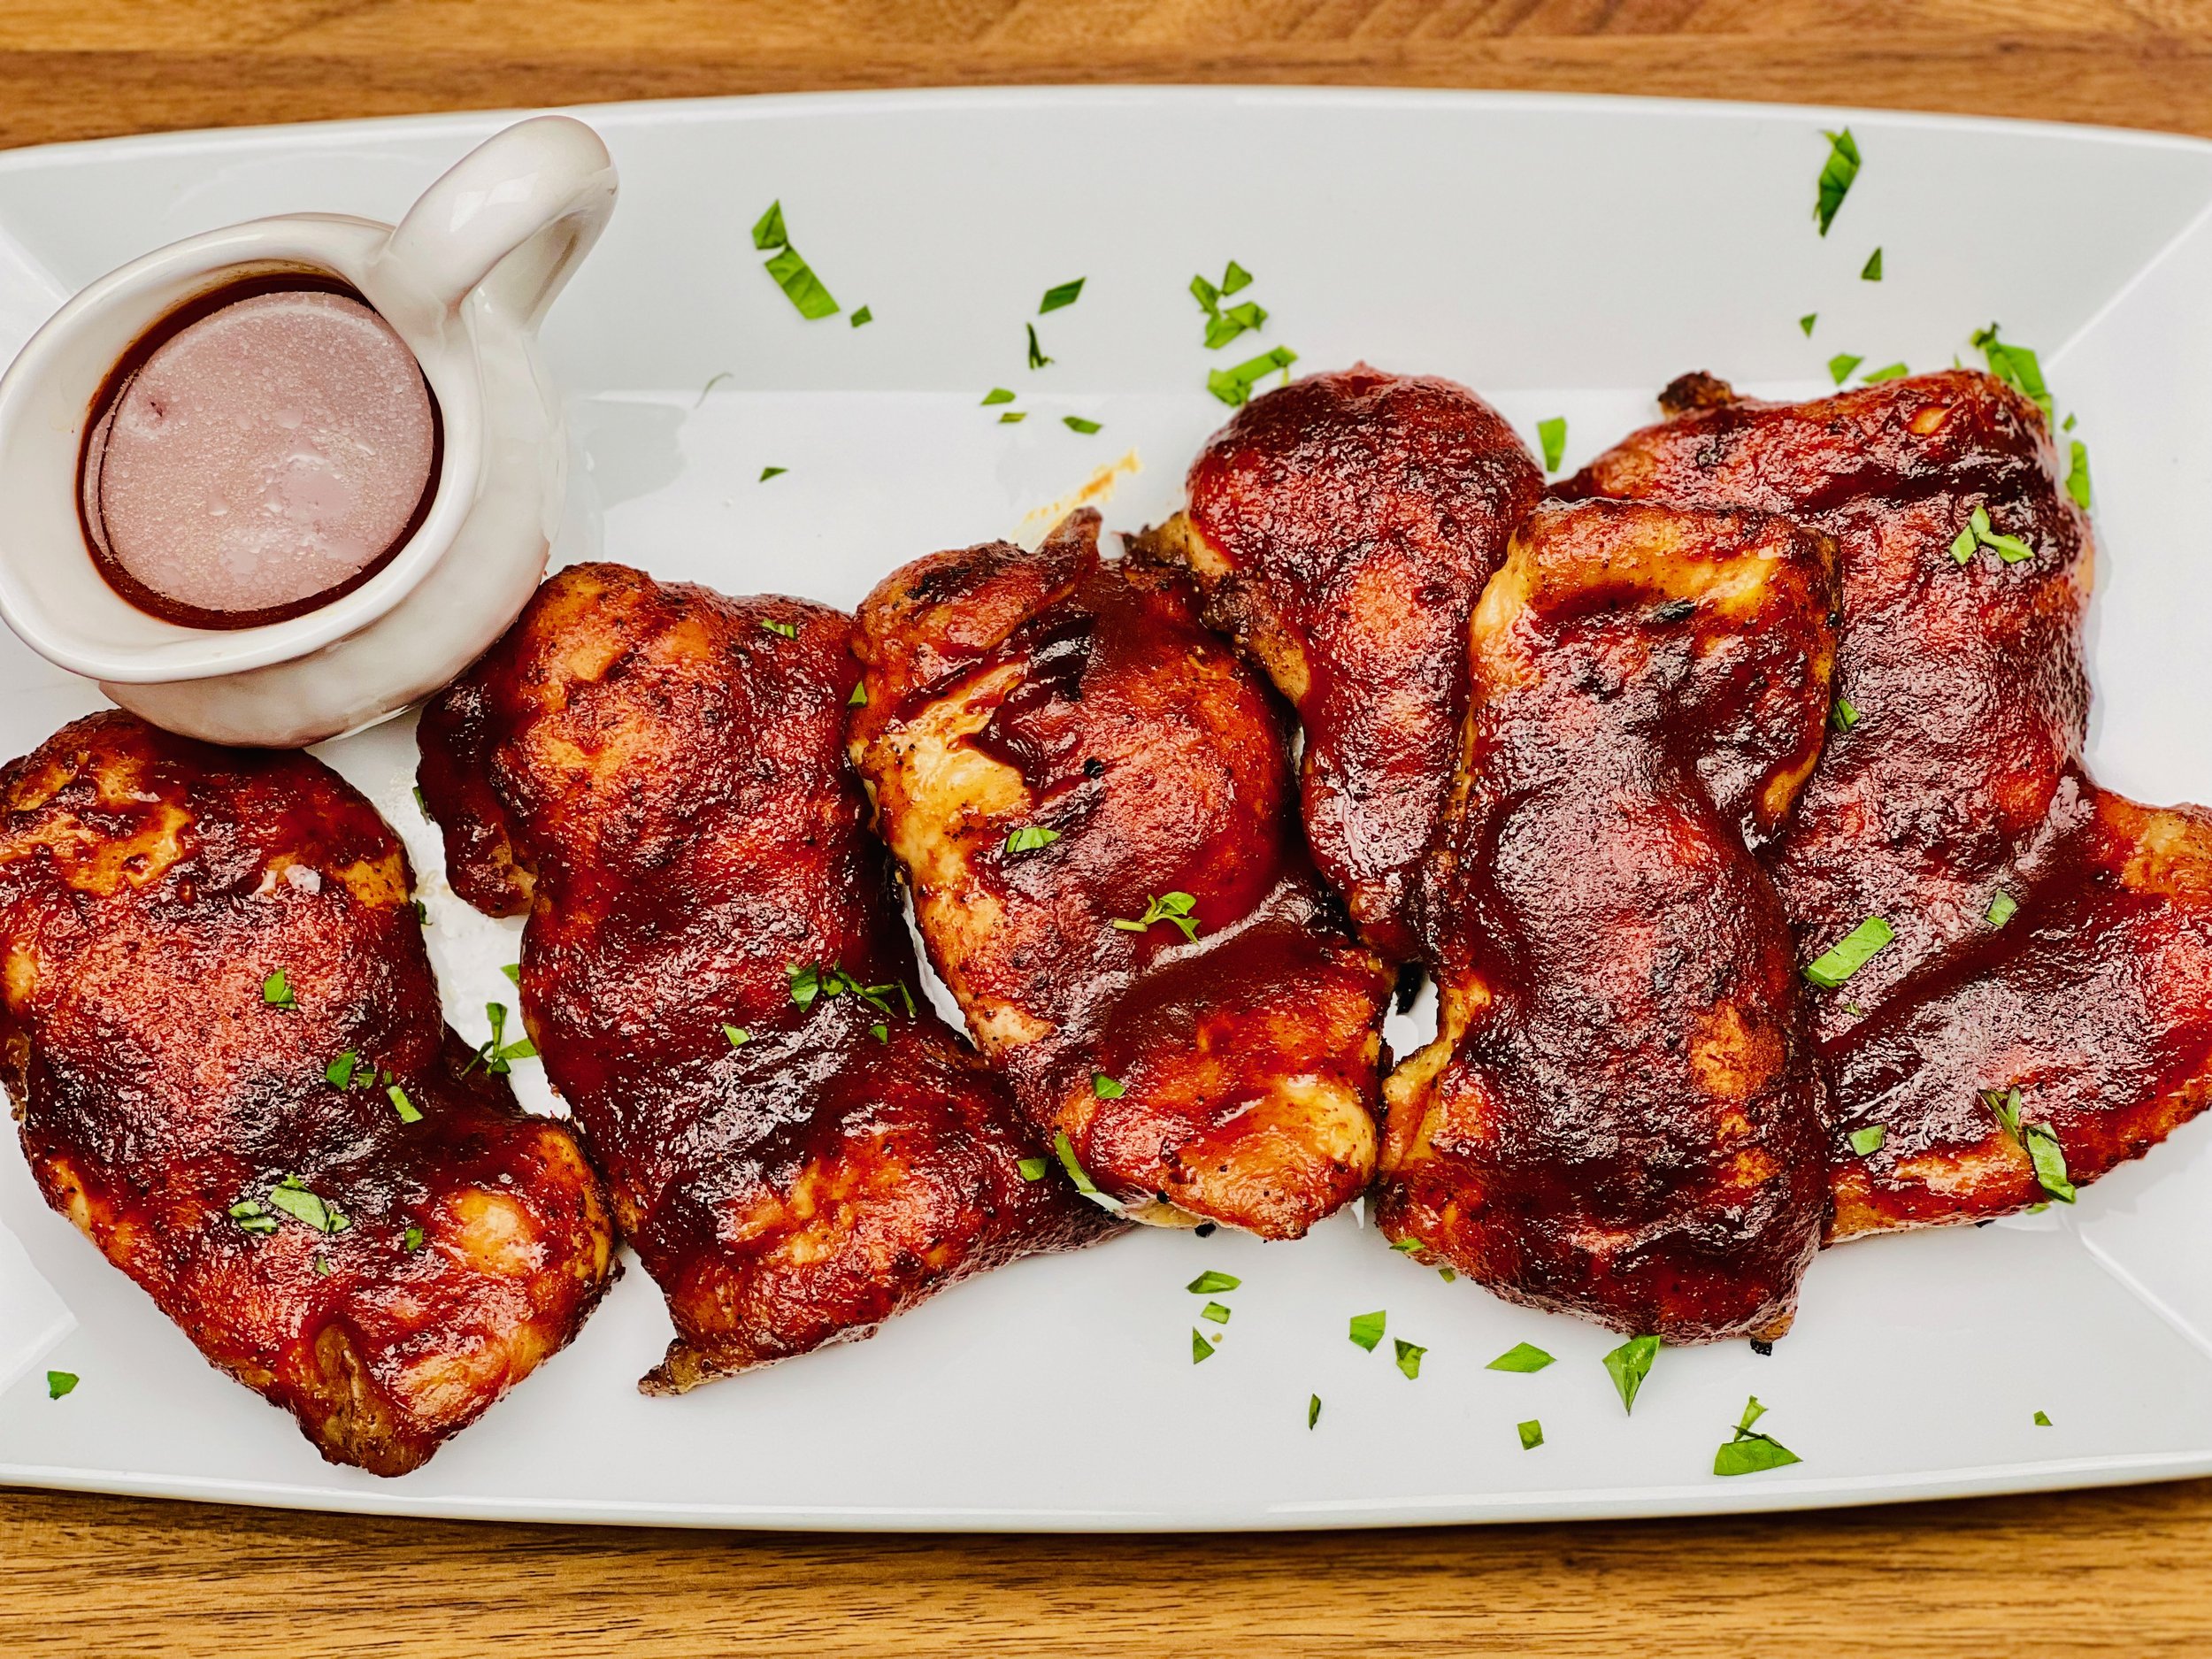
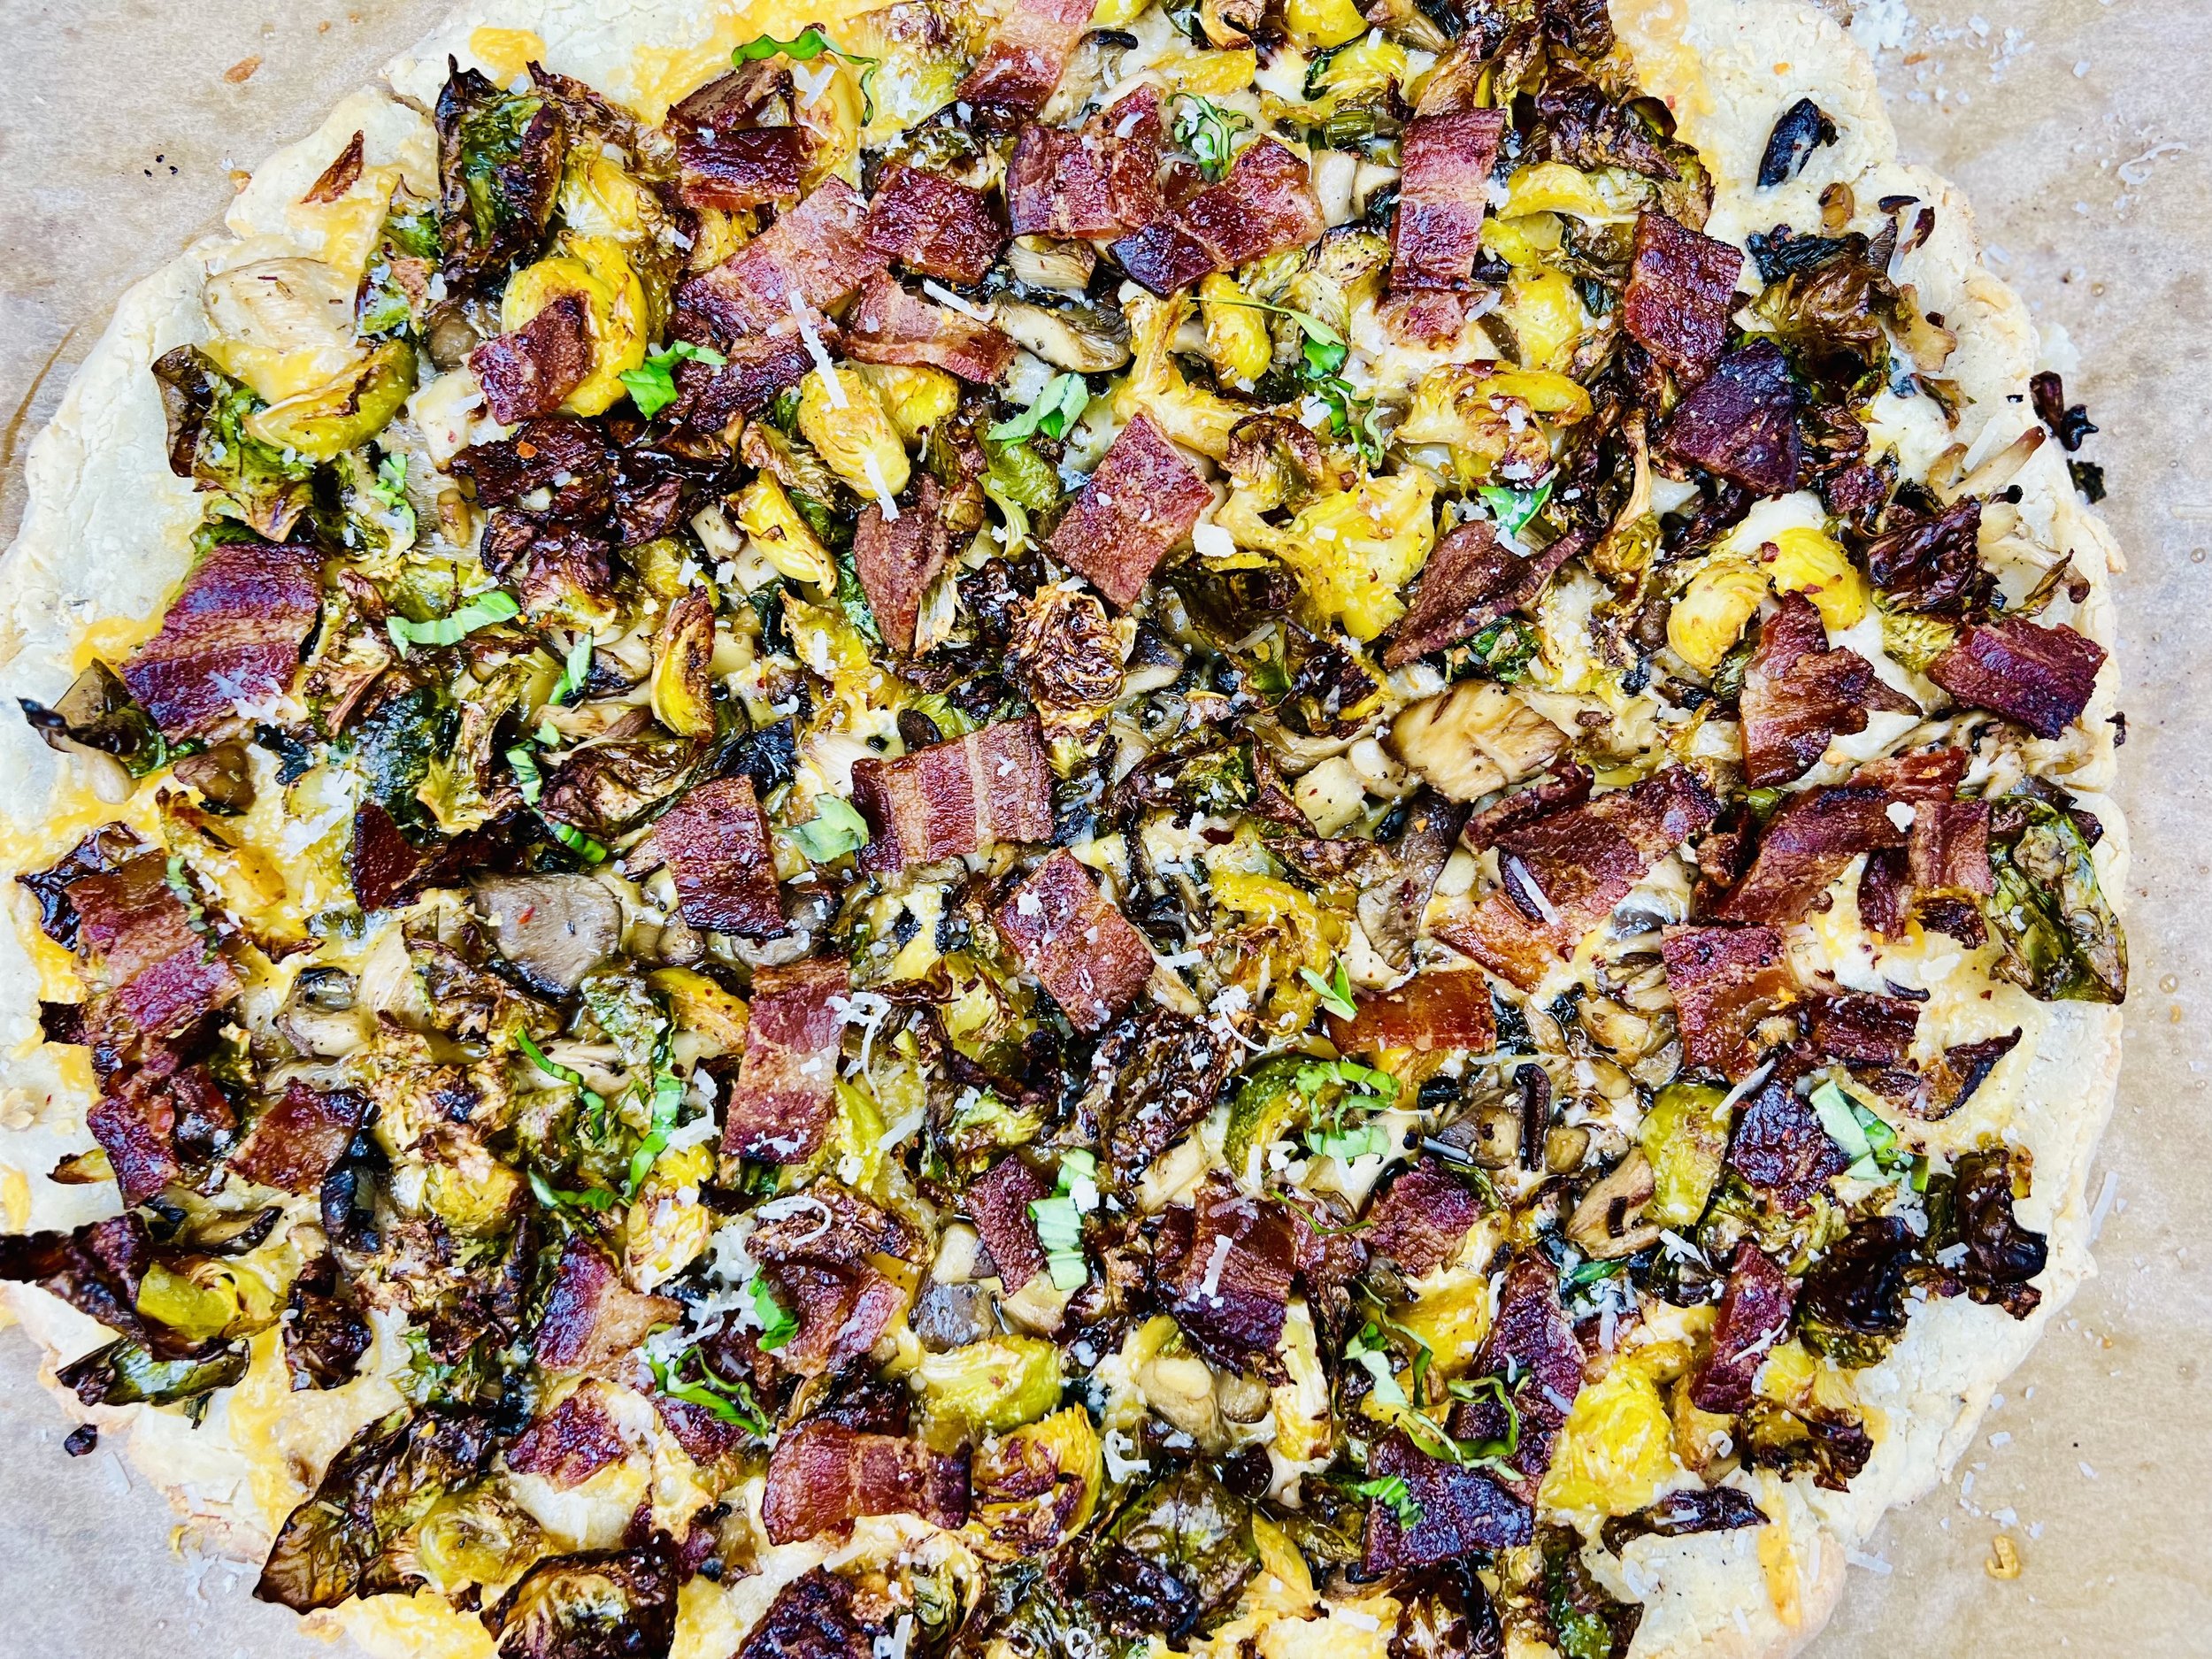
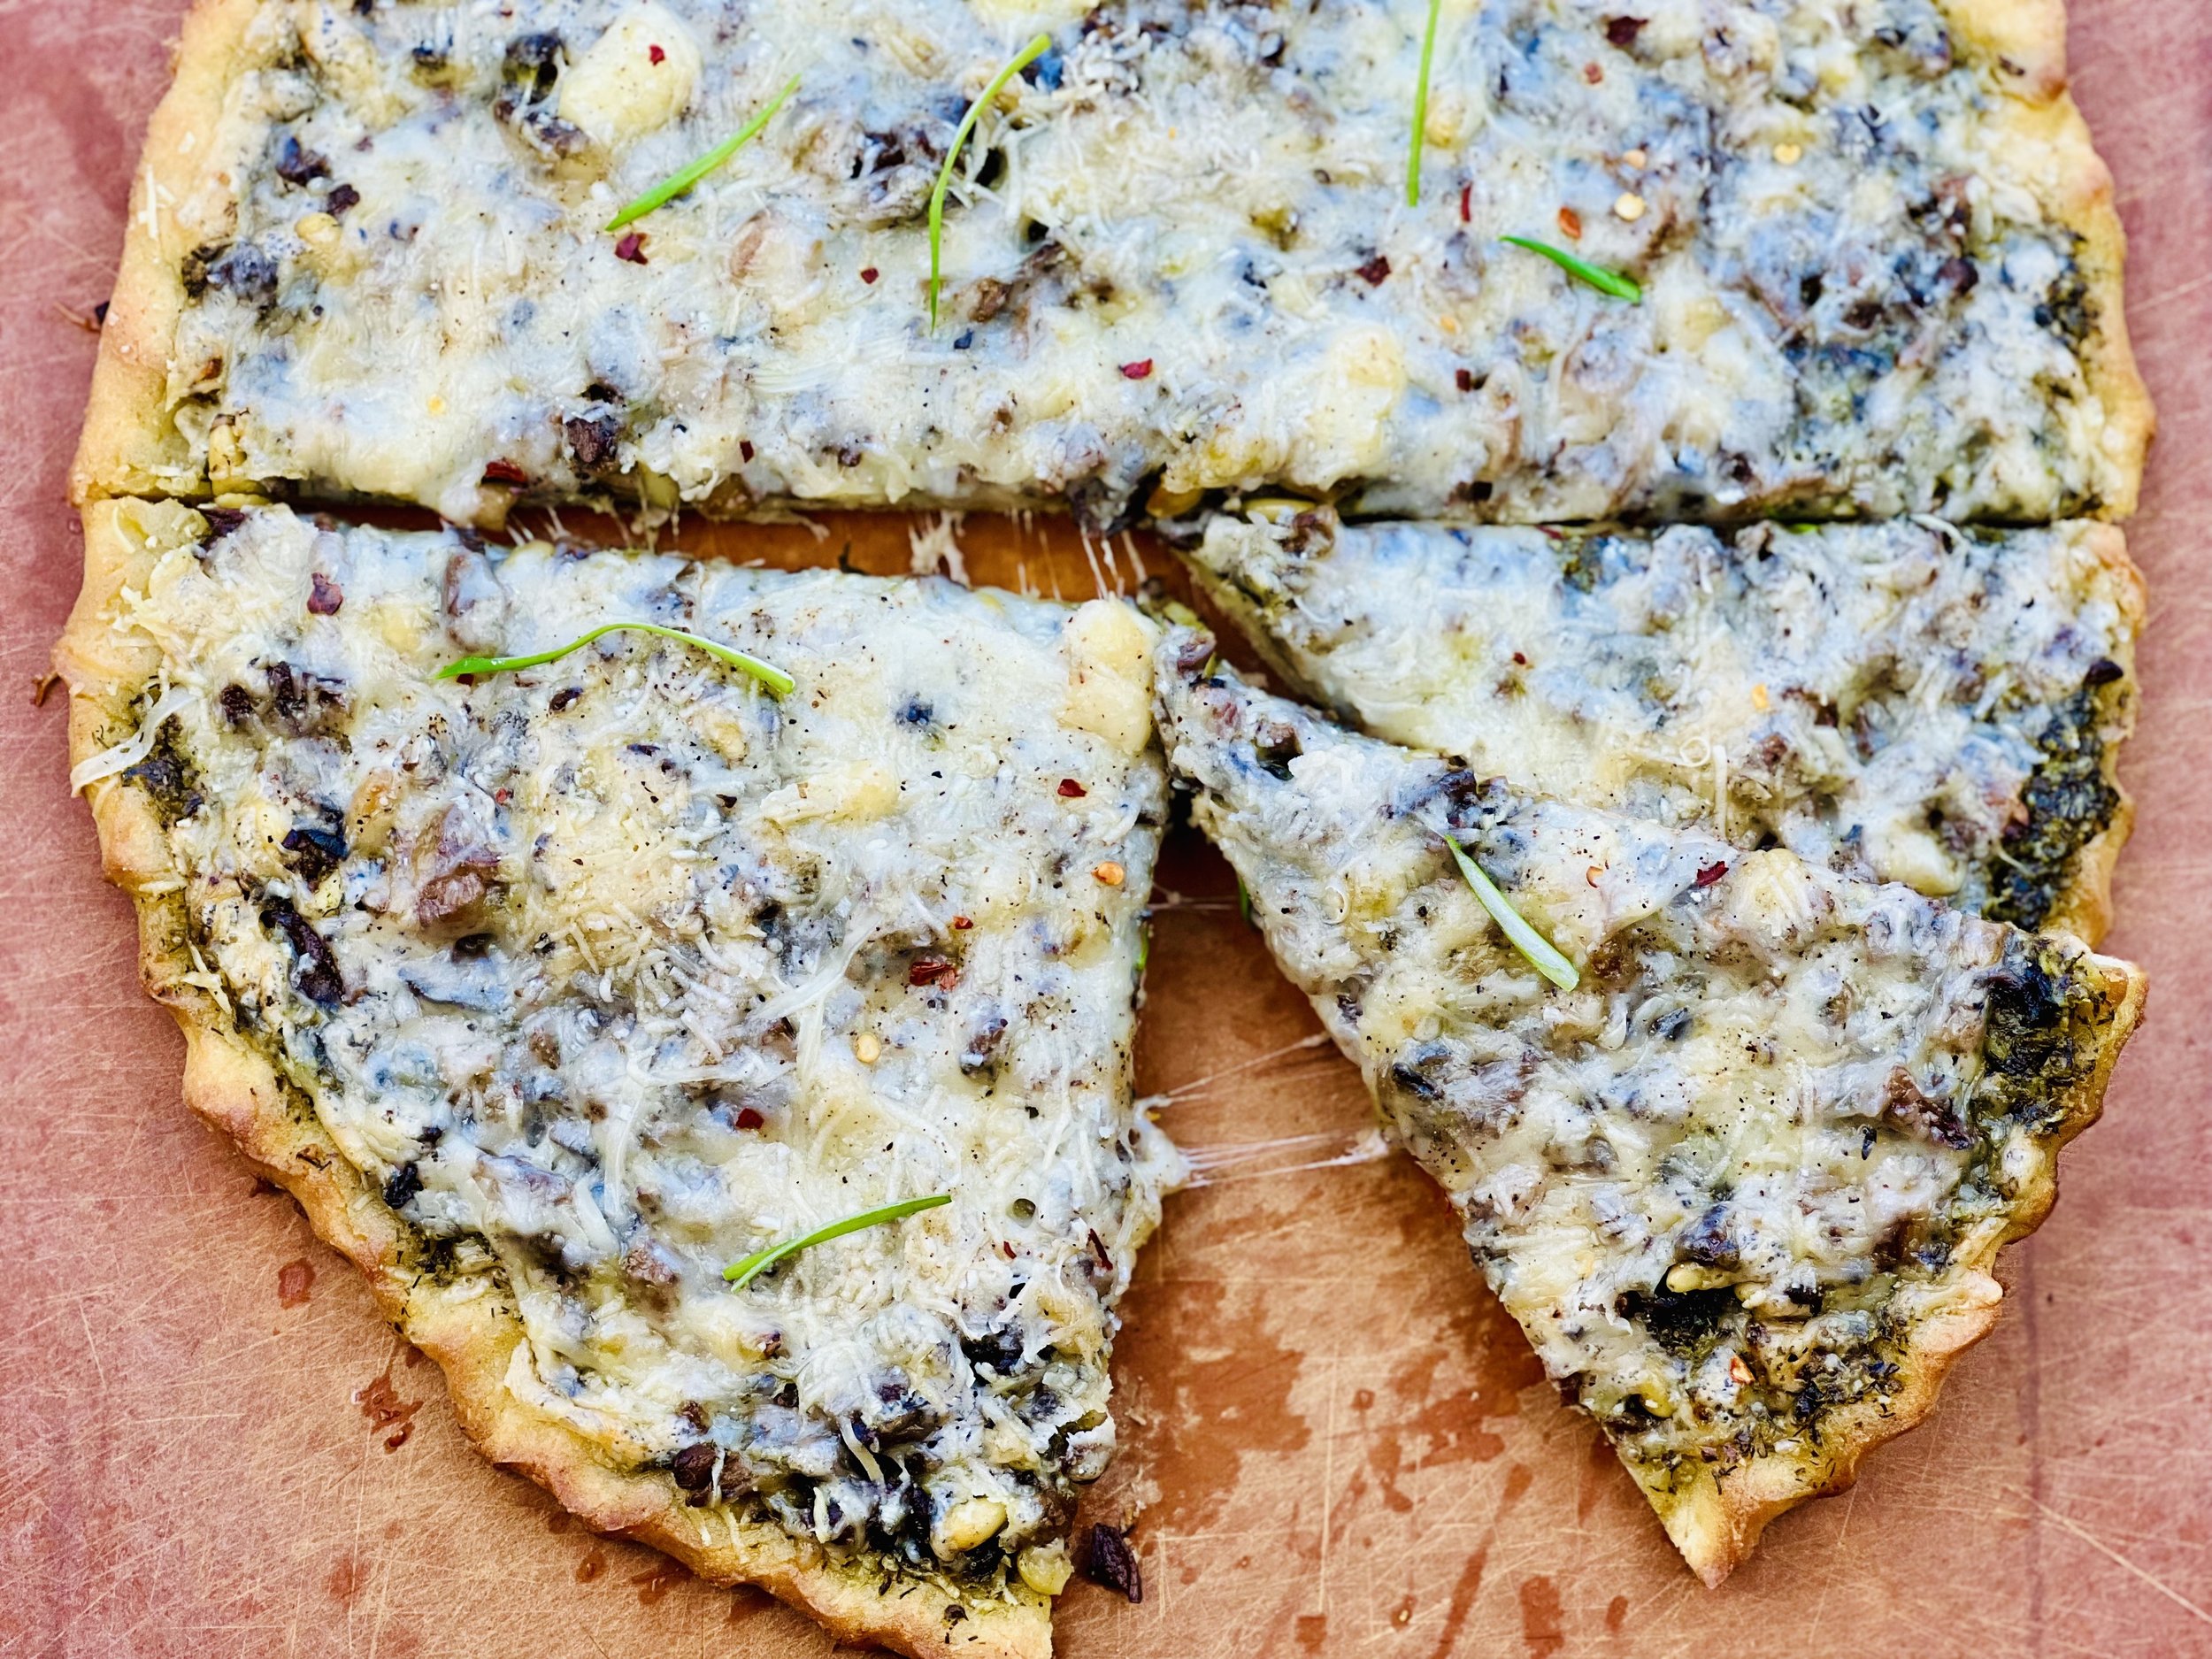
BBQ Chicken Pizza with Bacon and Pineapple (low FODMAP)
20 Minutes prep • 20 Minutes cook • Low FODMAP • Gluten-Free • Serves 4
20 Minutes prep • 20 Minutes cook • Low FODMAP • Gluten-Free • Serves 4 • Ok to make ahead: Steps 1-2
BBQ sauce, chicken, pineapple, and bacon. There are those who would say this is the perfect pizza! I say it’s delicious. And it’s a great way to use up leftover chicken. Shape the gluten-free crust, then pile on the toppings for a family-pleasing pizza dinner.
Ingredients: Pizza Crust
3/4 cup warm water (105 – 110 degrees F)
1 packet active dry yeast (about 2 1/4 tsp)
1 tablespoon sugar
2 cups gluten-free flour (Bob’s Red Mill works well)
1 teaspoon Kosher salt
1 large egg
1 teaspoon dried basil
3 tablespoons garlic-infused olive oil plus additional for spreading out the dough
1 teaspoon apple cider vinegar (or white vinegar works too)
Ingredients: Pizza
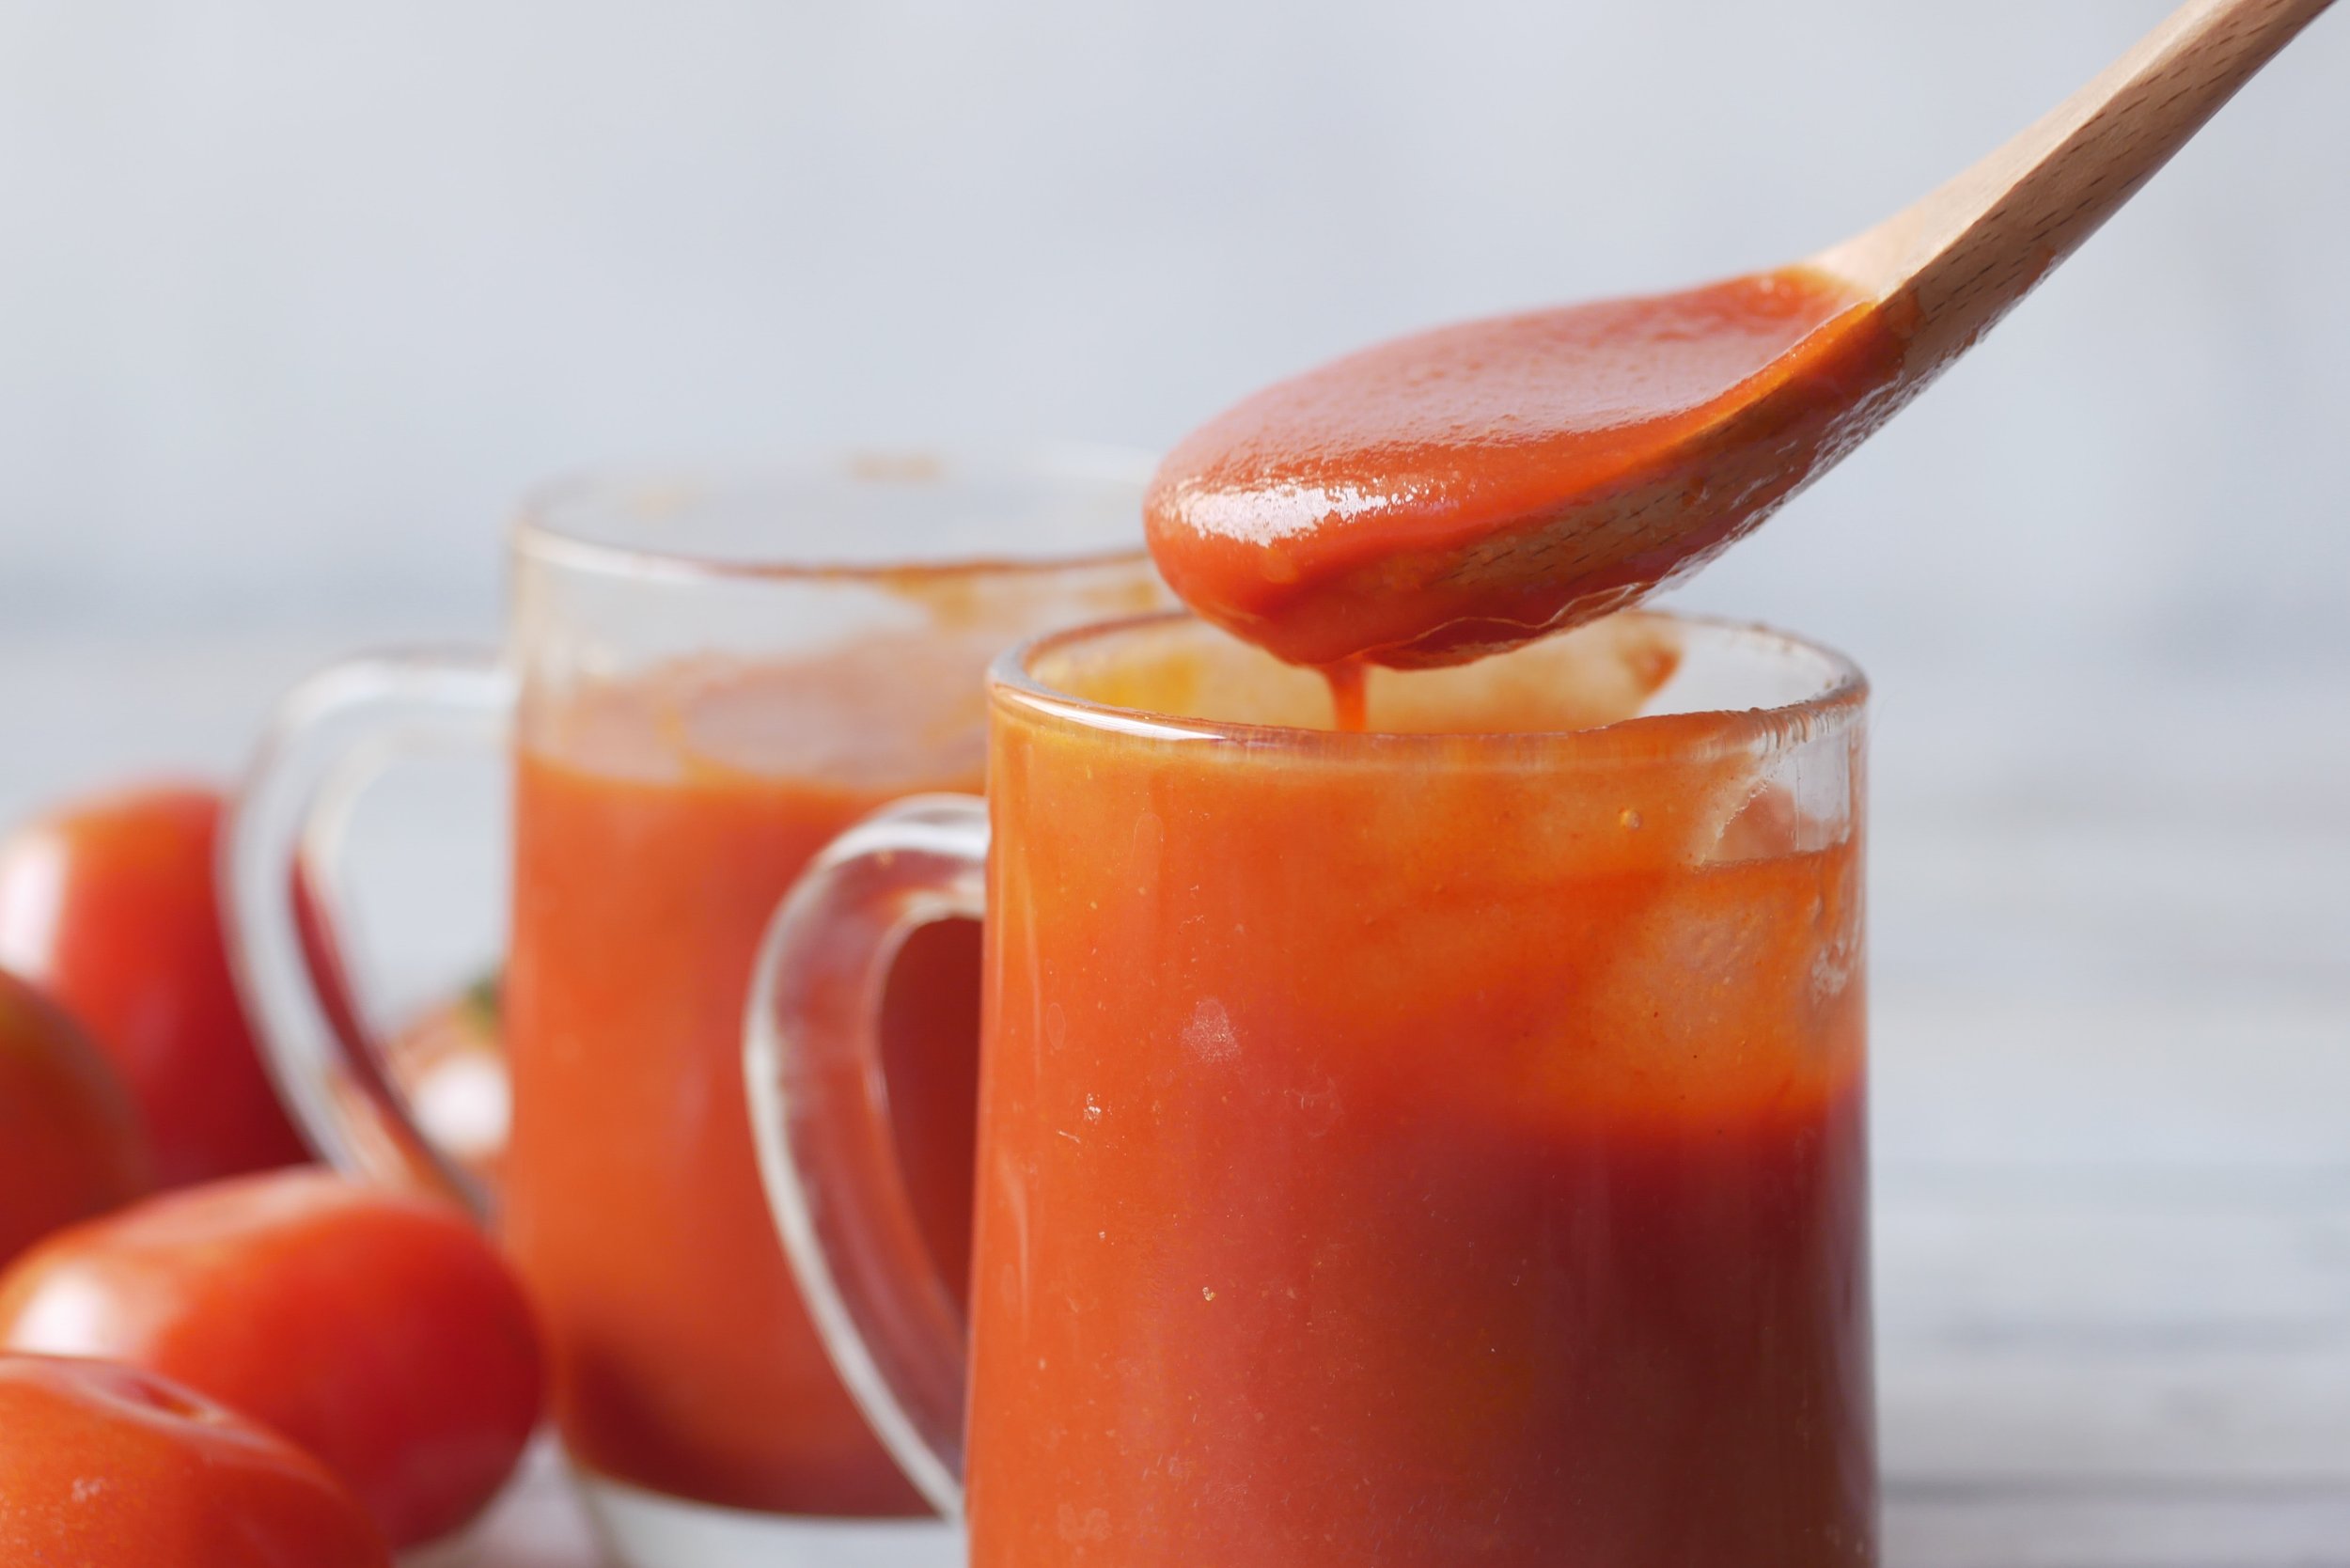
2/3 cup low FODMAP BBQ Sauce - See my recipe here
Cooked chicken (my Teriyaki Chicken works great), chopped
1 pound bacon, cooked, cooled and chopped
1 small can pineapple rounds in pineapple juice (or fresh pineapple), chopped
2 carrots, grated
2 green onions, green part only, chopped
1/2 cup cilantro, chopped
1/4 teaspoon chili flakes, crushed (or to your liking)
1 1/2 cups extra sharp cheddar cheese, grated
Directions
(1) Make the BBQ sauce: Directions to make my BBQ sauce are here. You may also use purchased low FODMAP. BBQ sauce such as FODY Foods Feelin’ Saucy BBQ Sauce.
(2) Prepare other ingredients: Cook and chop the bacon. Chop the cooked chicken. Grate the cheese. Chop the vegetables. Chop the pineapple.
Make-ahead note: At this point, you may set the BBQ sauce, and other prepared ingredients and set aside (and refrigerate) until you’re ready to make the pizza.
(3) Preheat the oven: Set pizza stone or cookie sheet on the middle rack of the oven and preheat oven to 425 degrees F.
(4) Start the yeast: Combine water, sugar, and yeast in a mixing bowl and let it sit for 5 minutes until it begins to froth.
(5) Make the dough: Combine flour, salt, and dried basil in a large bowl. Add in the egg, olive oil, vinegar, and yeast mixture. Stir until the flour is combined and the dough comes away from the sides of the bowl. Don’t add more flour – the dough is supposed to be a bit sticky.
(6) Shape the dough: Turn the dough out in the middle of a piece of parchment on a flat surface and, using your fingers dipped in olive oil, gently press and push the dough out into a round or rectangle. It’s a bit sticky so keep dipping your fingers in olive oil and keep pressing it out until it’s all about the same thickness and in the shape you want. The surface of your crust doesn’t have to be smooth, your toppings will be covering it anyway. I like to spread it out fairly thin so I have more room to add toppings. You can roll or crimp around the outside edge of the crust if you like just to make it pretty.
(7) Pre-cook the pizza crust: Before adding any sauce or toppings, transfer the dough on the parchment to the hot pizza stone or cookie sheet in the oven and cook for 8 minutes.
(8) Add toppings: Remove from the oven and spread the BBQ sauce on the hot pizza crust. Then, layer on the cooked chicken, pineapple, bacon, green onions, and the cheese. Season with salt and pepper.
(9) Finish: Put the pizza back in the oven and cook for another 8-10 minutes until the edges of the crust are browning nicely and the cheese is melted and bubbly.
(10) Plate and serve: Remove from the oven to a cutting board. Sprinkle with the red pepper flakes, and chopped cilantro, and let stand for a couple of minutes, then slice and serve hot as it’s best that way!
Eat and enjoy every bite because you can!
Recipe note: I use Diamond Crystal Kosher salt in all my recipes because it has a wonderful flat and crisp flake that tastes delicious. It is also the least salty salt available so you can use it more liberally as a seasoning than you can table salt or sea salt. If you use another type of salt, you may need to reduce the amount so it is not over-salted.
Link note: This post contains links for you to easily purchase items listed on the page. In some cases, we have provided a special discount code for IBS Game Changers so be sure to use it when you purchase an item to get the discount that has been arranged just for you! As an Amazon Associate, I earn a commission from qualifying Amazon purchases.
More Deliciously Low FODMAP™ Pizza recipes


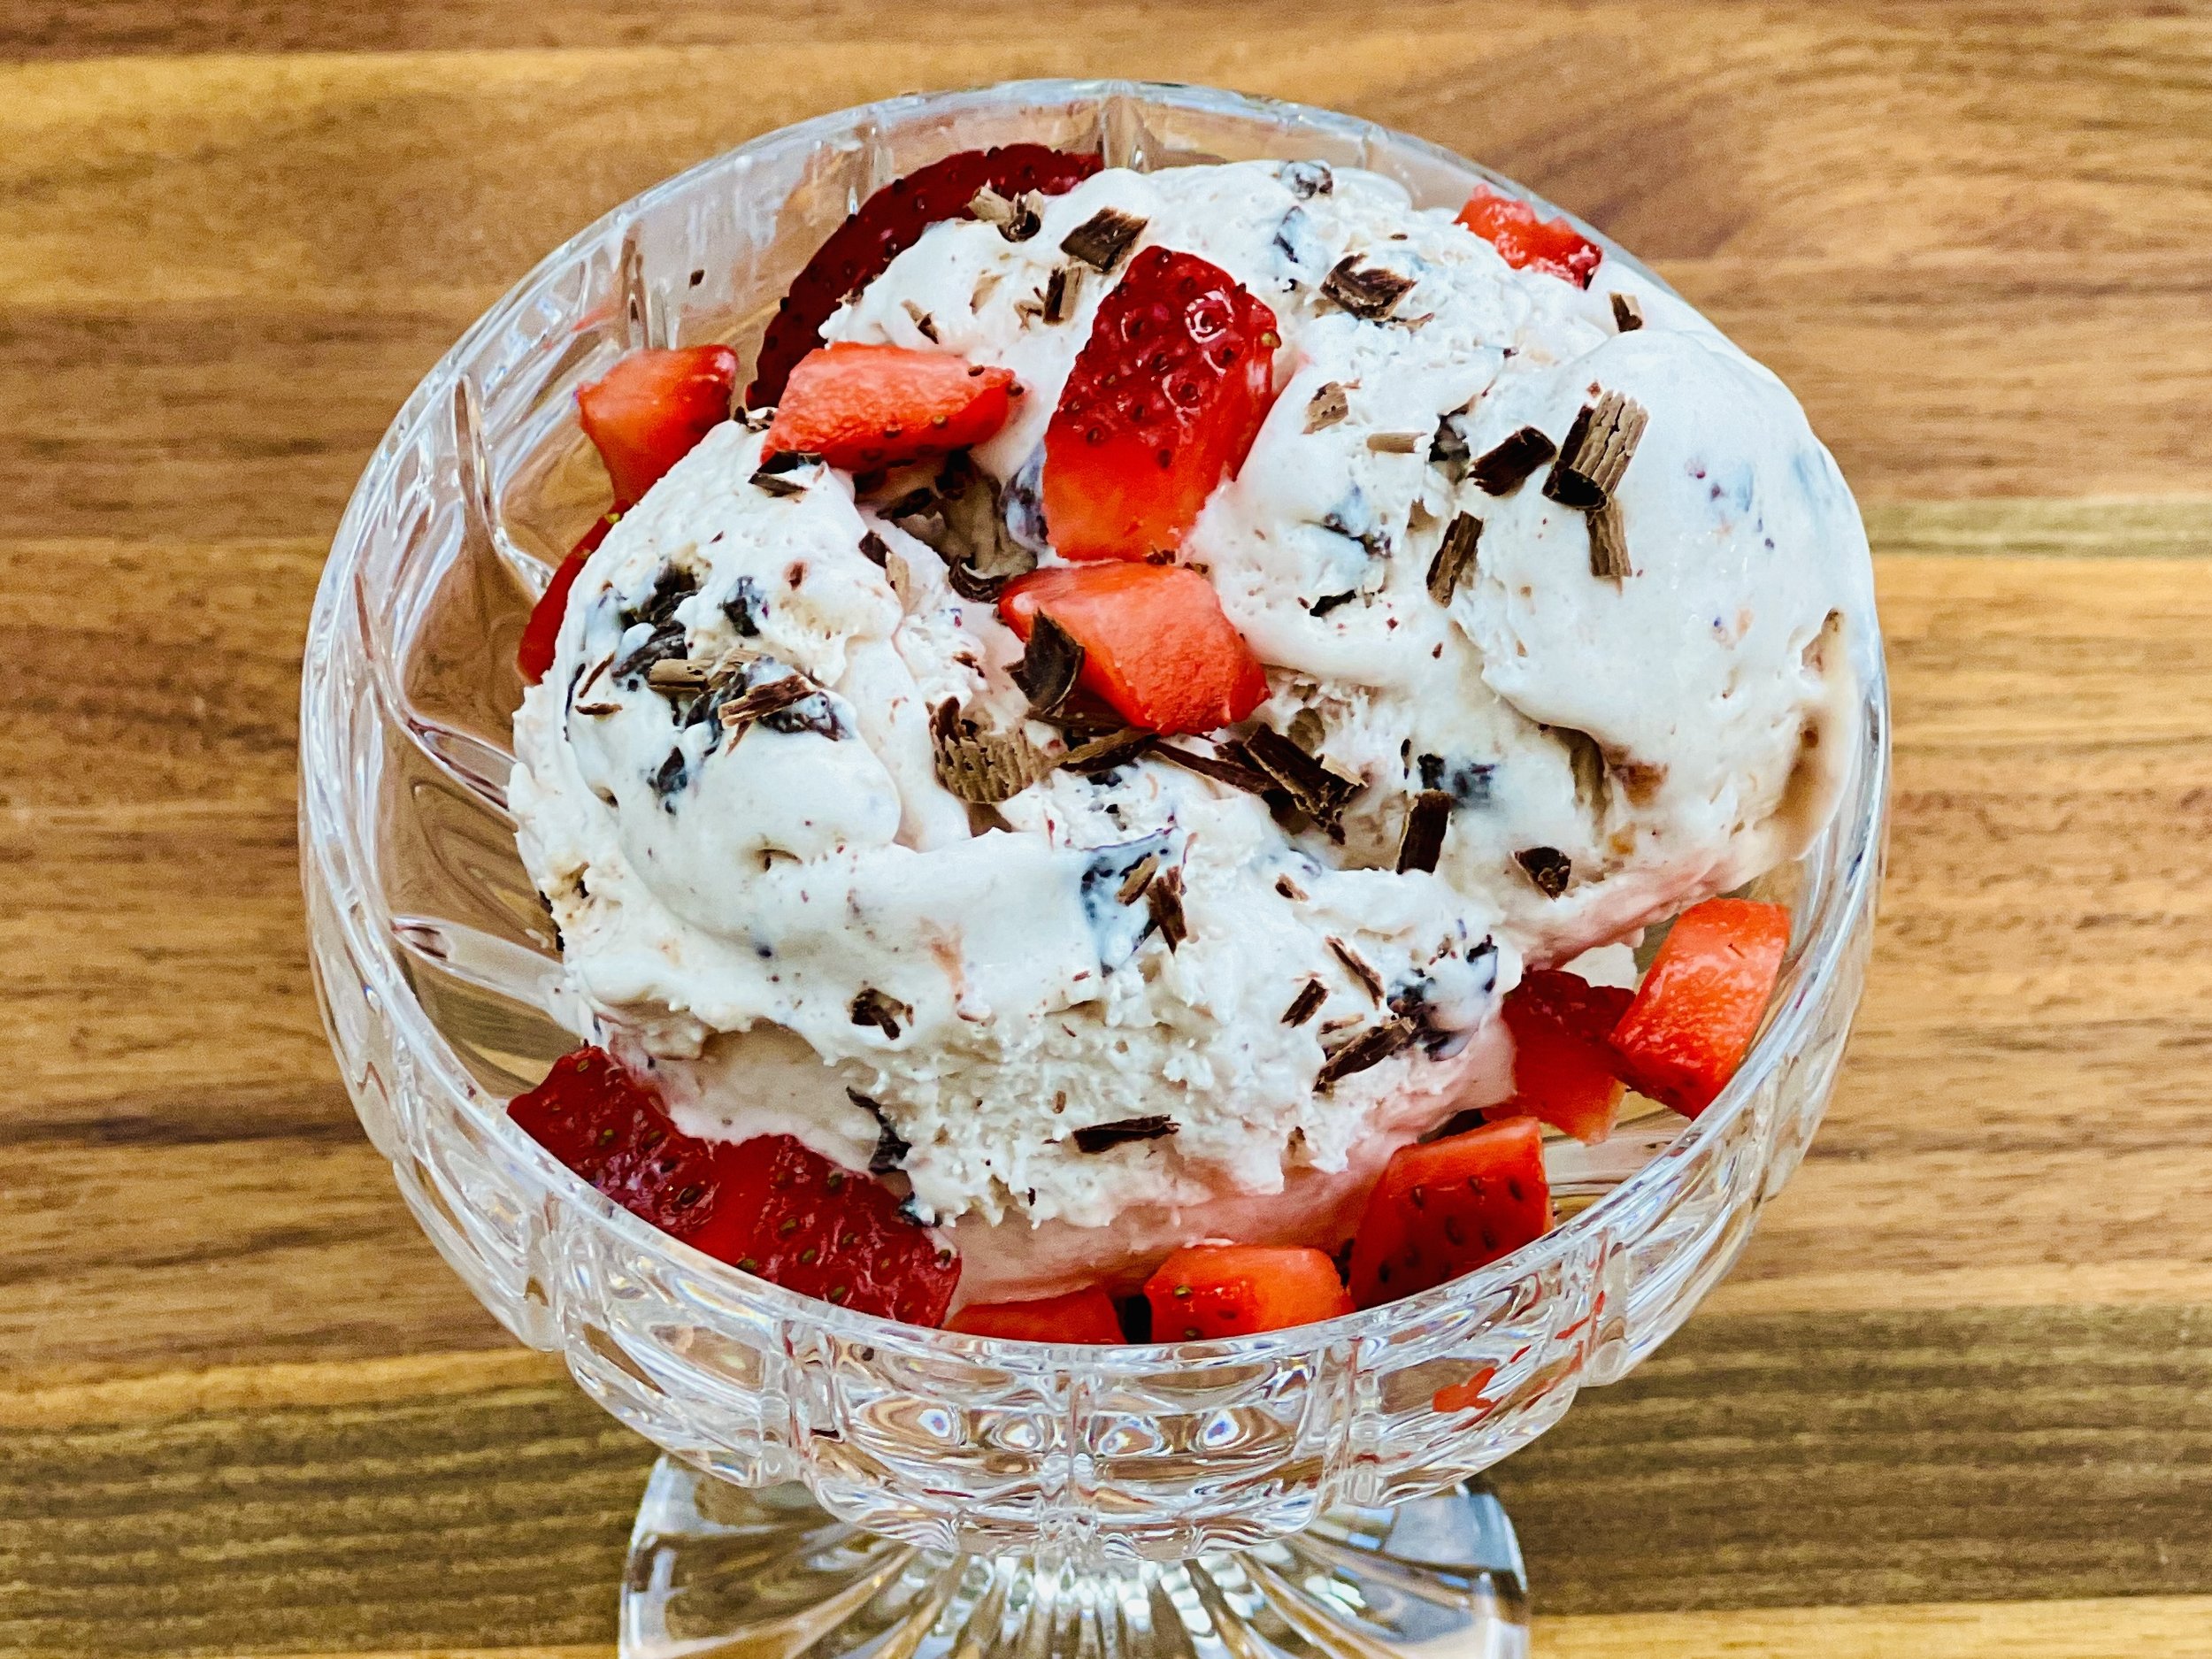
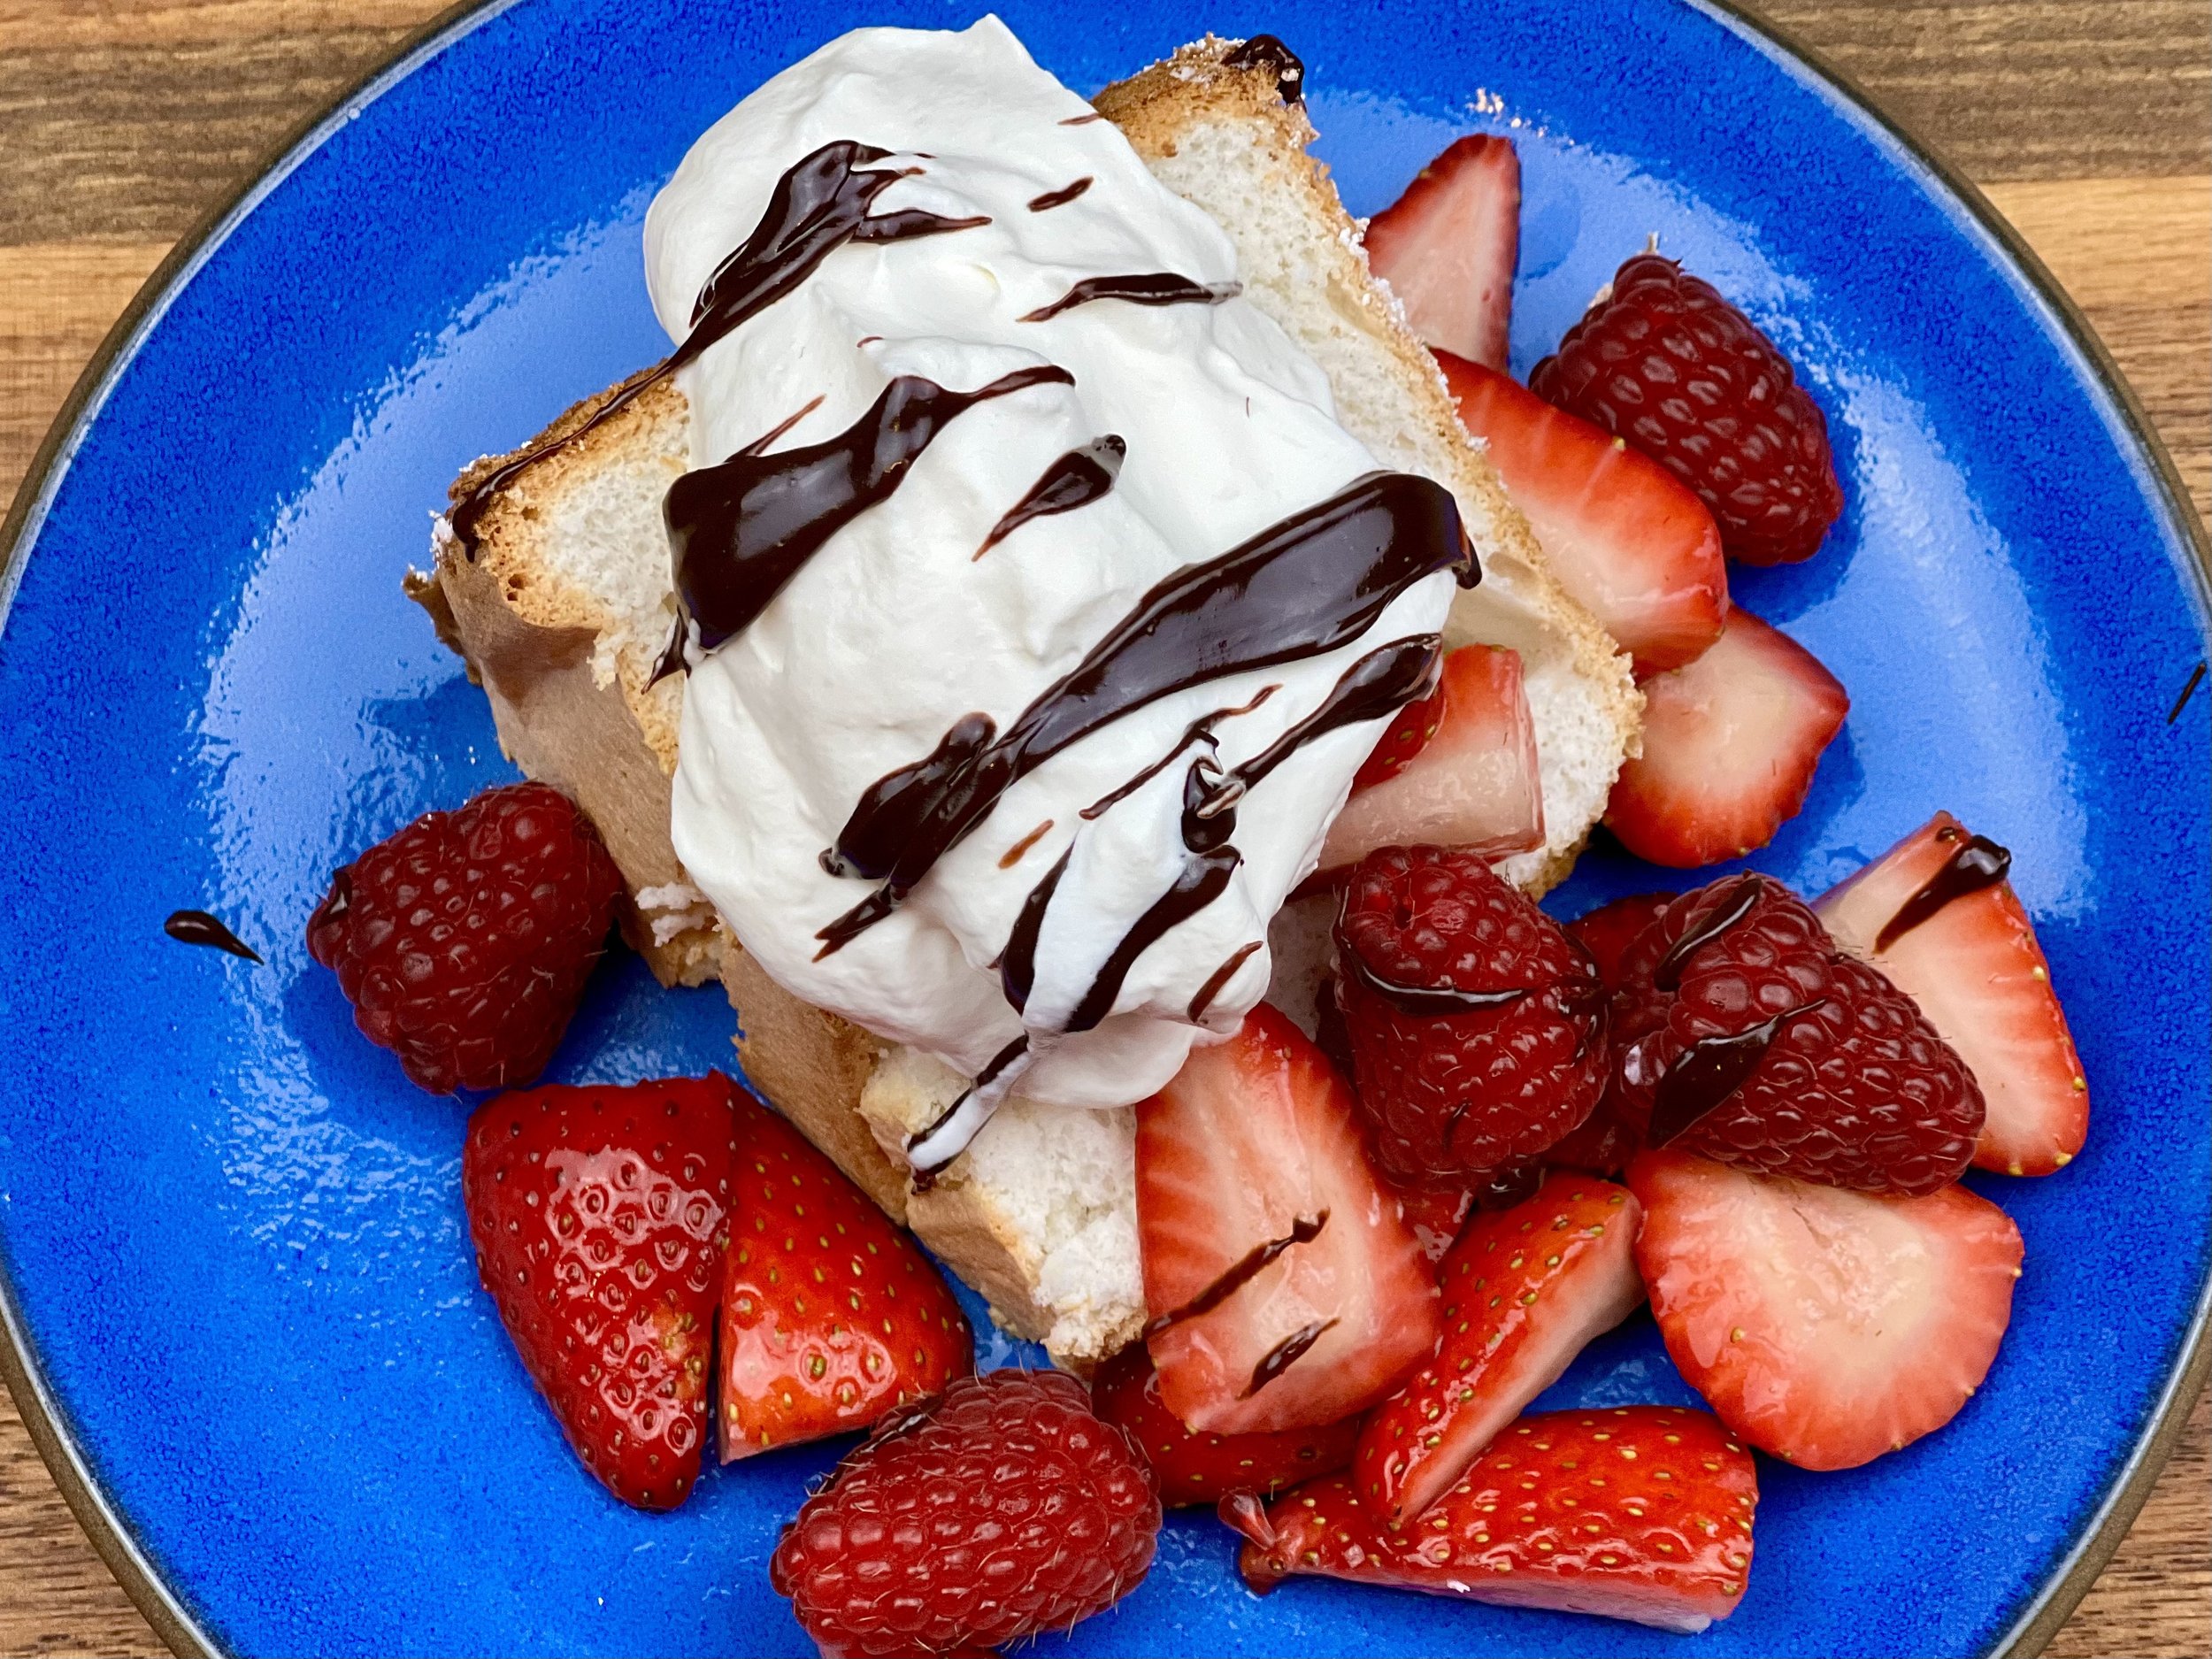
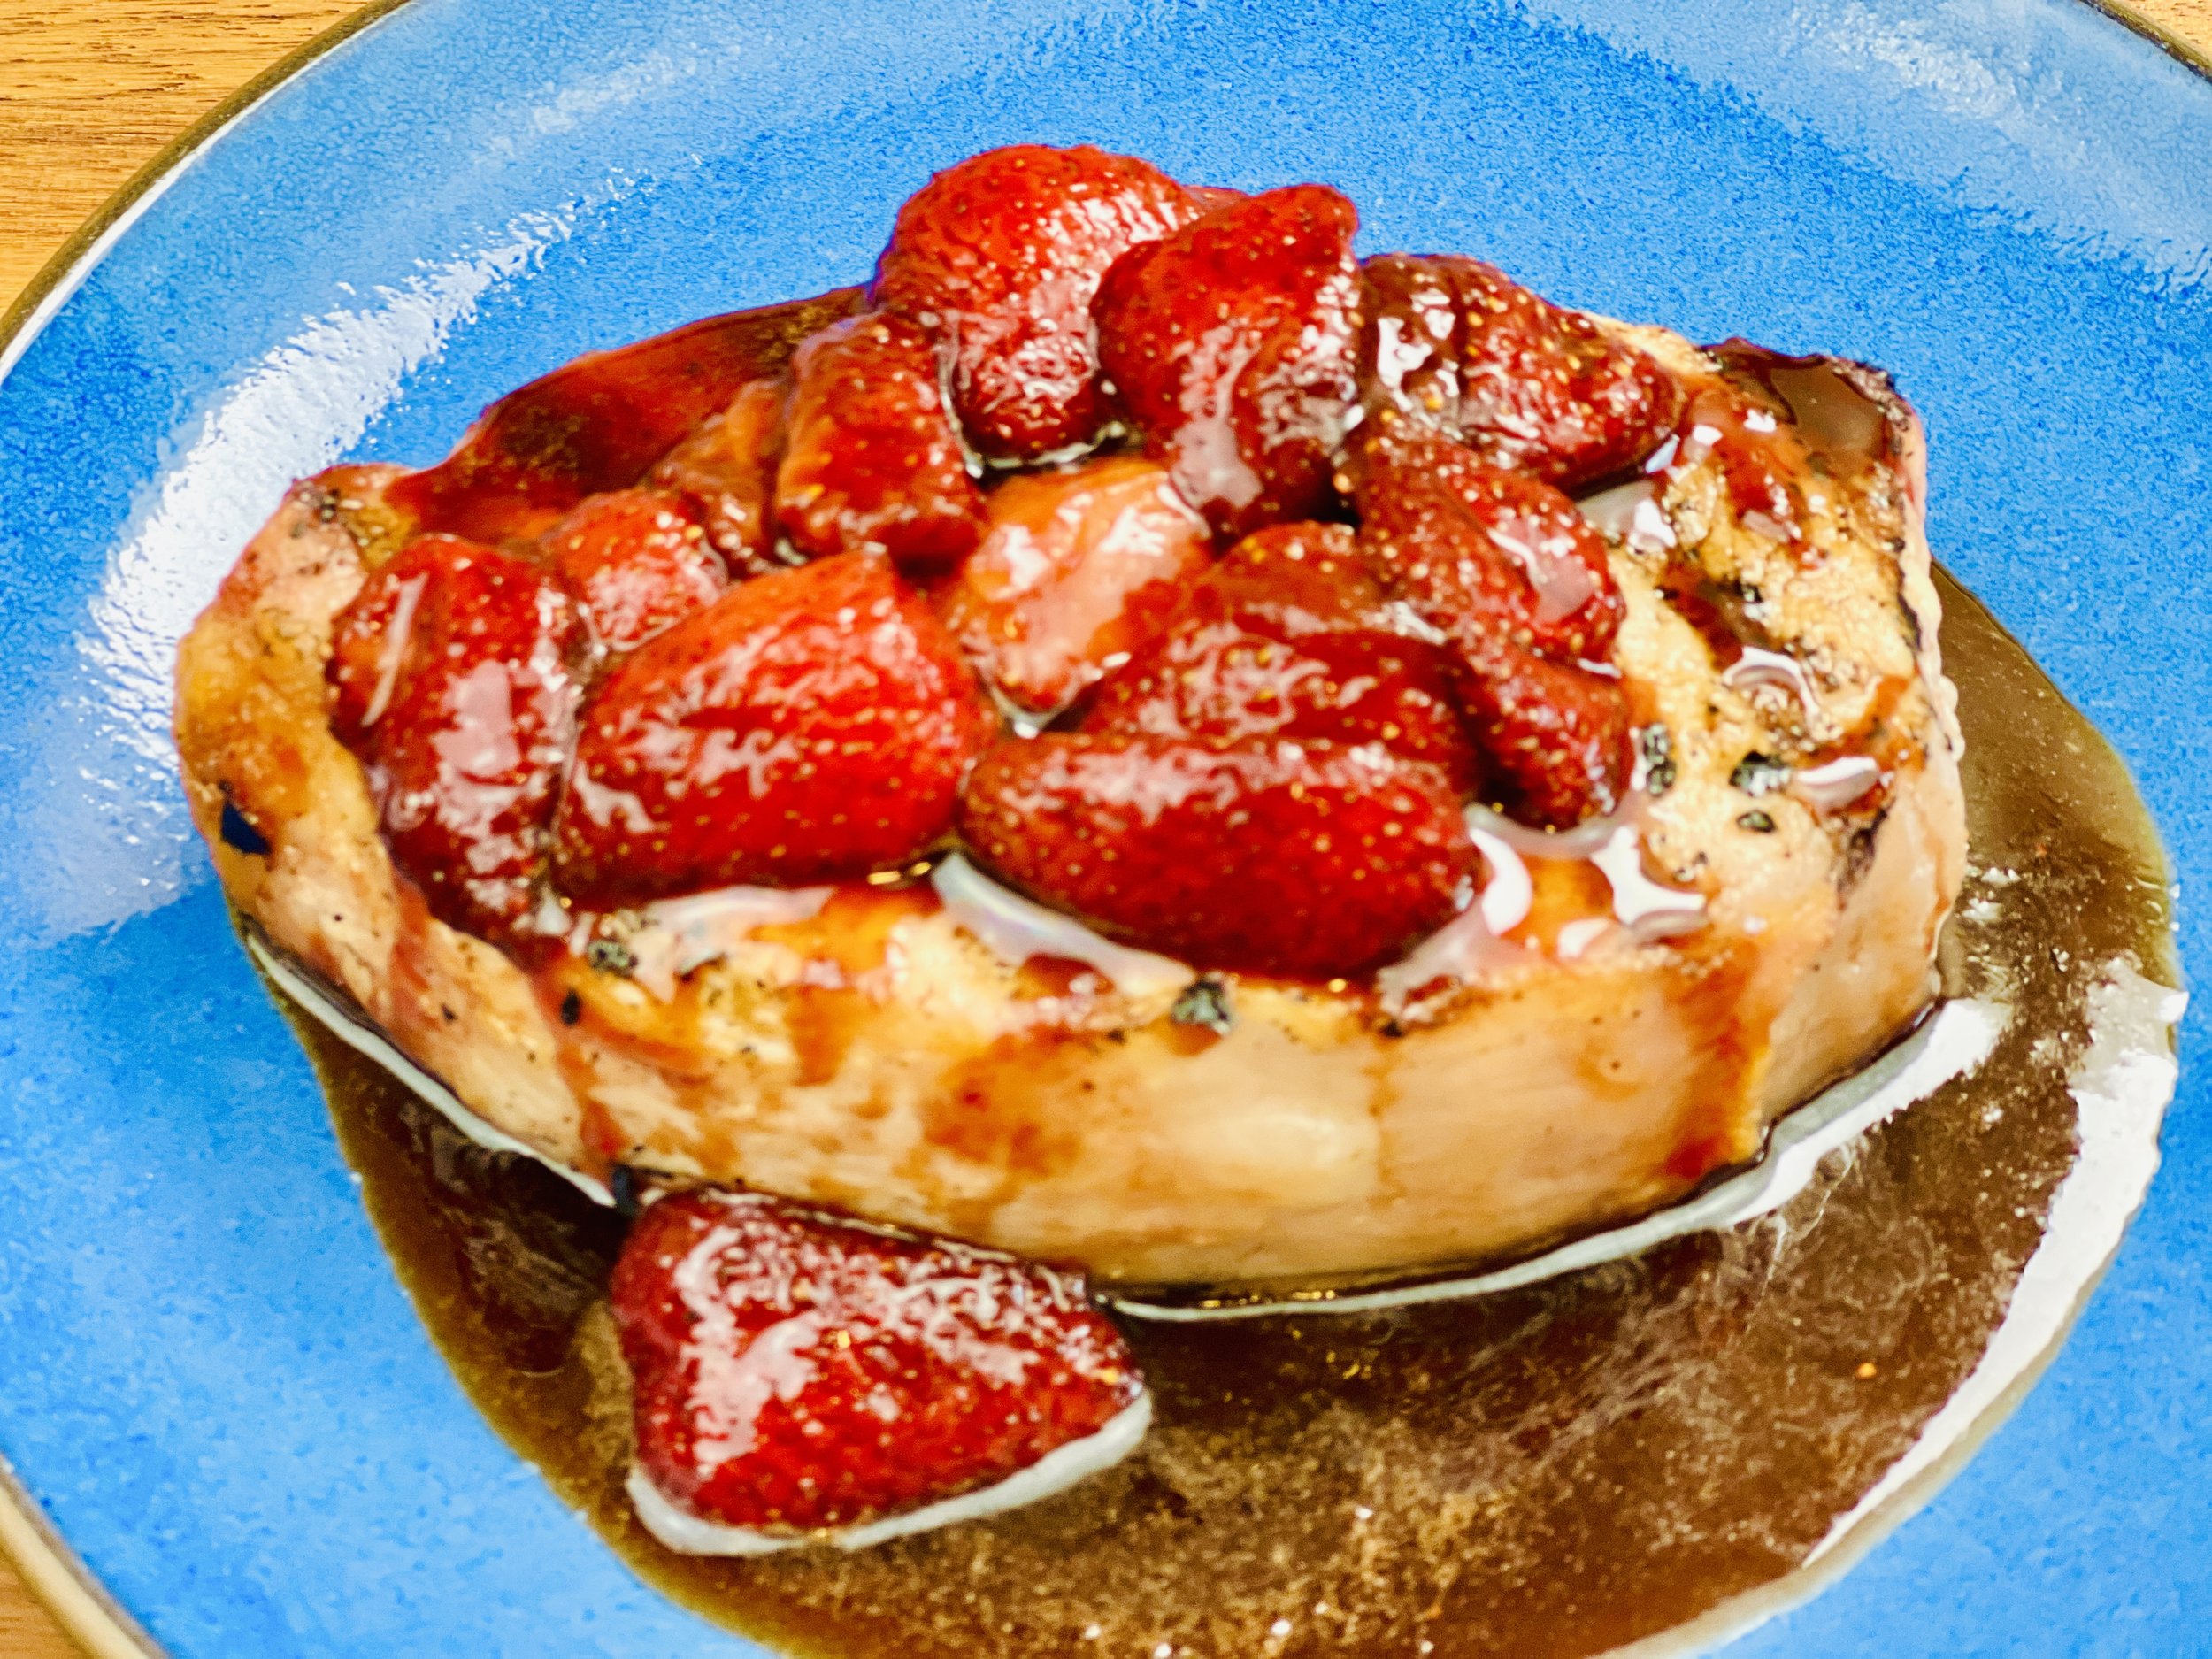
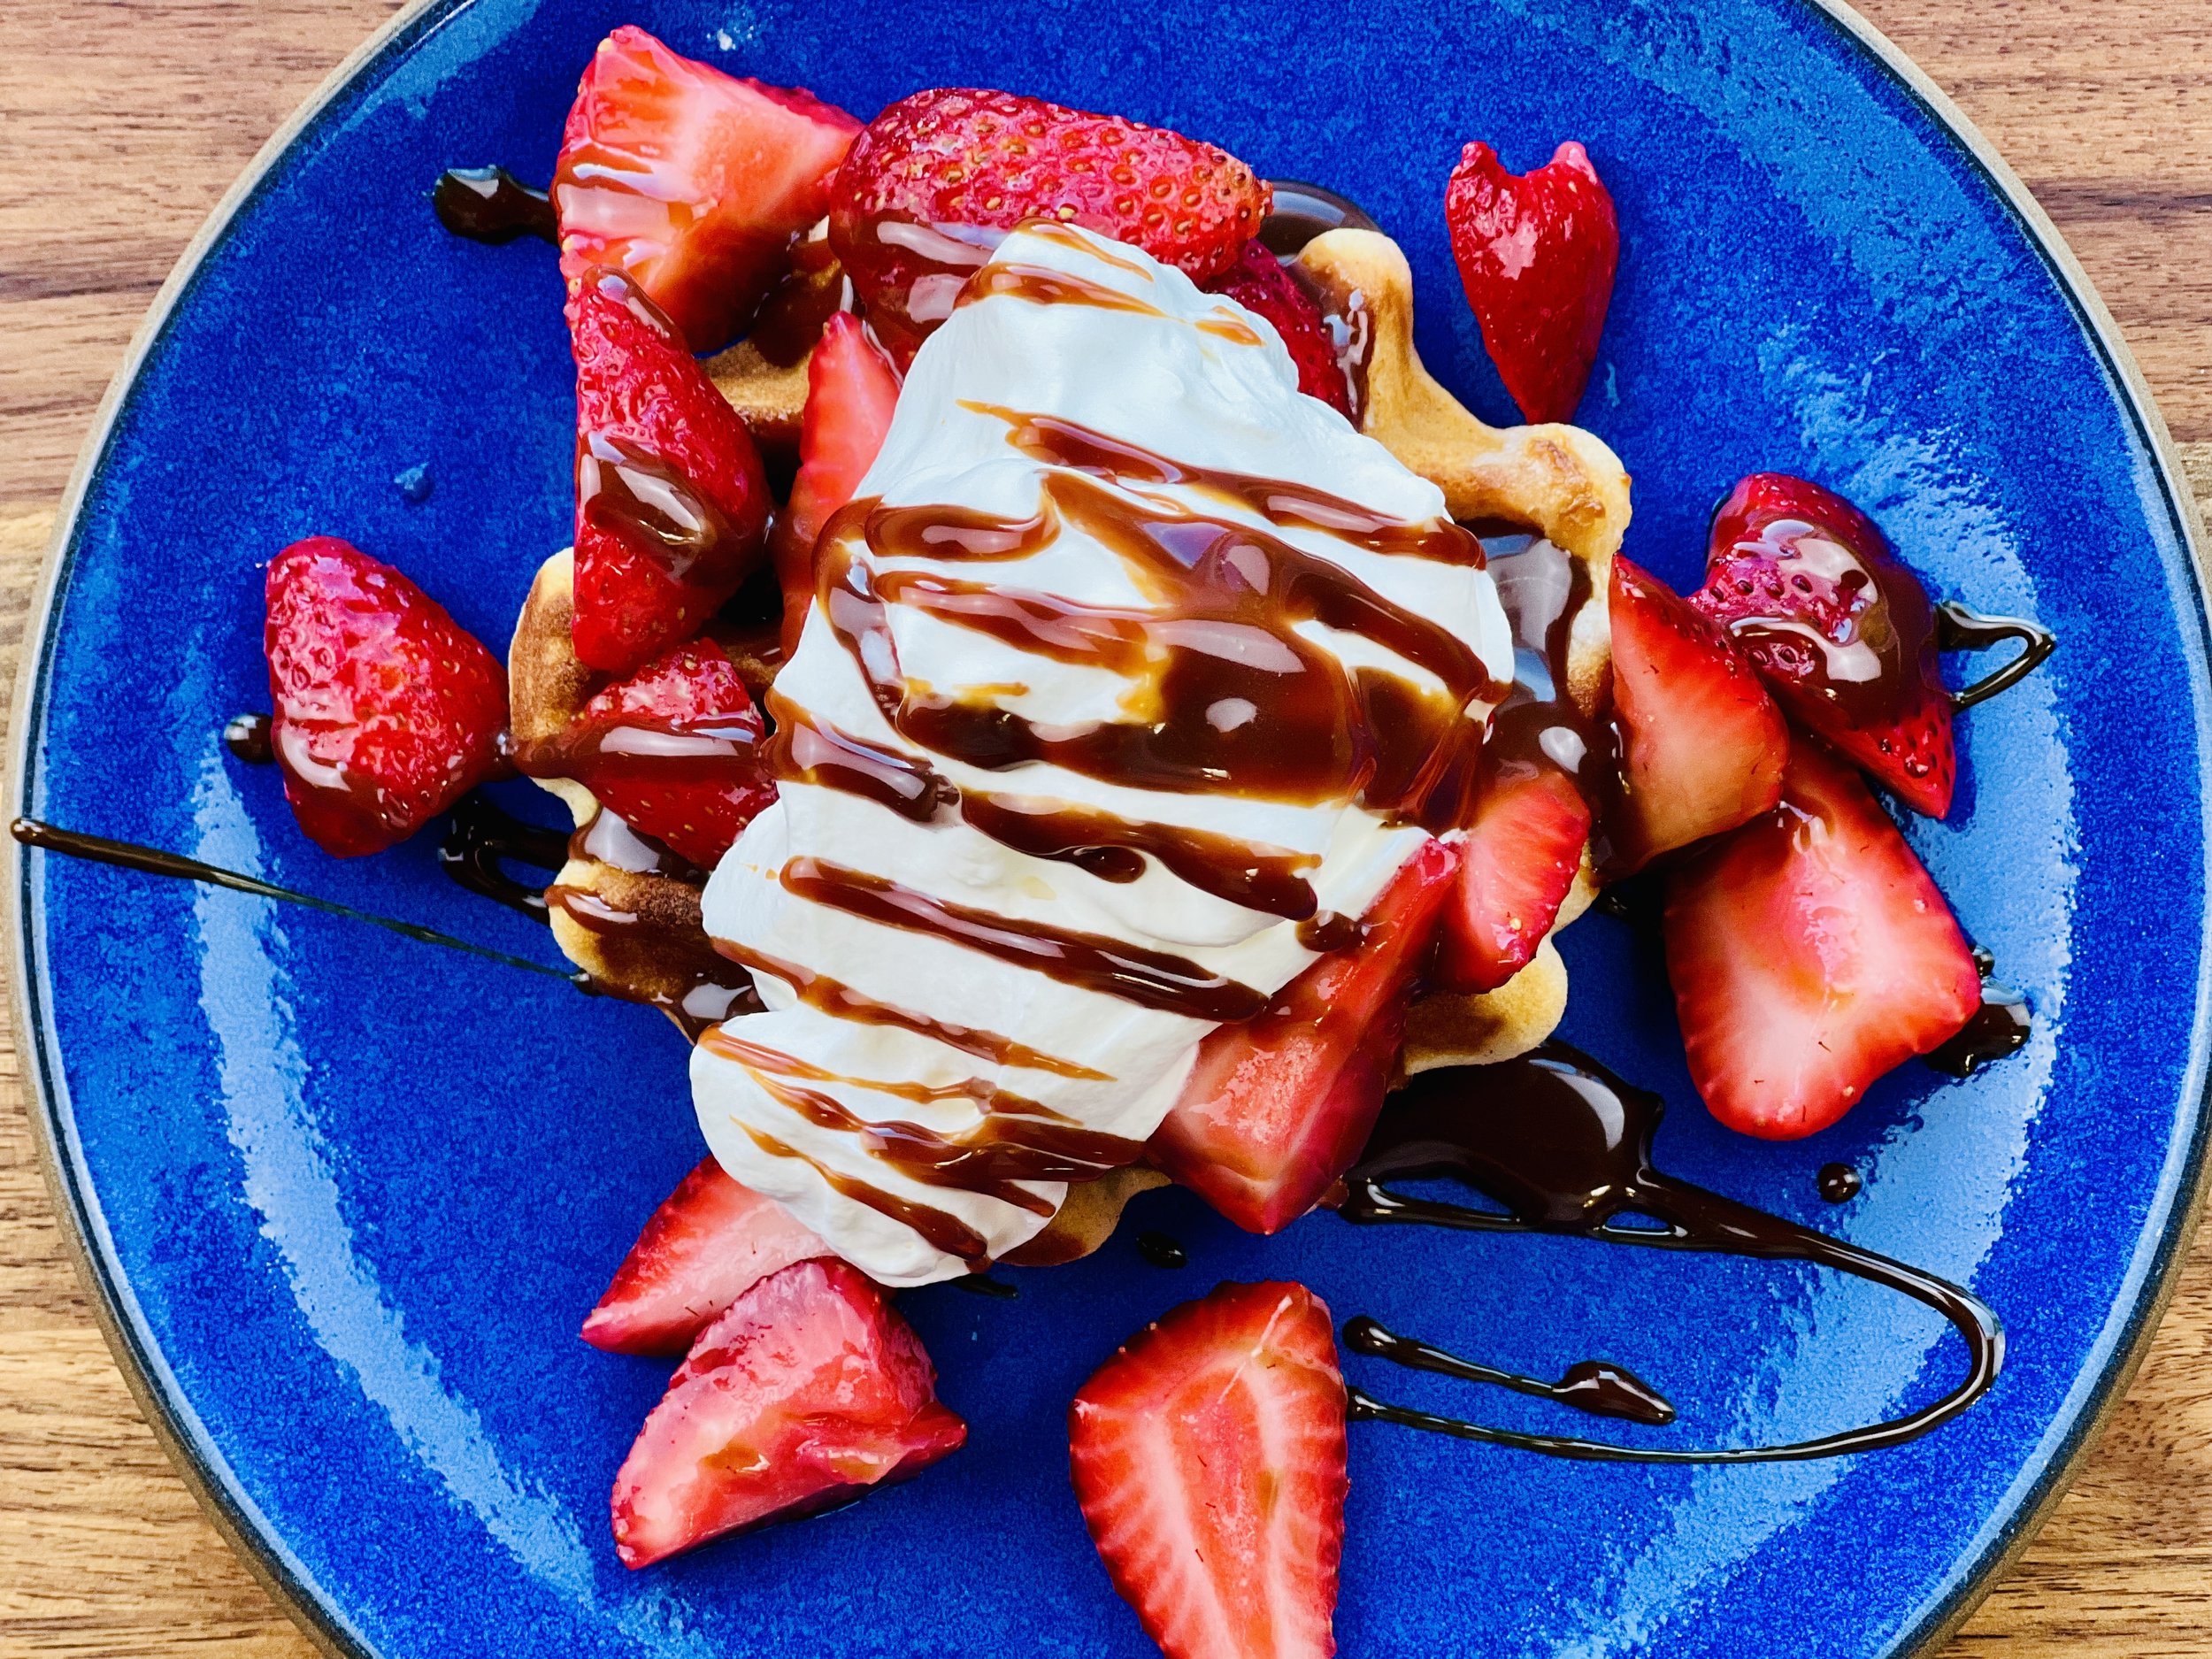
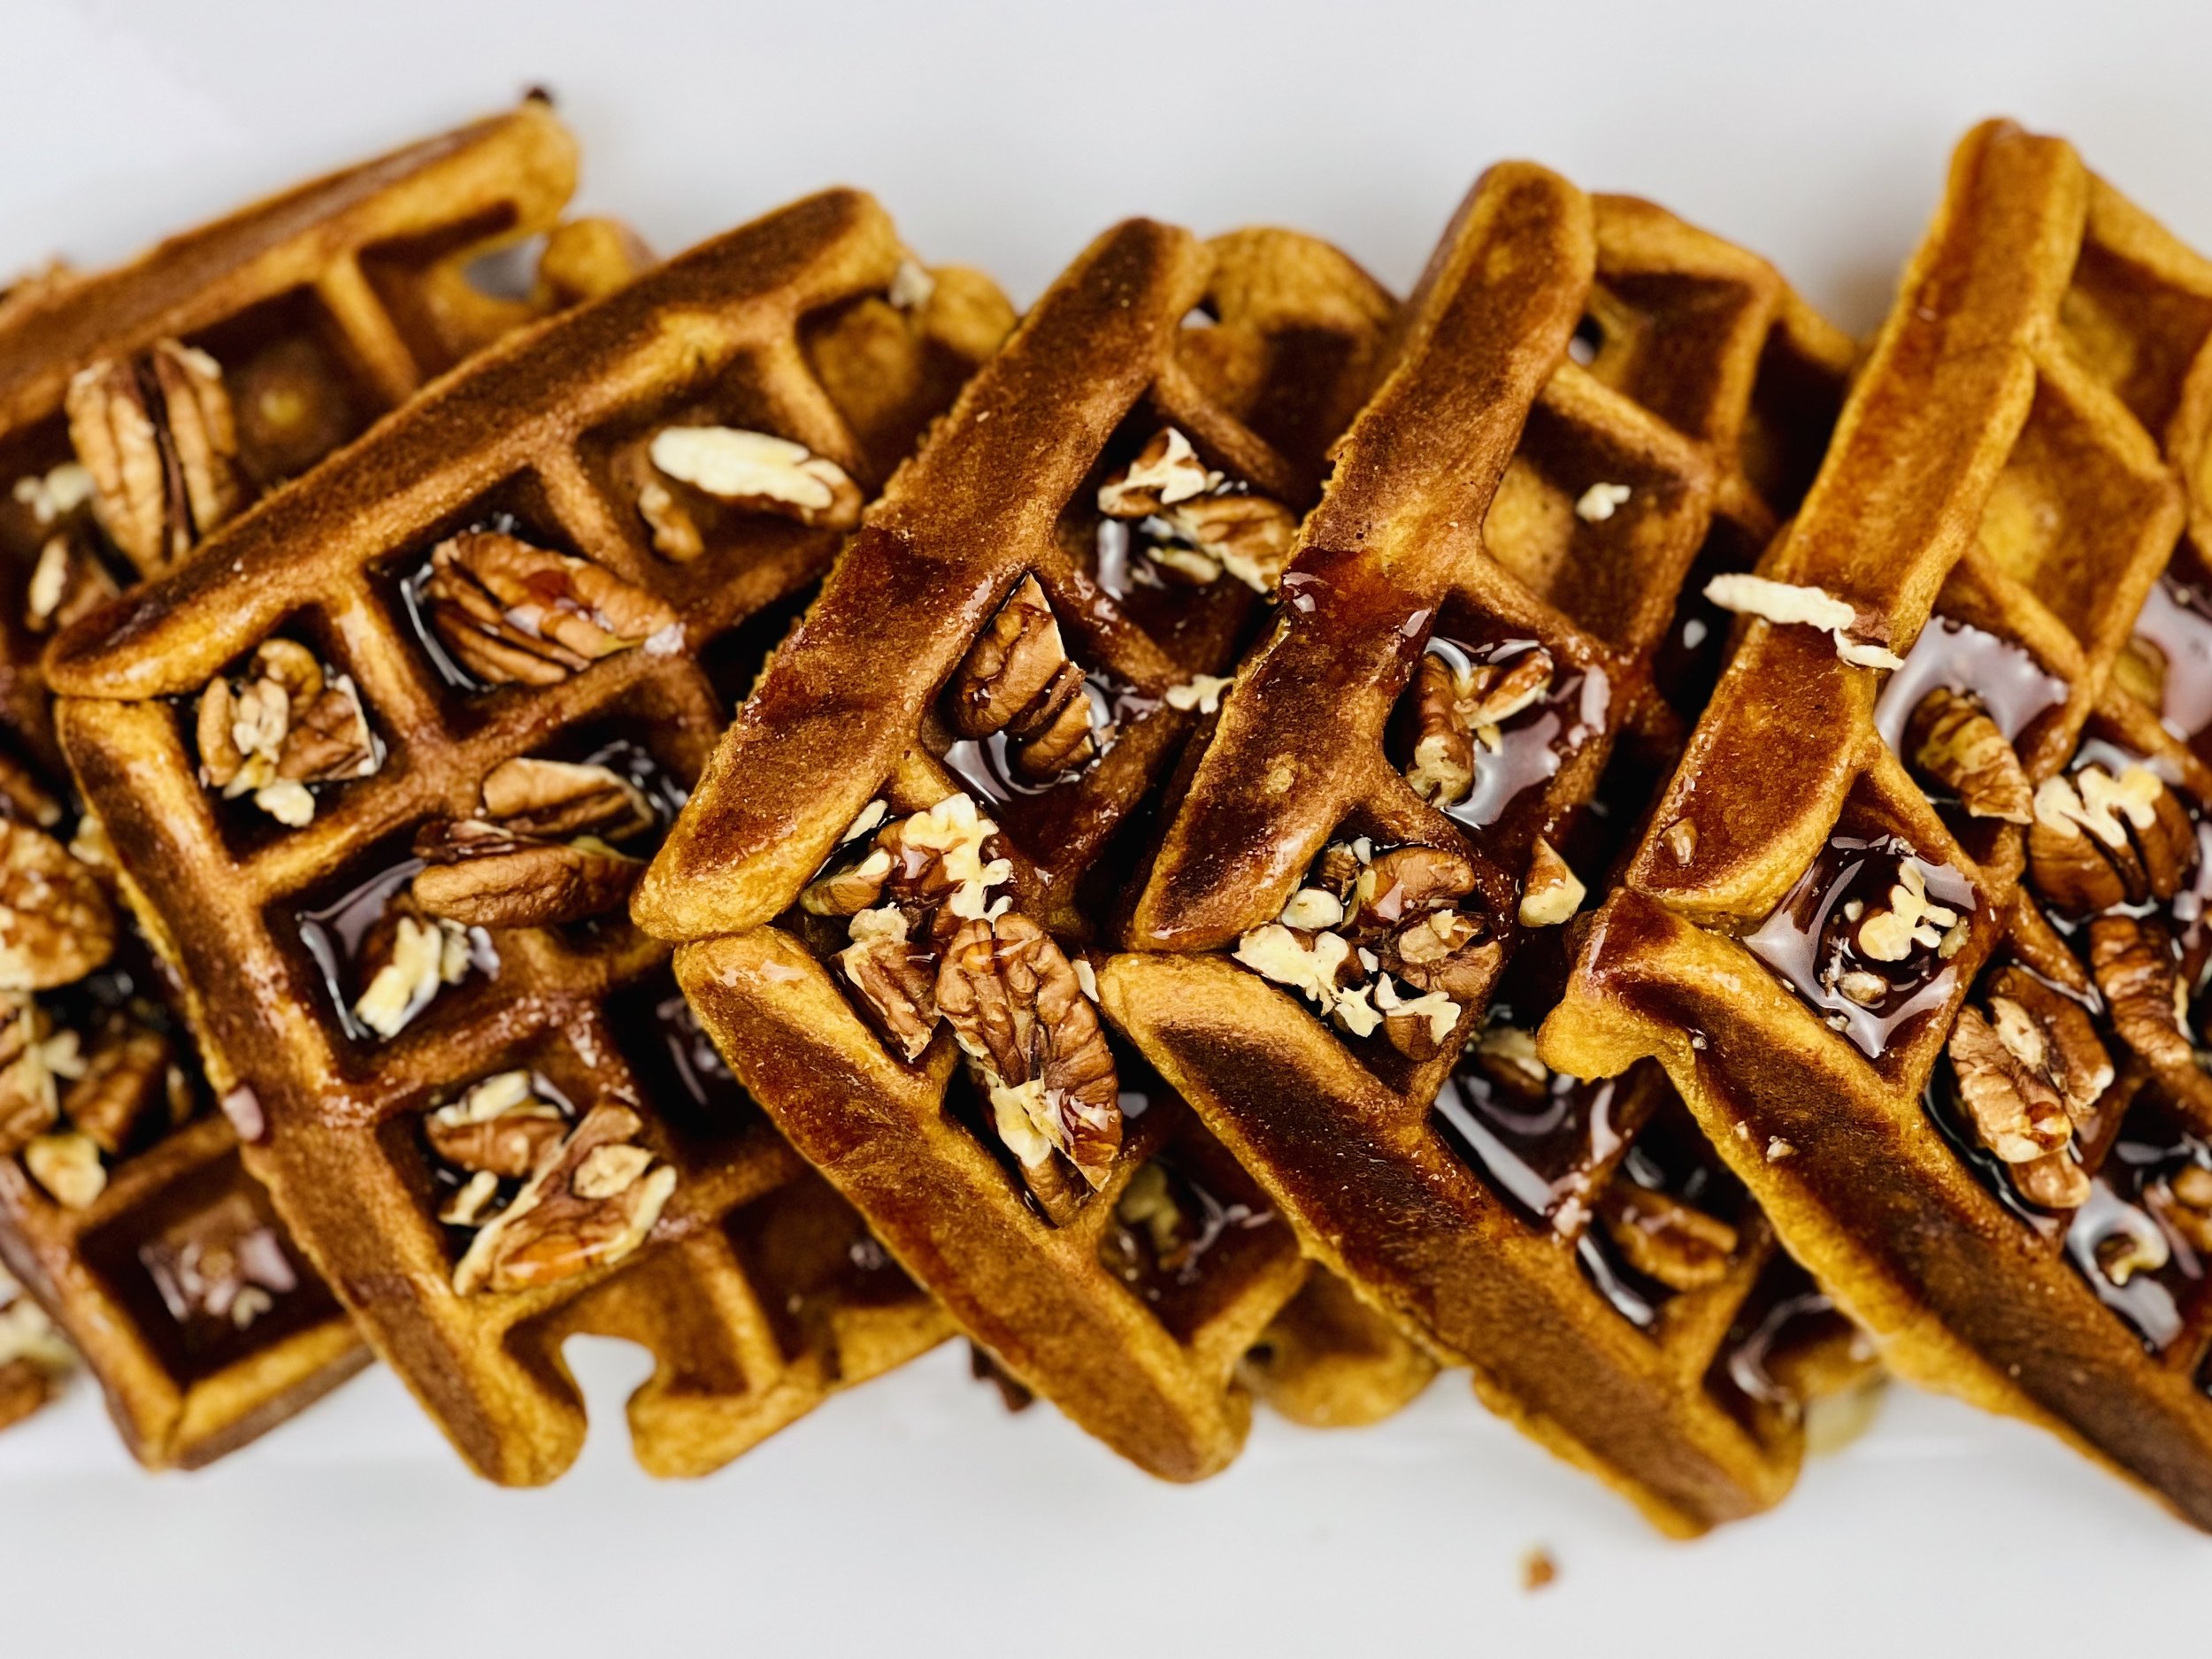
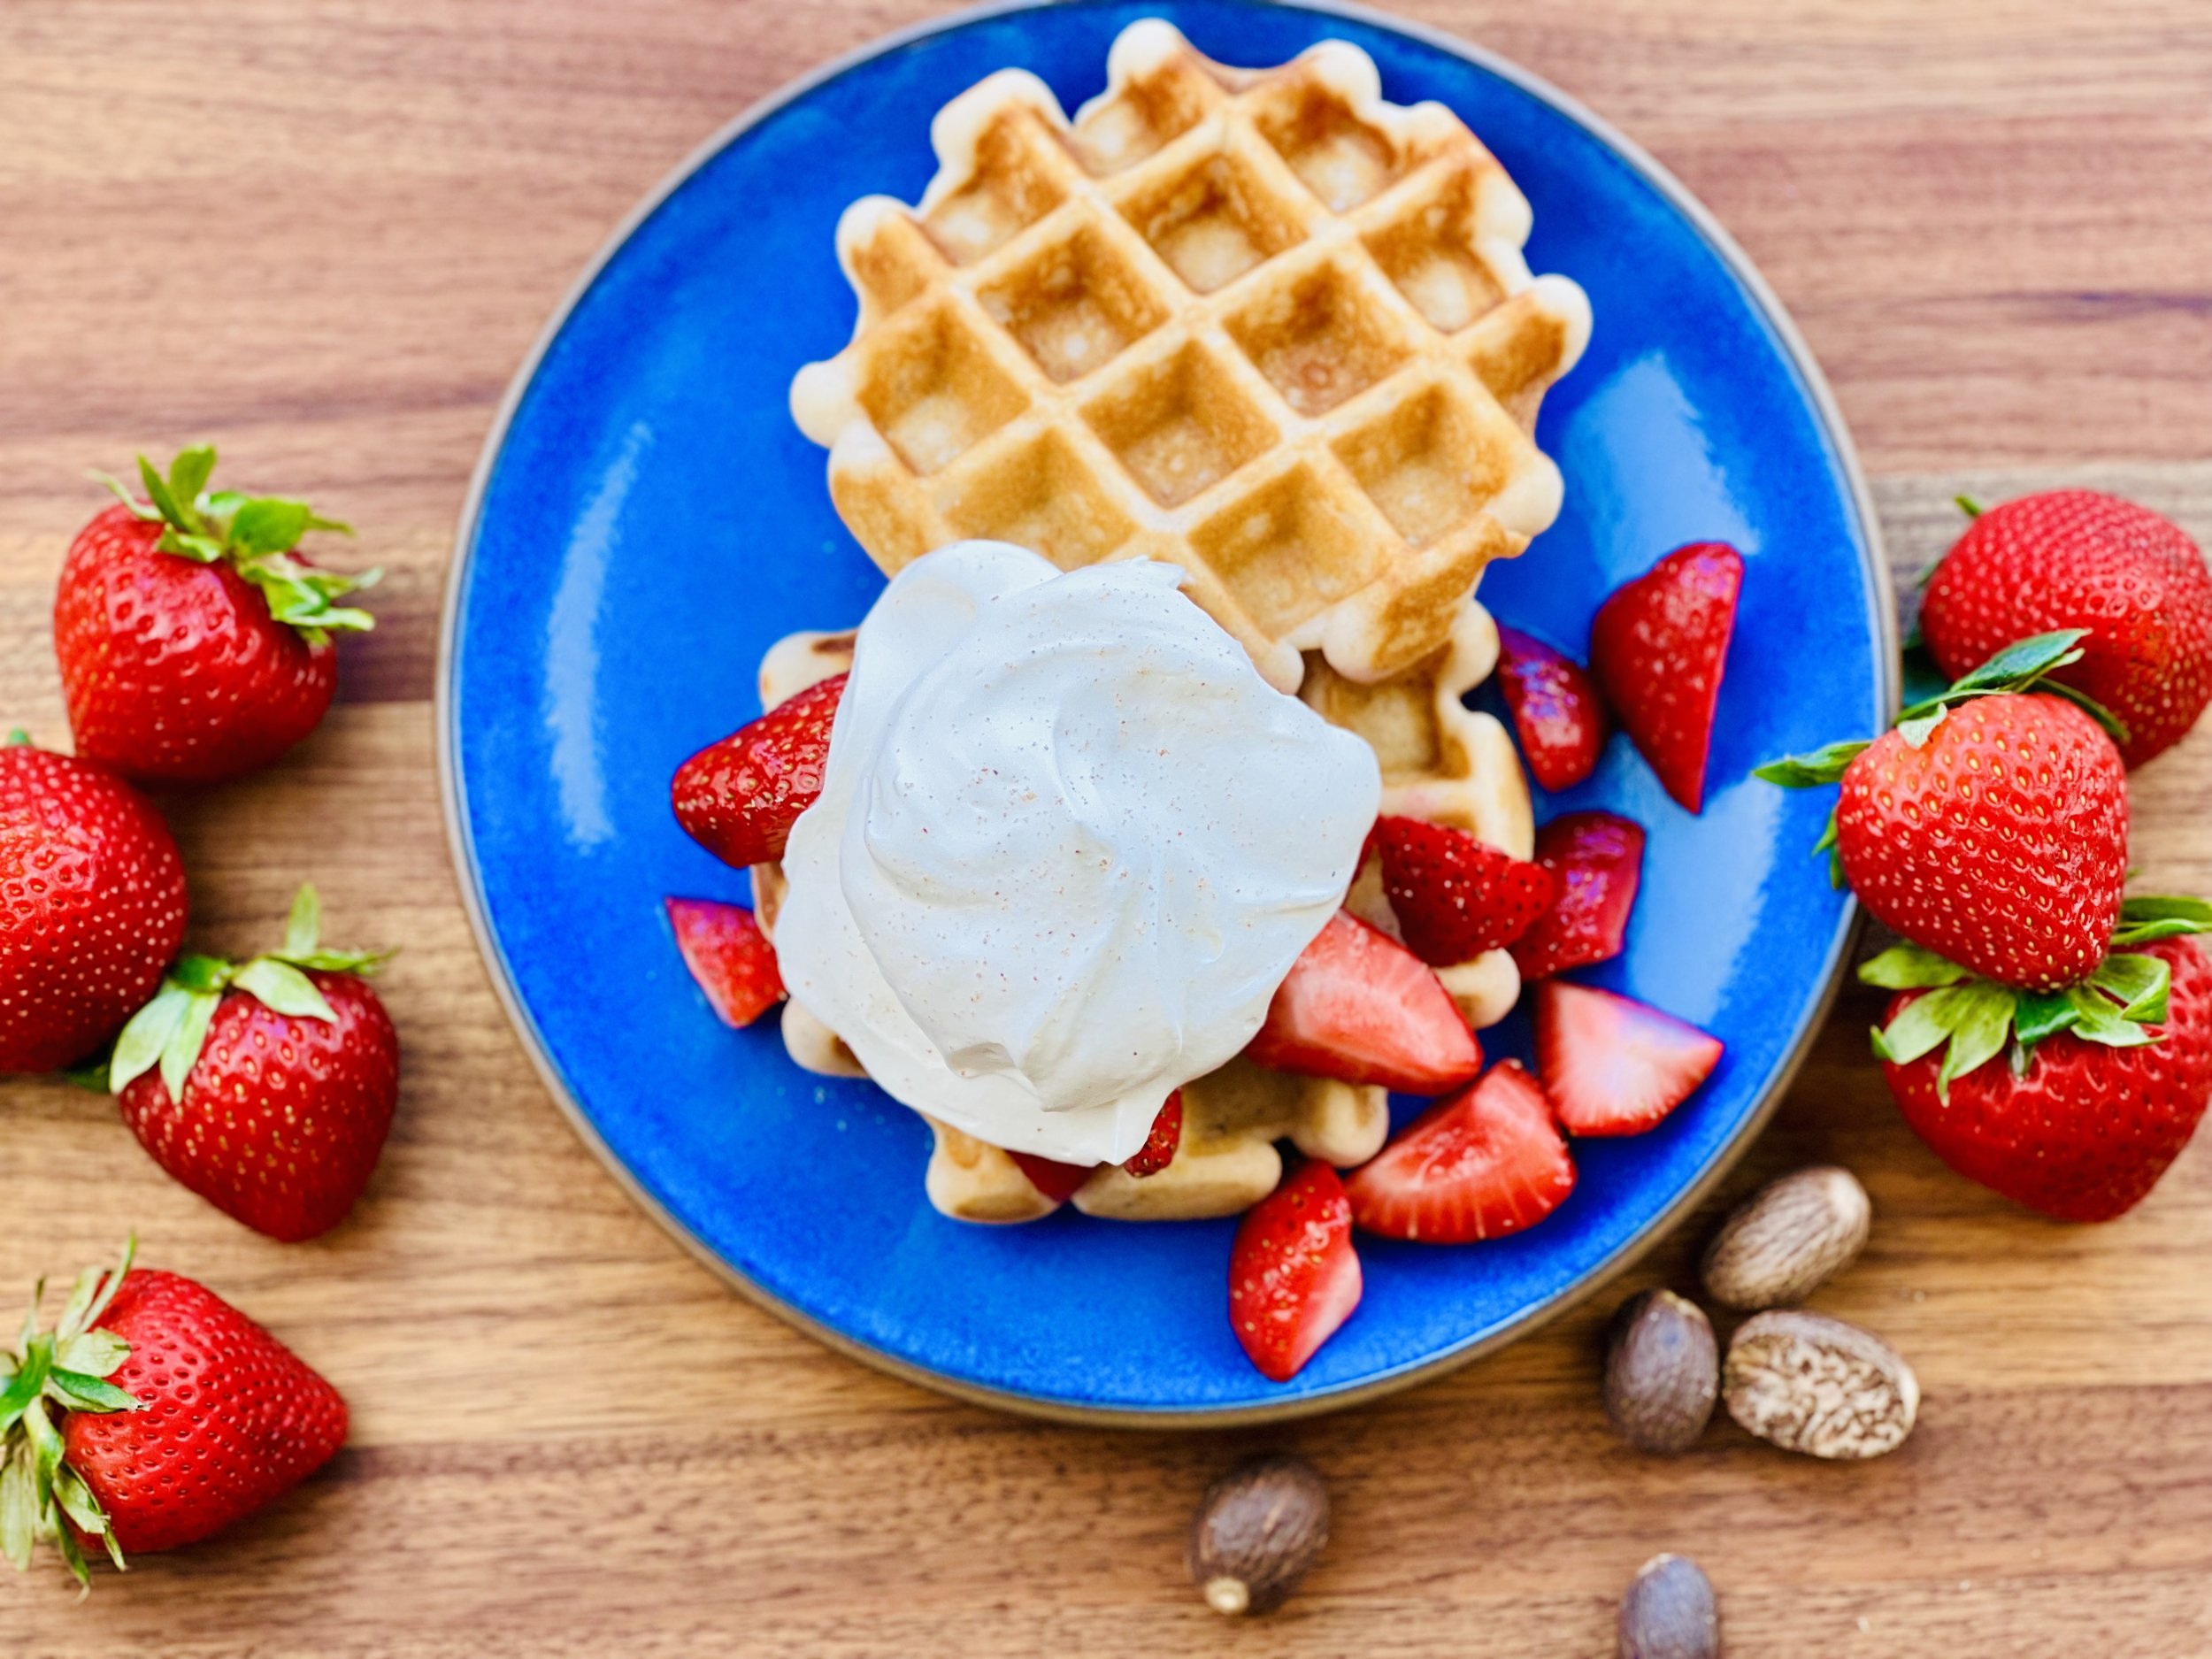
Chocolate Strawberry Dessert Waffles (low FODMAP)
20 Minutes prep • 10 Minutes cook • Low FODMAP • Gluten-free • Serves 4
20 Minutes prep • 10 Minutes cook • Low FODMAP • Gluten-free • Serves 4 • Ok to make ahead: Steps 1 - 6
Those of us who don’t eat breakfast often miss the wonderful breakfast foods that tend to be served only in the morning. But why not have breakfast foods at other times? For example, who doesn’t love a dessert waffle? This combination of crisp waffles, sweet strawberries, melted chocolate, and whipped cream makes a decadent breakfast or delicious dessert.
This is an exclusive recipe just for recipe club members.
In addition to the two free recipes I create each week I am creating and delivering one very special recipe just for my recipe club members. If you’re not yet a member, I encourage you to join! Membership in the club includes access to the complete archive of recipes with filters so it can become your virtual low FODMAP cookbook plus, I am creating and delivering one special NEW recipe every week ONLY for recipe club members. And, for my true fans, I’ll be sharing behind-the-scenes content, and updates on the progress of the new cookbook.
Your membership in the club helps me continue creating new, delicious, easy-to-make, low FODMAP recipes just for you.
As always, all recipes will emphasize simple ingredients, easy preparation, and delicious low FODMAP results. Recipes will be for everything from main courses, salads, soups, side dishes, appetizers, desserts, sauces, breakfast and lunch, and even mocktails and cocktails. Everything you need to prepare fantastic low FODMAP meals everyone will love.
Join the club. Become a Patron. Let’s keep making delicious Low FODMAP meals together.
More Deliciously Low FODMAP™ dessert recipes
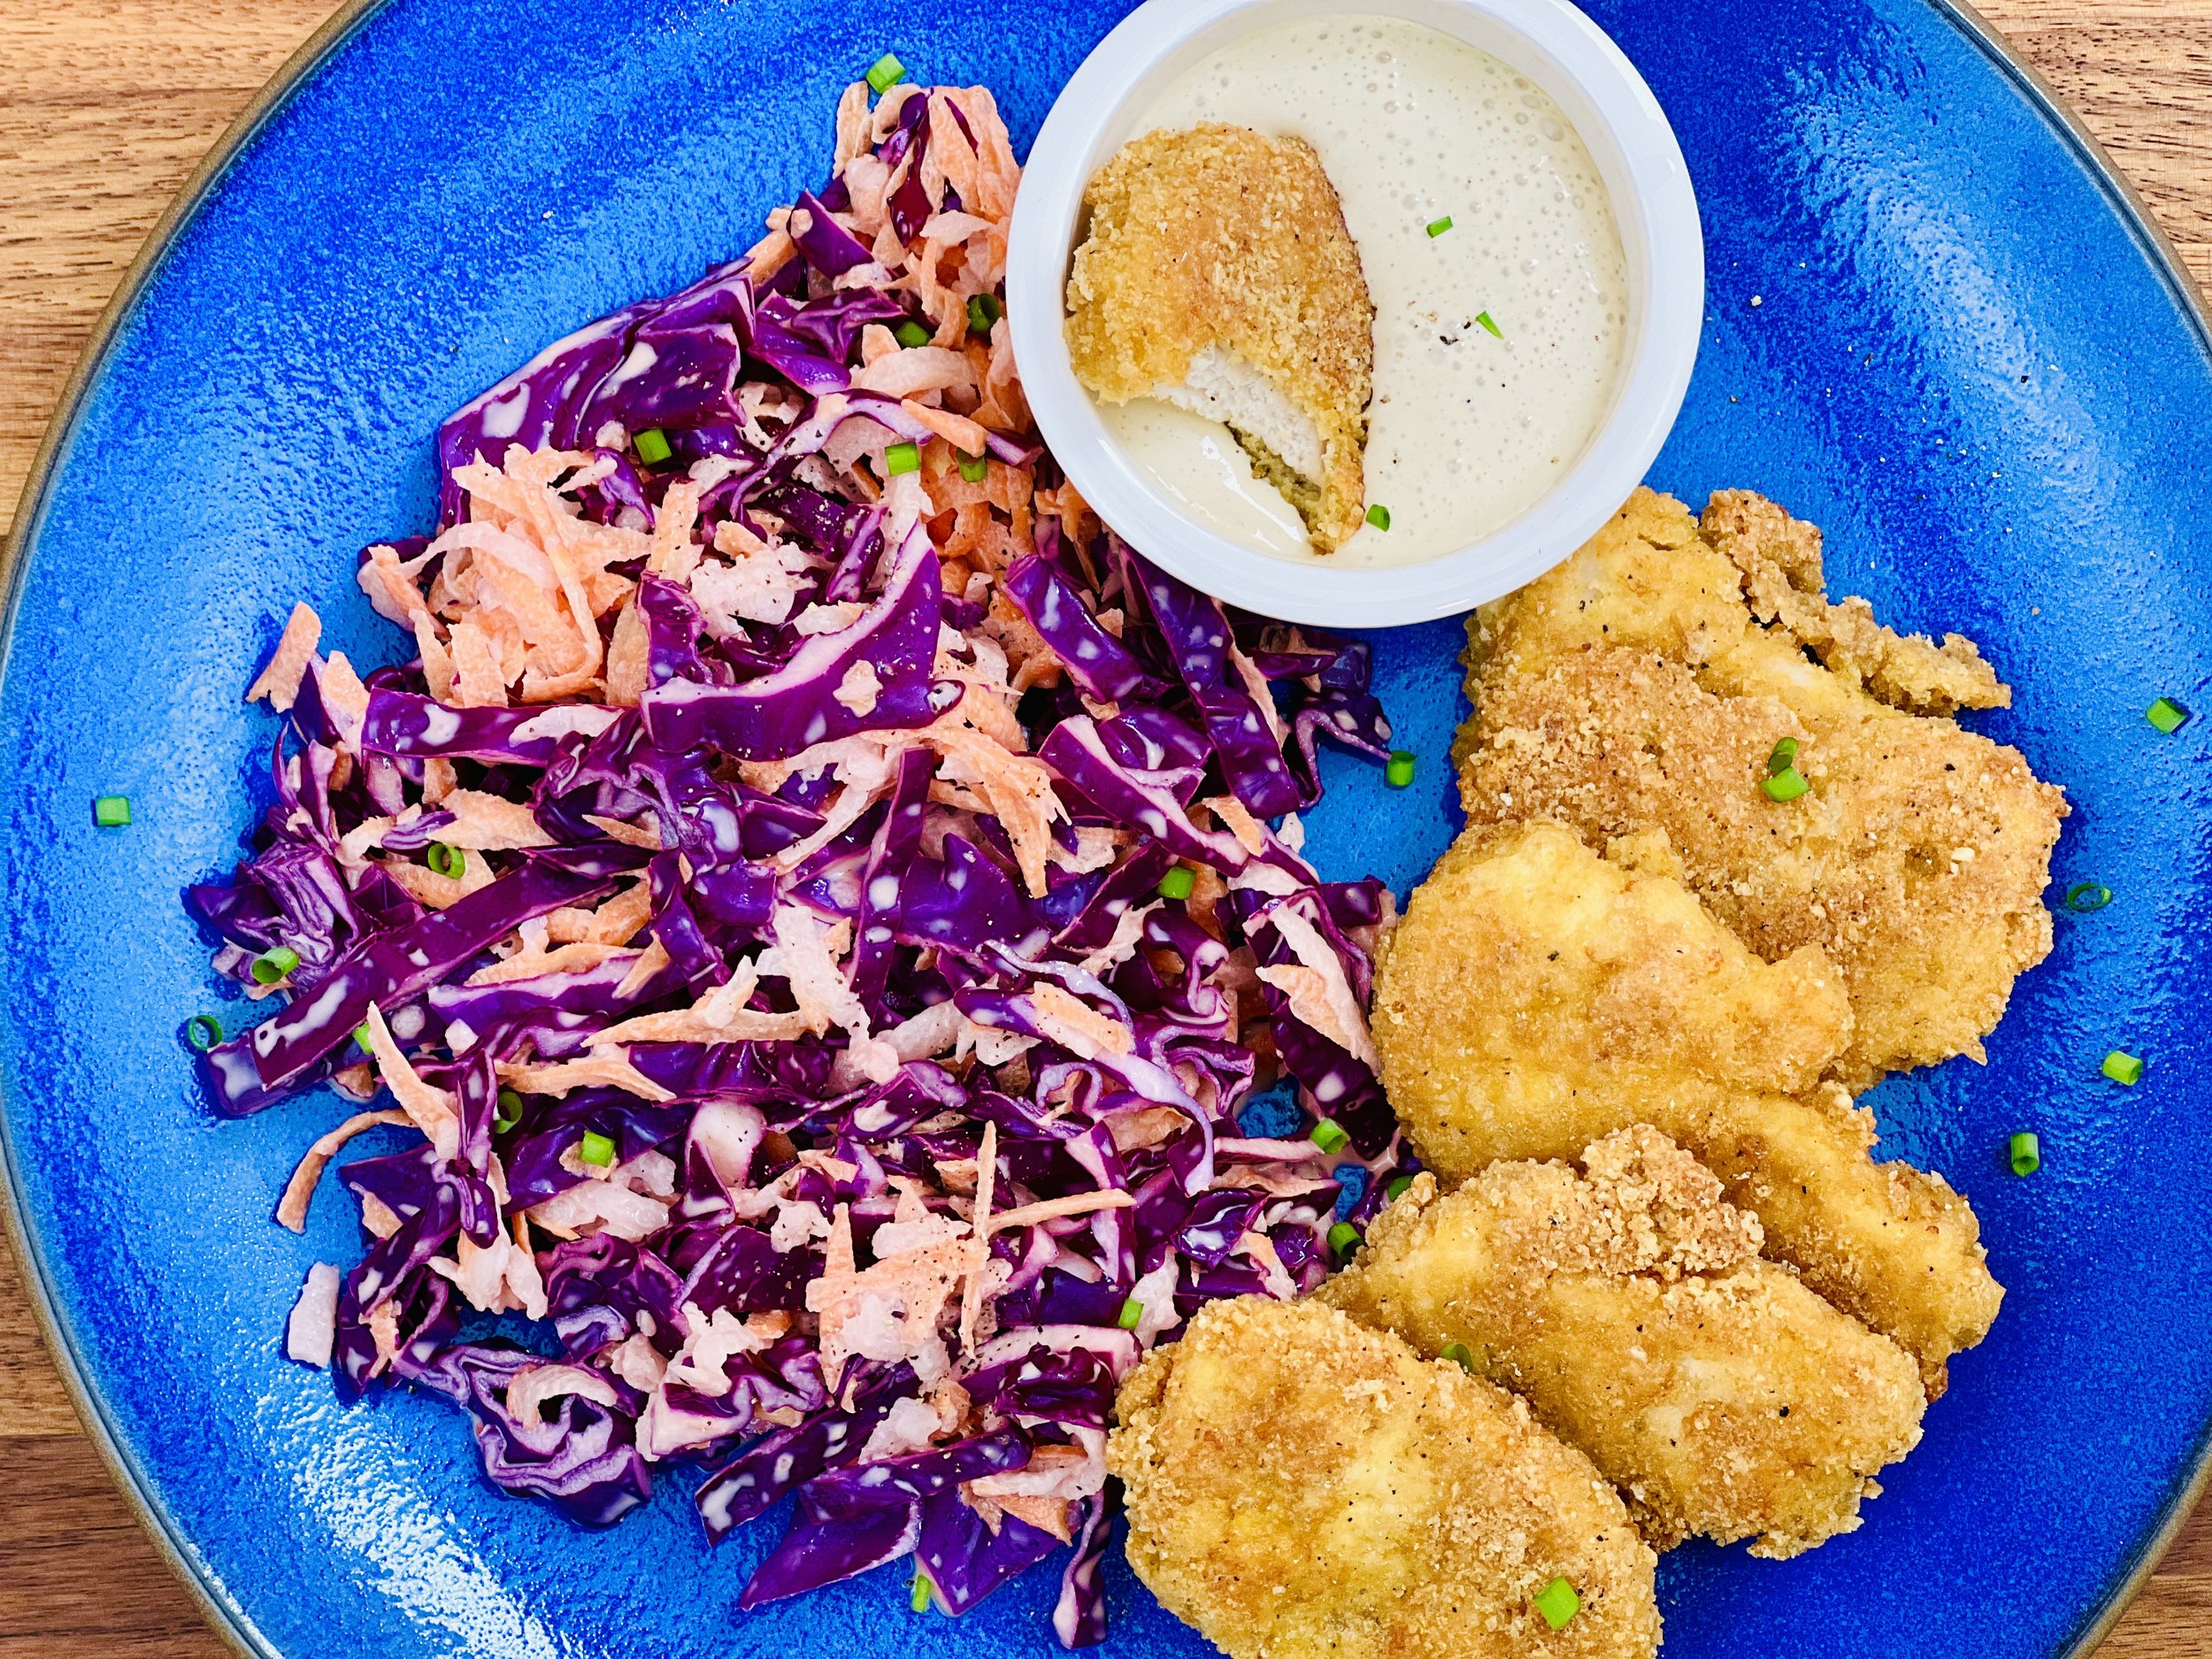
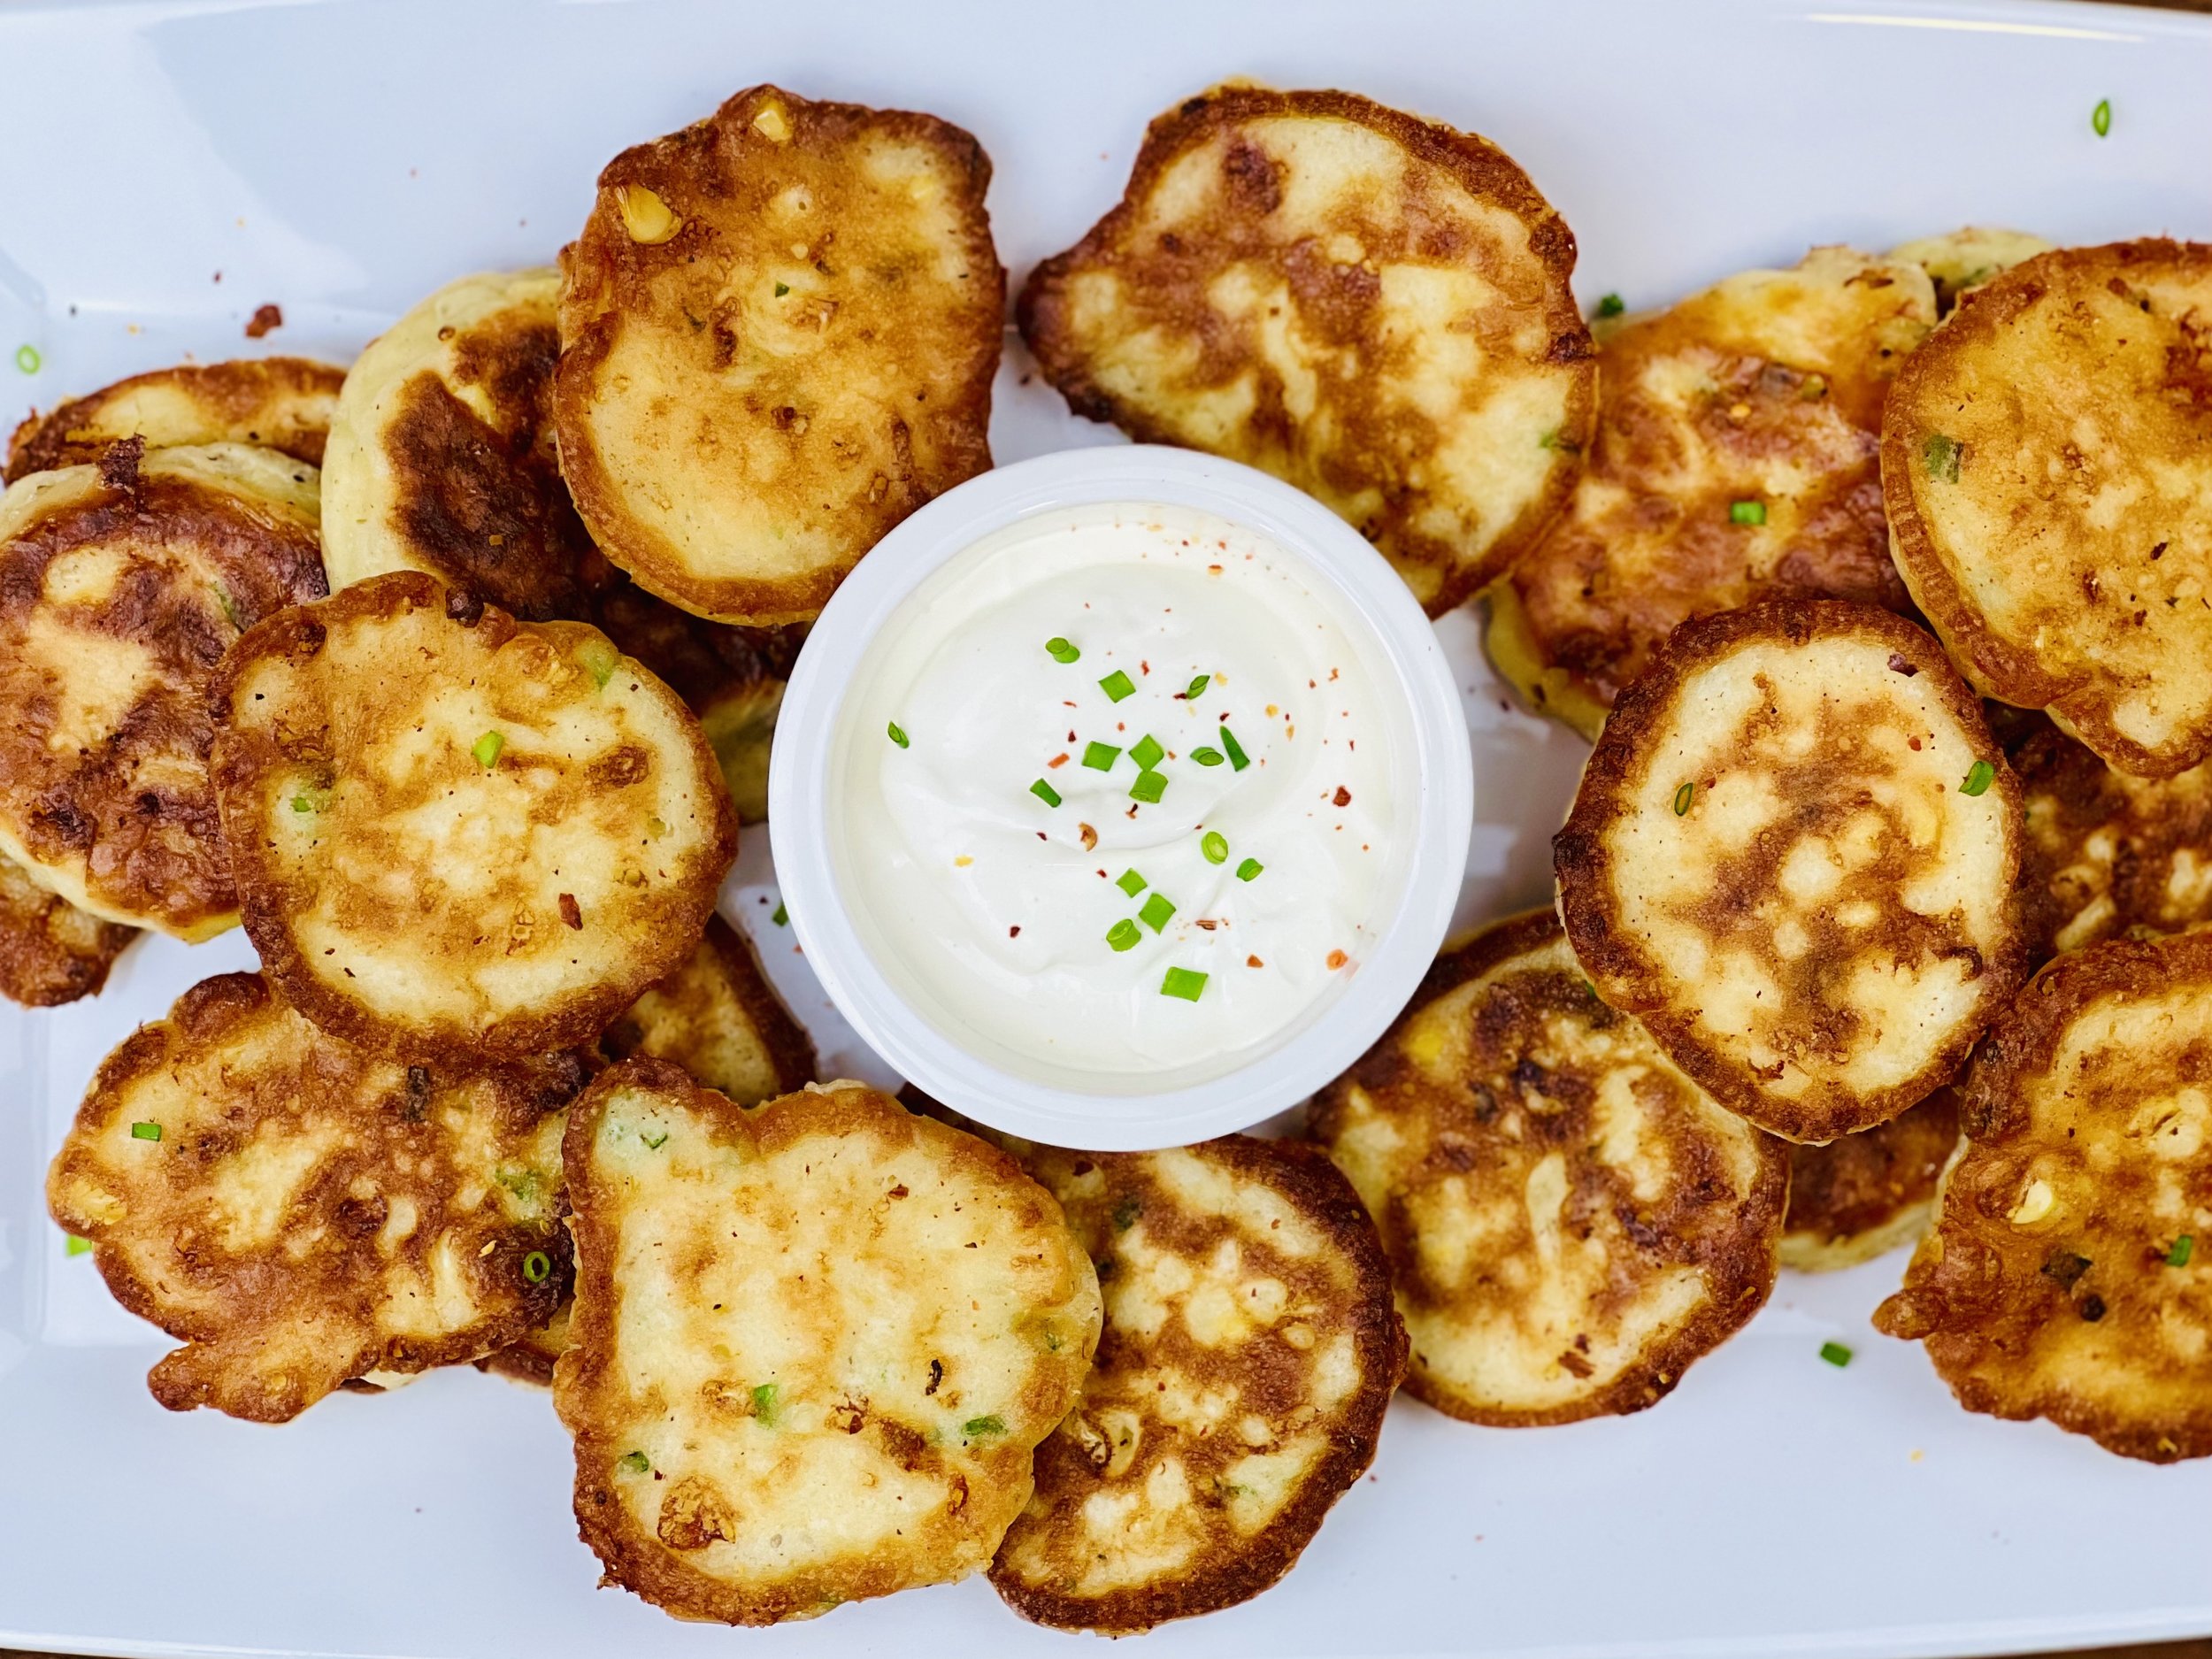
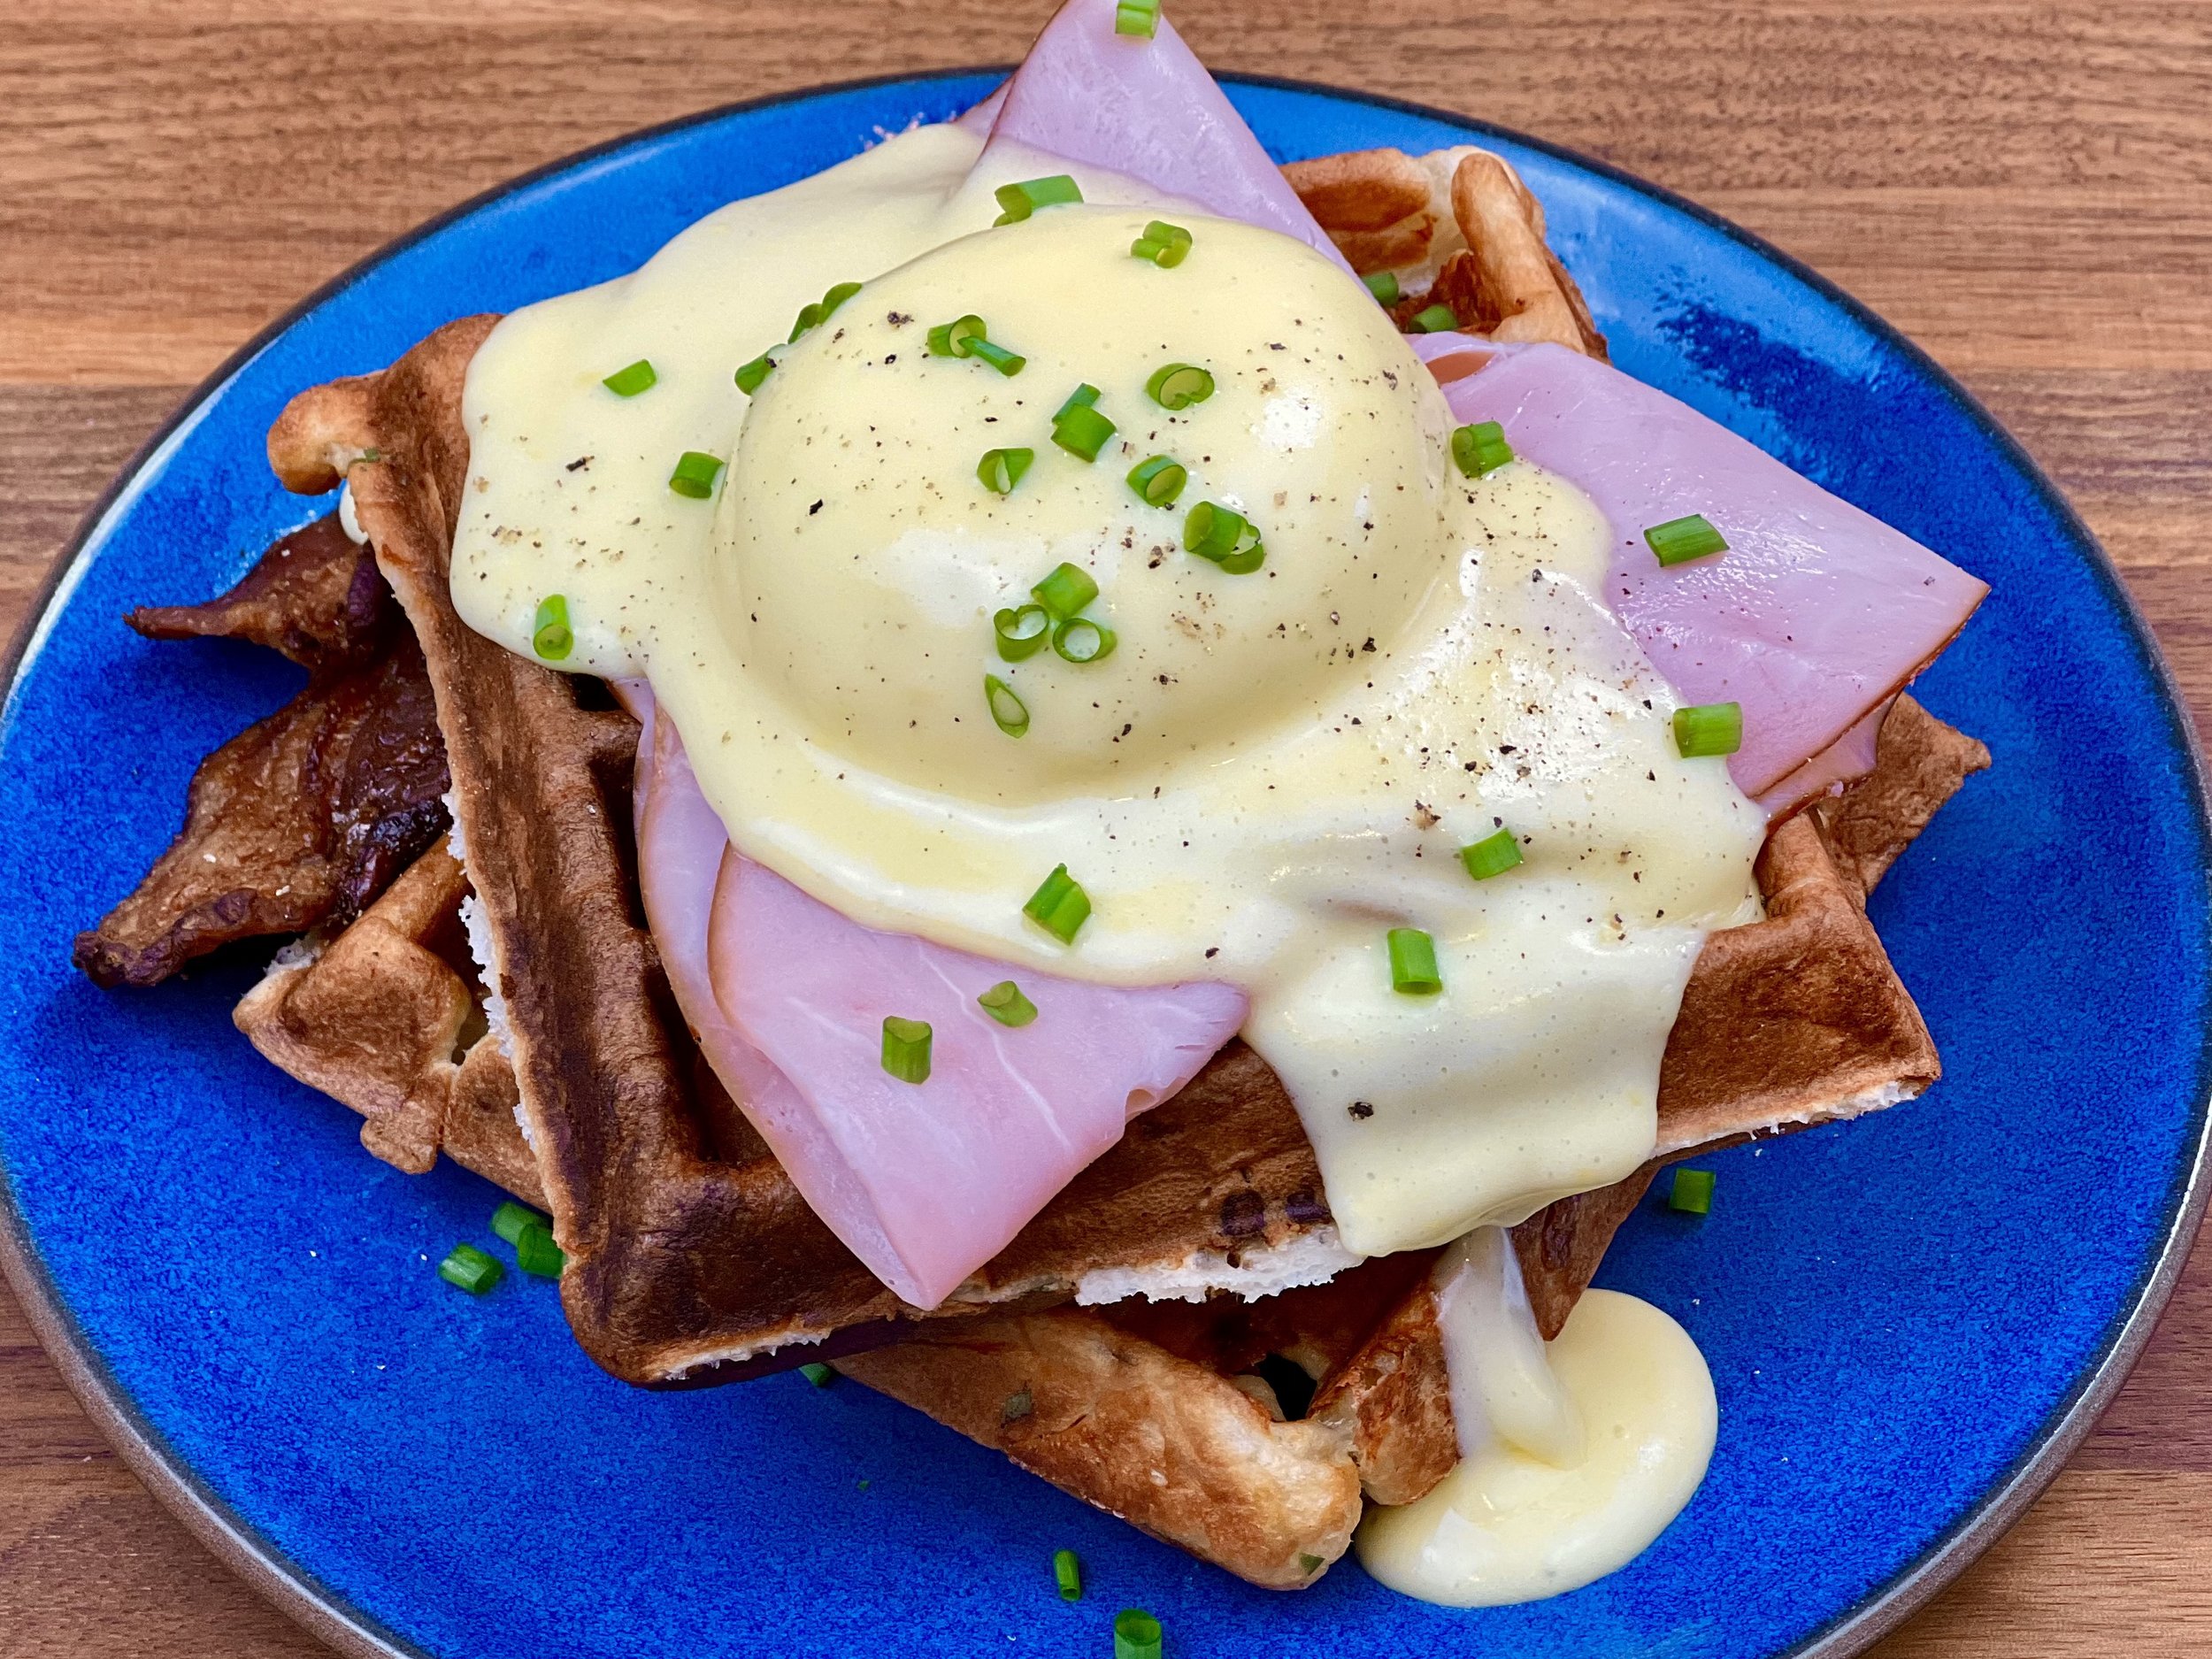
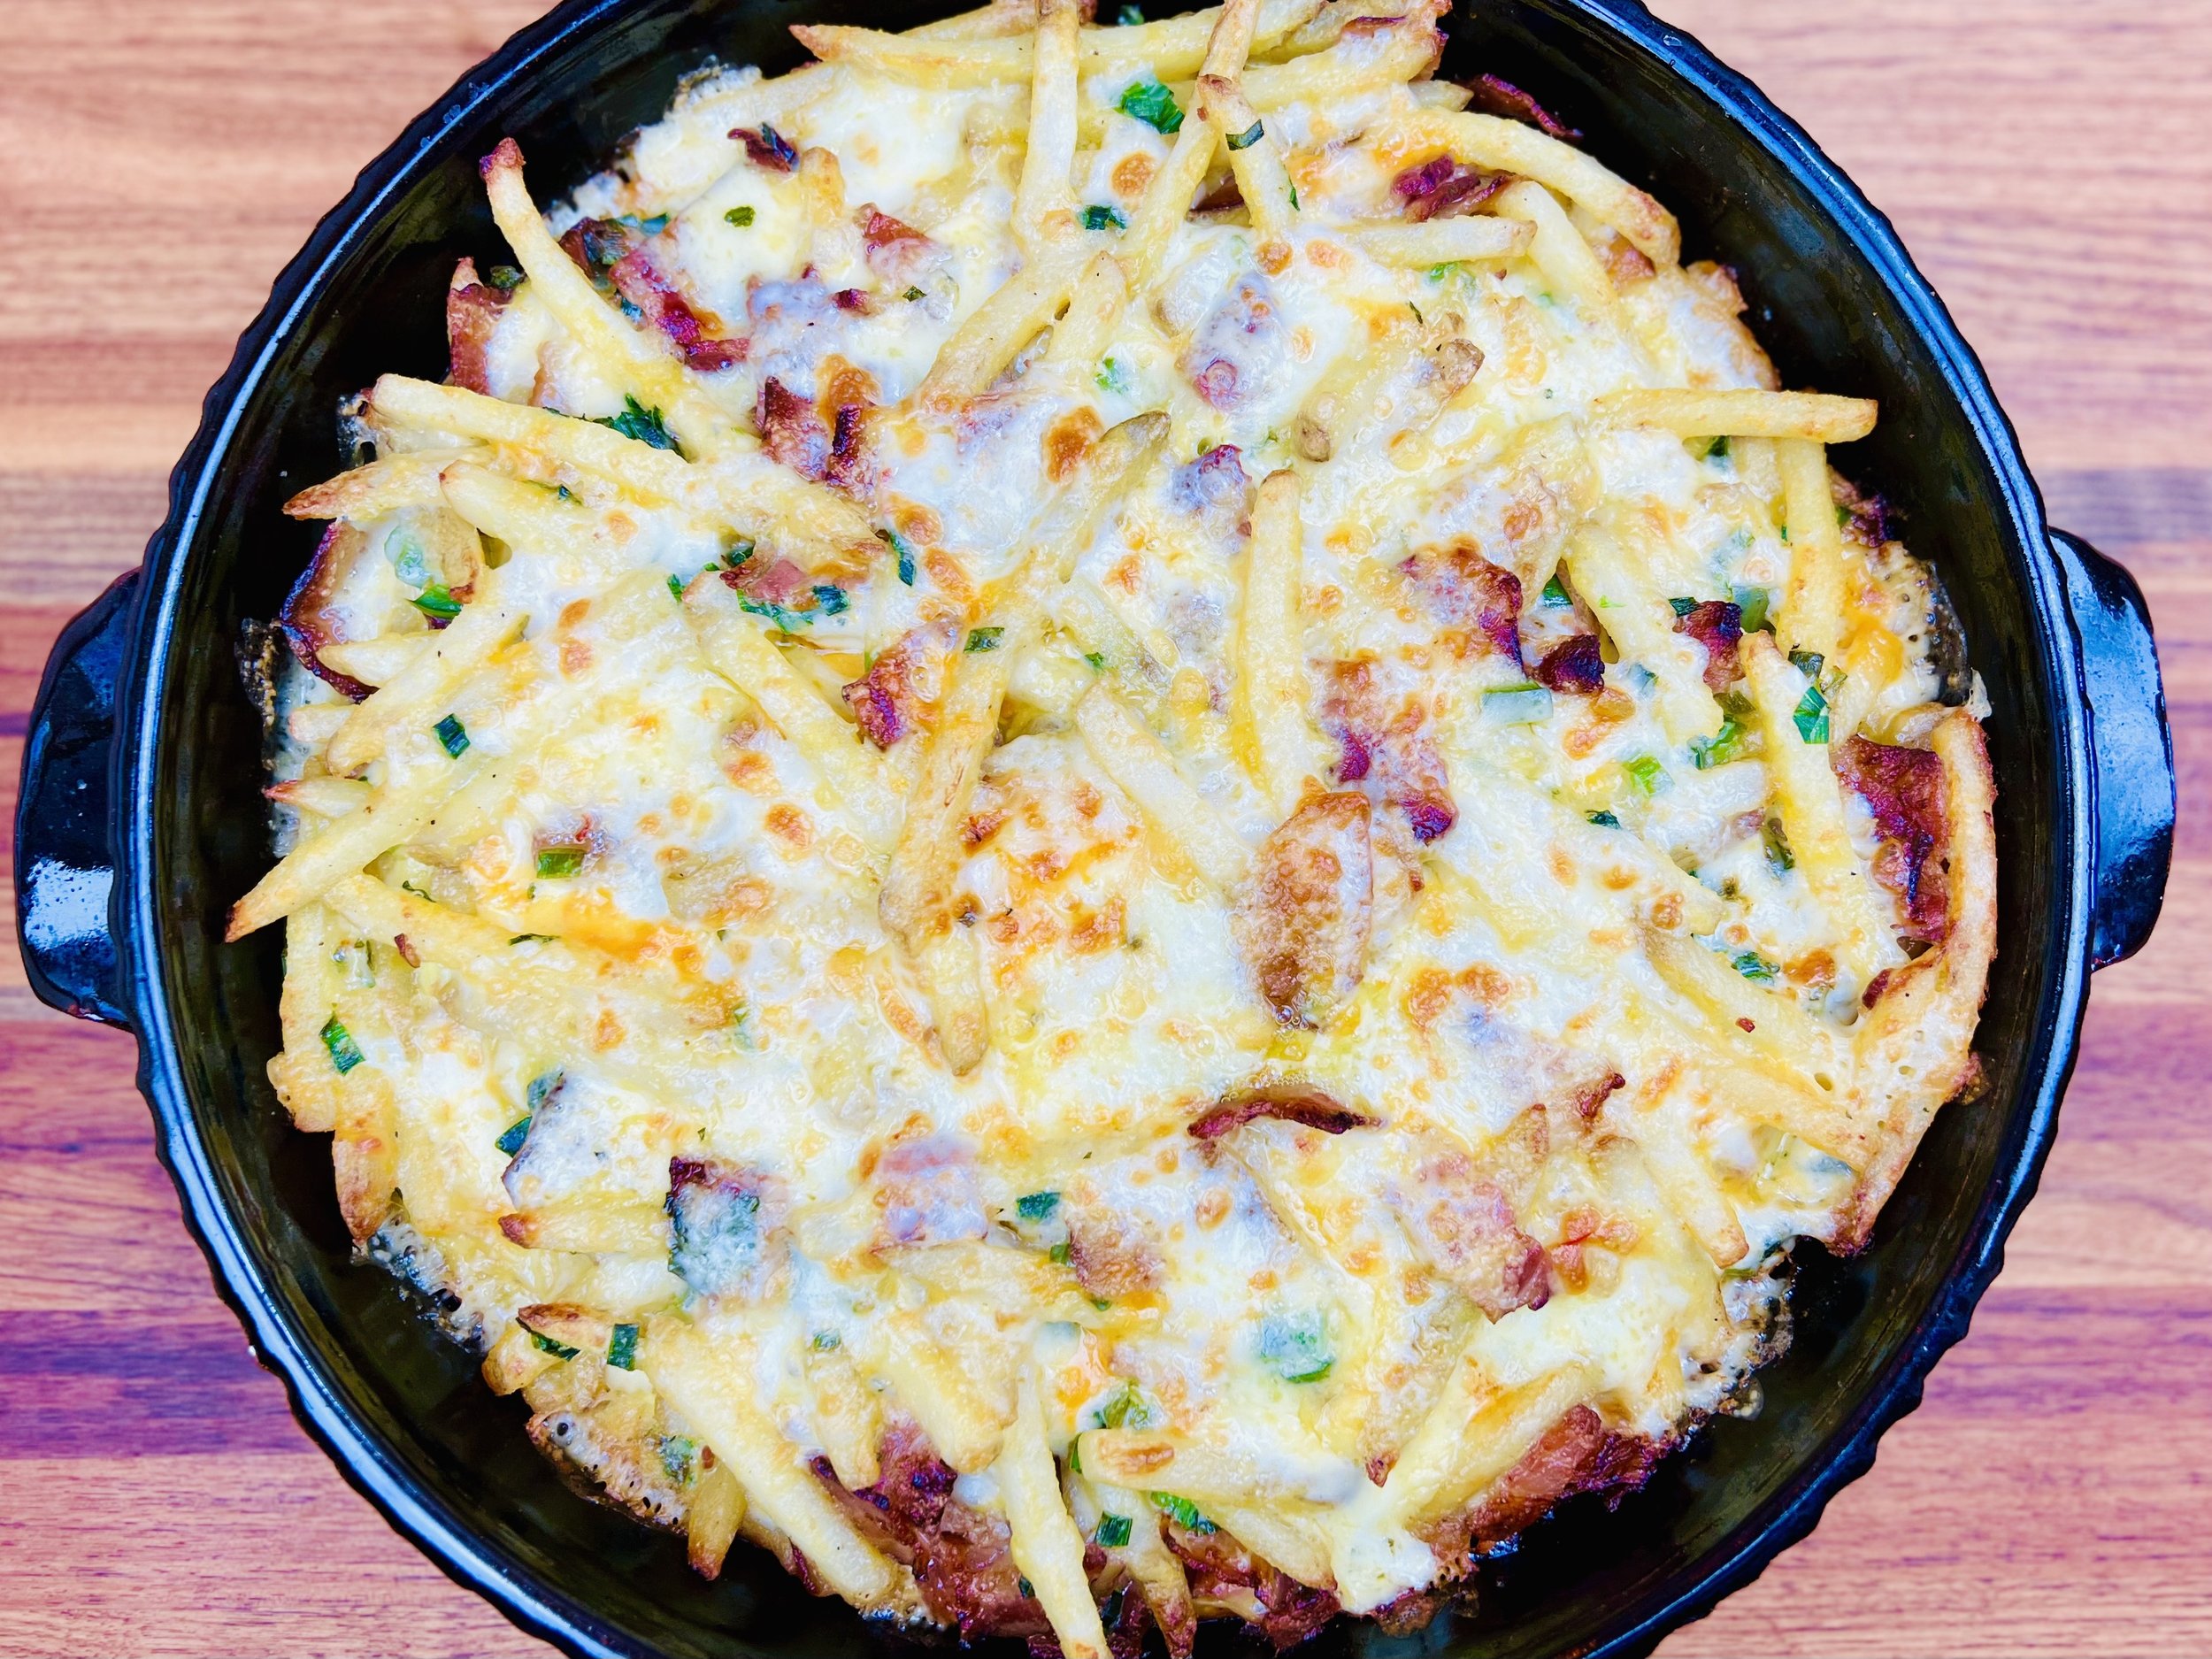
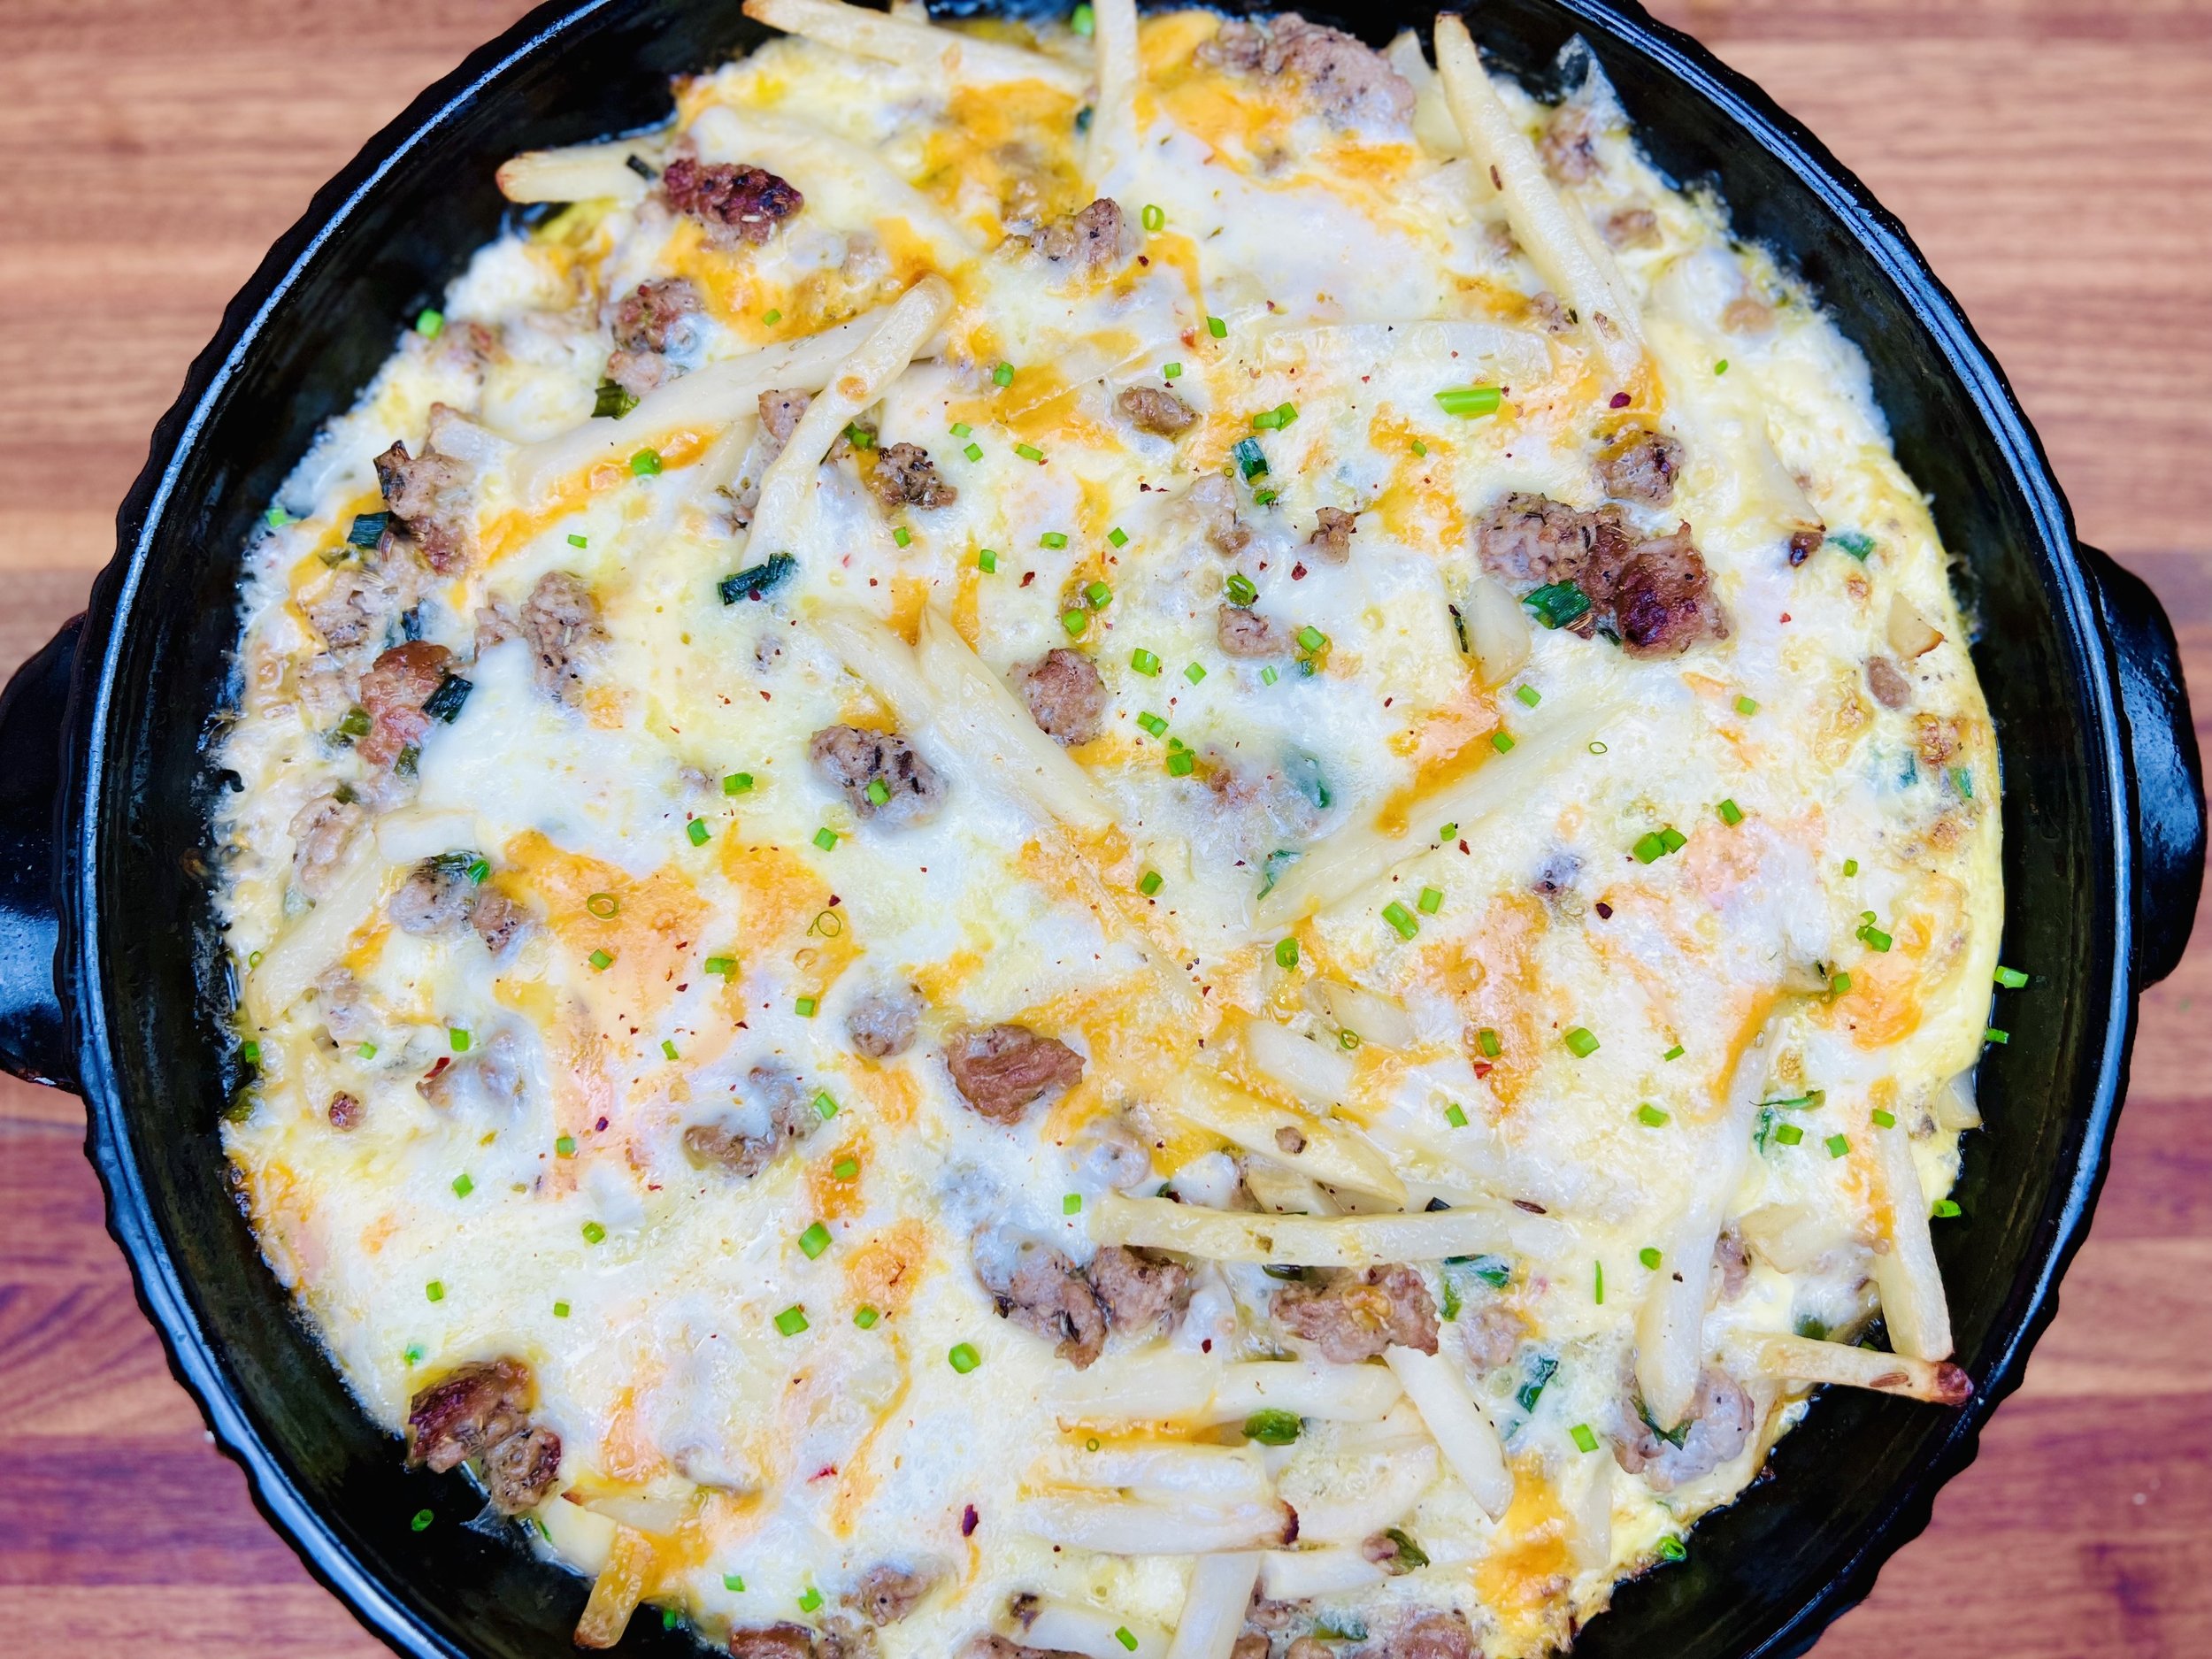
Bacon Cheddar Savory Waffles (low FODMAP)
20 Minutes prep • 25 Minutes cook • Low FODMAP • Serves 4
20 Minutes prep • 20 Minutes cook • Low FODMAP • Gluten-Free • Serves 4 • Ok to make ahead: Steps 1-5
When I was a kid, my mom would sometimes make waffles for dinner and I loved it! These savory cheddar waffles are my take on dinner waffles, but they are equally delicious for breakfast. If you’re not a fan of bacon, leave it out. These waffles are fantastic with or without the bacon. These savory waffles can be served with butter and syrup, or Benedict-style with hollandaise, poached eggs, and bacon. Serving them for dinner? Try topping with fried chicken! No matter how you top them, you can’t top them!

Ingredients
1 3/4 cups plus 2 tablespoons gluten-free Bisquick or gluten-free baking flour
1 tablespoon baking powder
1 teaspoon Gourmend garlic chive powder (use code IBSGC15 for 15% discount)
1/2 teaspoon smoked paprika
1 teaspoon Kosher salt
3 large eggs, separated
1 1/2 cups lactose-free whole milk with 1 tablespoon white vinegar added to make it sour
6 tablespoons unsalted butter, melted and cooled slightly
1 1/2 cups extra sharp cheddar cheese, grated
2 tablespoons parmesan cheese, grated
4 slices bacon, cooked and chopped
Directions
(1) Prepare: Cook the bacon. Grate the cheese. Preheat waffle iron. In a medium bowl, whisk together flour, baking powder, salt, and spices until evenly incorporated. Combine the milk and vinegar and let sit for 5 minutes to sour.
(2) Combine wet and dry ingredients: Separate the eggs, putting the whites in the bowl of your stand mixer, and set aside. Whisk the egg yolks together with the sour milk. Add to dry ingredients and stir with a rubber spatula until fully combined. Stir in the melted butter.
(3) Beat the egg whites: Beat egg whites with a whisk or with the whisk attachment in the bowl of your stand mixer. Beat on medium-high speed until the whites hold medium-soft peaks.
(4) Fold in egg whites and cheese: Fold the egg whites into the batter to lighten and keep folding until almost incorporated. Fold in the shredded cheddar and Parmesan cheeses, and the chopped cooked bacon (if using).
(5) Cook the waffles: In my waffle iron, this recipe makes two full Belgian waffles (each divided into 4 quarters). Spray the preheated waffle iron with non-stick spray. Scoop about half the batter, divided in four, into the waffle iron. You may need more or less batter depending on your specific device. Cook for about 5 minutes (longer than you would for a typical sweet waffle) or until waffles are deep golden brown and crisp. Remove from the waffle iron and set on a cooling rack to cool (so they remain crisp).
(6) Plate and serve: These savory waffles can be served for breakfast, with butter and syrup, or Bennedict-style with hollandaise, poached eggs, and bacon. Serving them for dinner? Try topping with fried chicken.
(7) Store and reheat: These waffles reheat and freeze well. Keep them in an airtight container in the fridge for 2-3 days. To reheat, put them in a preheated 300-degree F oven for 5 to 10 minutes until heated through and even a bit crispier than they were fresh out of the waffle iron. You can also reheat in the toaster—but the result isn’t quite as crisp as the oven version. Freeze waffles in an airtight container for up to 3-4 months so you can pull one or two out at a time and enjoy them.
Eat and enjoy every bite because you can!
Recipe note: I use Diamond Crystal Kosher salt in all my recipes because it has a wonderful flat and crisp flake that tastes delicious. It is also the least salty salt available so you can use it more liberally as a seasoning than you can table salt or sea salt. If you use another type of salt, you may need to reduce the amount so it is not over-salted.
Link note: This post contains links for you to easily purchase items listed on the page. In some cases, we have provided a special discount code for IBS Game Changers so be sure to use it when you purchase an item to get the discount that has been arranged just for you! As an Amazon Associate, I earn a commission from qualifying Amazon purchases.
More Deliciously Low FODMAP™ breakfast recipes


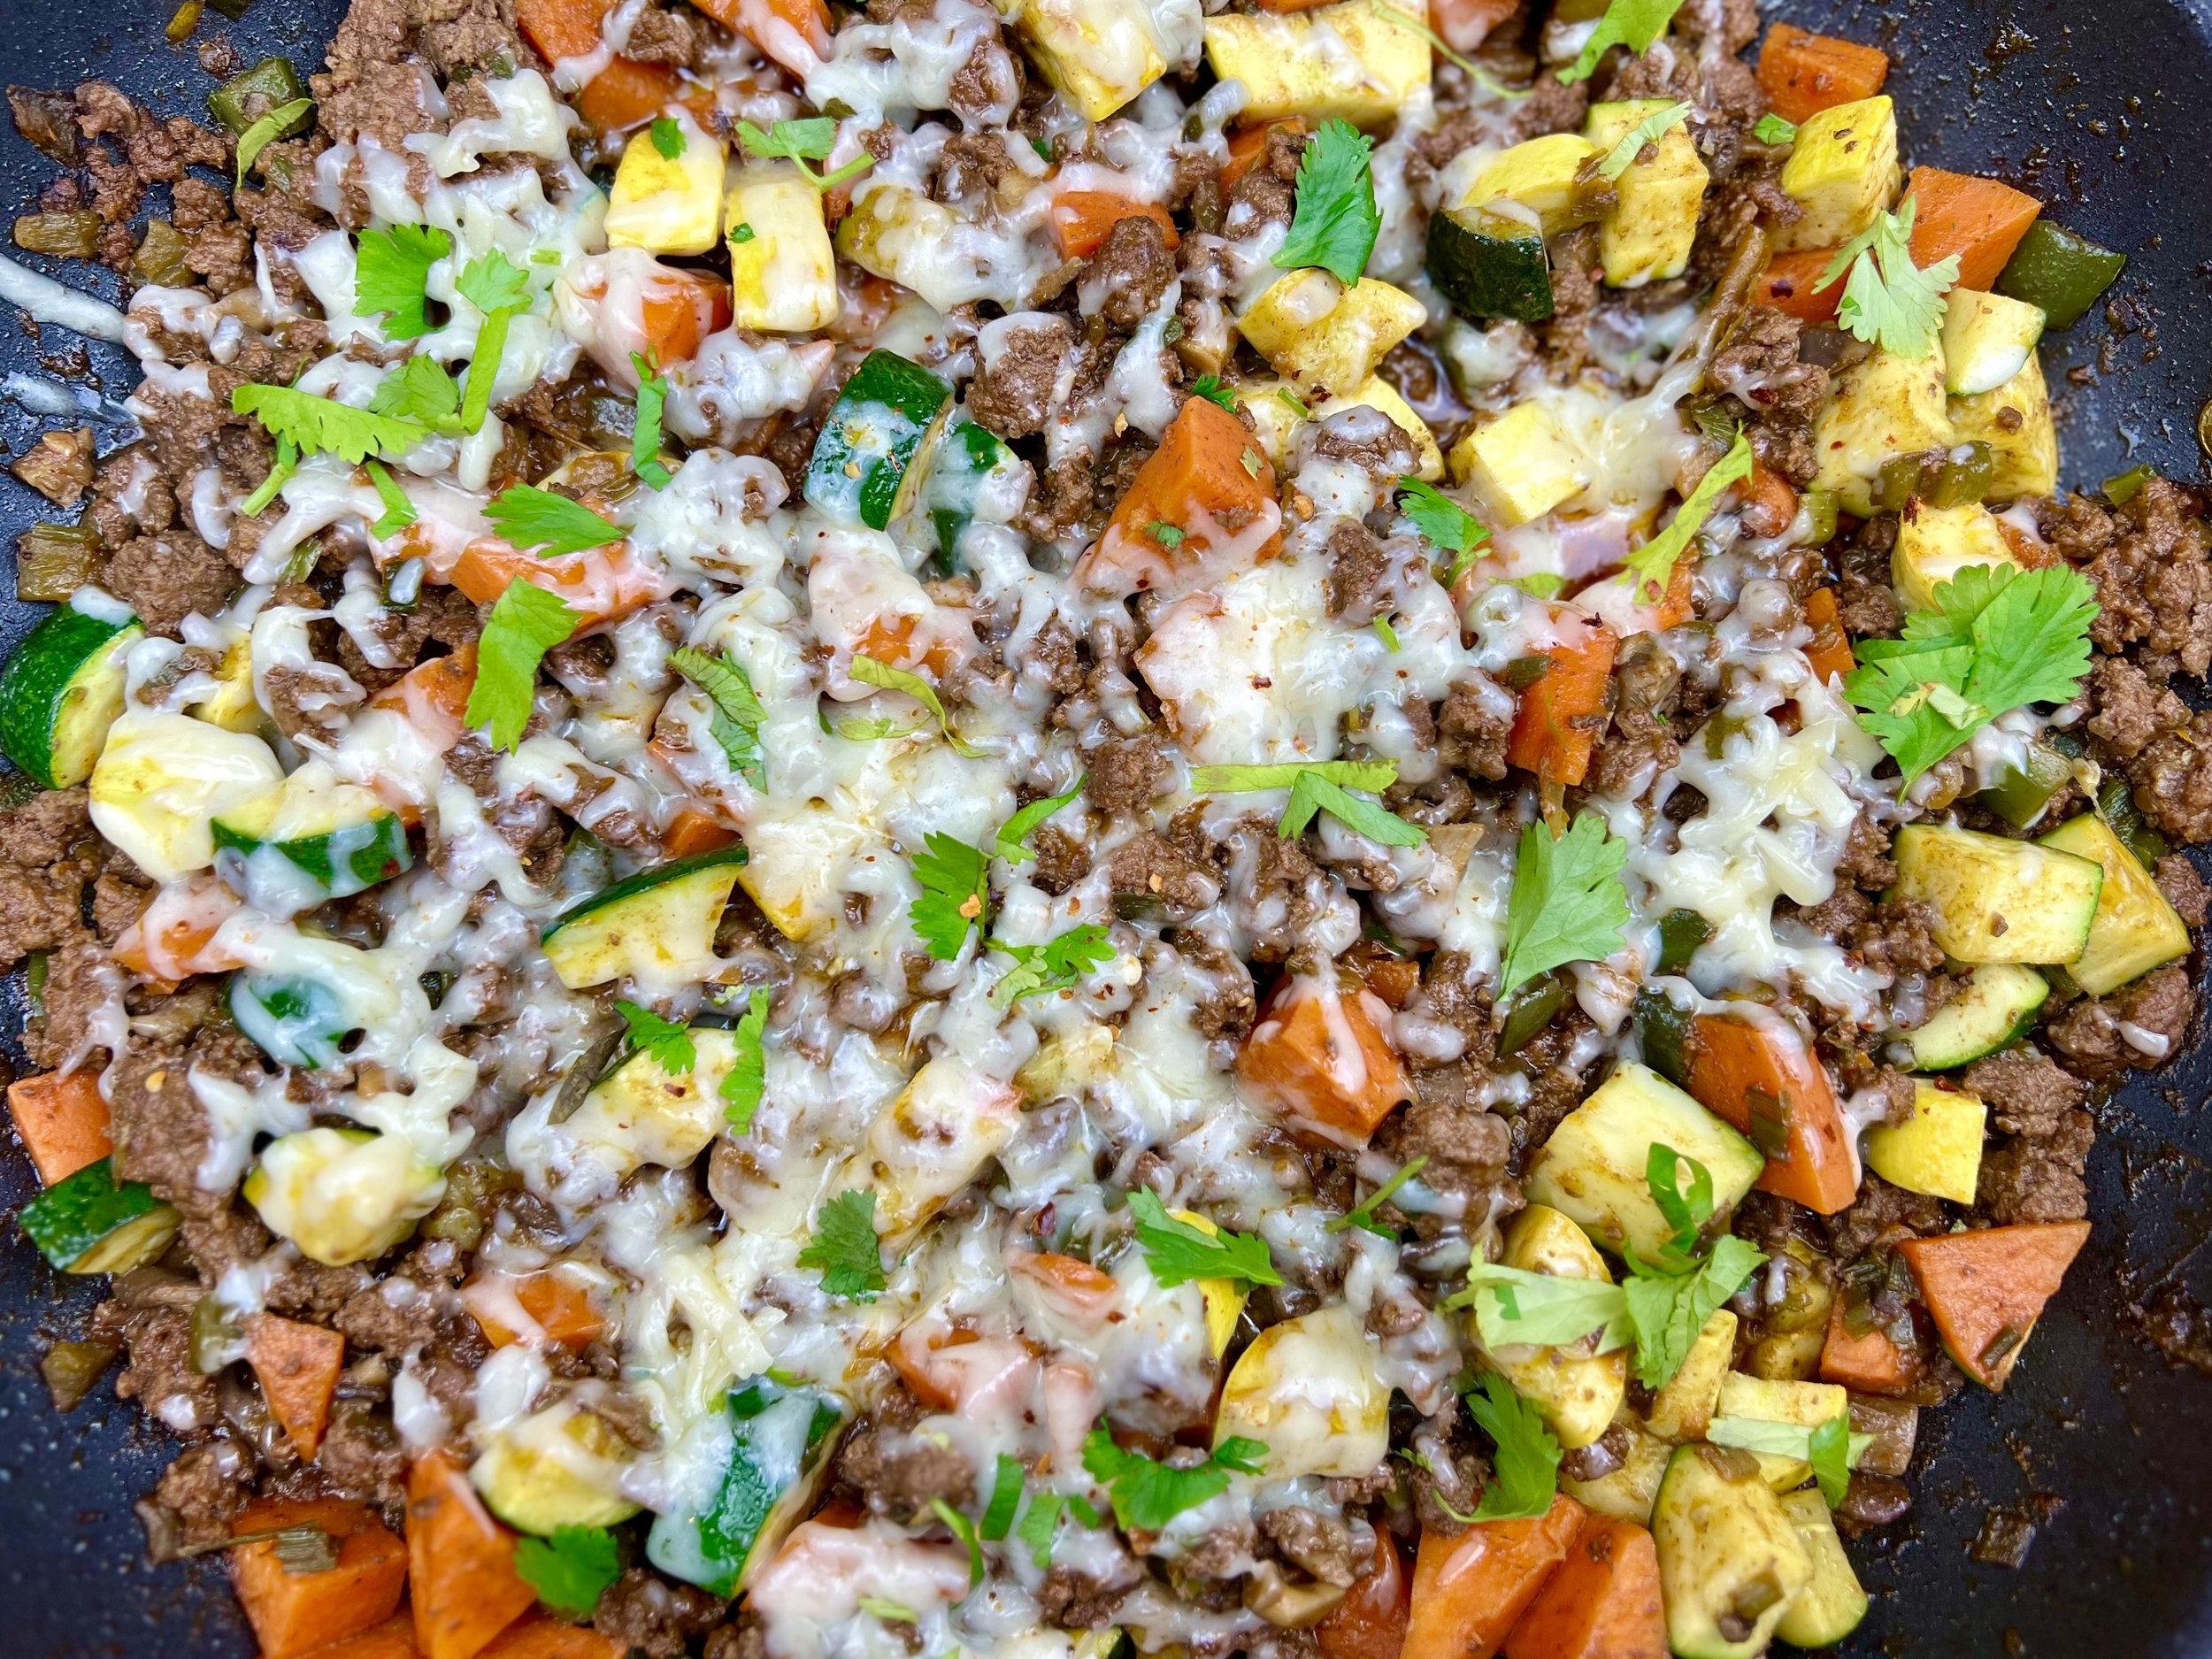


Crispy Tikka Masala Tofu Bowl (low FODMAP)
5 Minutes prep • 45 Minutes cook • Low FODMAP • Gluten-Free • Lactose-Free • Vegetarian • Vegan • Serves 2 - 4
15 Minutes prep • 45 Minutes cook • Low FODMAP • Gluten-Free • Lactose-Free • Vegetarian • Vegan • Serves 2 - 4 • Ok to make-ahead: Steps 1 - 2
Fresh flavors and colors and crispy tofu blend together in this delicious bowl with a creamy, lightly spicy, Tikka Masala sauce. I served it over brown rice but you could use quinoa, white rice, or even polenta. Your vegetarian and vegan friends will love it and so will the rest of the table. It’s hearty and flavorful and features 12 different plants to delight your gut biome. It heats up nicely in the microwave so make a little extra and save it for lunch.

Ingredients: Sauce
1 tablespoon garlic-infused olive oil
1 bunch green onions, green part only, chopped
2 tablespoons Smoke N Sanity Tikka Masala seasoning (use code IBSGC10 for 10% discount)
1 teaspoon ground cumin
1 can coconut milk
Juice of 1/2 lemon
1/2 cup cilantro, chopped (or use 1/4 cup chopped chives if you’re not a fan of cilantro)
2 small zucchini and 1 summer squash, cubed
Ingredients: Tofu
1/2 cup corn starch
1/4 cup white sesame seeds
1 teaspoon Kosher salt
2 tablespoons garlic-infused olive oil
1 package firm or extra-firm tofu, drained
Ingredients: Bowl
1 cup white rice or brown rice, rinsed and cooked per package instructions in low FODMAP chicken broth (use code IBSGC15 for 15% discount) or water
For serving:
1 carrot, grated
2 radishes, sliced
1/2 cup cilantro or chives, chopped
1/2 cup microgreens (optional)
Directions
(1) Prepare: Drain the tofu and set it on a rimmed dish lined with paper towels. Cover with paper towels and set a cast-iron frying pan or another heavy object on top of the block of tofu to press the water out. Let sit for about 30 minutes. Chop the radish and grate the carrot.
(2) Cook the rice: Rinse and cook the rice per package instructions. I like to cook it in chicken broth instead of water, but either one is delicious and, of course, if you’re making it vegetarian, don’t use chicken broth!
(3) Dredge the tofu: Put the cornstarch, sesame seeds, salt, and pepper on a plate and mix together. Cut the drained tofu into cubes. Toss the cubes in the cornstarch mixture covering all sides of each cube.
(4) Cook the tofu: Heat the olive oil in a medium skillet. When hot, add the tofu all in one layer. Cook until browned, then flip each piece of tofu over. Cook again until brown, then flip to another side until all 4 sides are browned and crisp.
(5) Prepare the sauce: Heat the olive oil in a medium skillet. When hot, add the chopped green onions. Cook for about a minute, then add the Tikka Masala and the ground cumin. Cook for about 30 seconds, then add the coconut milk. Stir to blend, add the cubed summer squash and zucchini, and simmer for about 5 minutes. Then add the lemon juice and cilantro or chives. Stir, taste, and add salt and pepper to your liking.
(6) Plate and serve: Put a scoop of rice on each plate or bowl. Ladle over the sauce with the summer squash and zucchini. Add a scoop of crispy tofu. Drizzle over a bit more sauce. Add the carrot and radishes around the edge and sprinkle the microgreens (or chopped cilantro or green onions) over the top.
Eat and enjoy every bite because you can!
Recipe note: I use Diamond Crystal Kosher salt in all my recipes because it has a wonderful flat and crisp flake that tastes delicious. It is also the least salty salt available so you can use it more liberally as a seasoning than you can table salt or sea salt. If you use another type of salt, you may need to reduce the amount so it is not over-salted.
Link note: This post contains links for you to easily purchase items listed on the page. In some cases, we have provided a special discount code for IBS Game Changers so be sure to use it when you purchase an item to get the discount that has been arranged just for you! As an Amazon Associate, I earn a commission from qualifying Amazon purchases.
More Deliciously Low FODMAP™ main course recipes
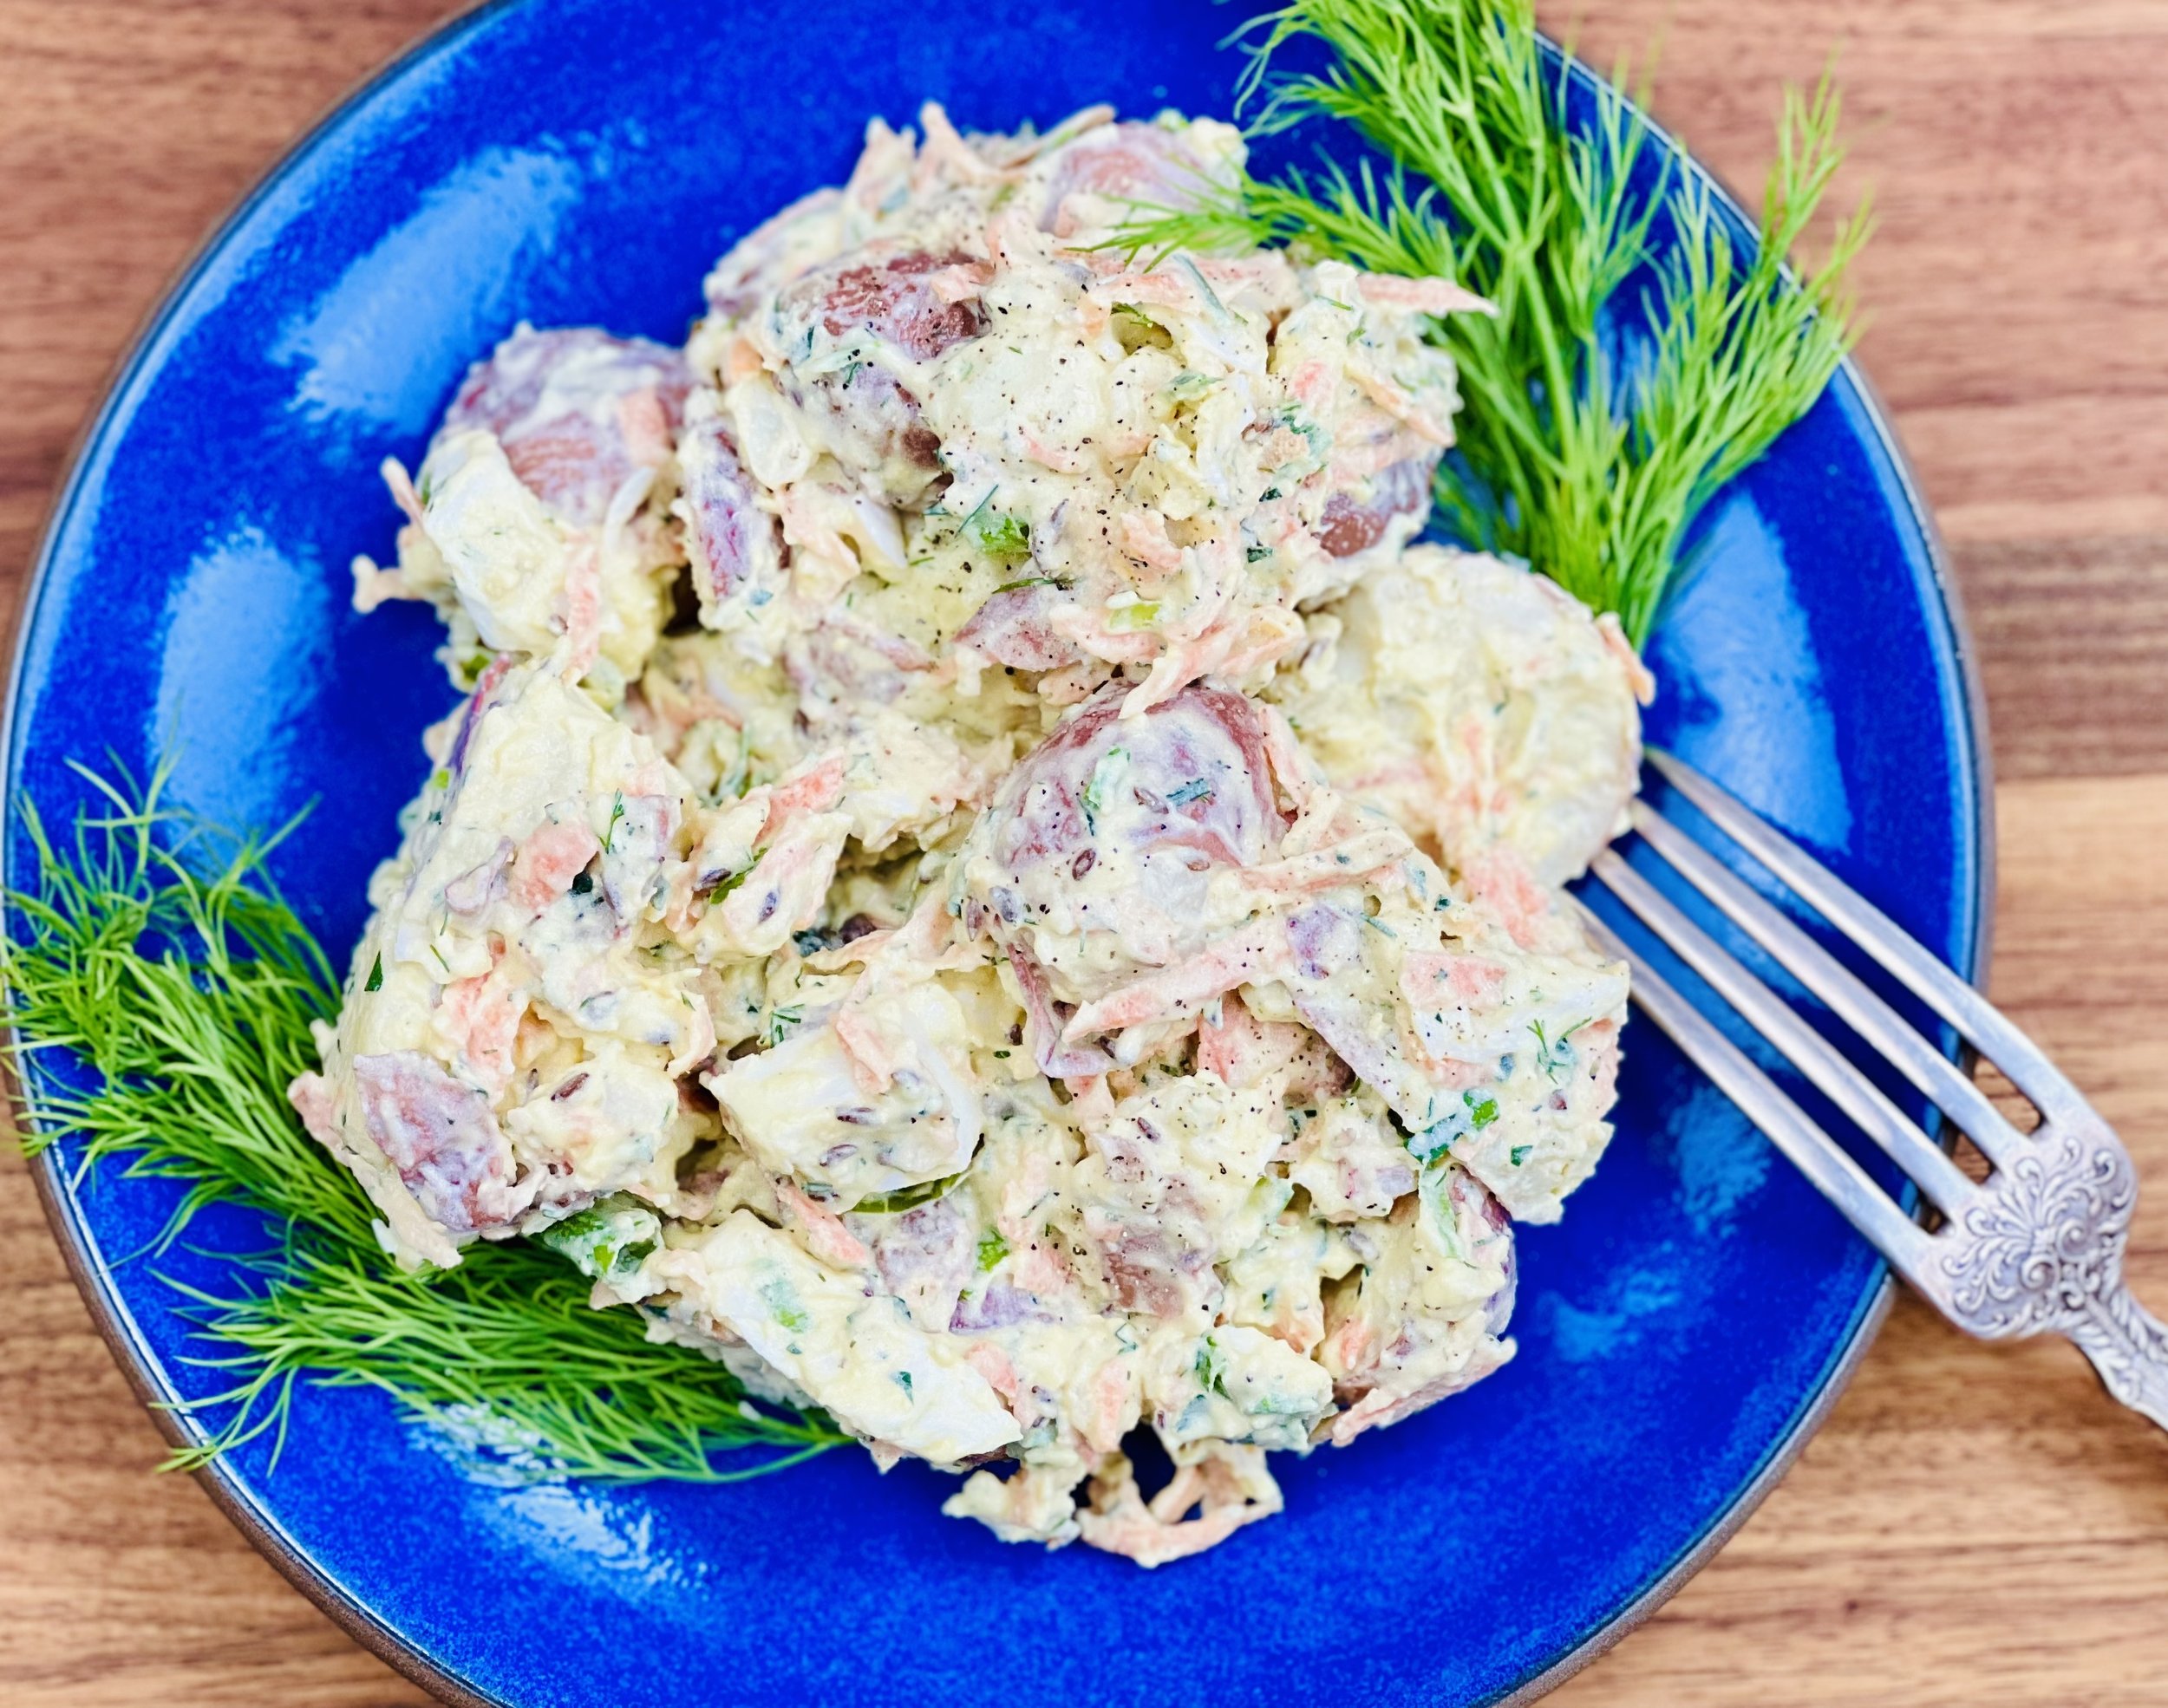
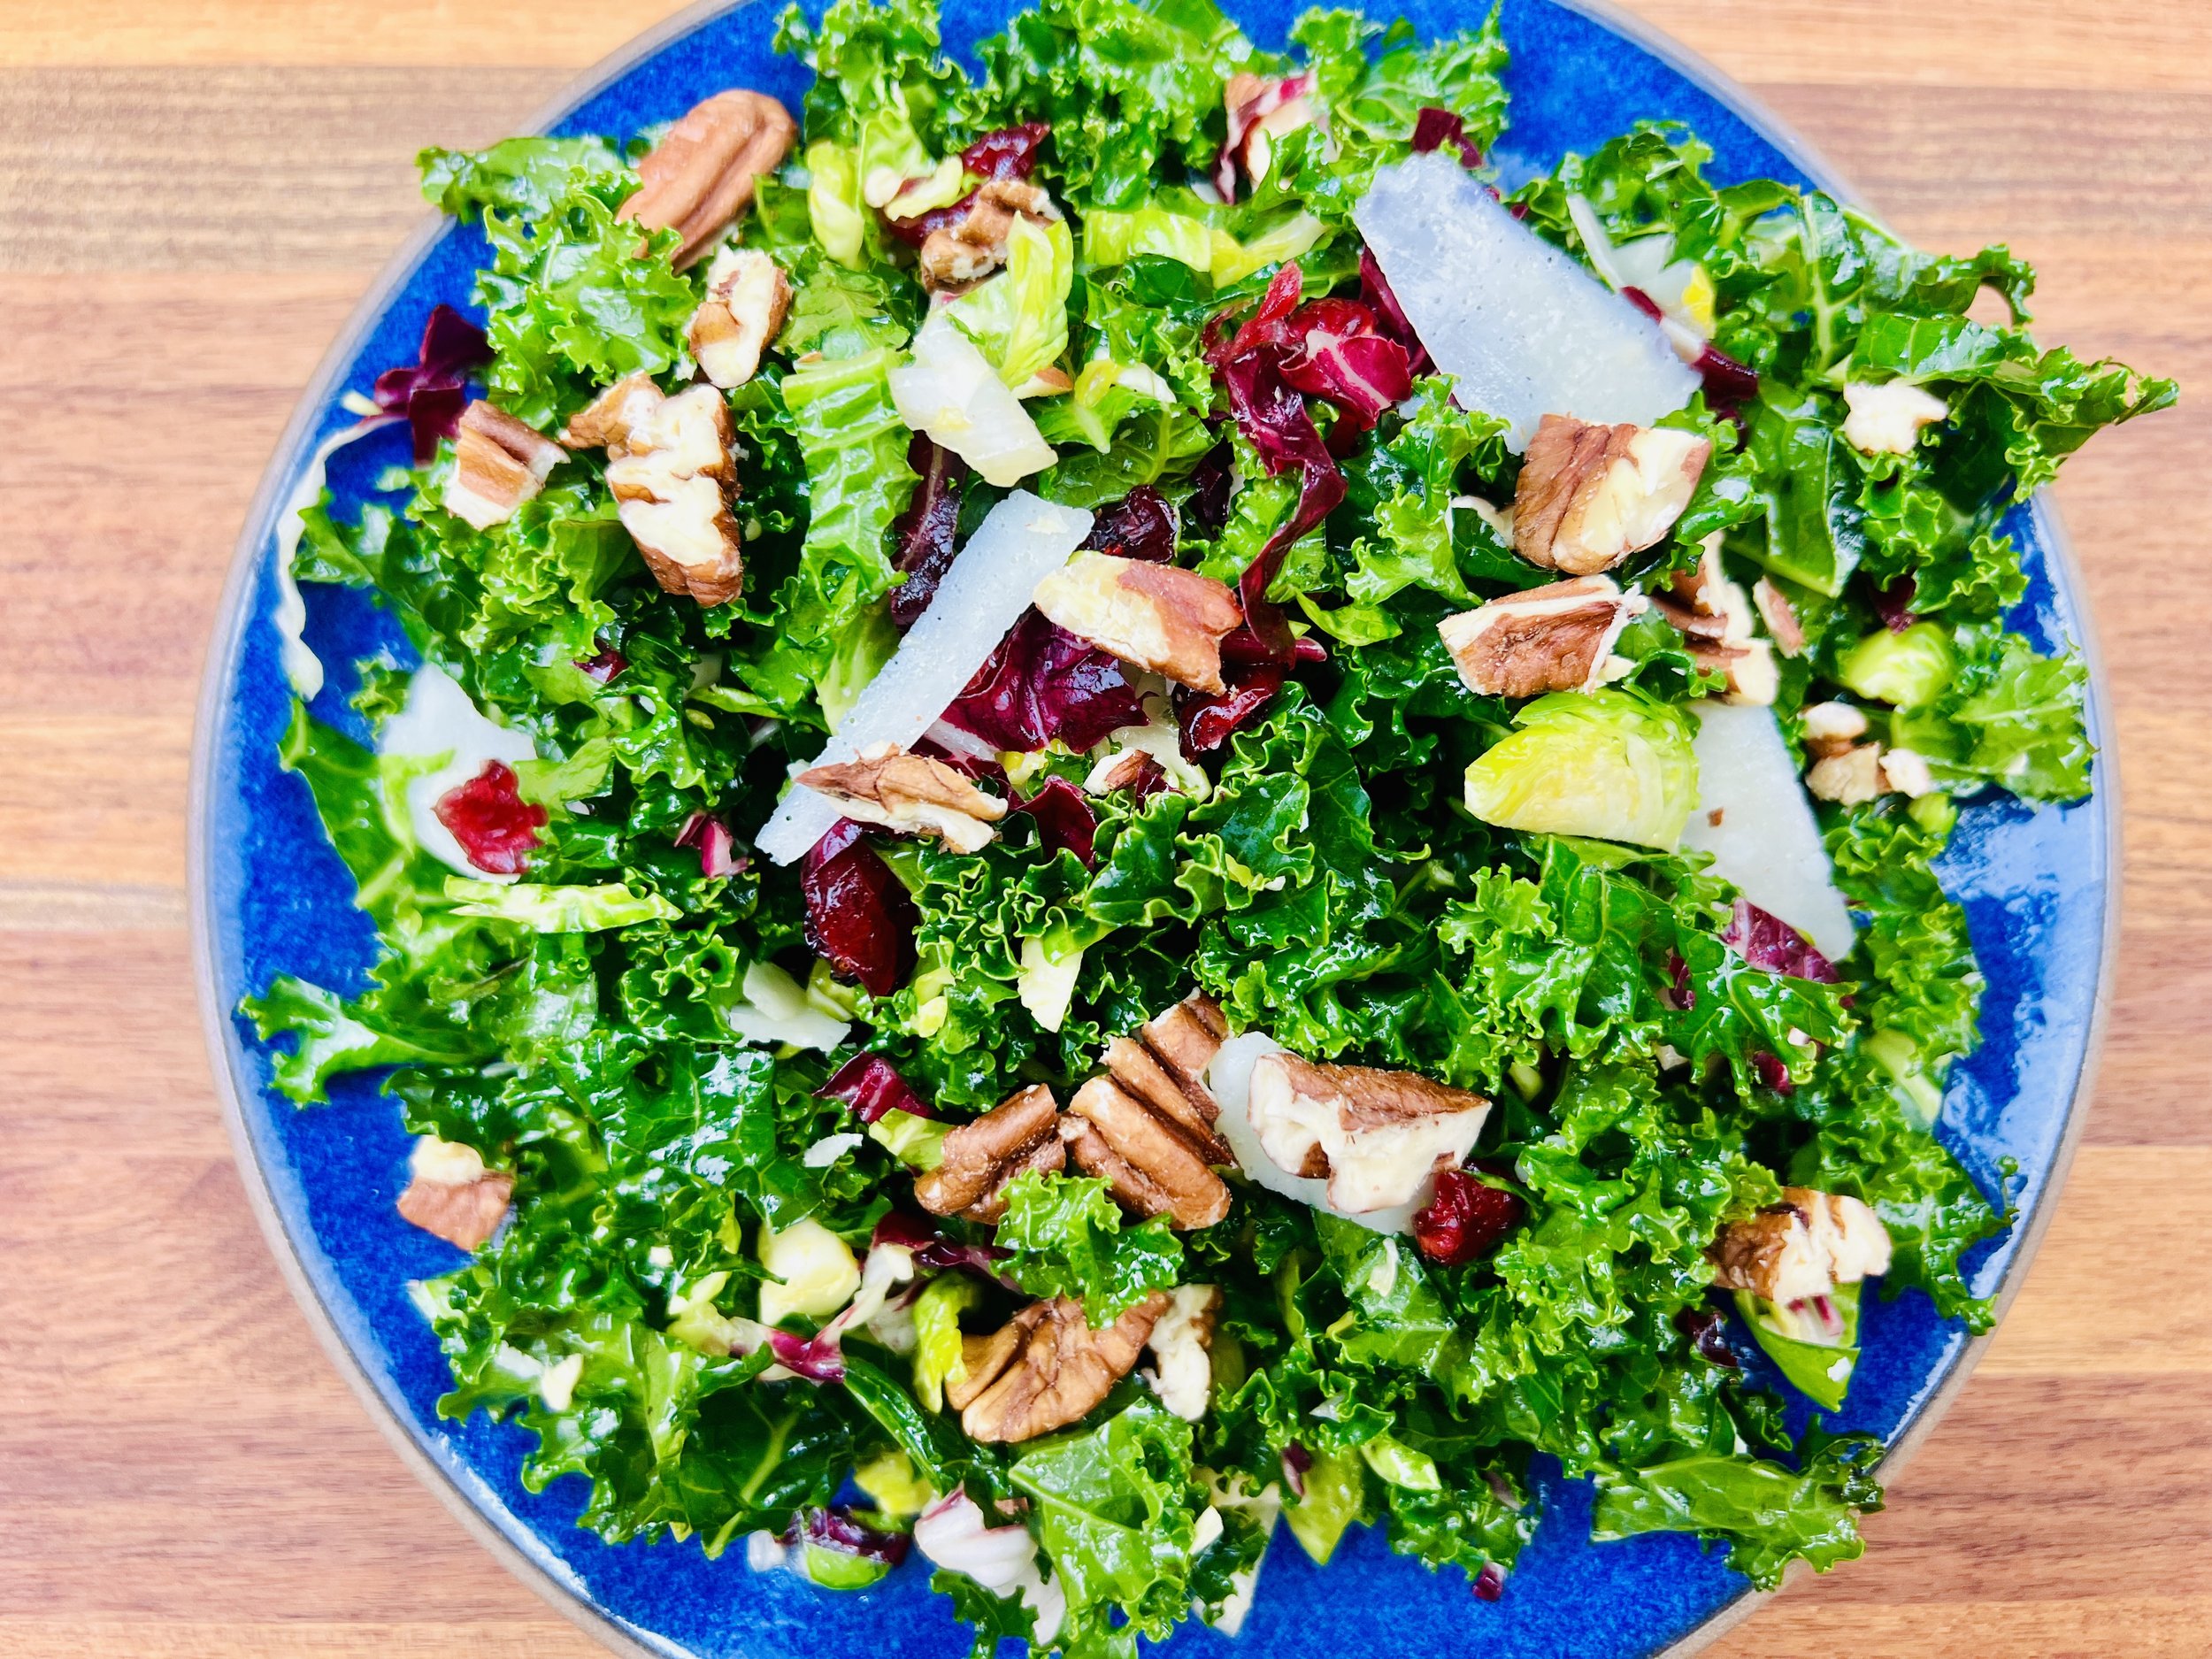
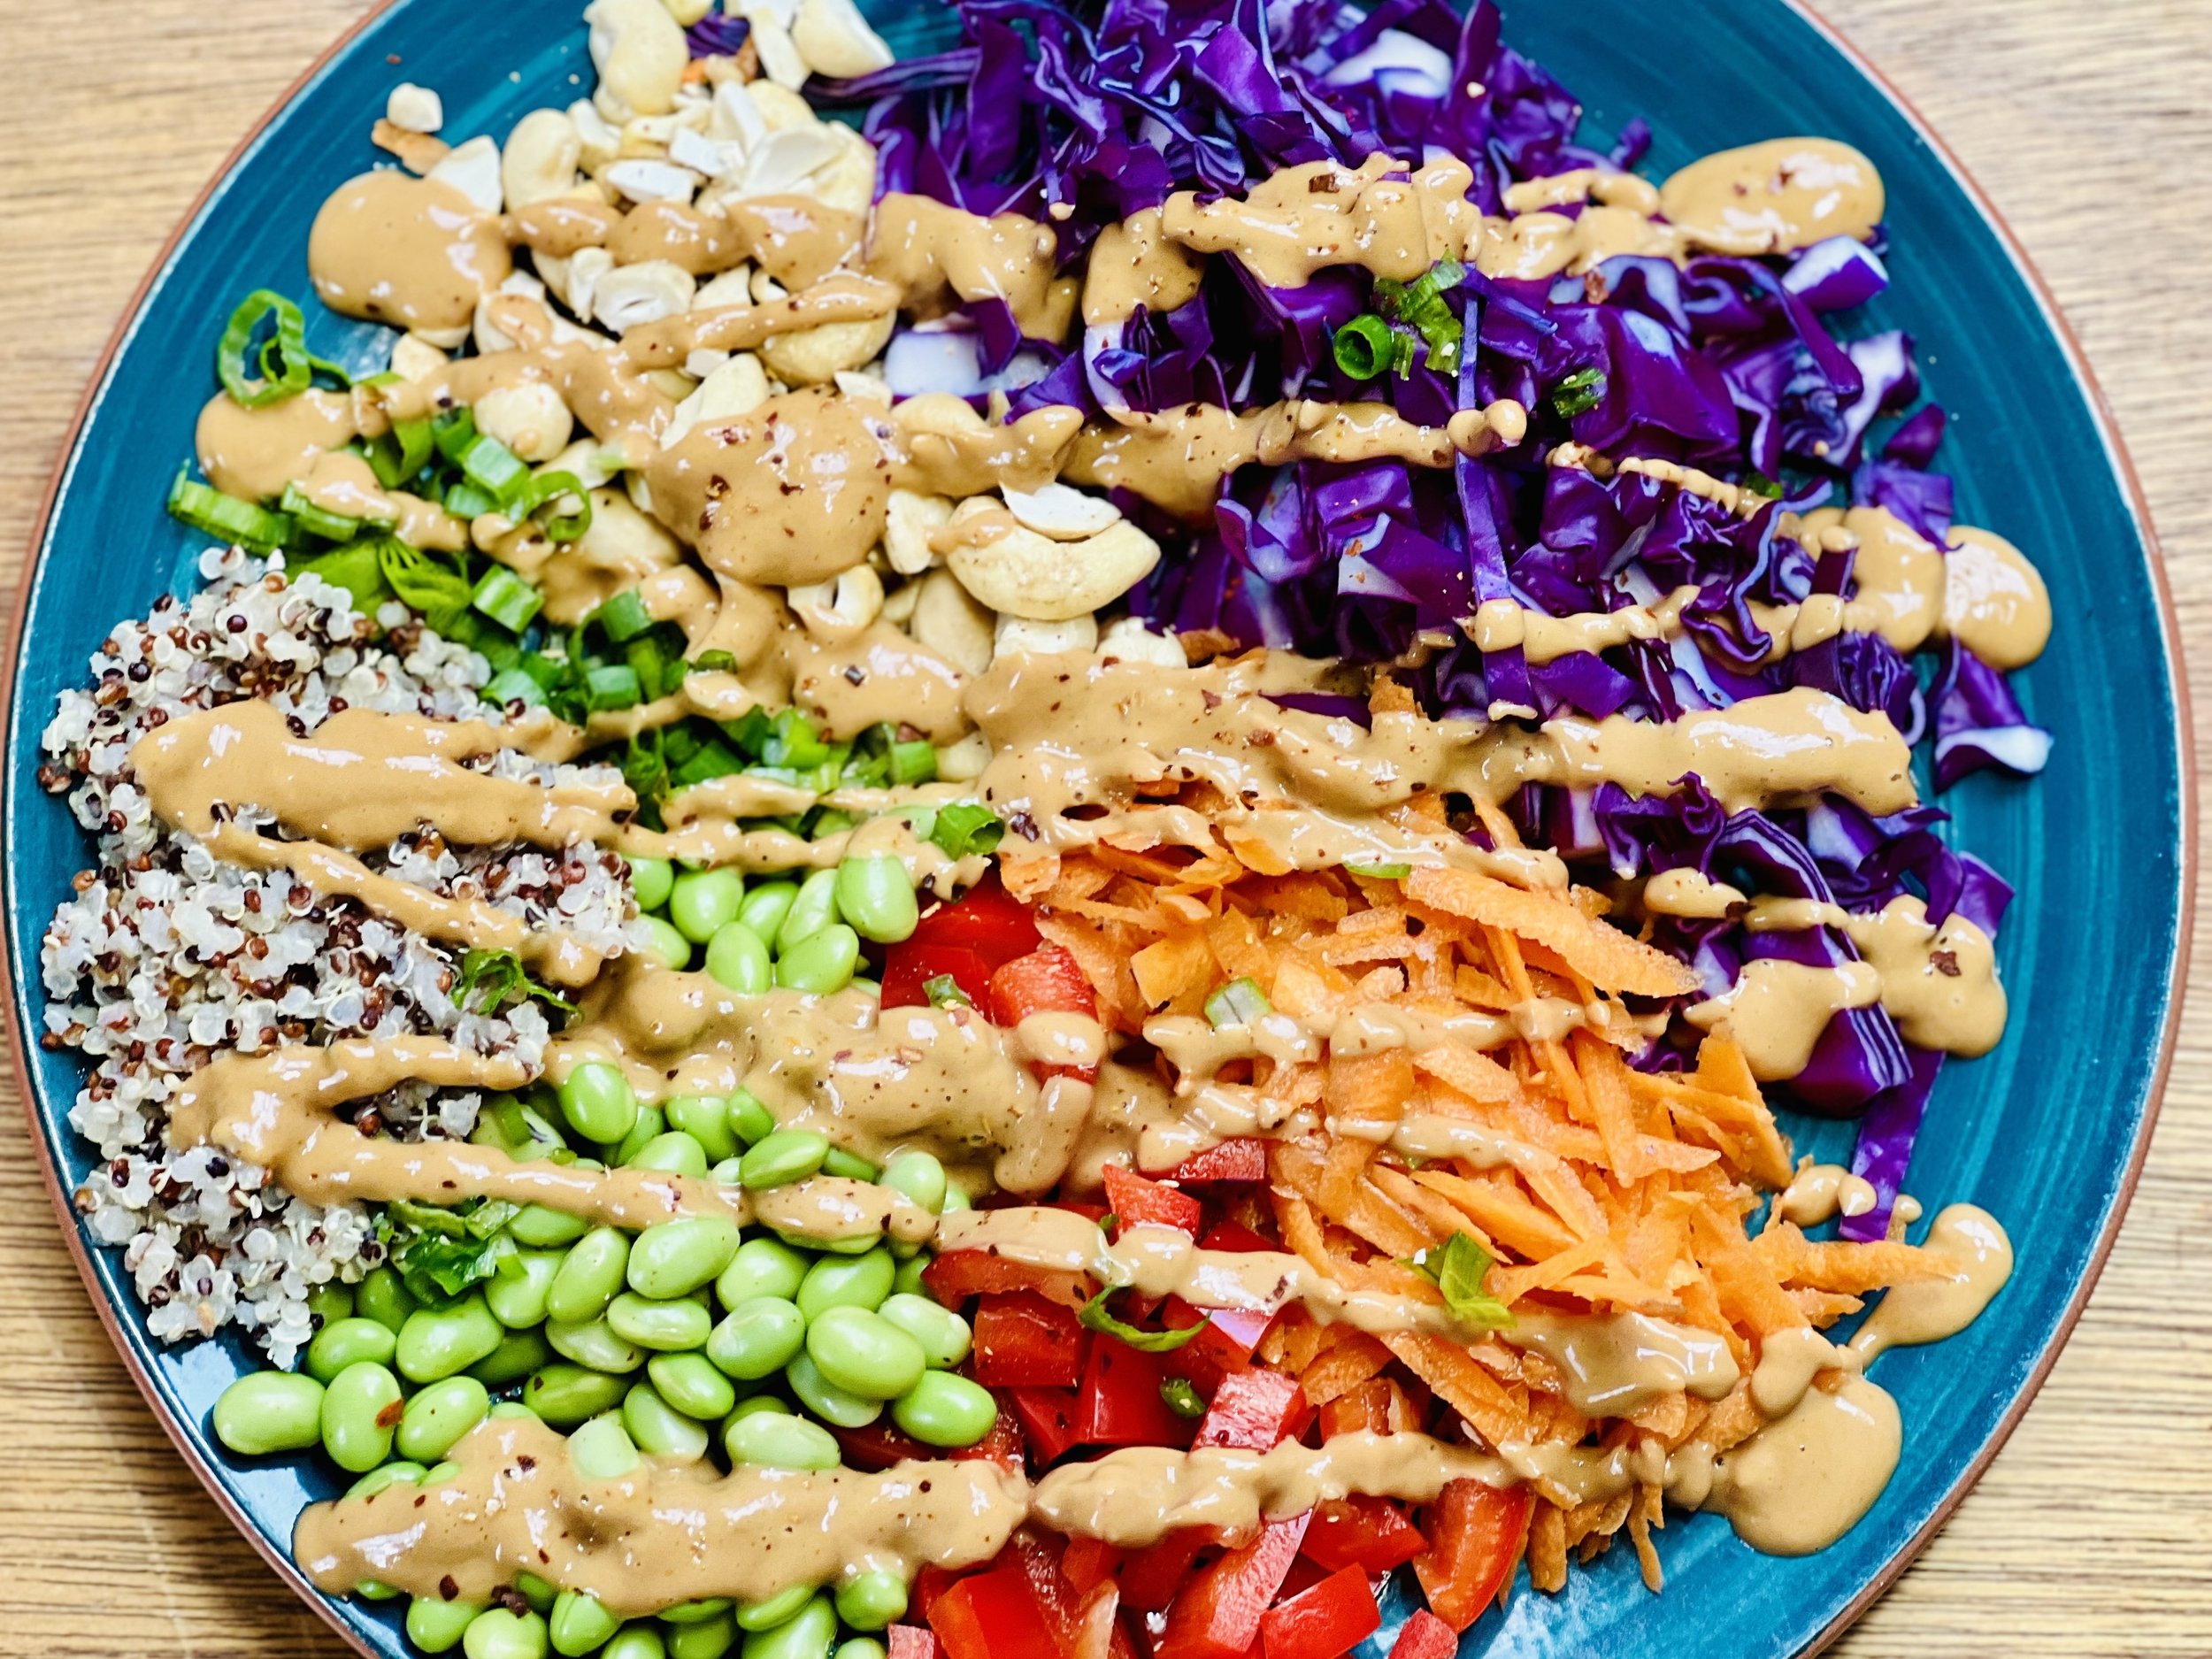
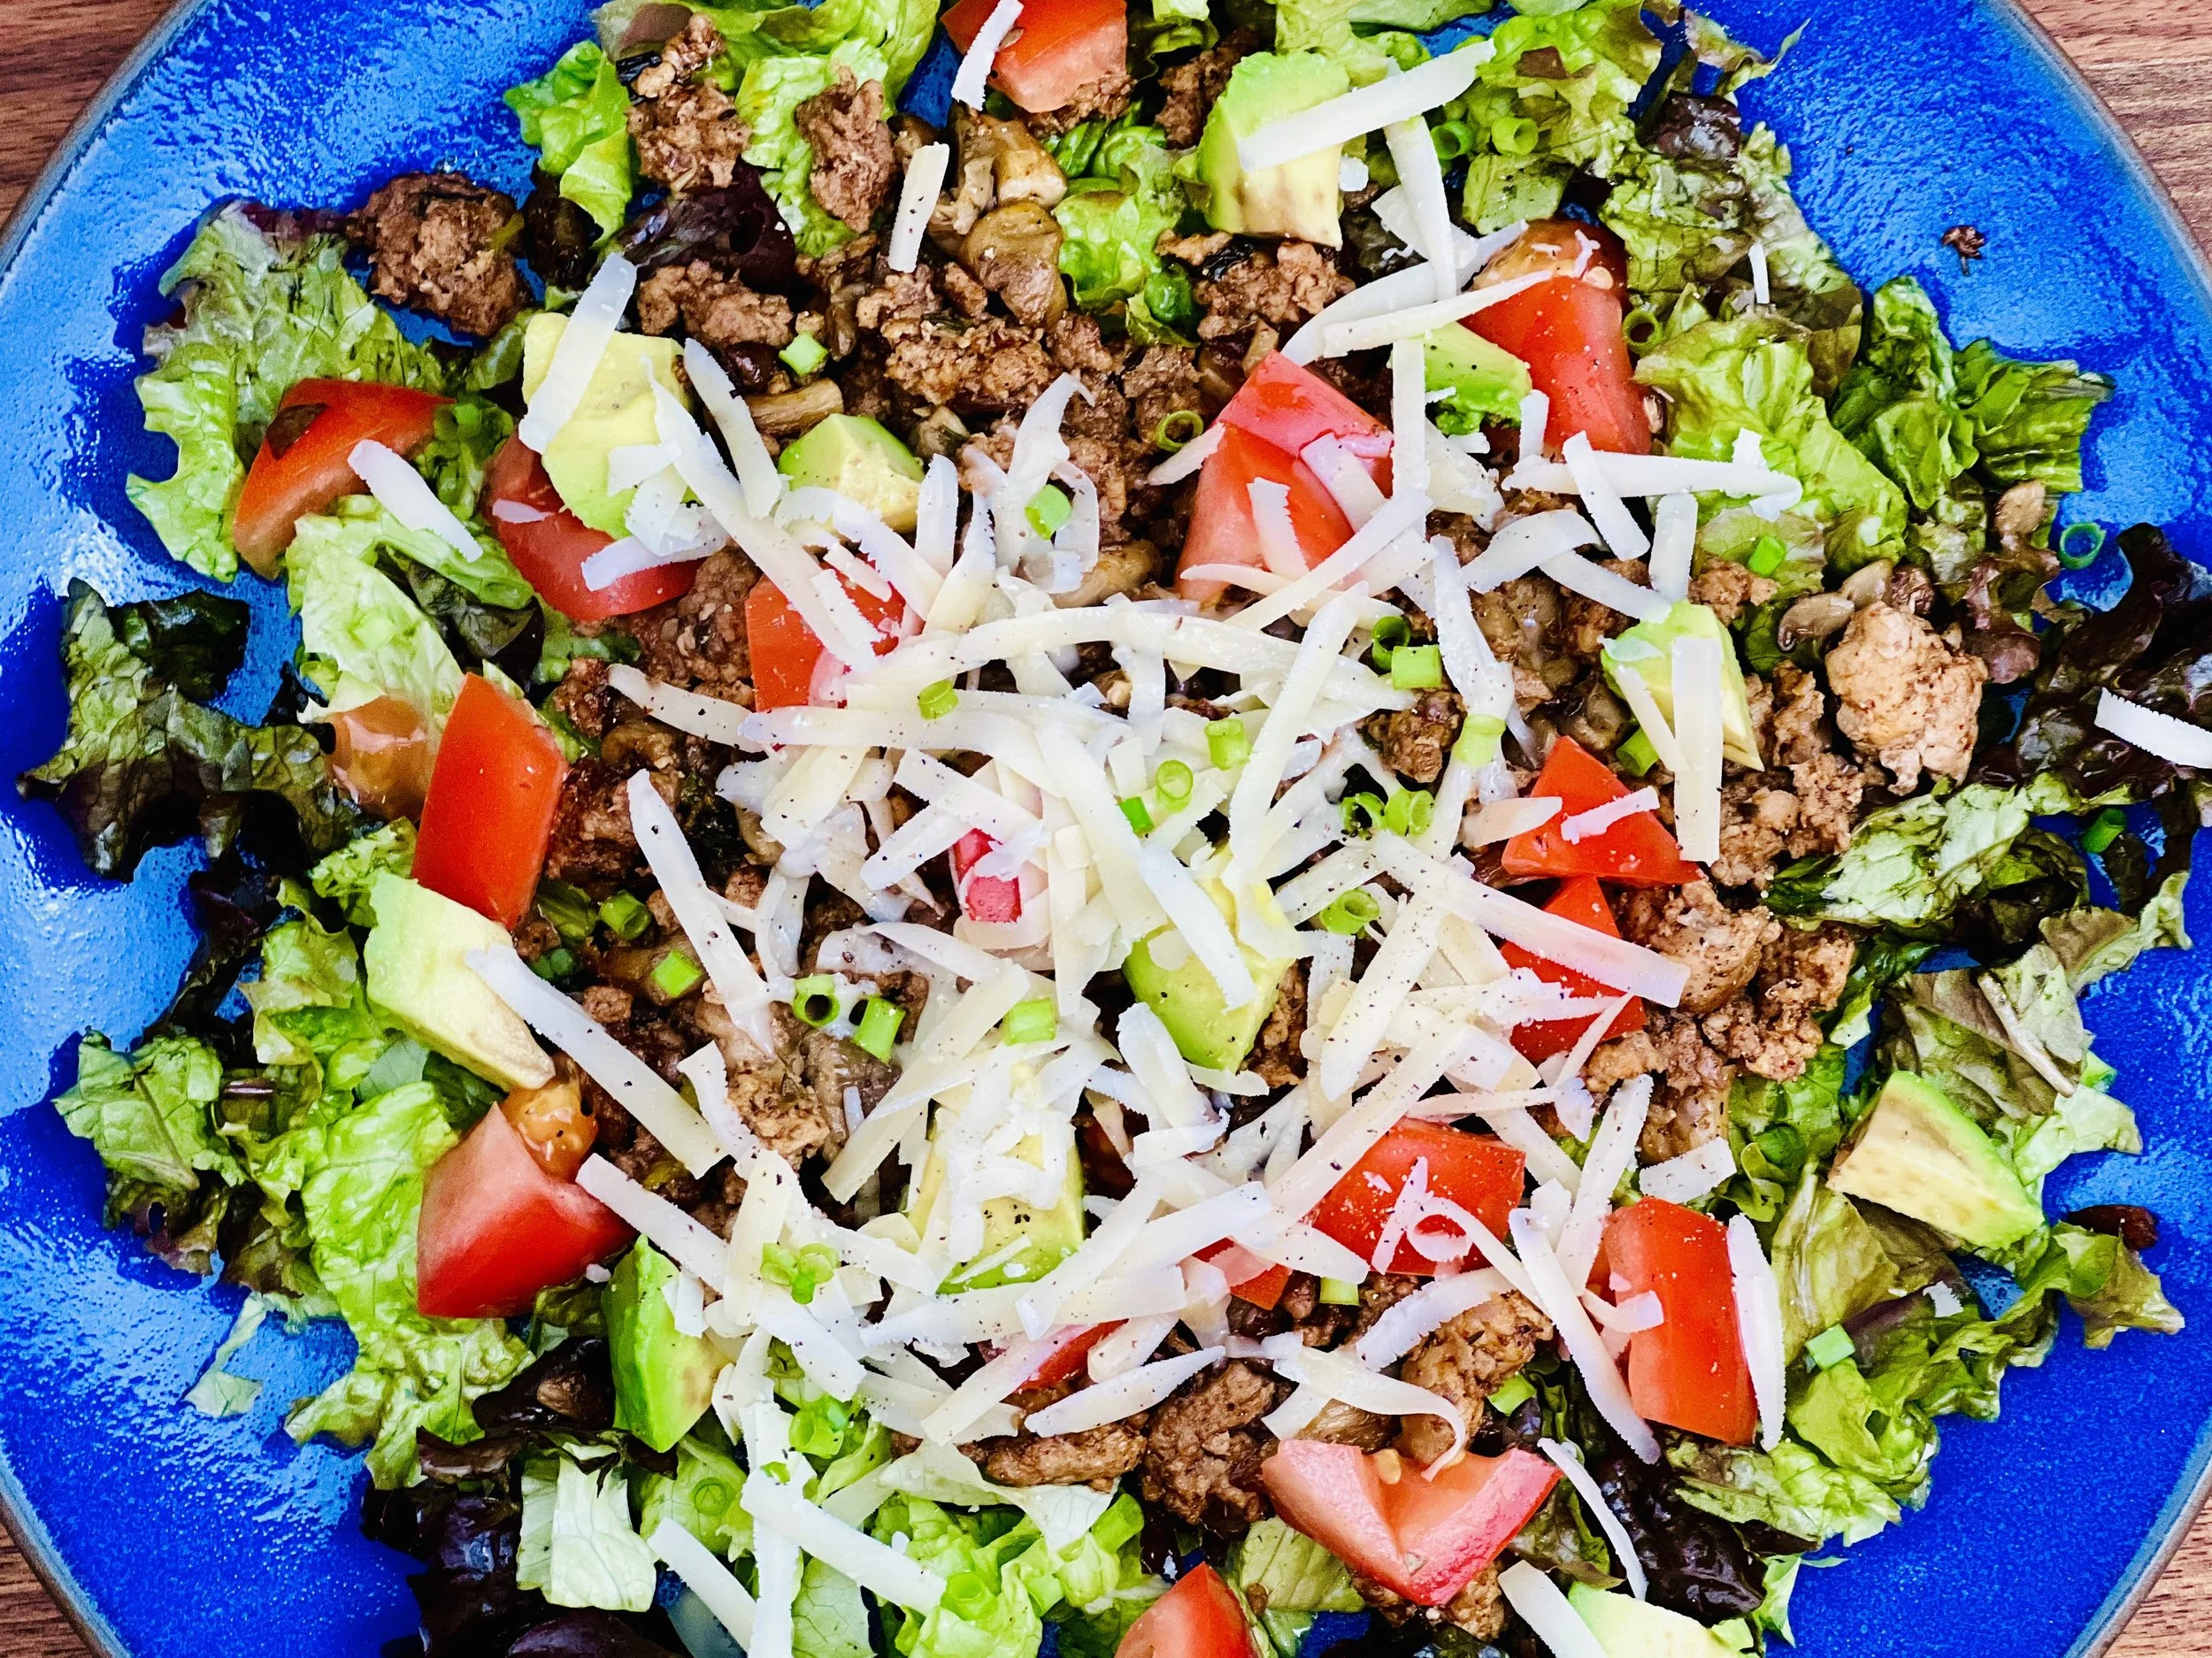
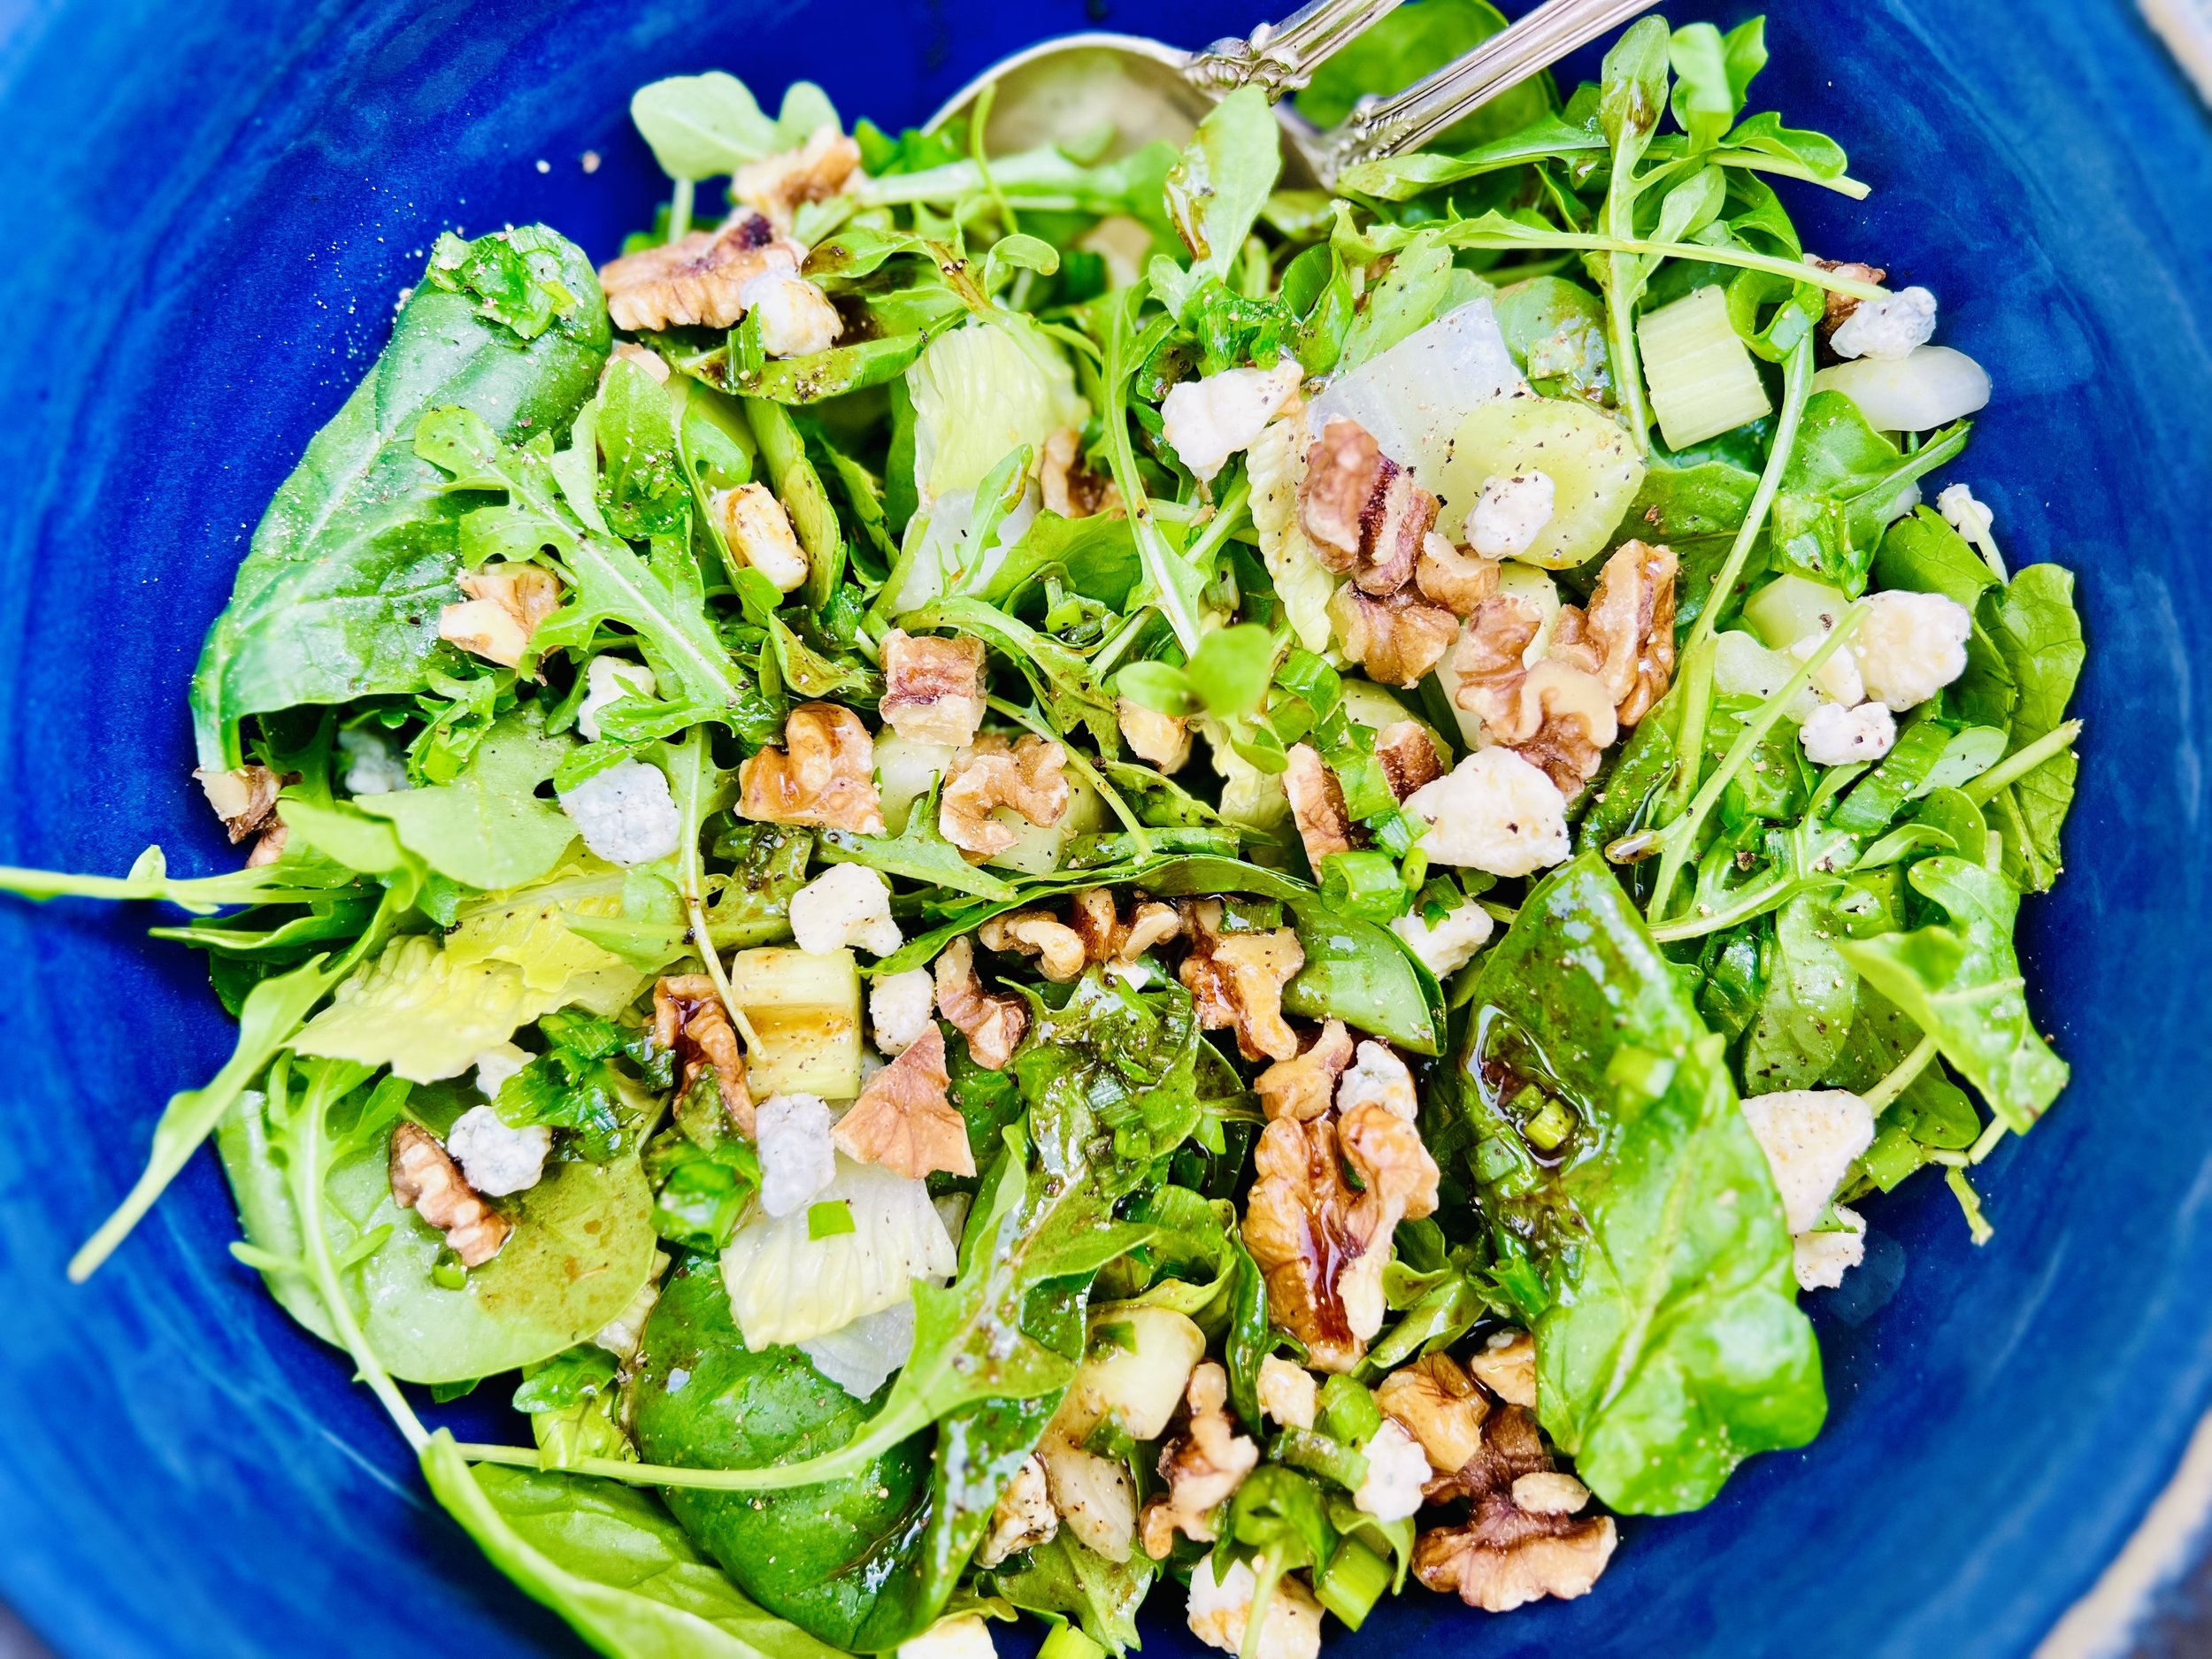
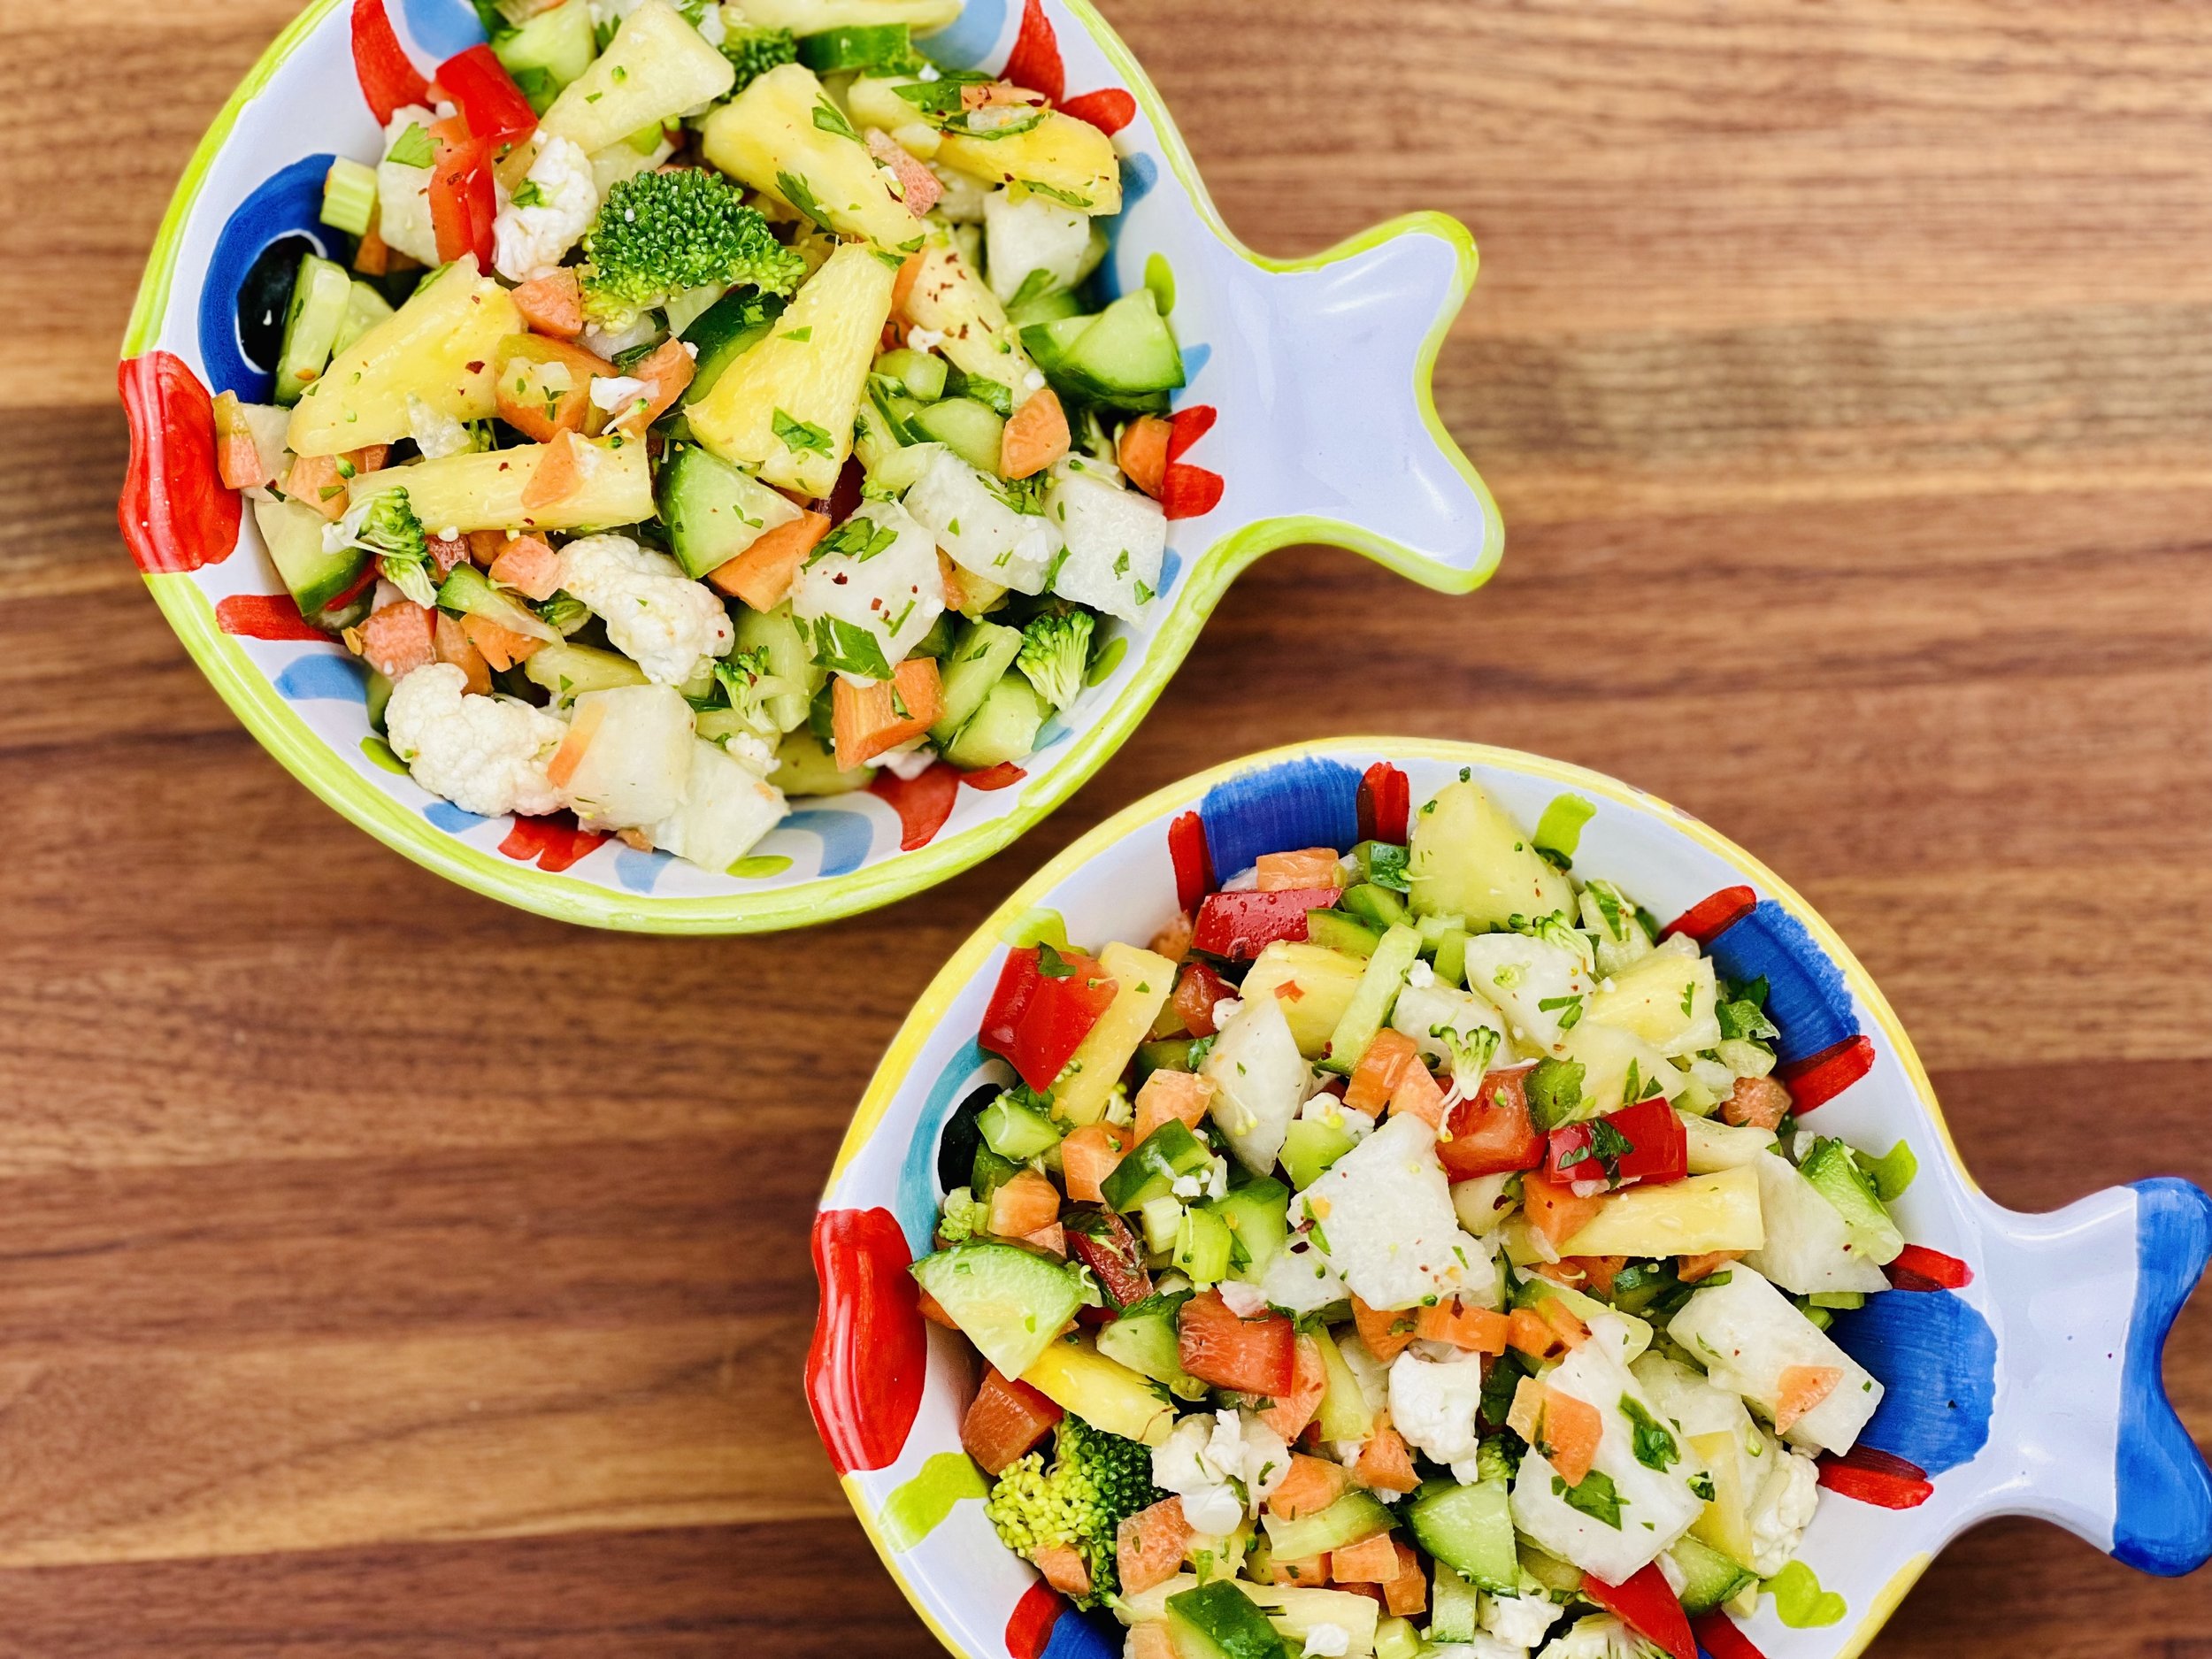
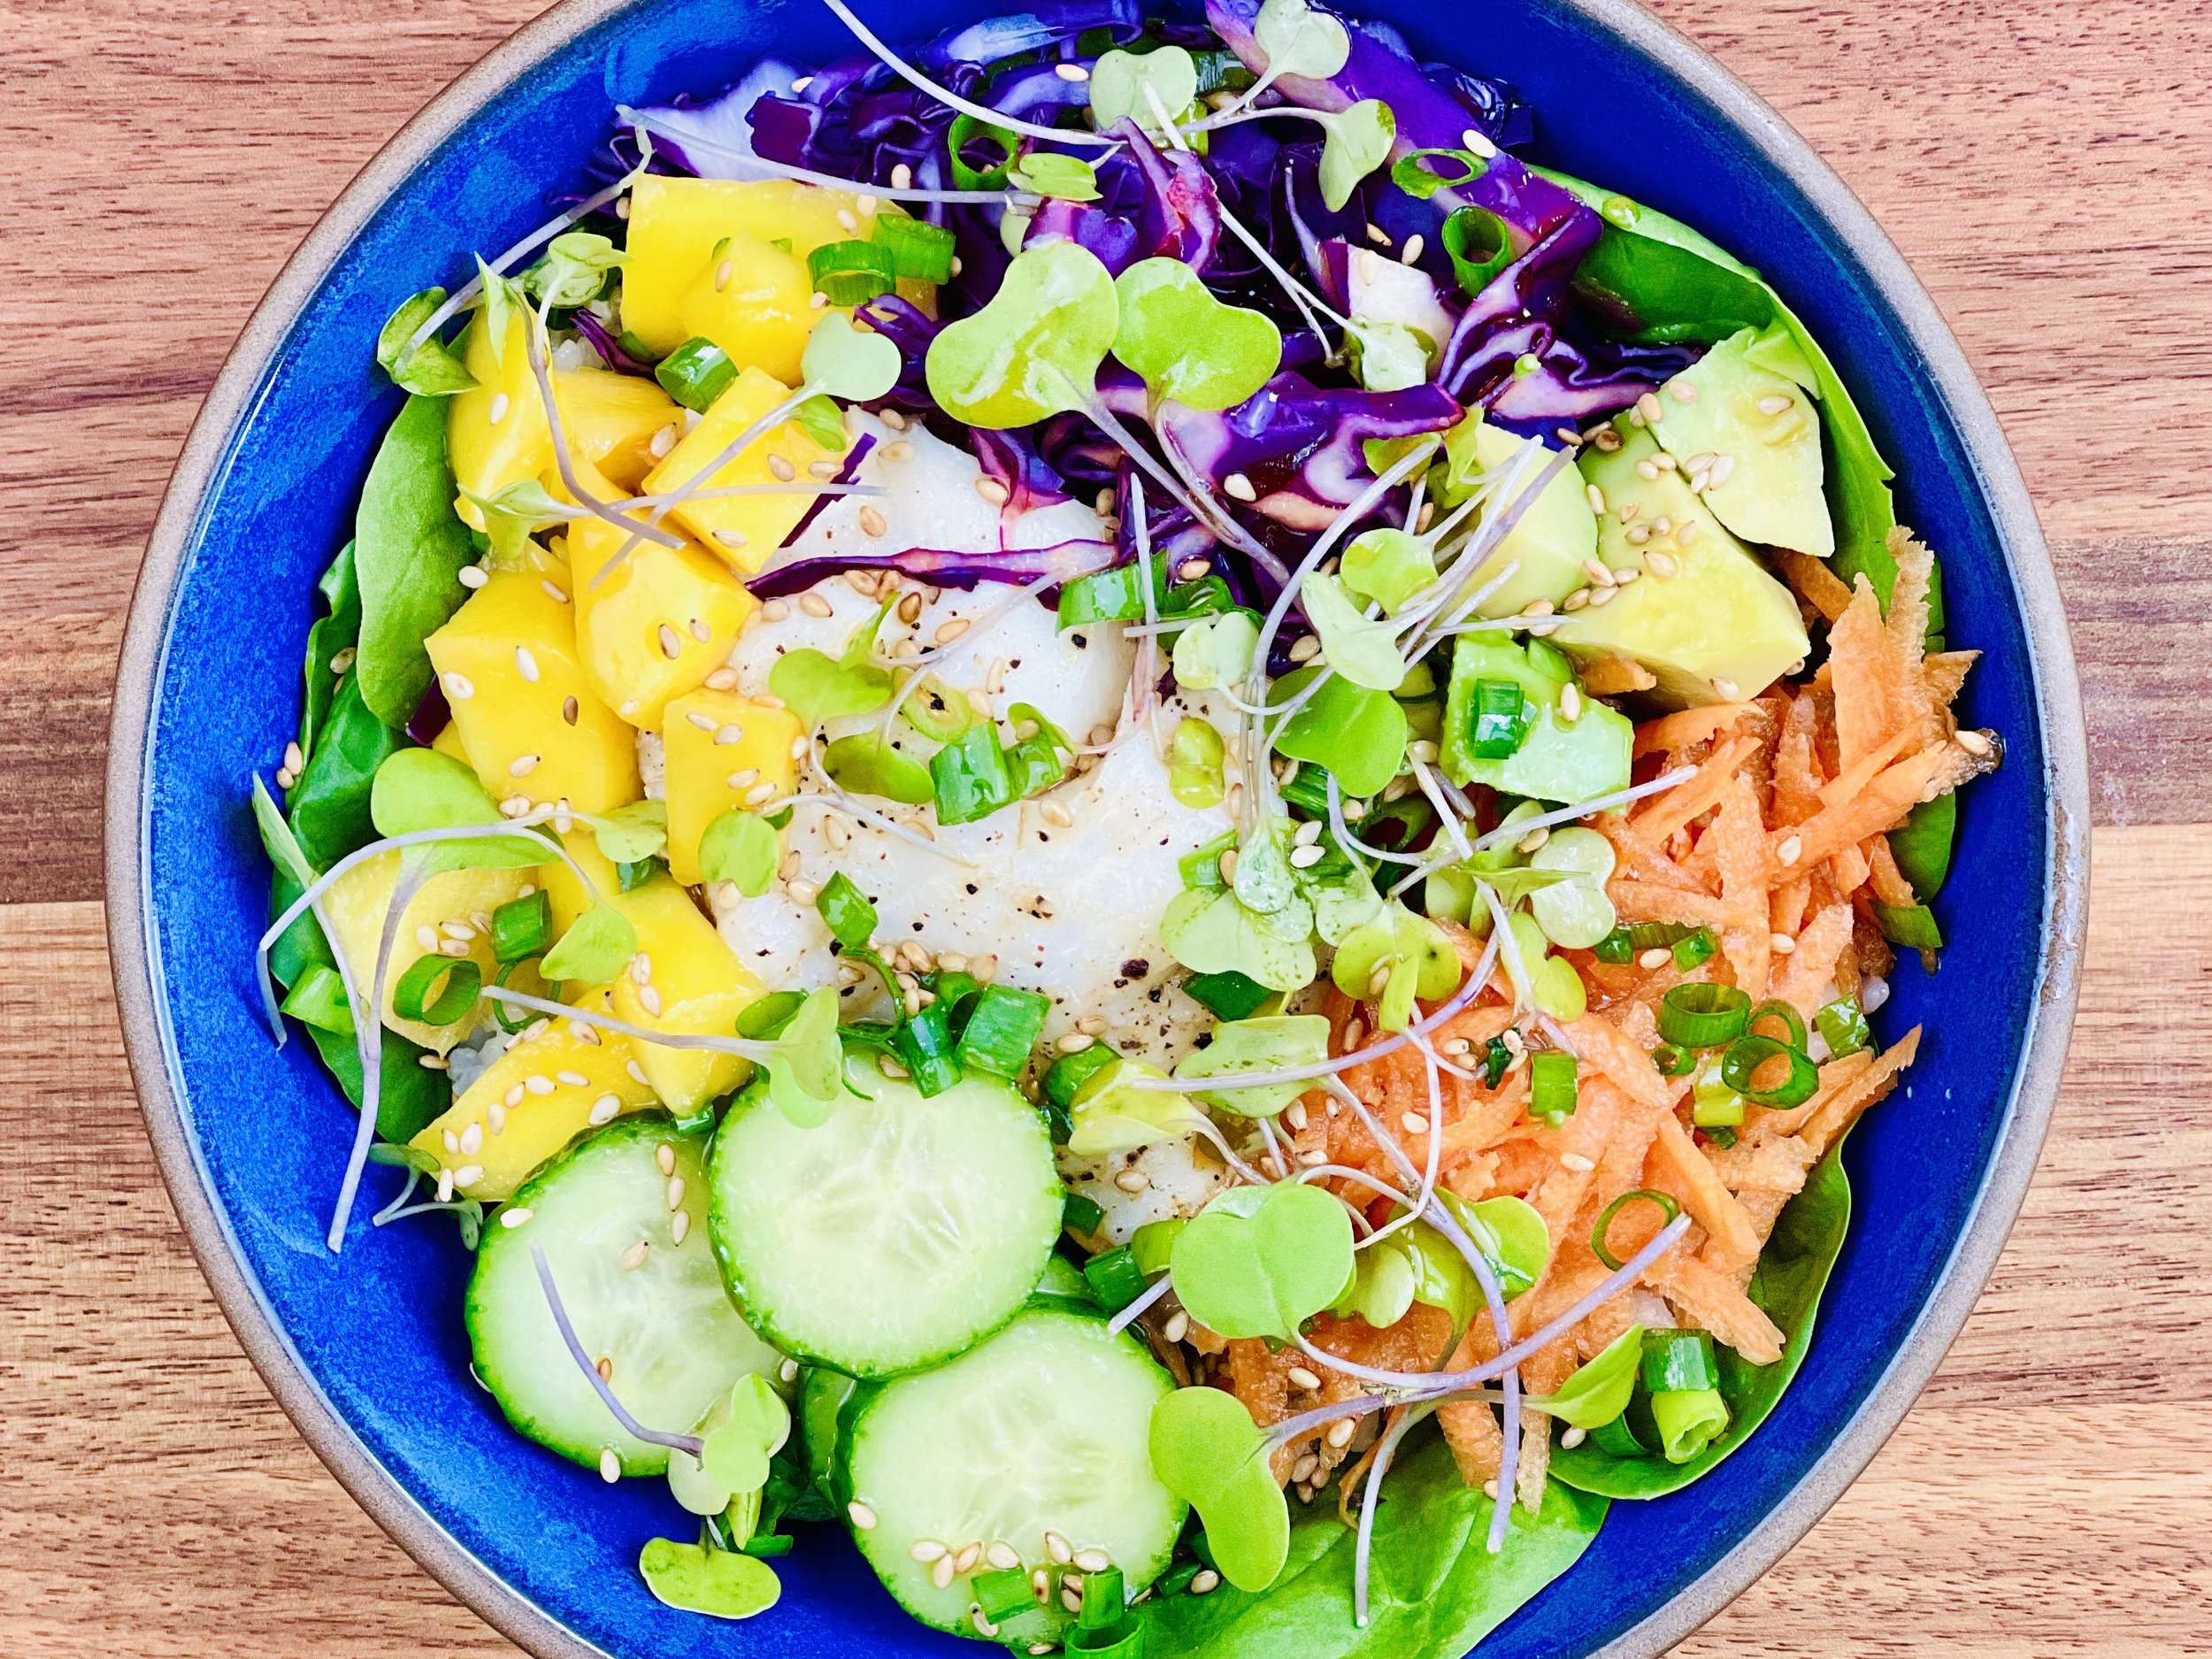
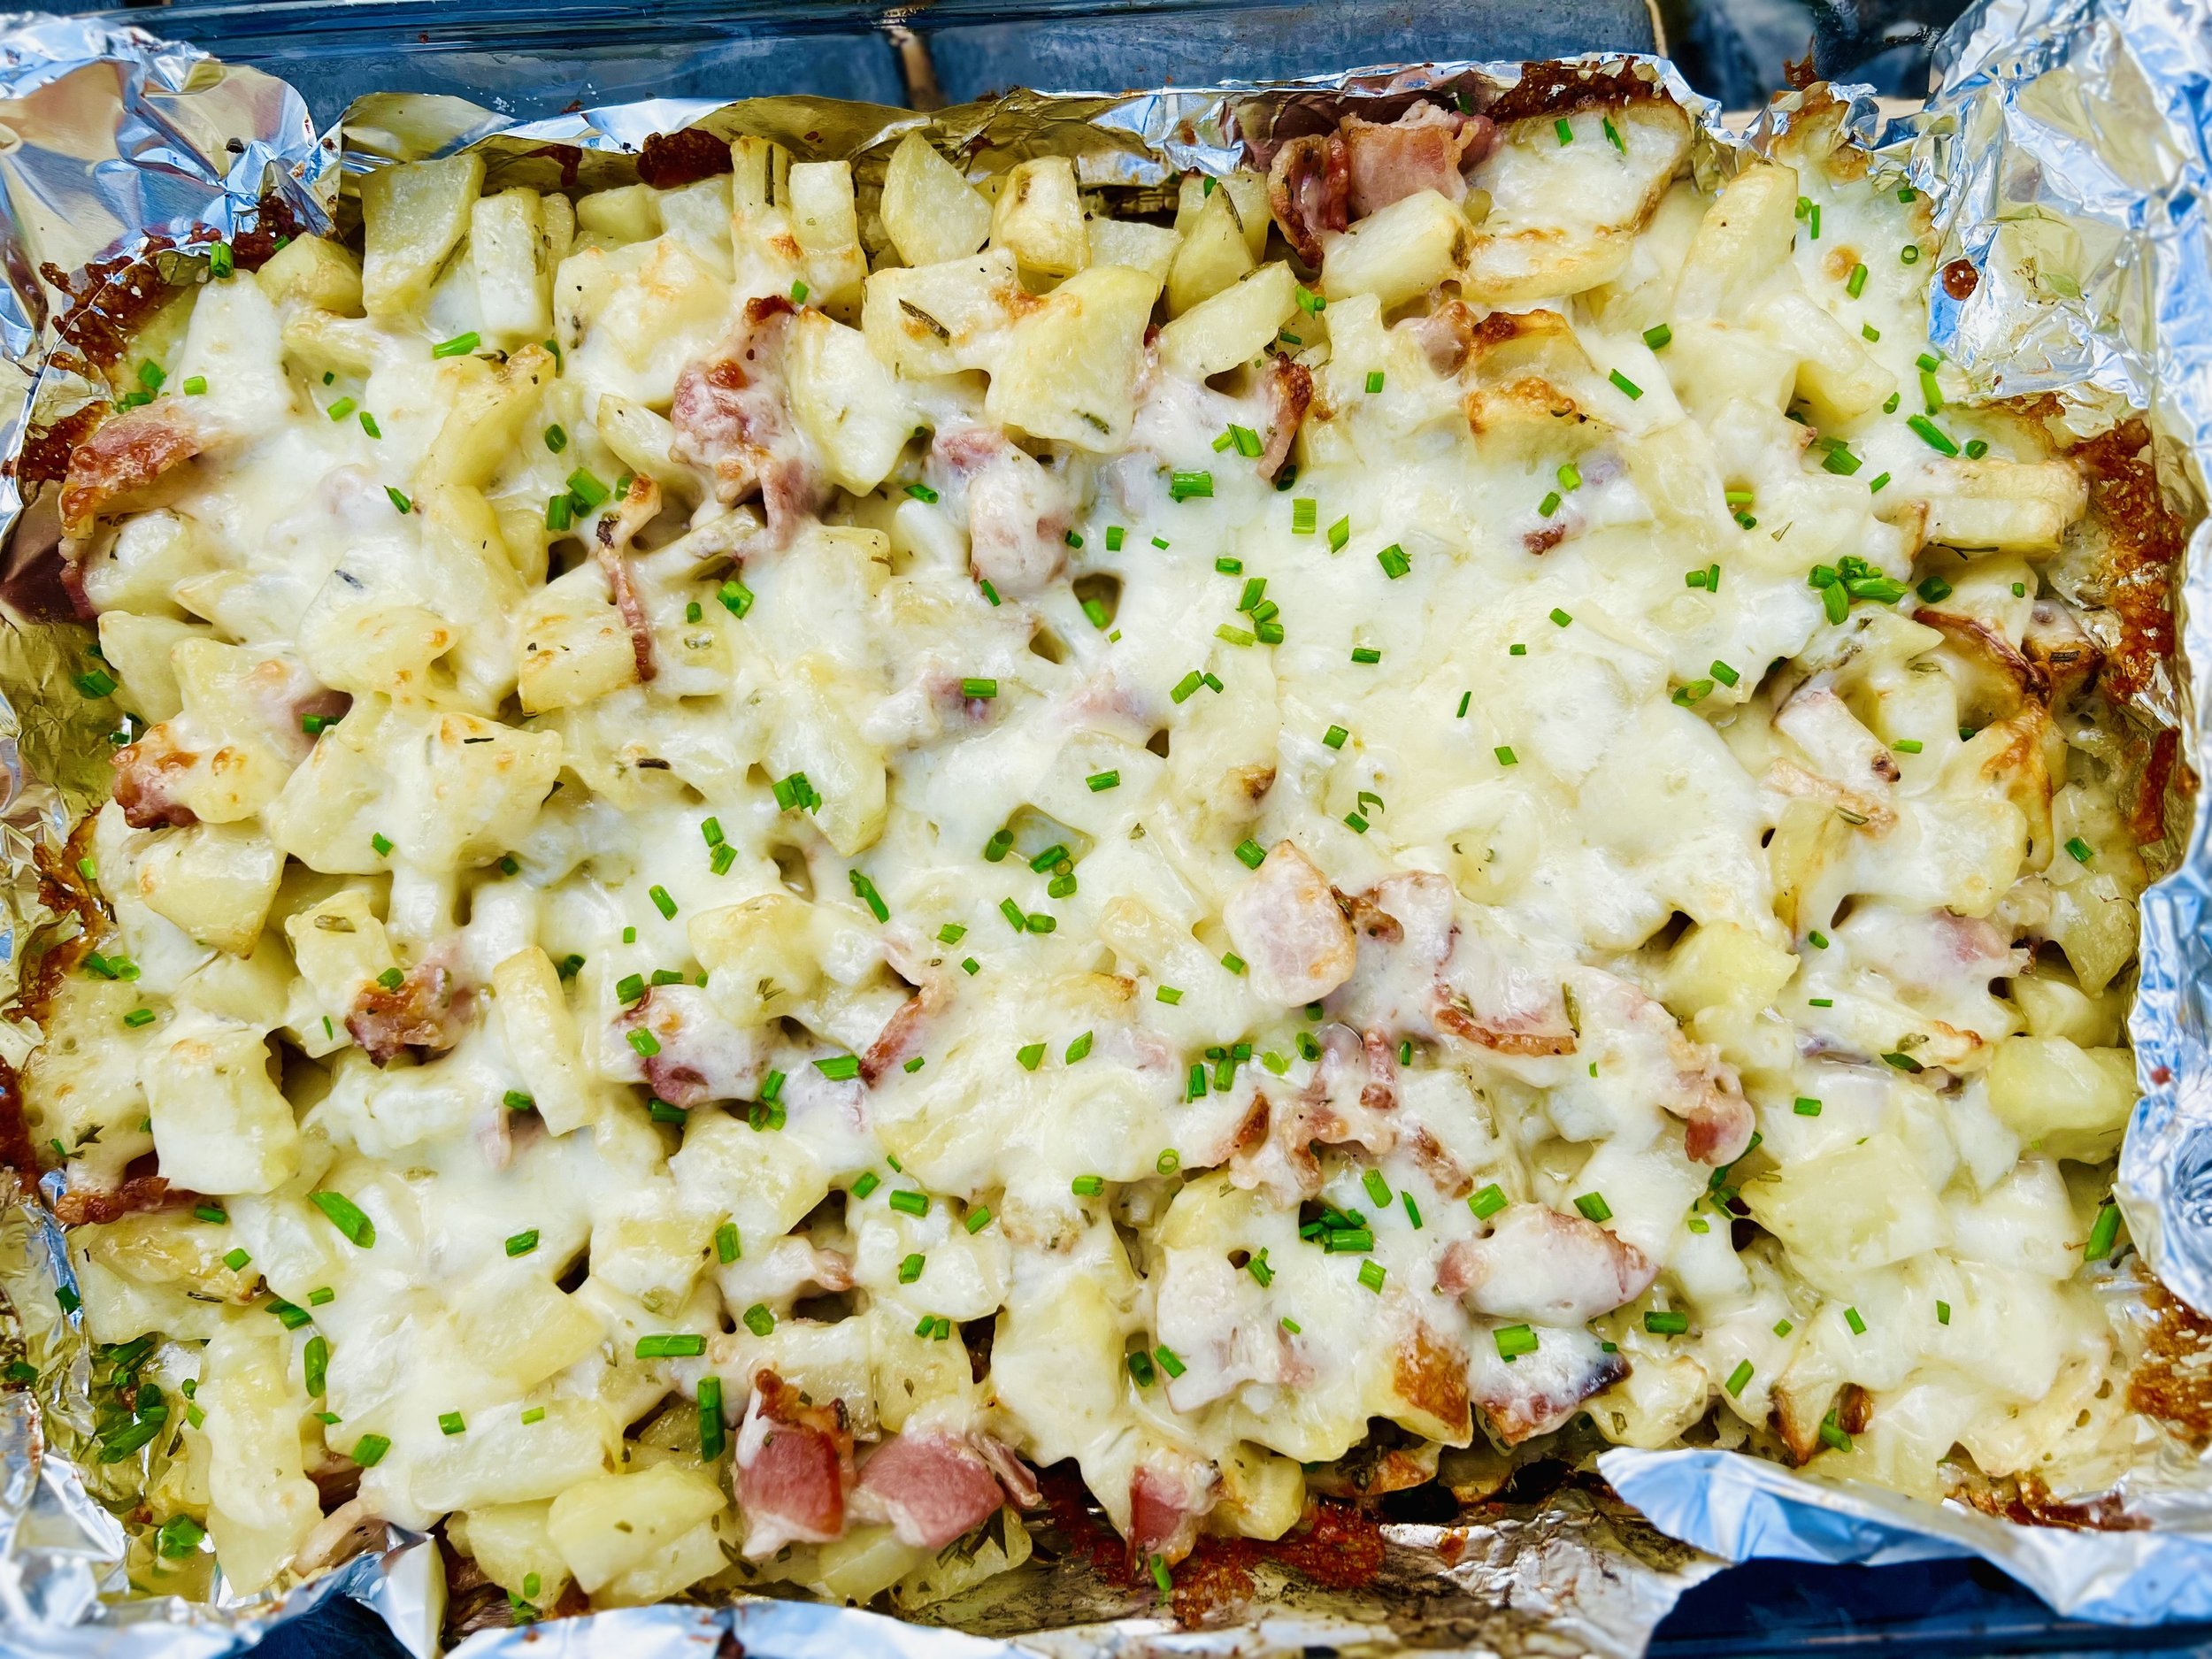
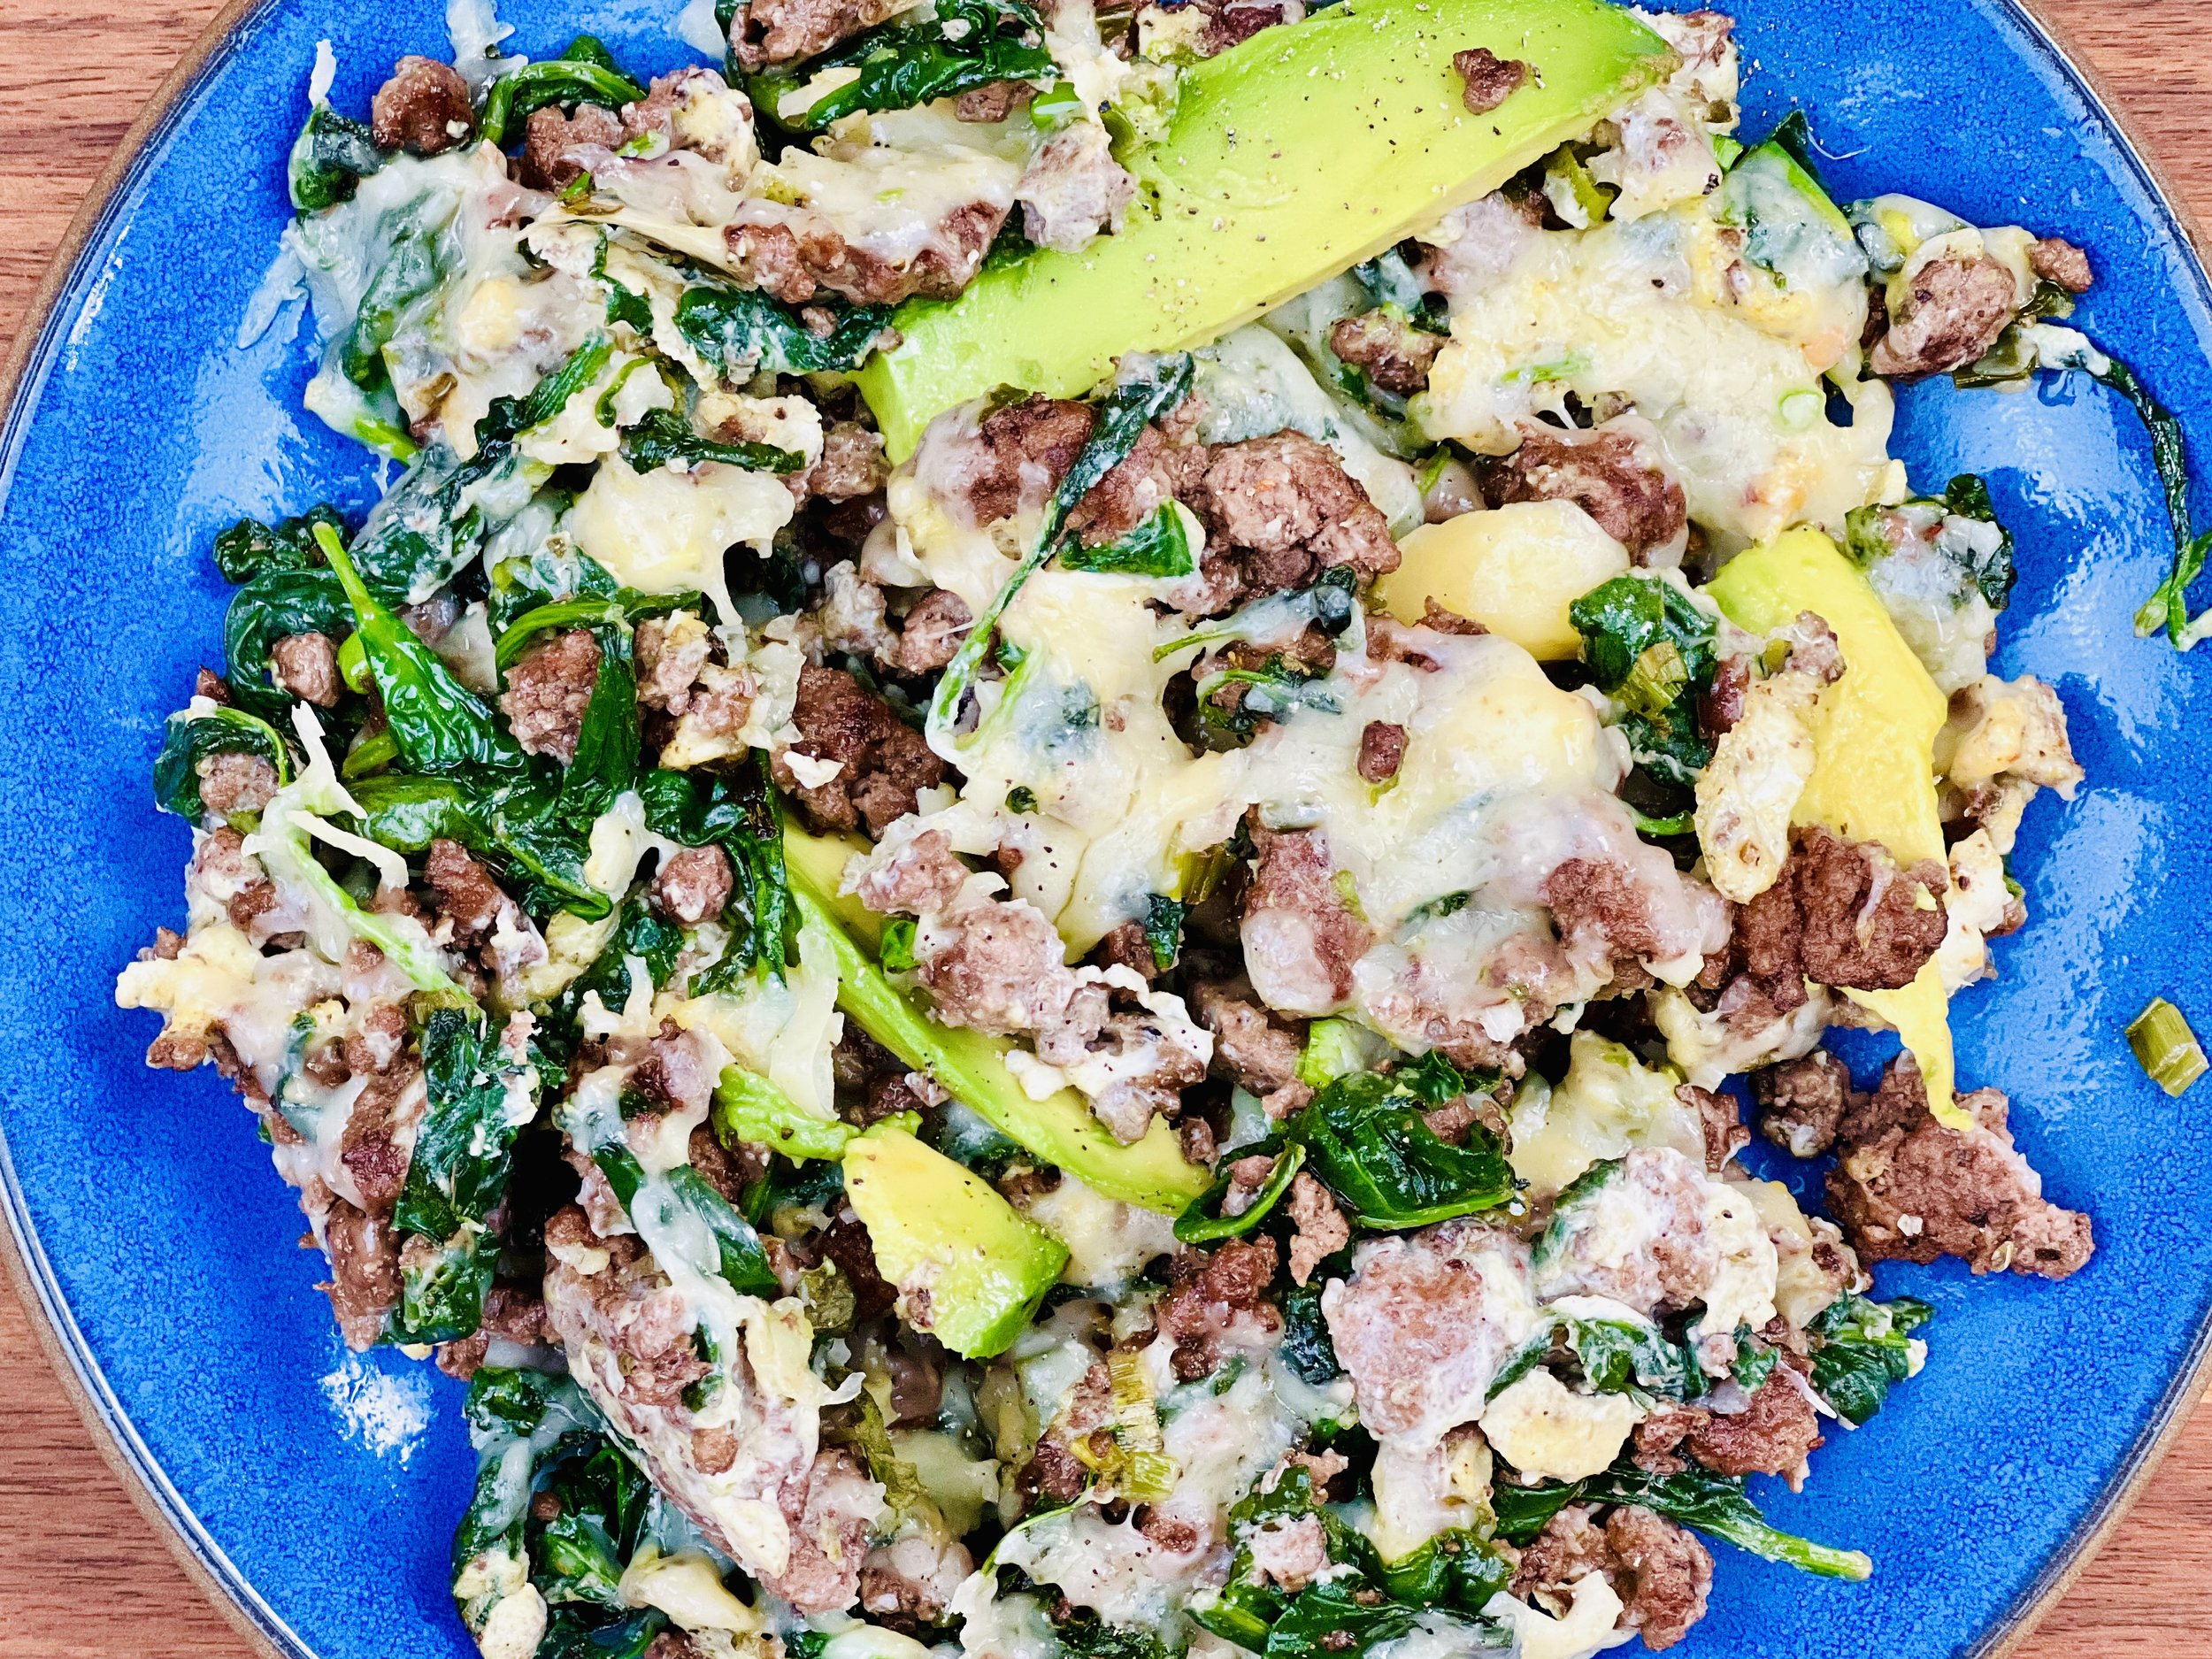
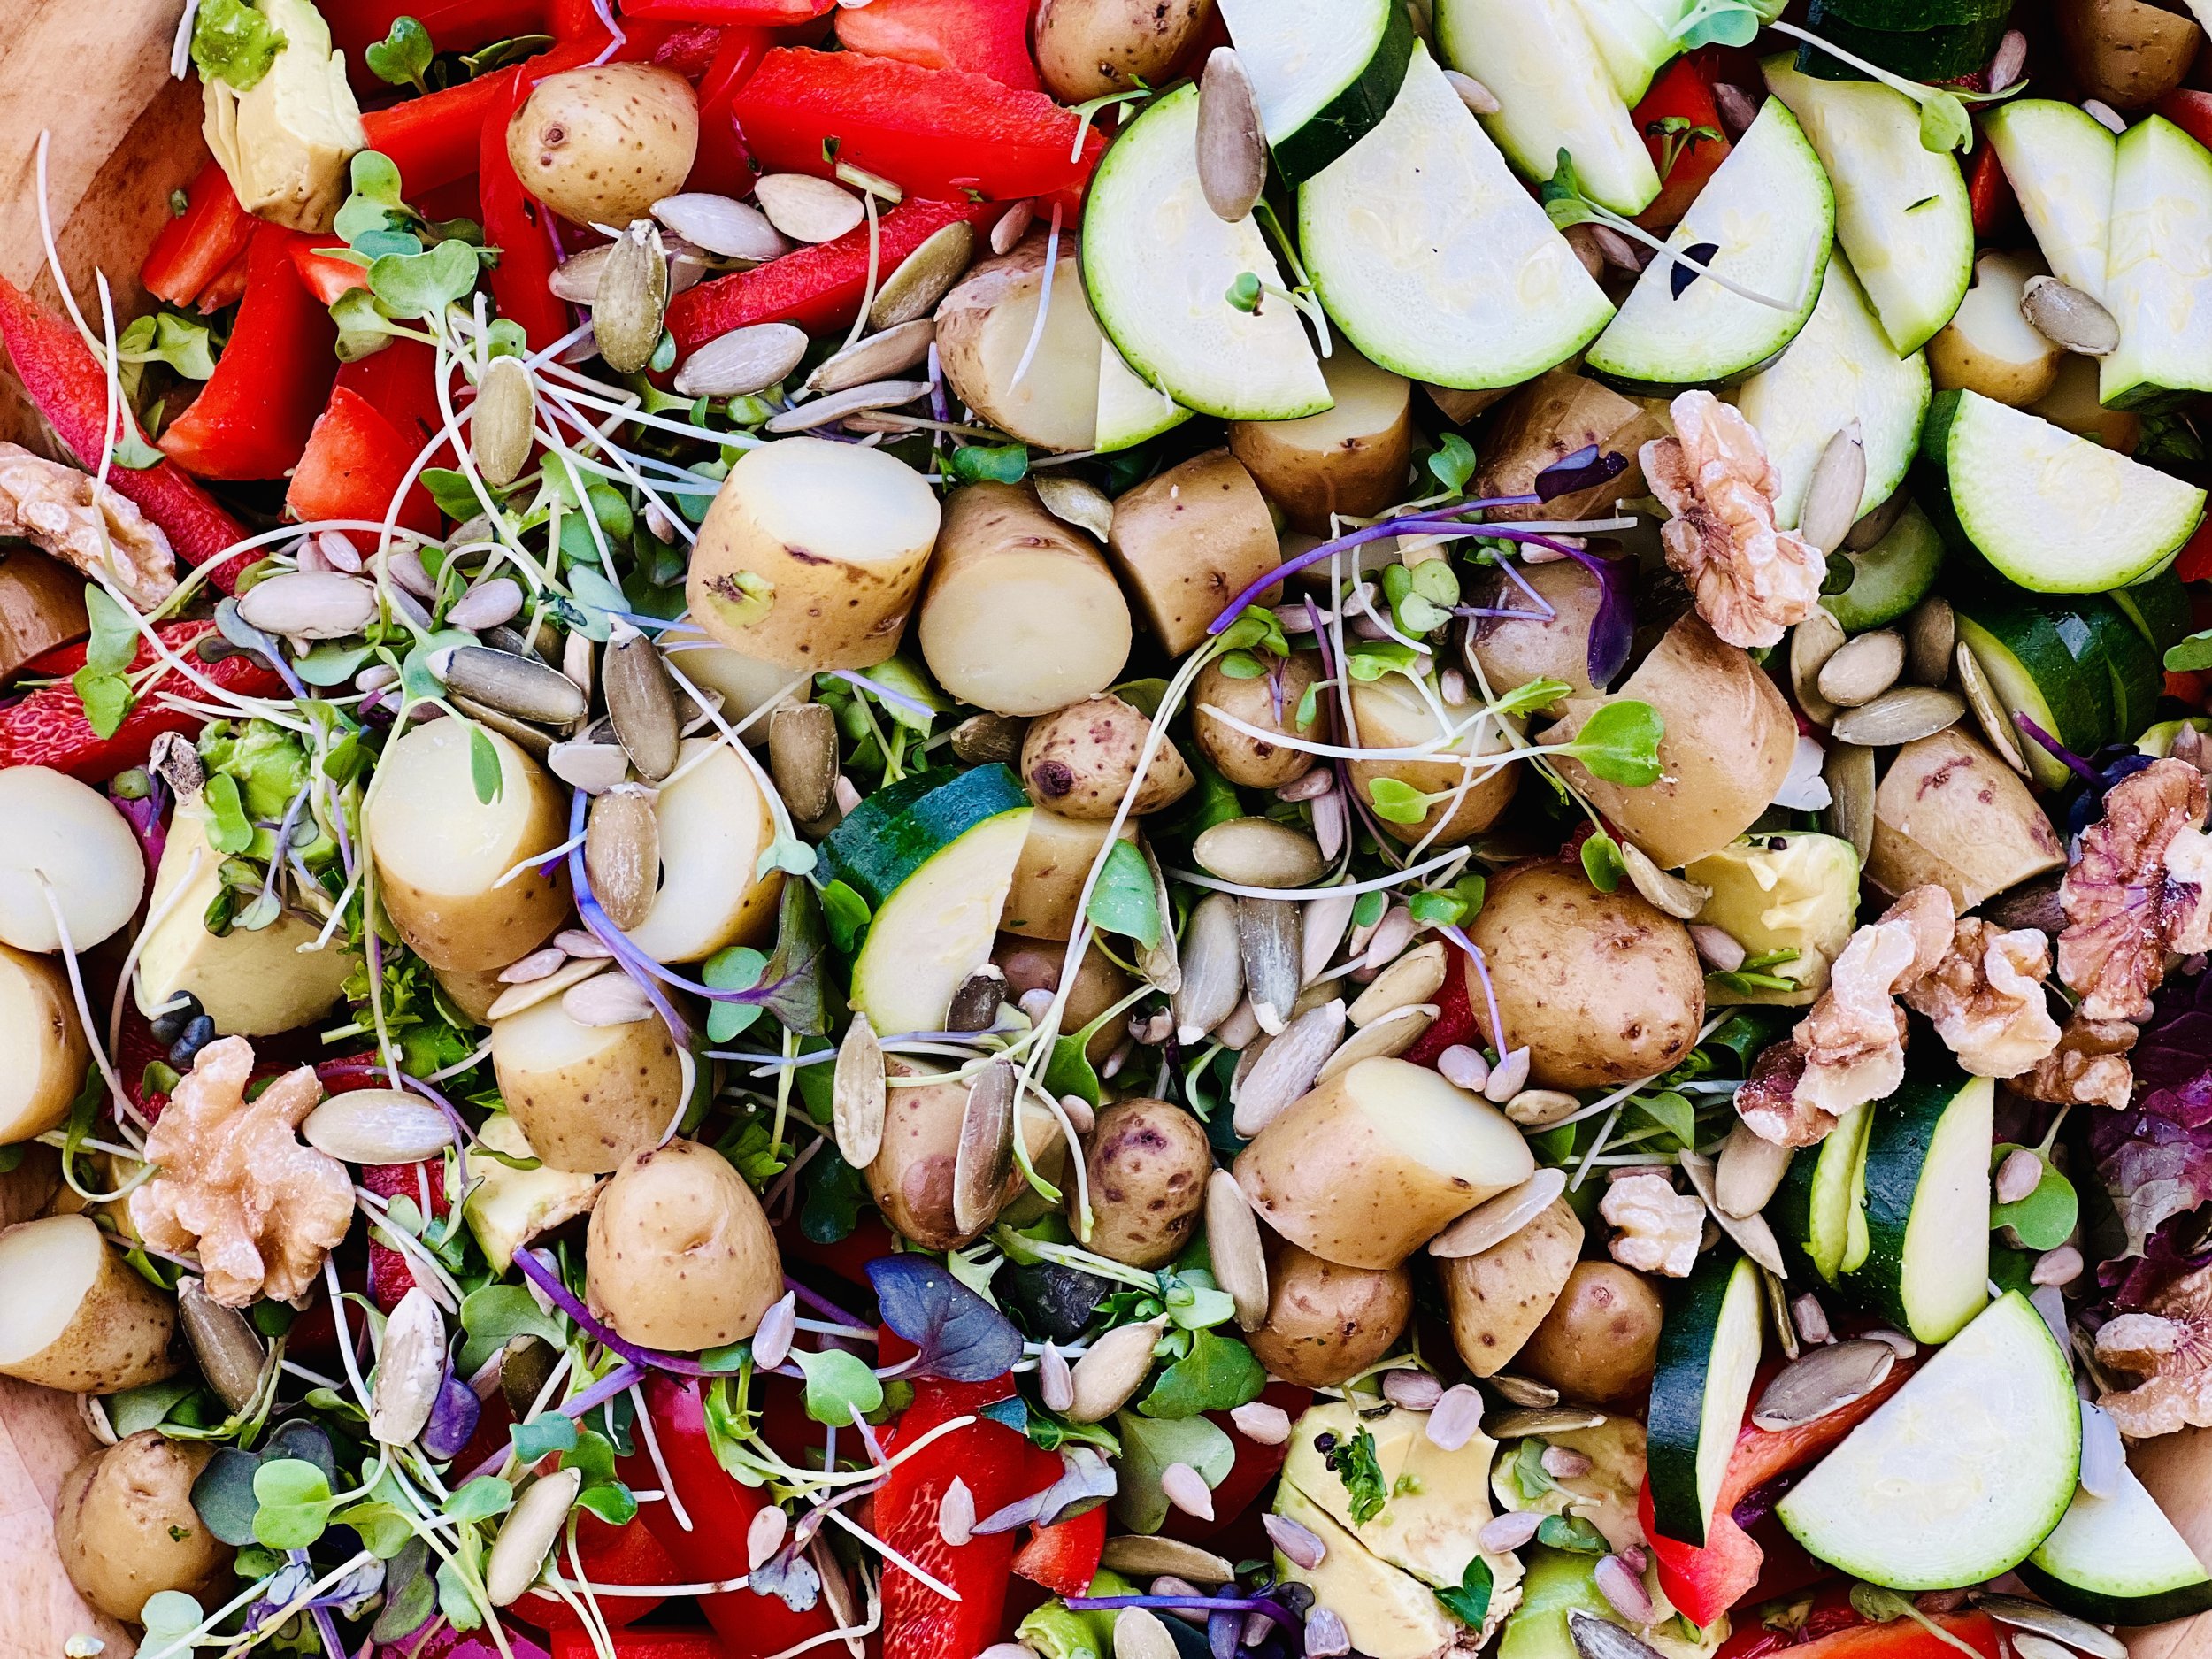
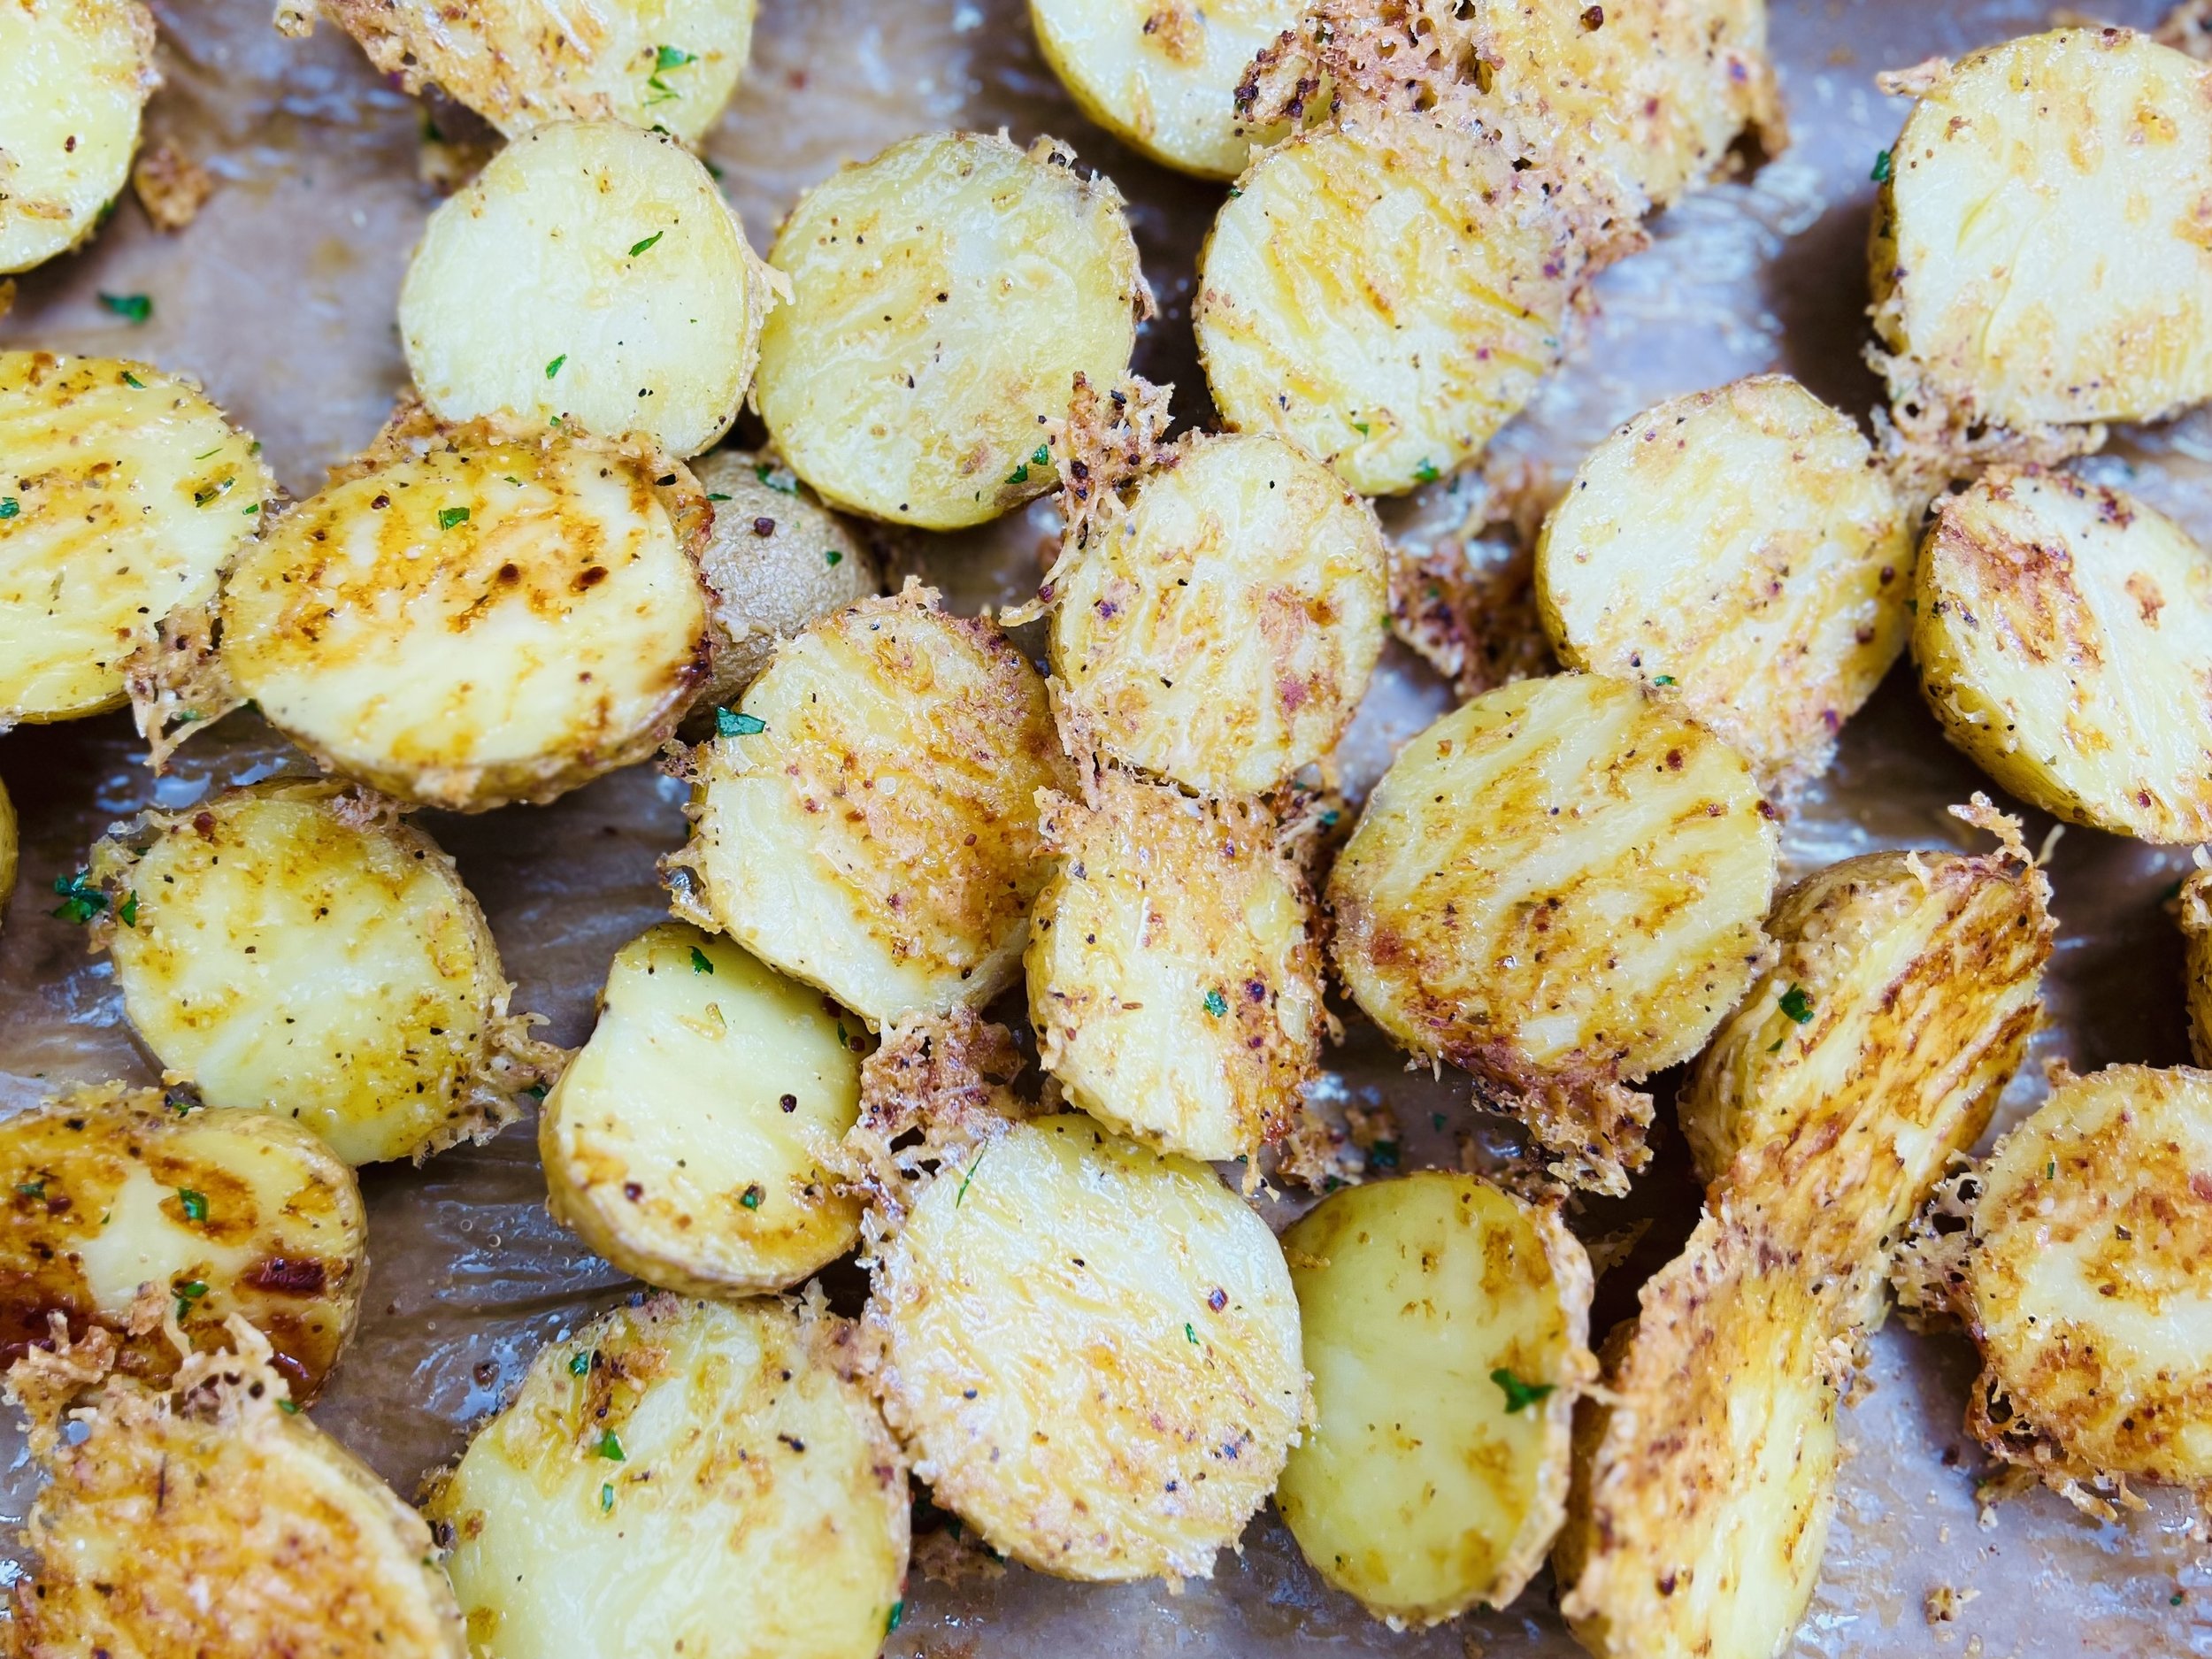
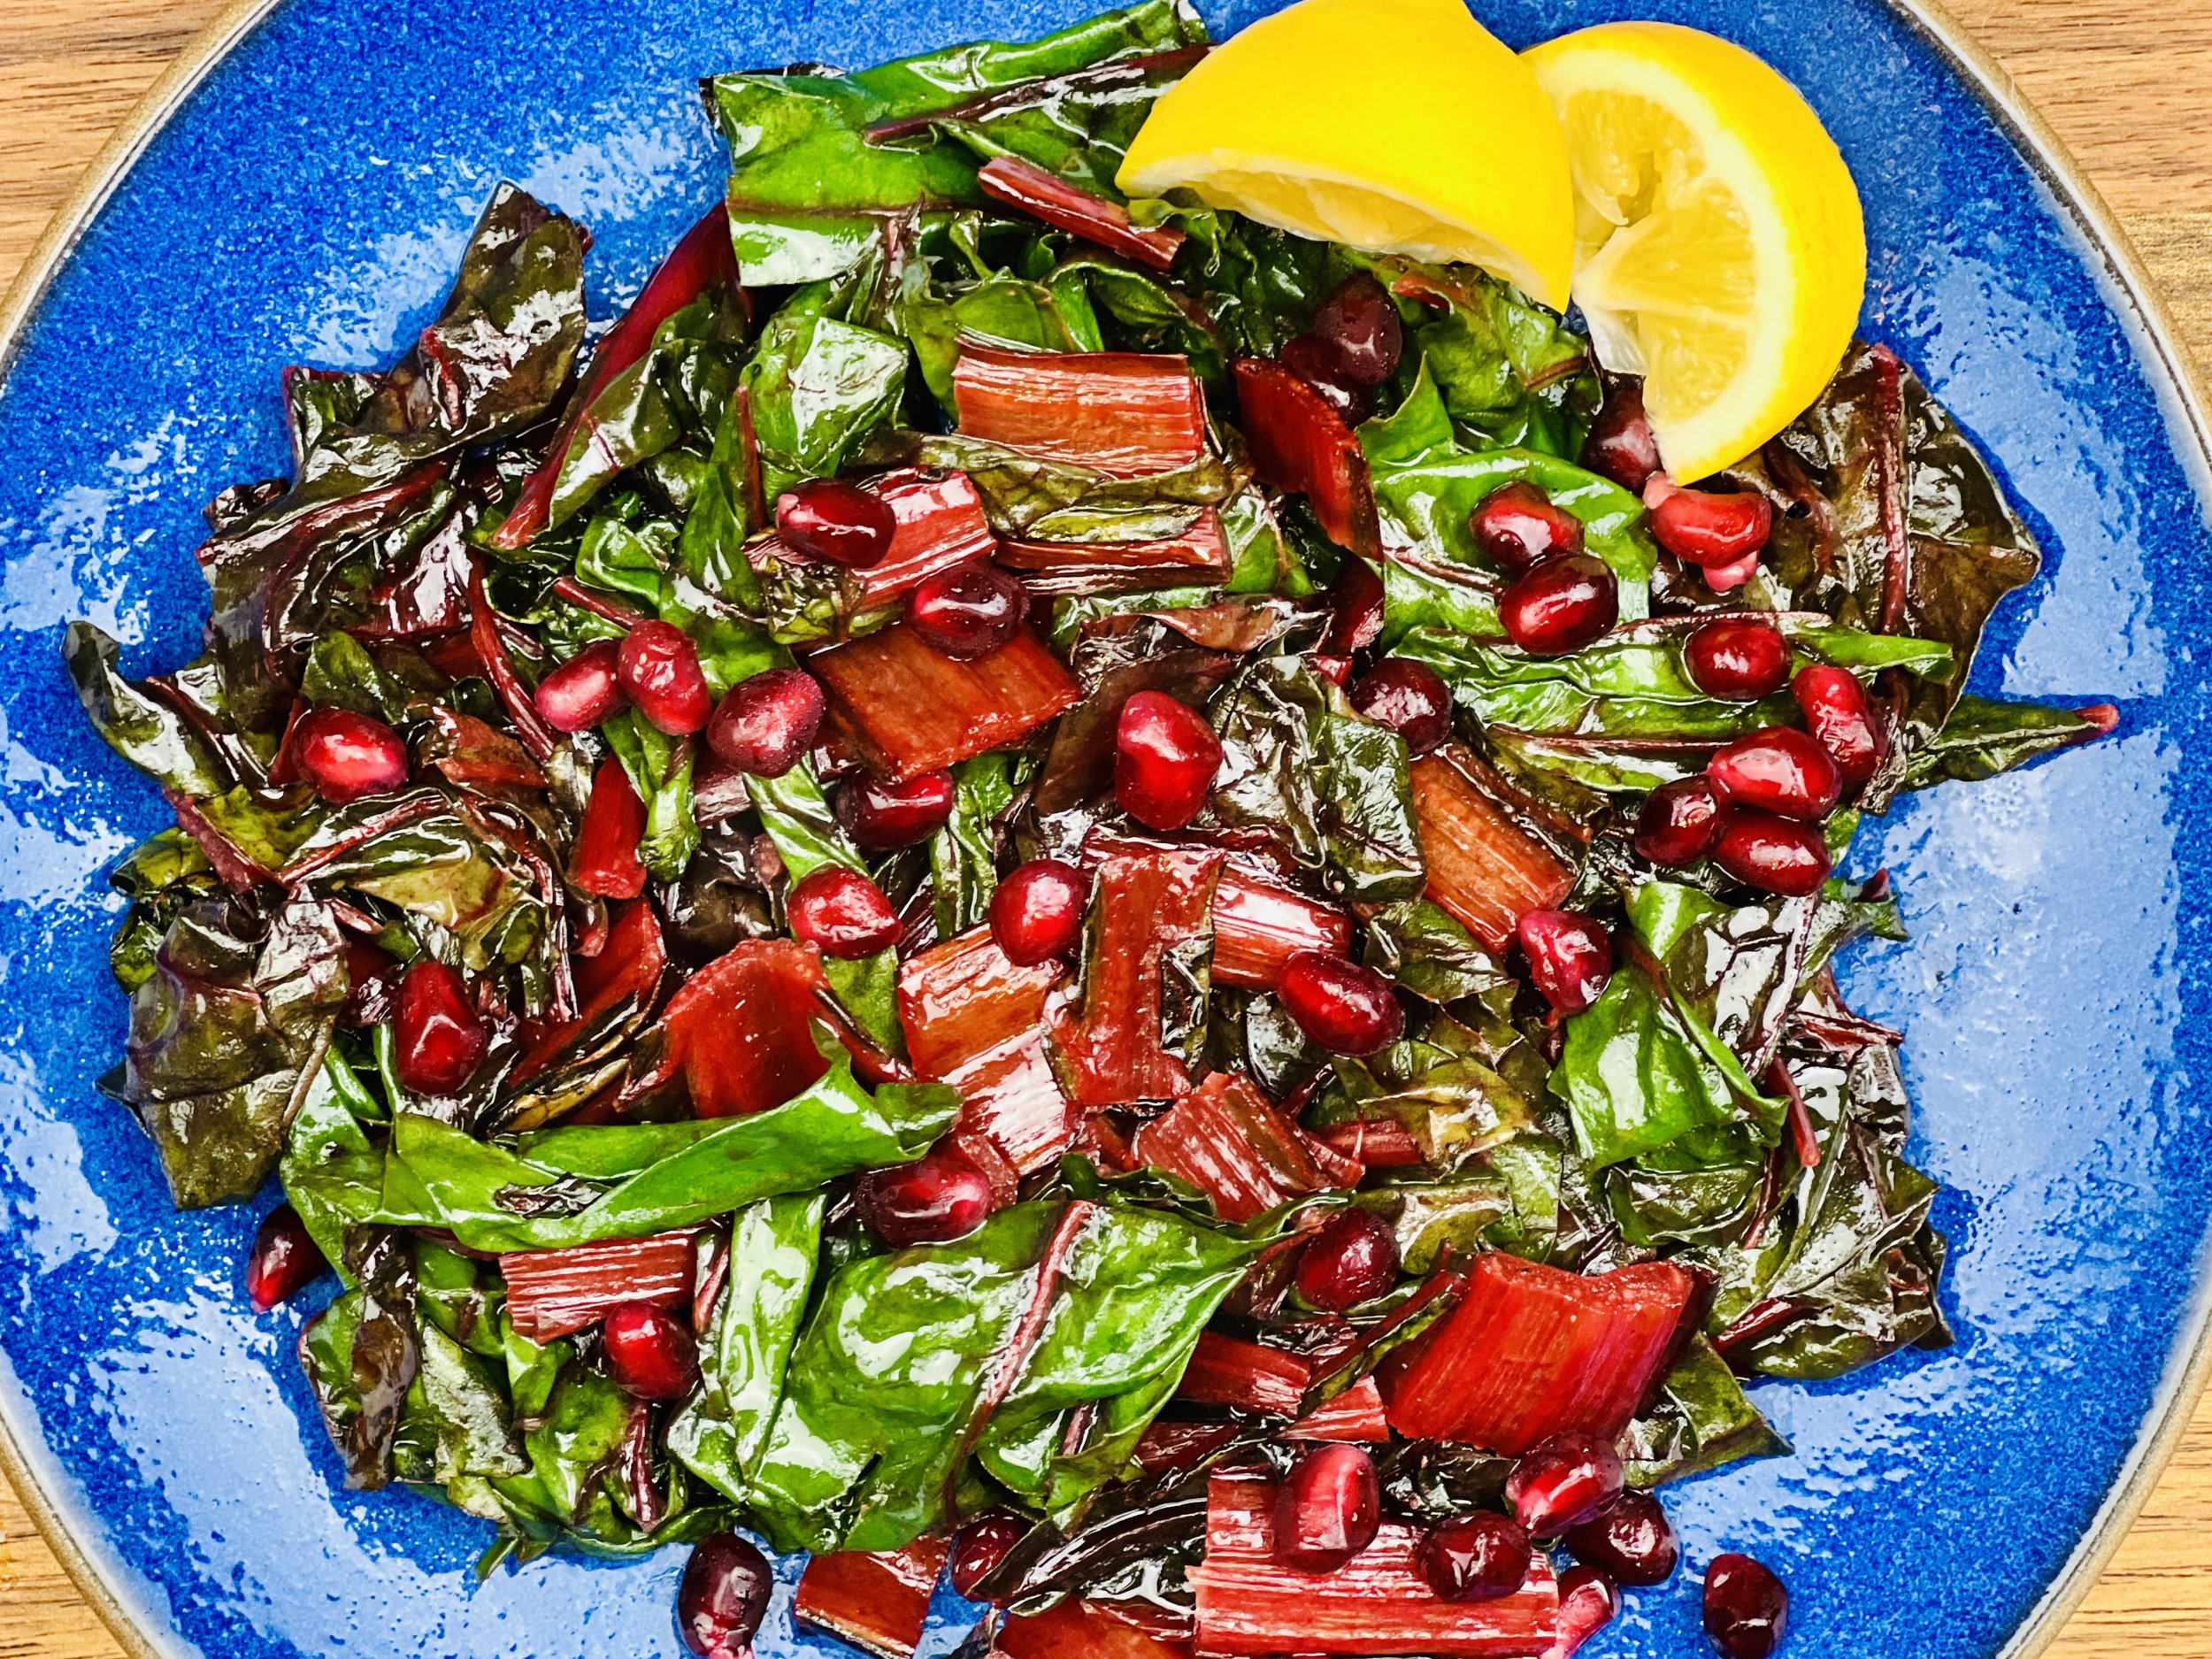
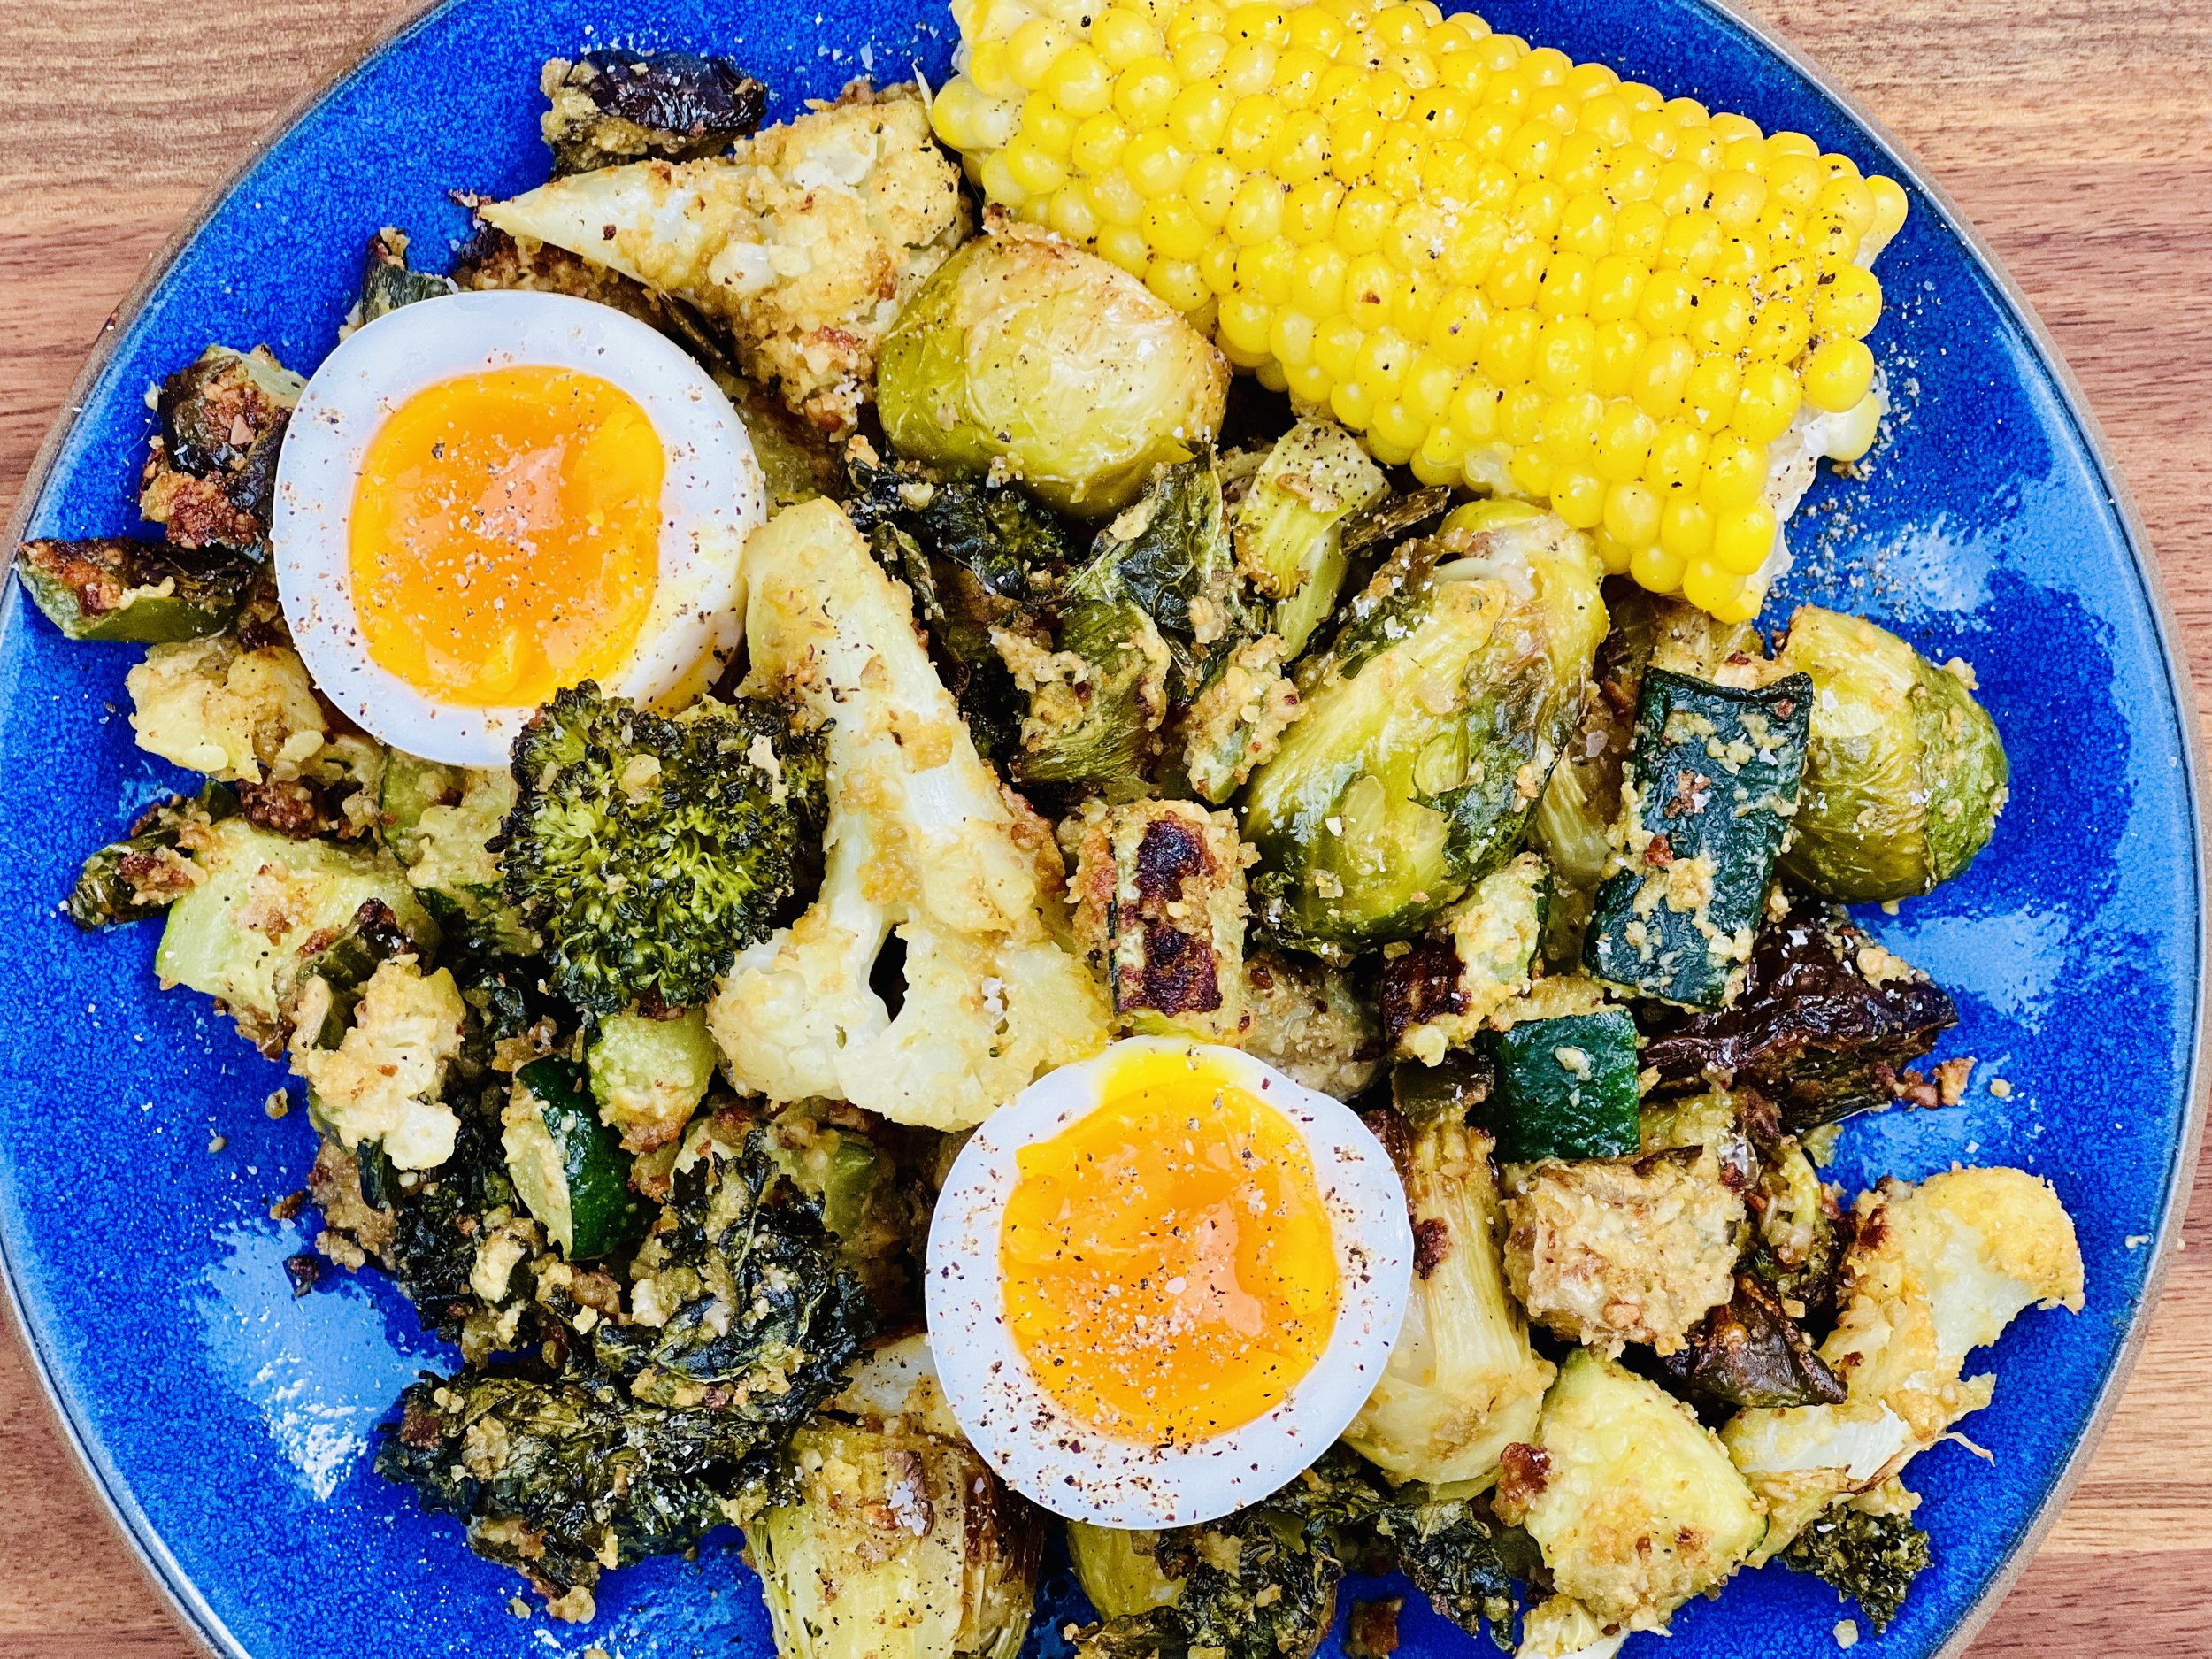
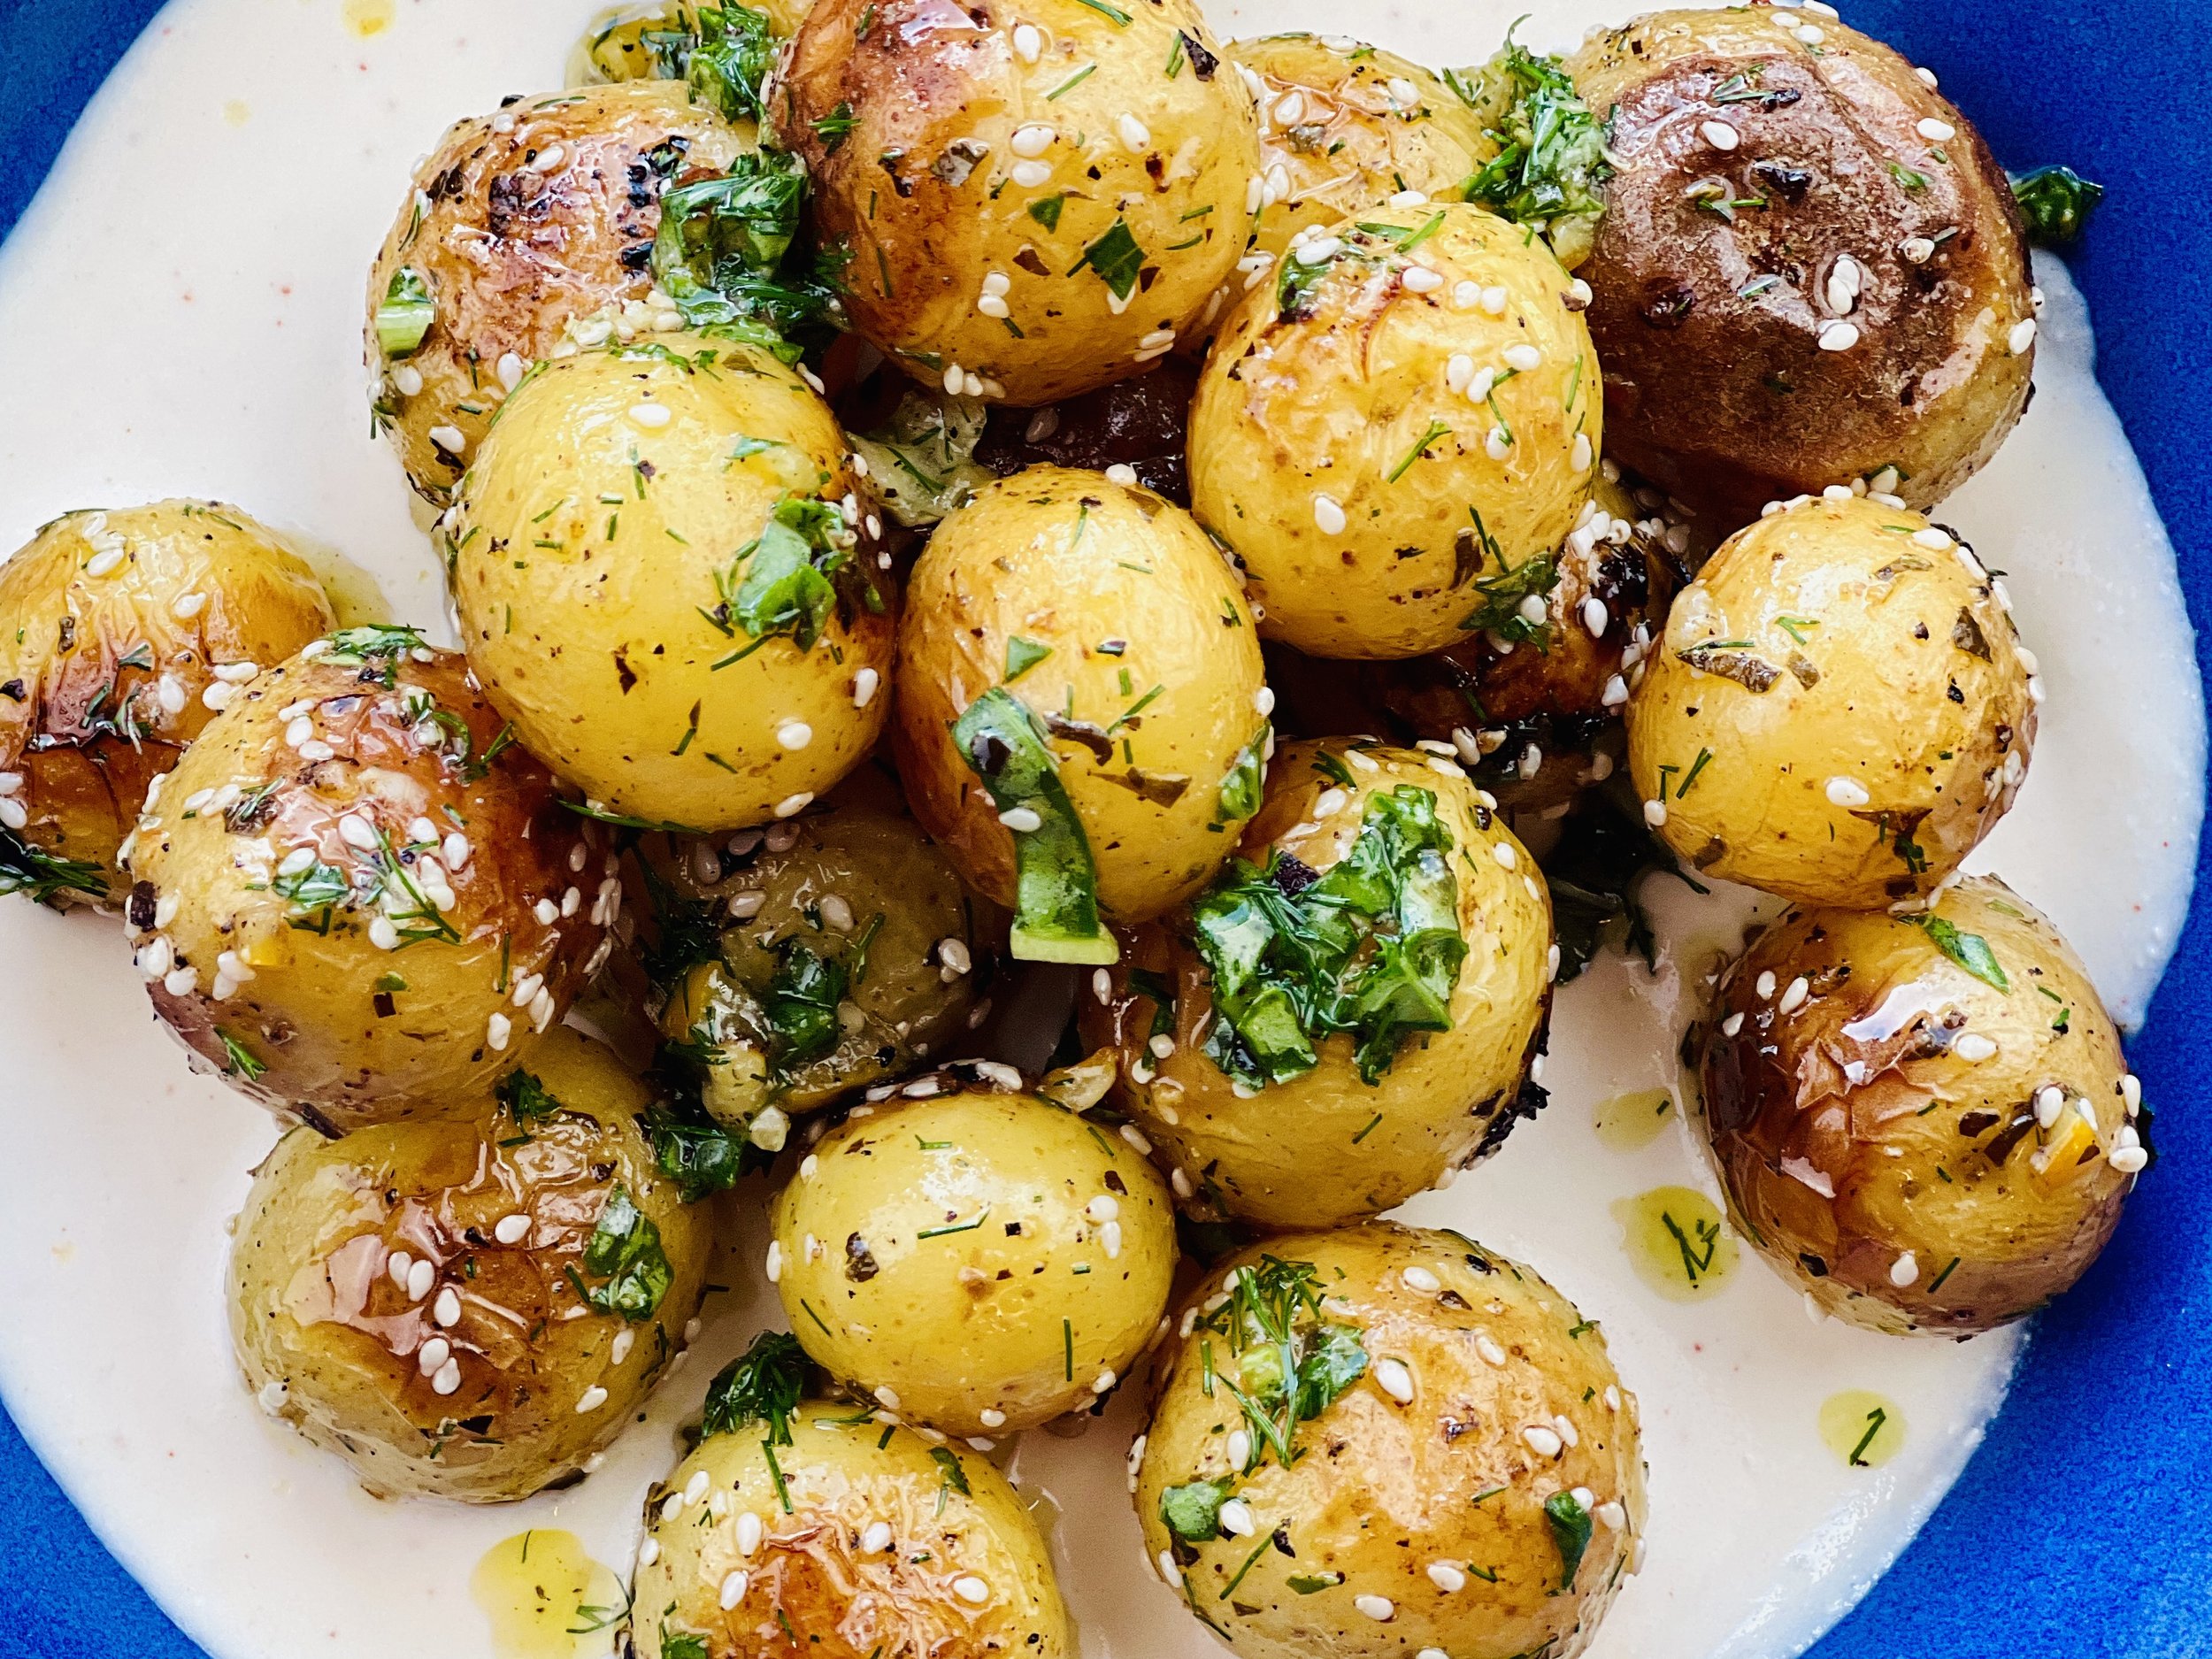
Target 30 Greens and Potato Salad (low FODMAP)
20 Minutes prep • Low FODMAP • Gluten-free • Lactose-free • Vegetarian • Vegan • Serves 4
20 Minutes prep • Low FODMAP • Gluten-free • Lactose-free • Vegetarian • Vegan • Serves 4 • Ok to make ahead: Steps 1 - 4
Here’s another salad in my series of Target 30 recipes. What’s Target 30 you say? For the optimal health of your gut biome, the latest recommendation is to eat 30 different plant-based foods every week. Learn more about that in this very interesting article here. That doesn’t mean you stuff yourself with salad all day every day. It’s not volume, it’s variety that makes your gut biome so happy. Plants include nuts, seeds, herbs, spices, fruits, vegetables, and even oils. Potatoes are plants so they count too! As you all know if you’ve been here a while, I love salad! This latest salad is one more great way to pack plants into your diet in a delicious way!
This is an exclusive recipe just for recipe club members.
In addition to the two free recipes I create each week I am creating and delivering one very special recipe just for my recipe club members. If you’re not yet a member, I encourage you to join! Membership in the club includes access to the complete archive of recipes with filters so it can become your virtual low FODMAP cookbook plus, I am creating and delivering one special NEW recipe every week ONLY for recipe club members. And, for my true fans, I’ll be sharing behind-the-scenes content, and updates on the progress of the new cookbook.
Your membership in the club helps me continue creating new, delicious, easy-to-make, low FODMAP recipes just for you.
As always, all recipes will emphasize simple ingredients, easy preparation, and delicious low FODMAP results. Recipes will be for everything from main courses, salads, soups, side dishes, appetizers, desserts, sauces, breakfast and lunch, and even mocktails and cocktails. Everything you need to prepare fantastic low FODMAP meals everyone will love.
Join the club. Become a Patron. Let’s keep making delicious Low FODMAP meals together.
More Deliciously Low FODMAP™ salad recipes
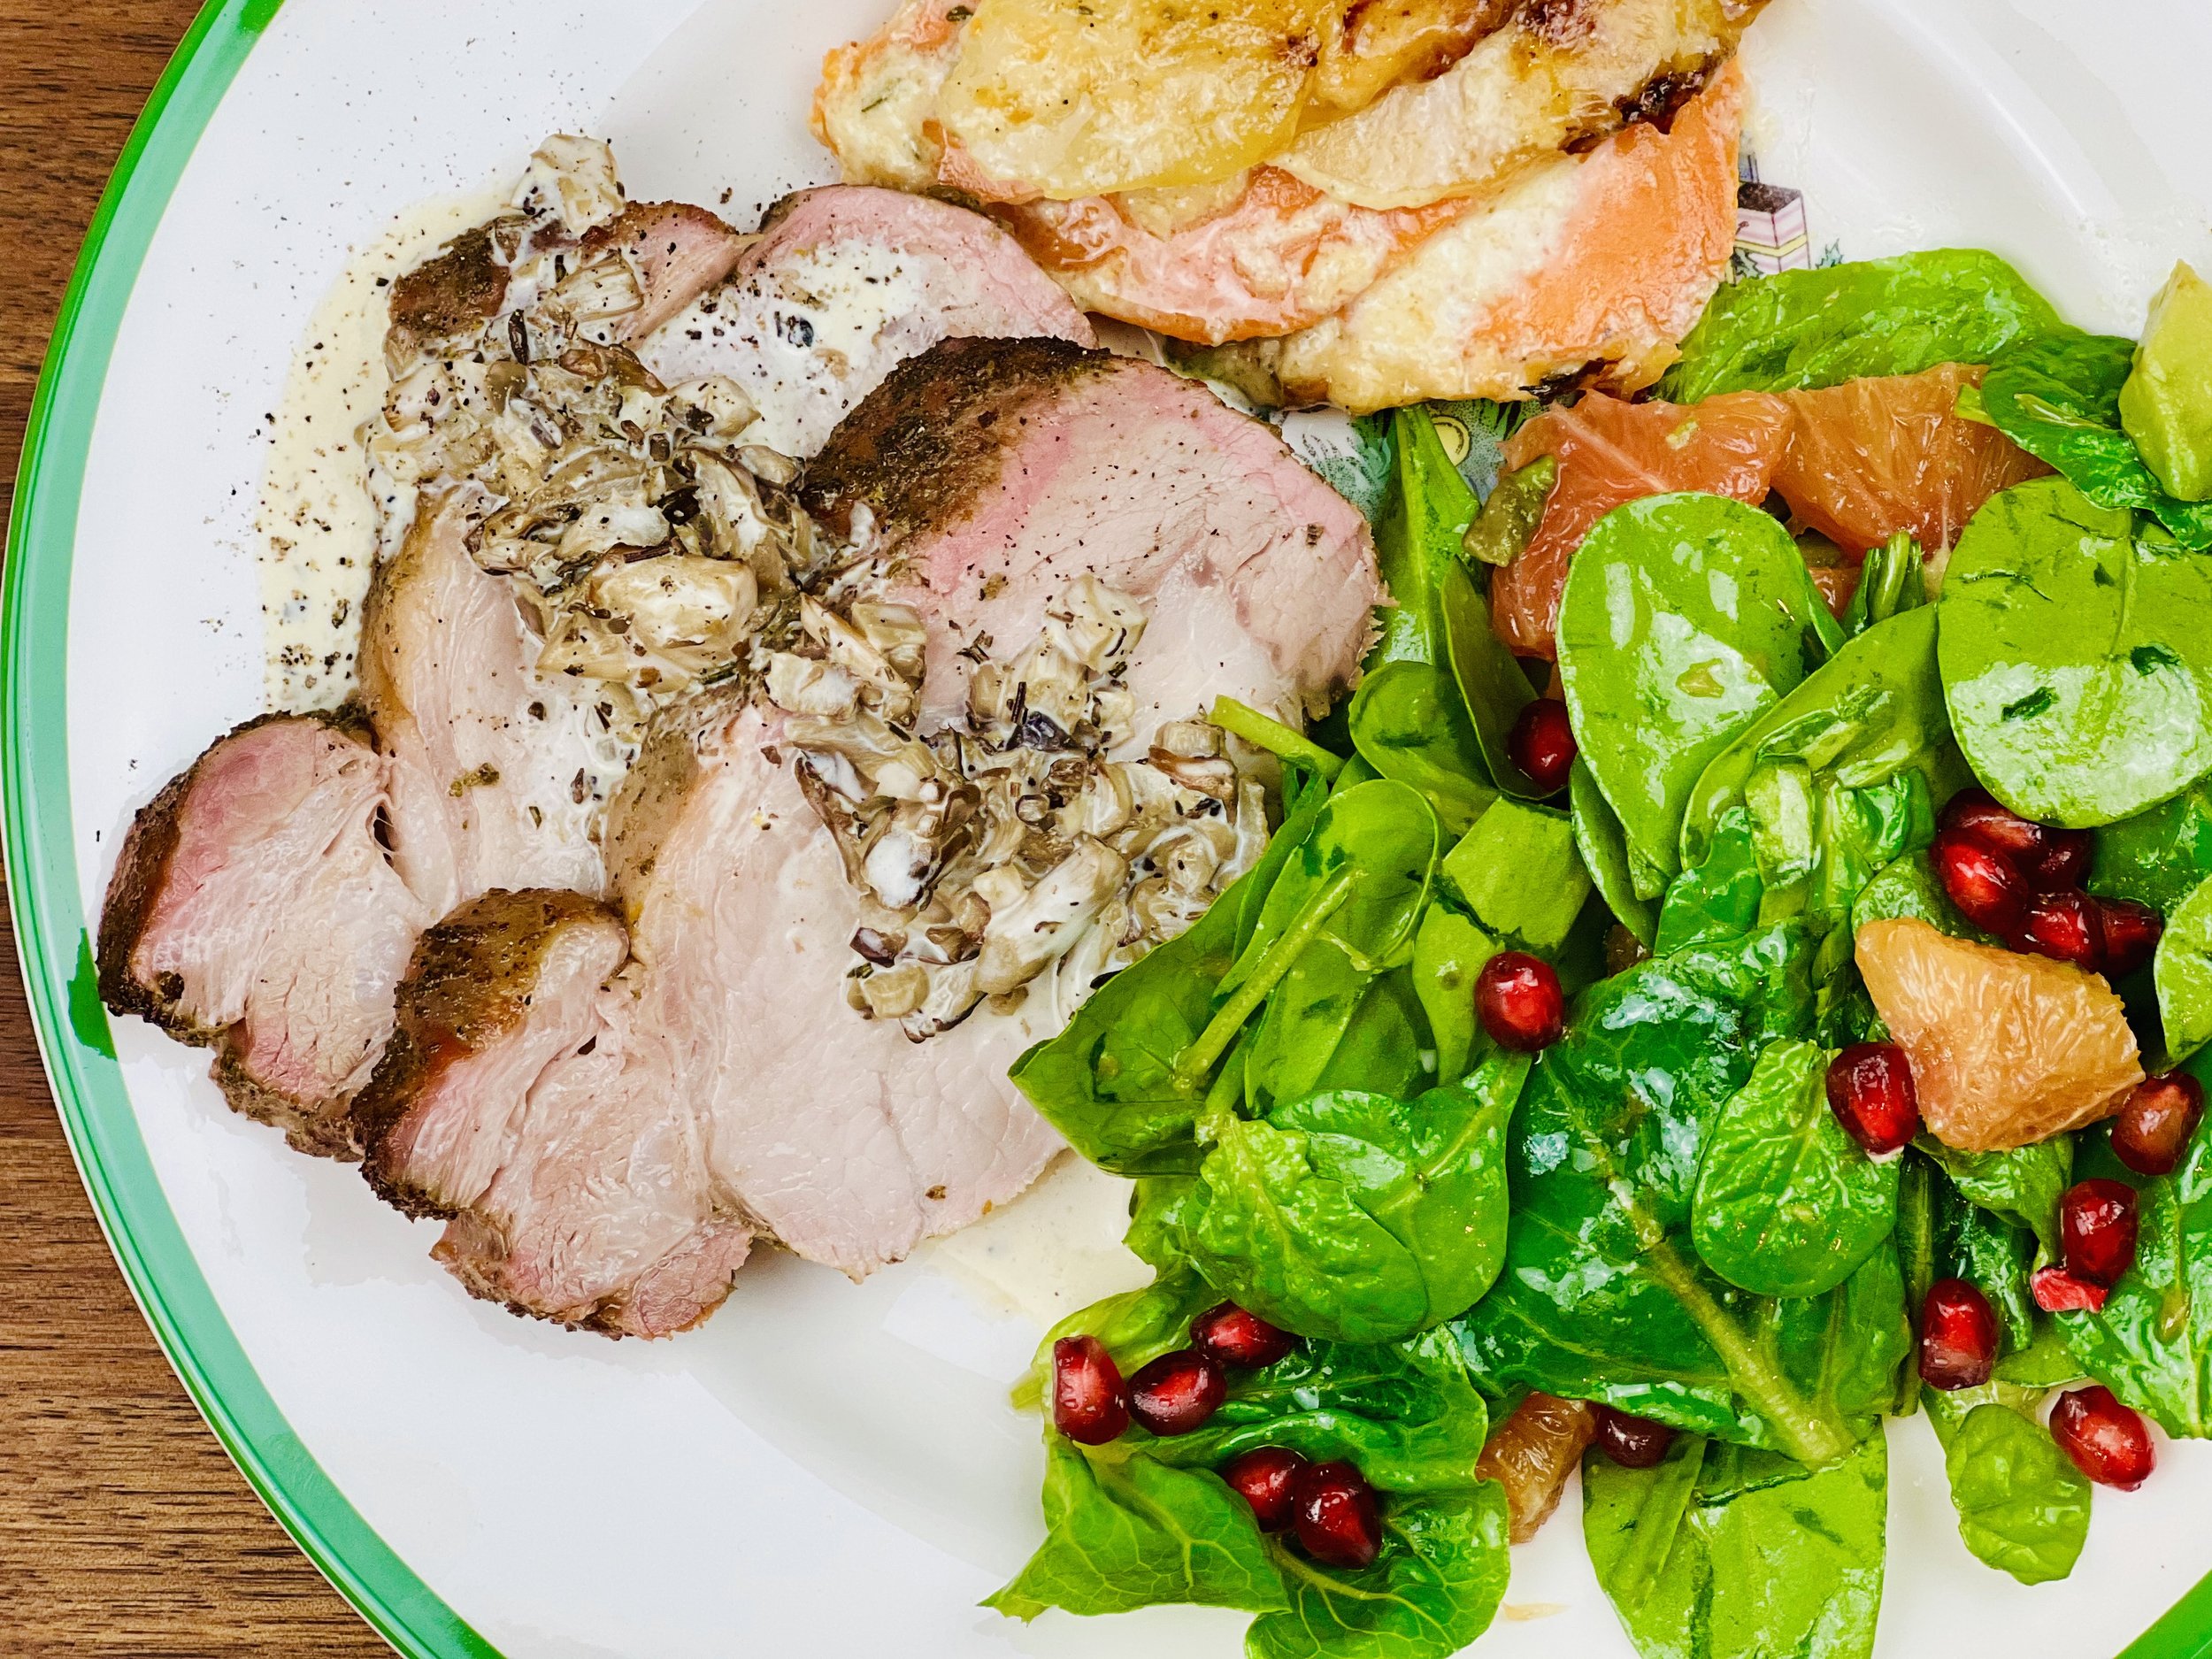
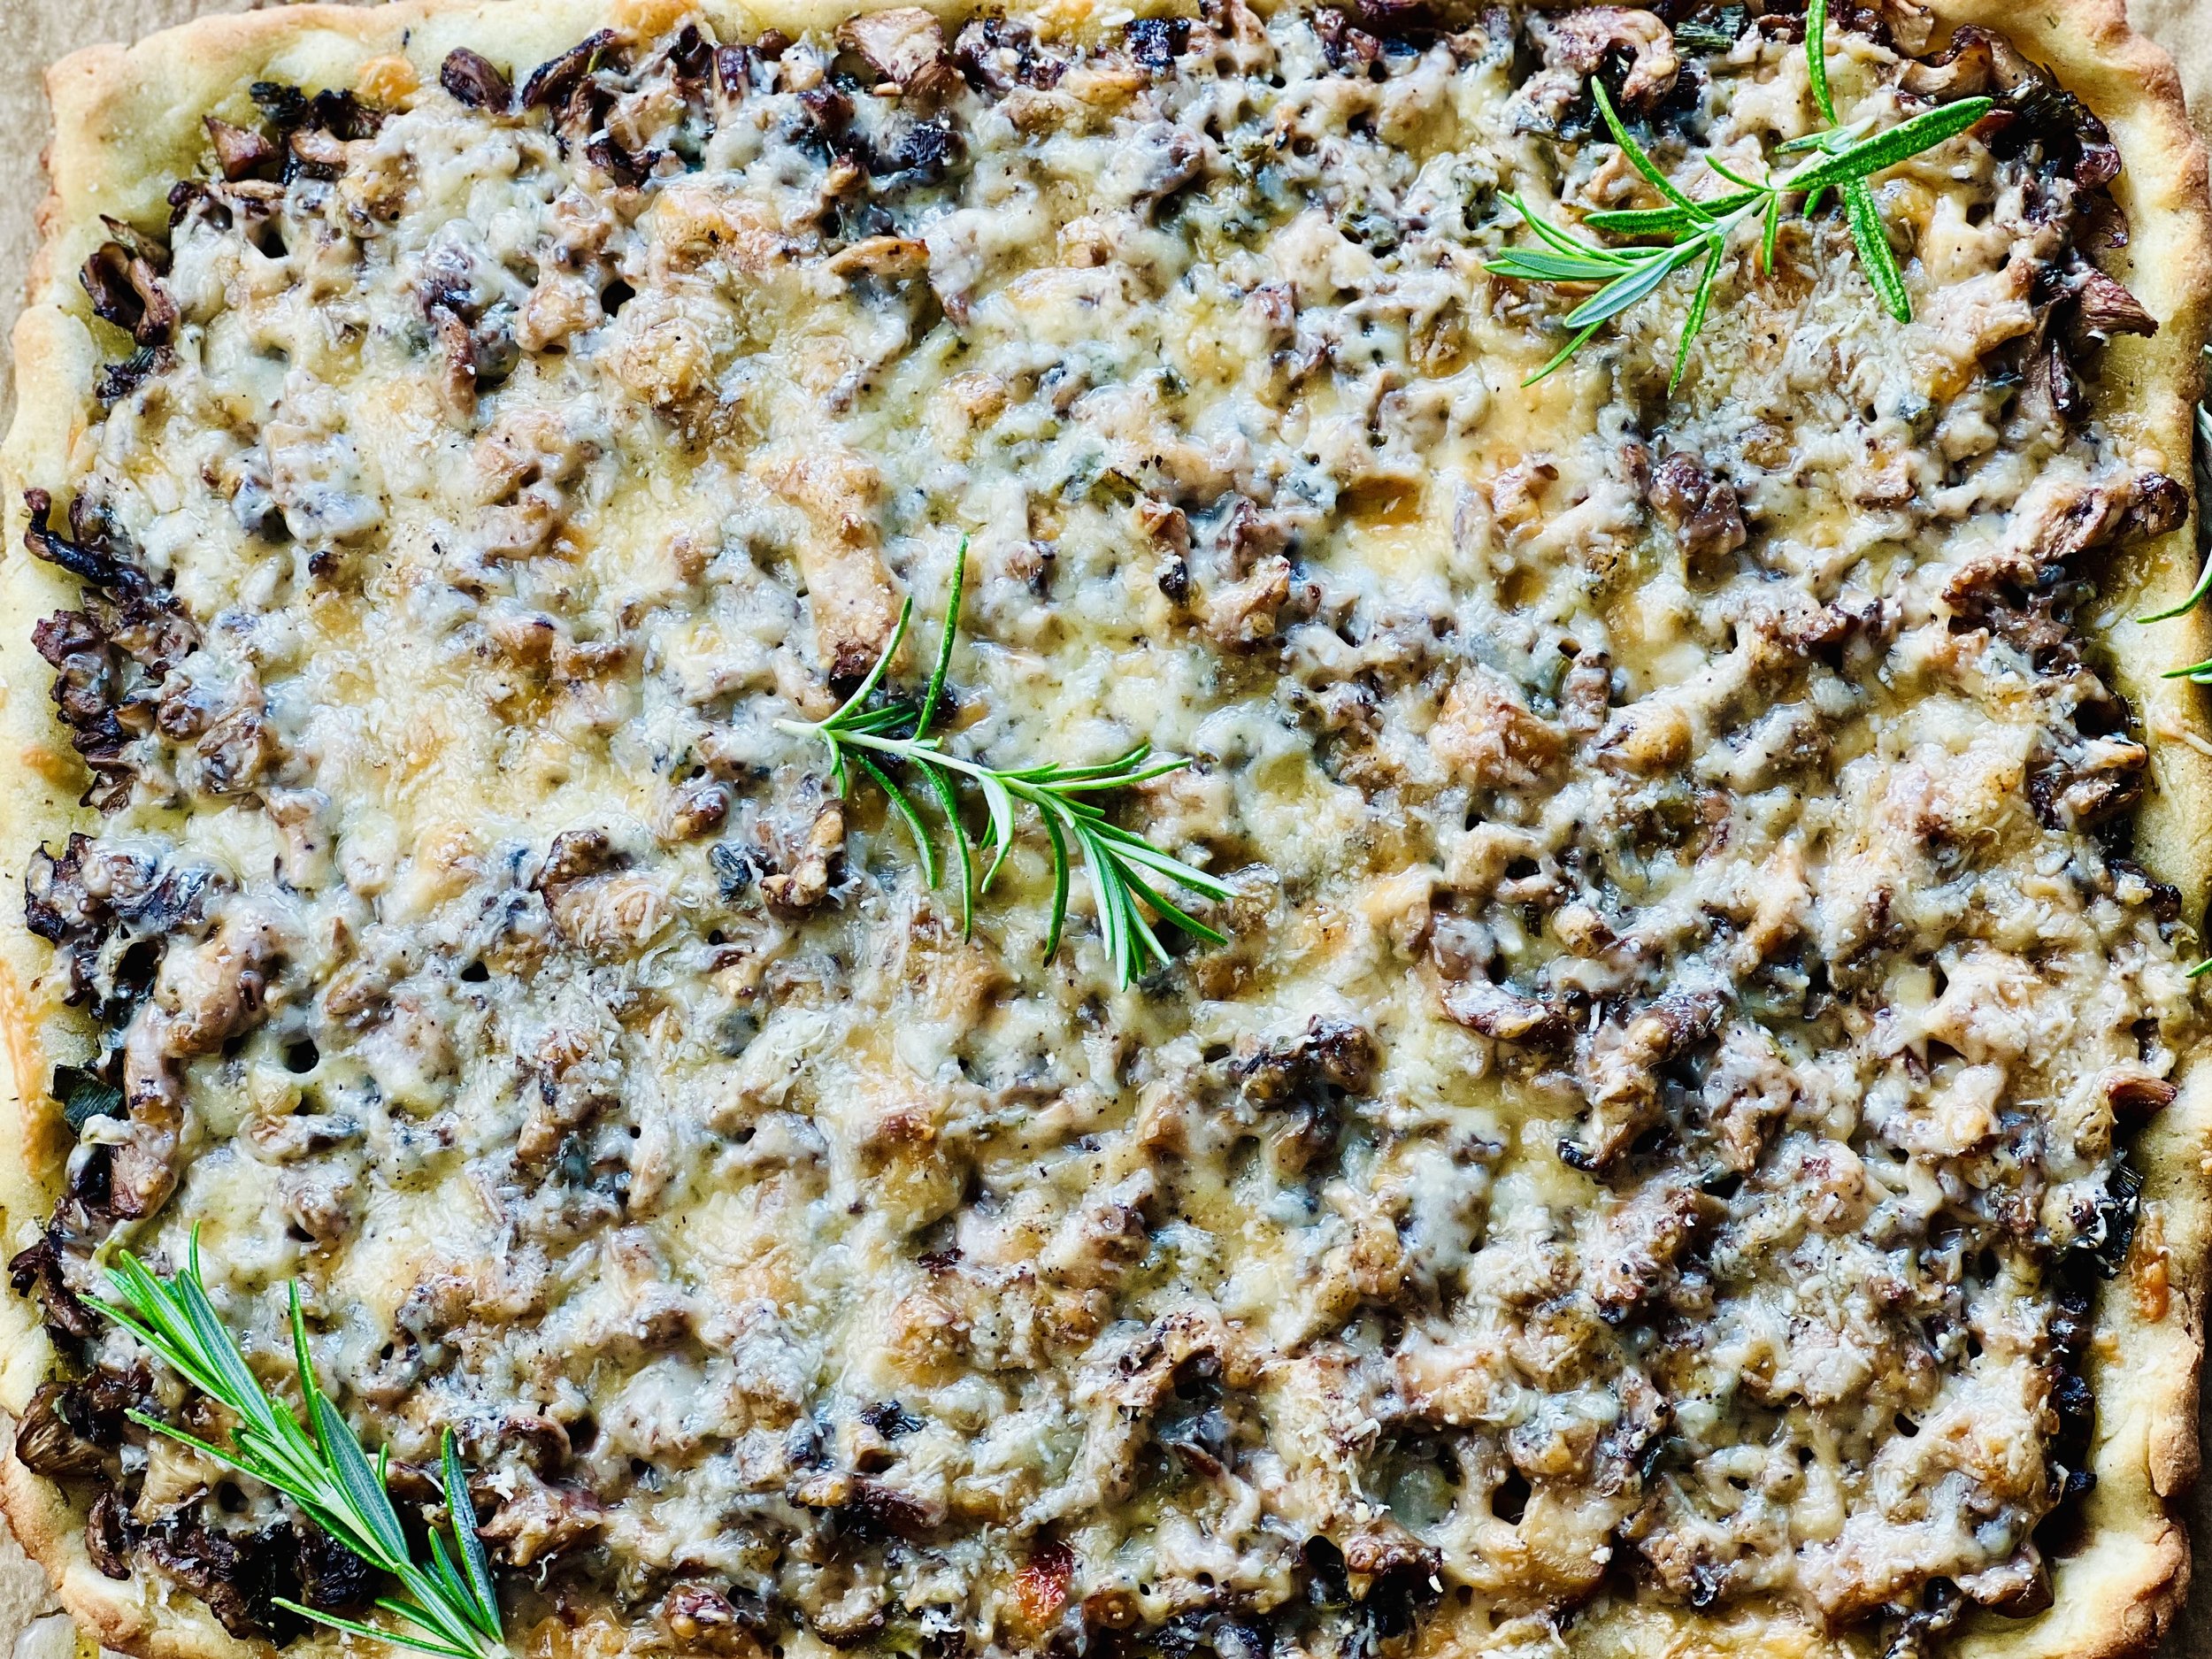
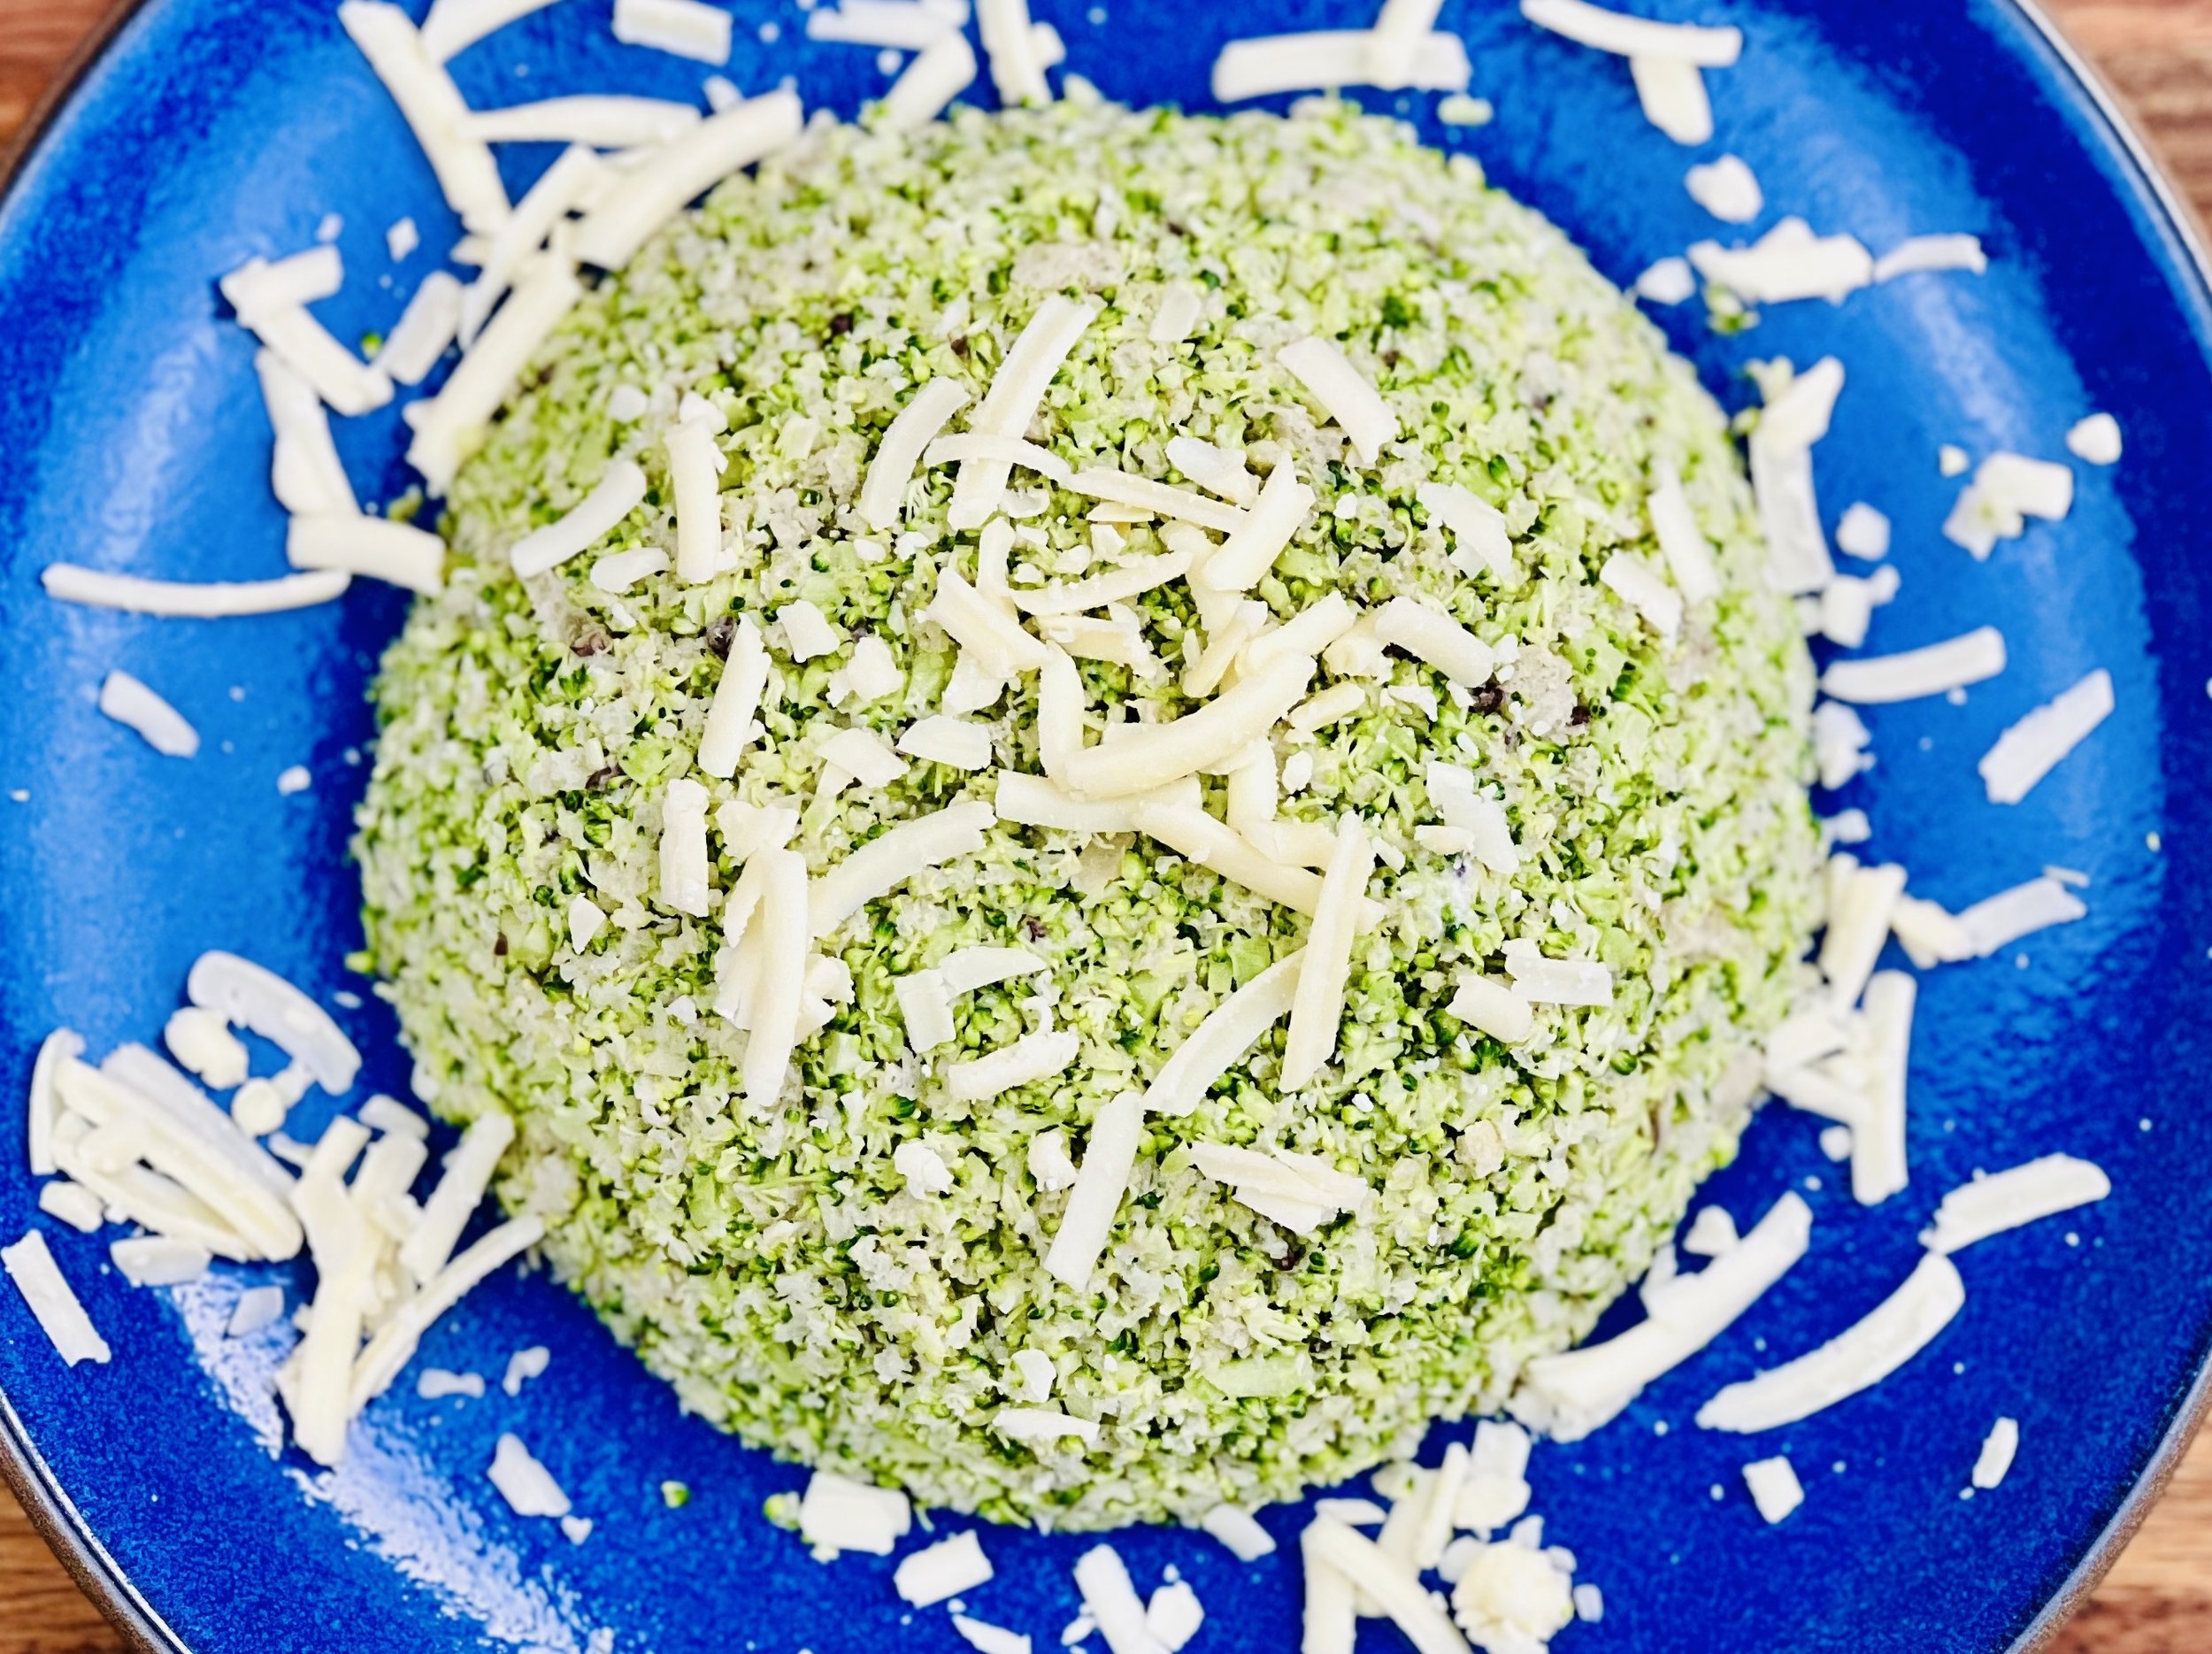
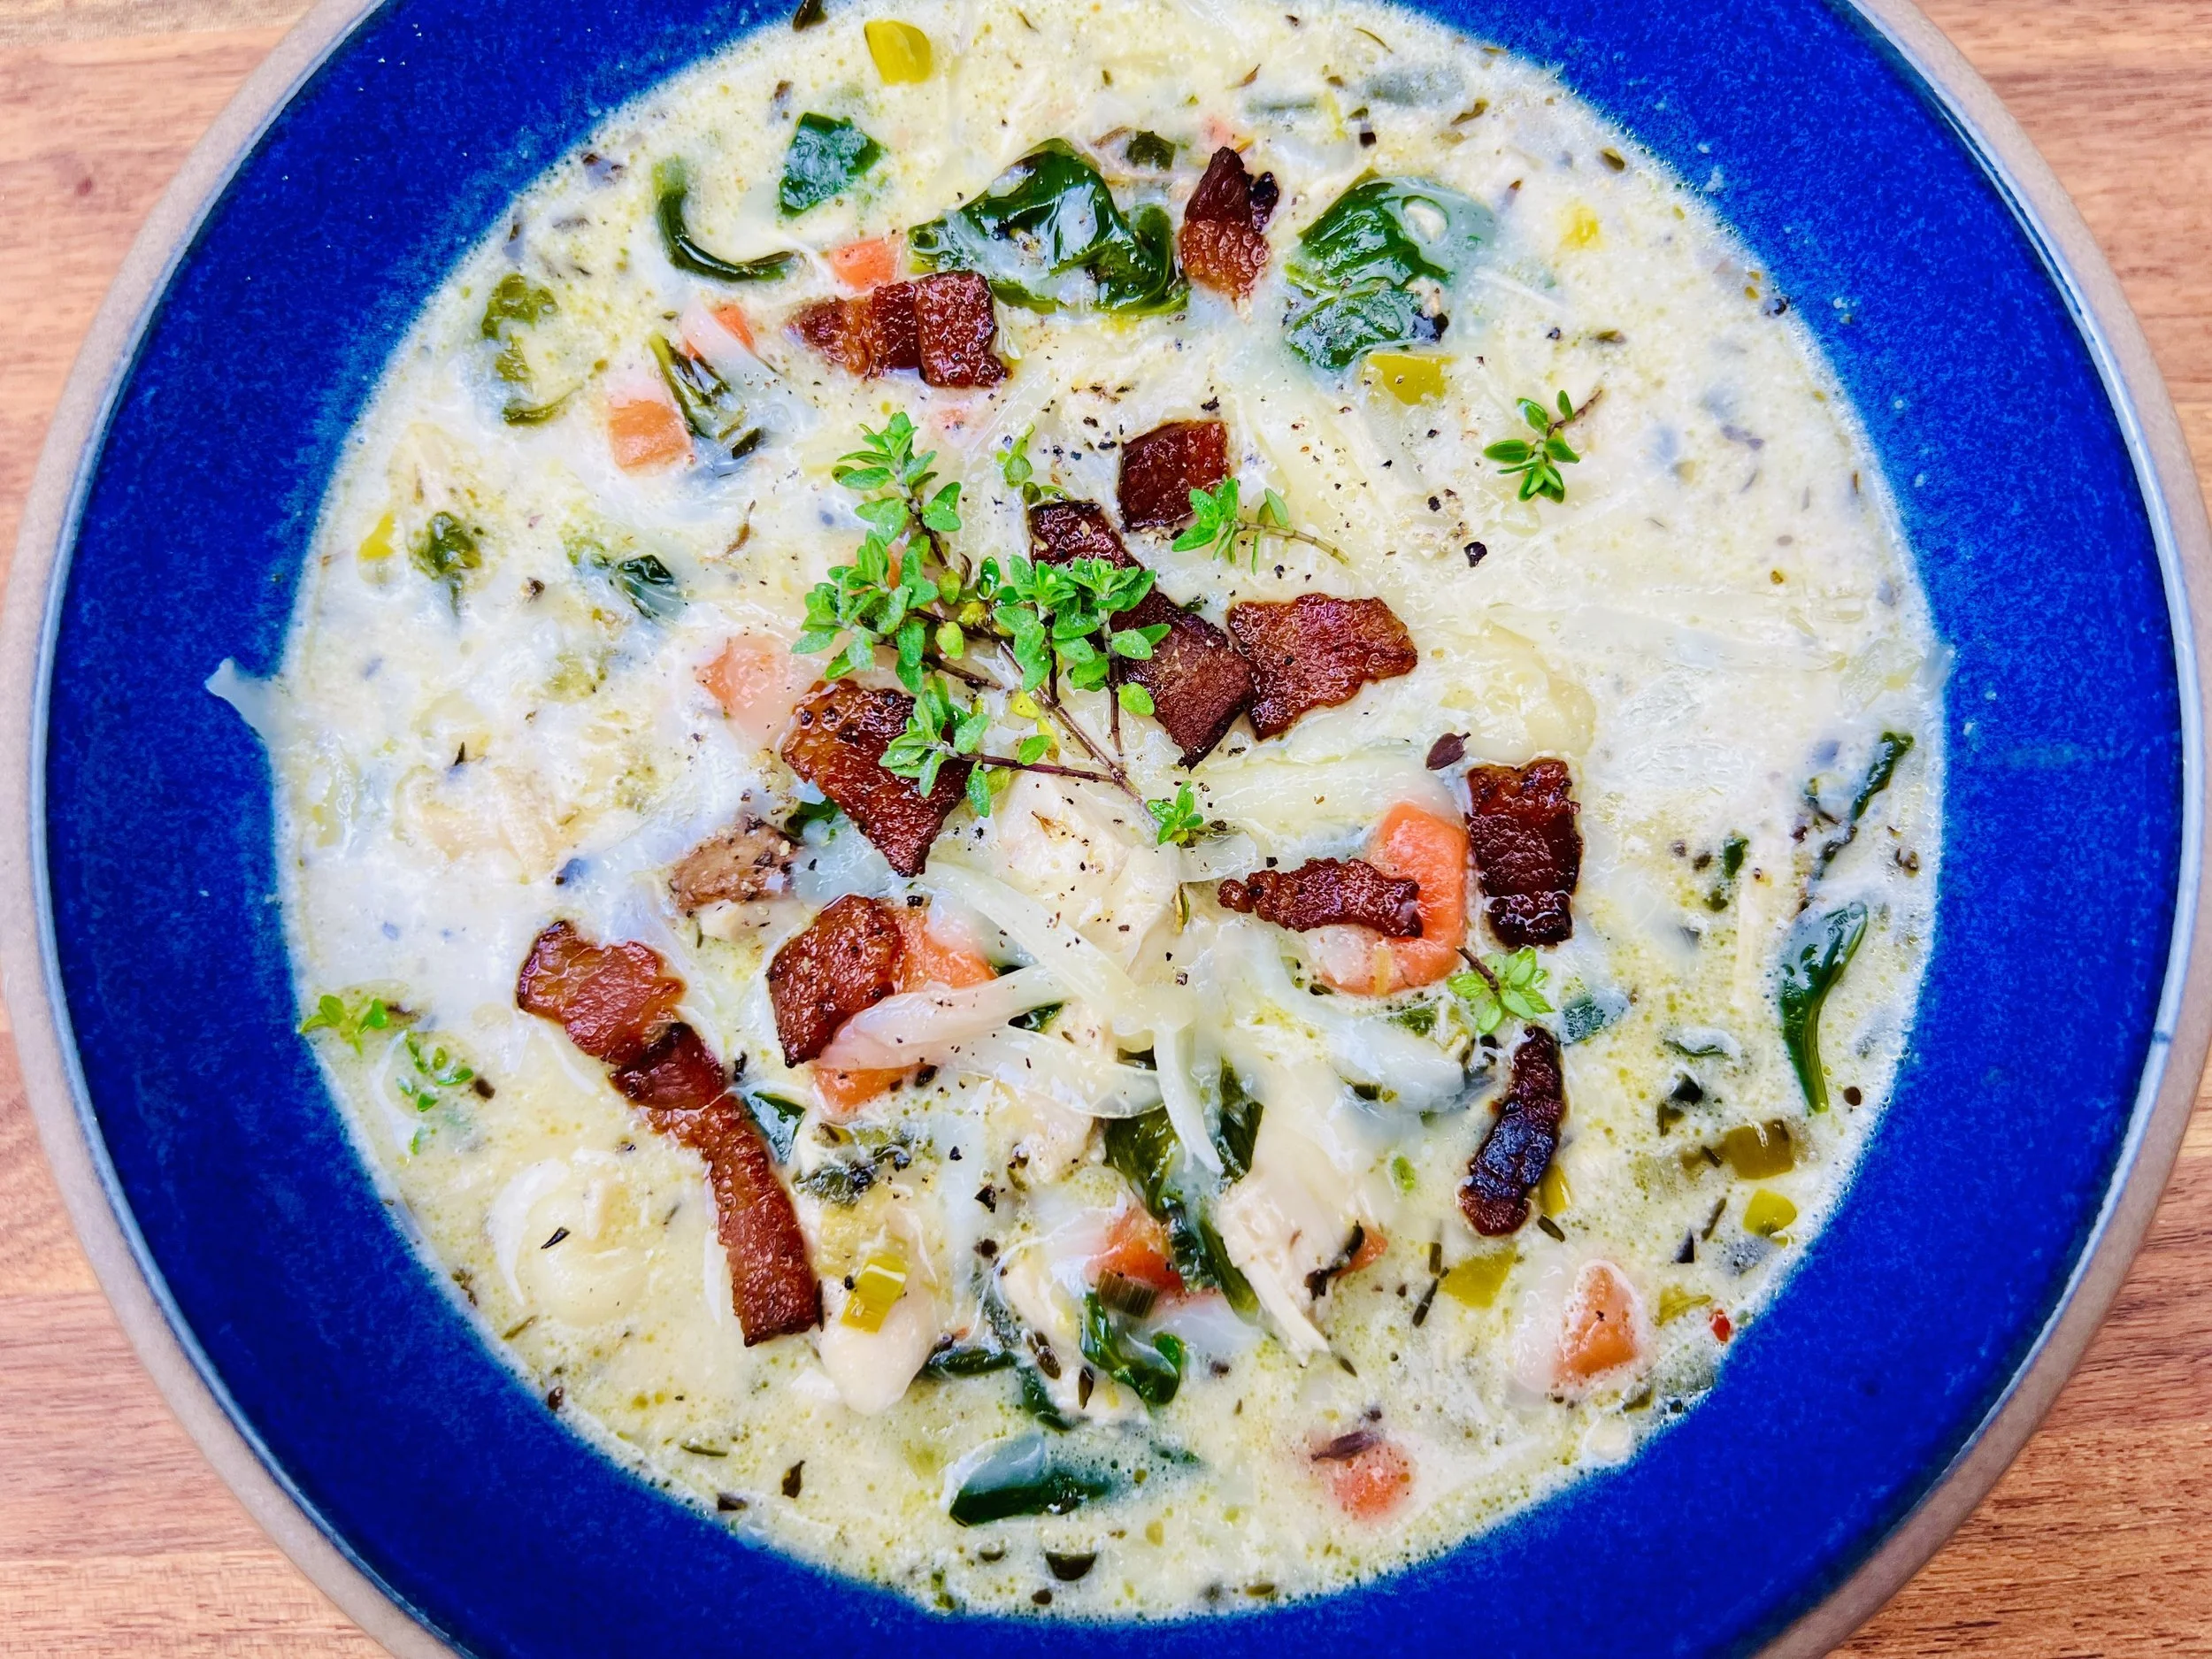
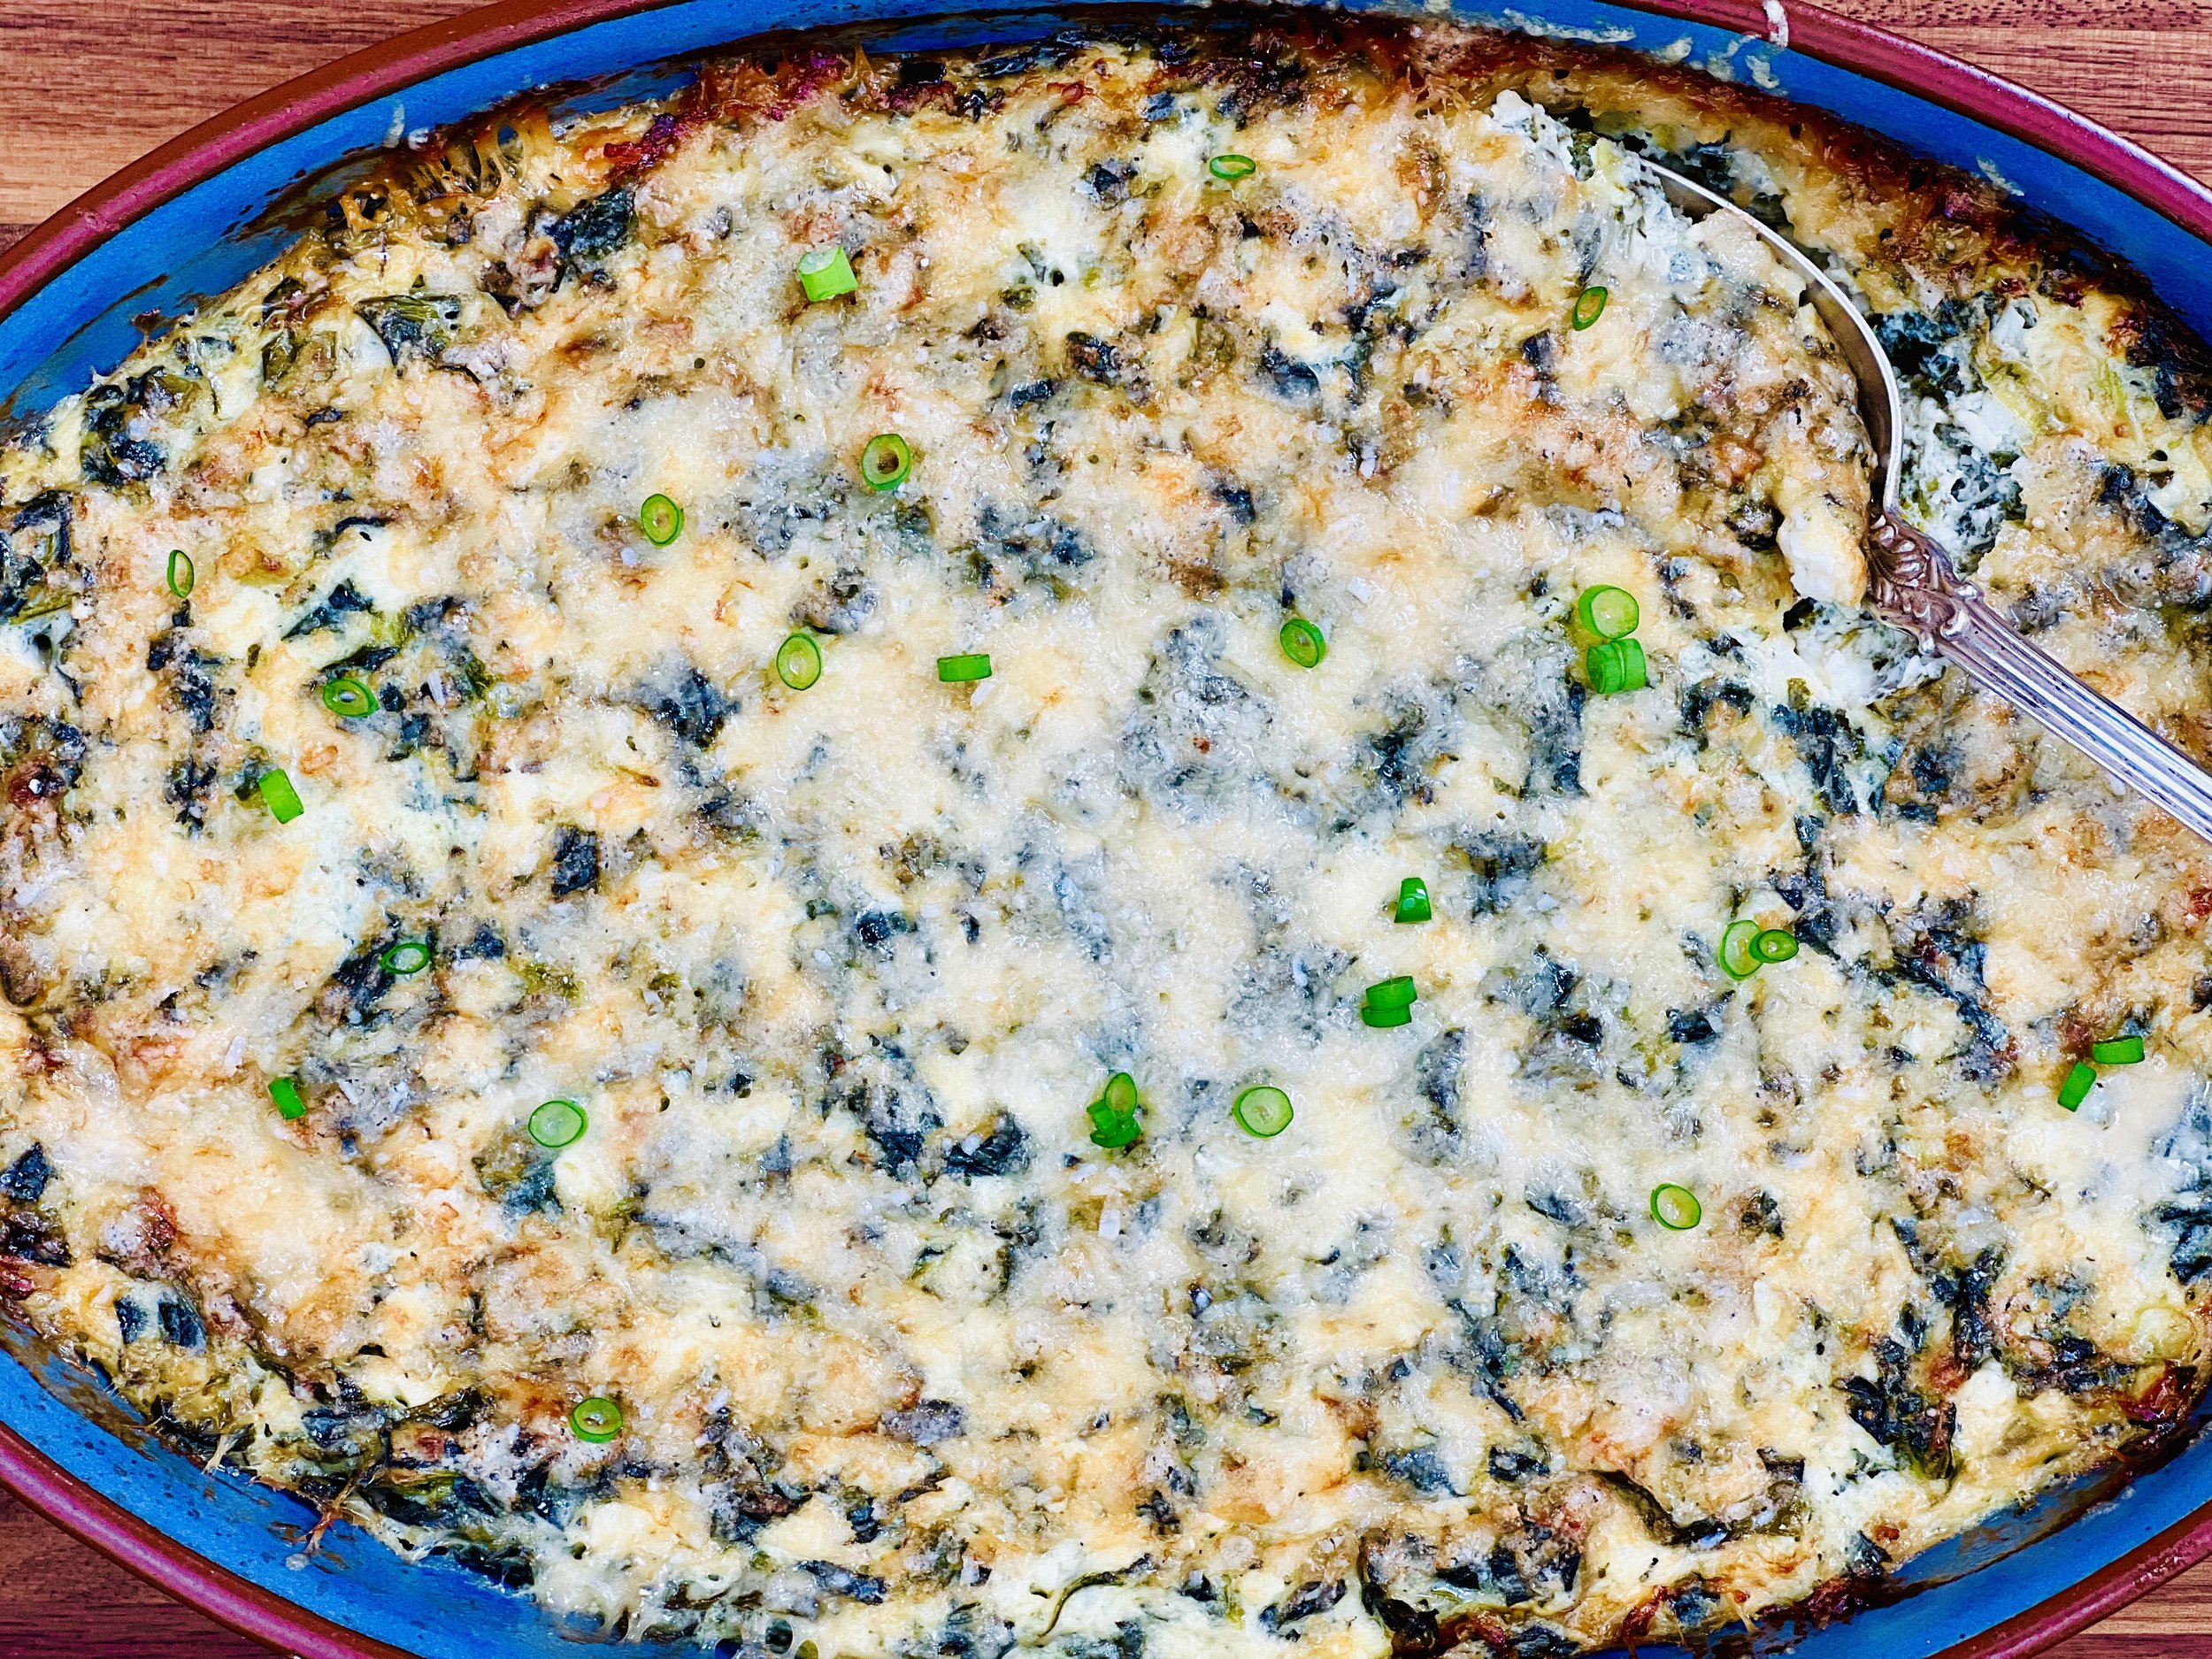
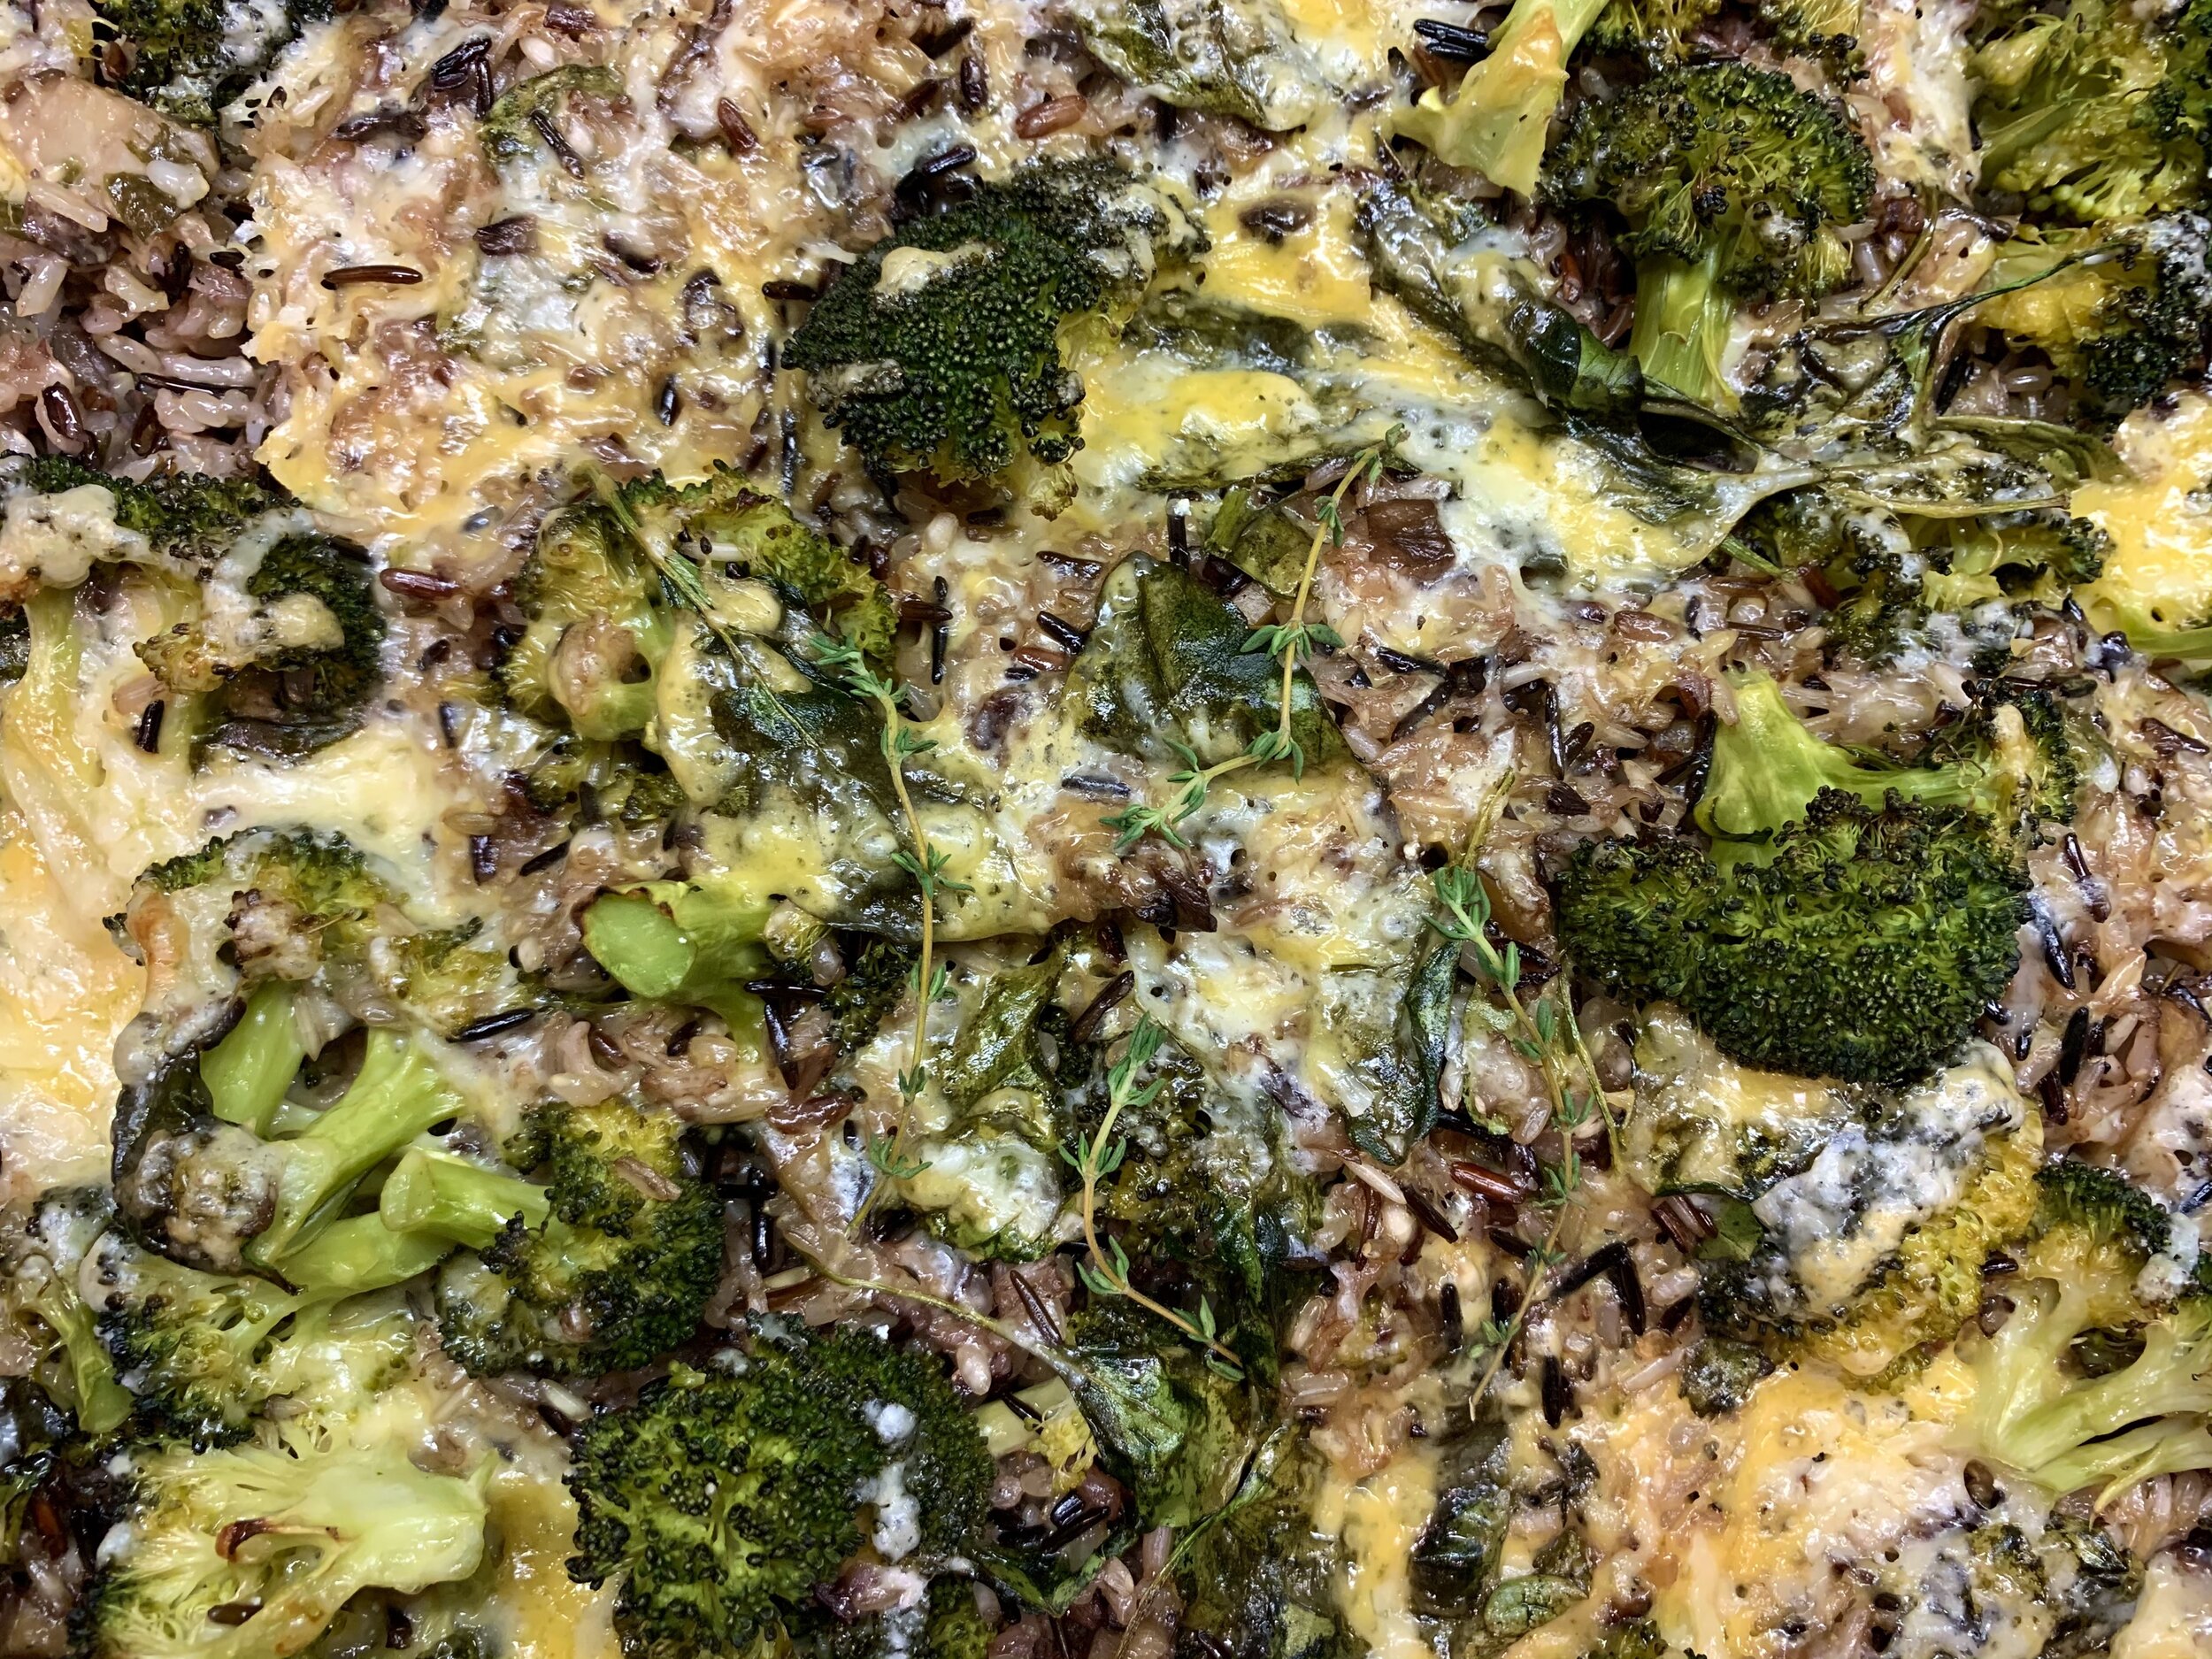
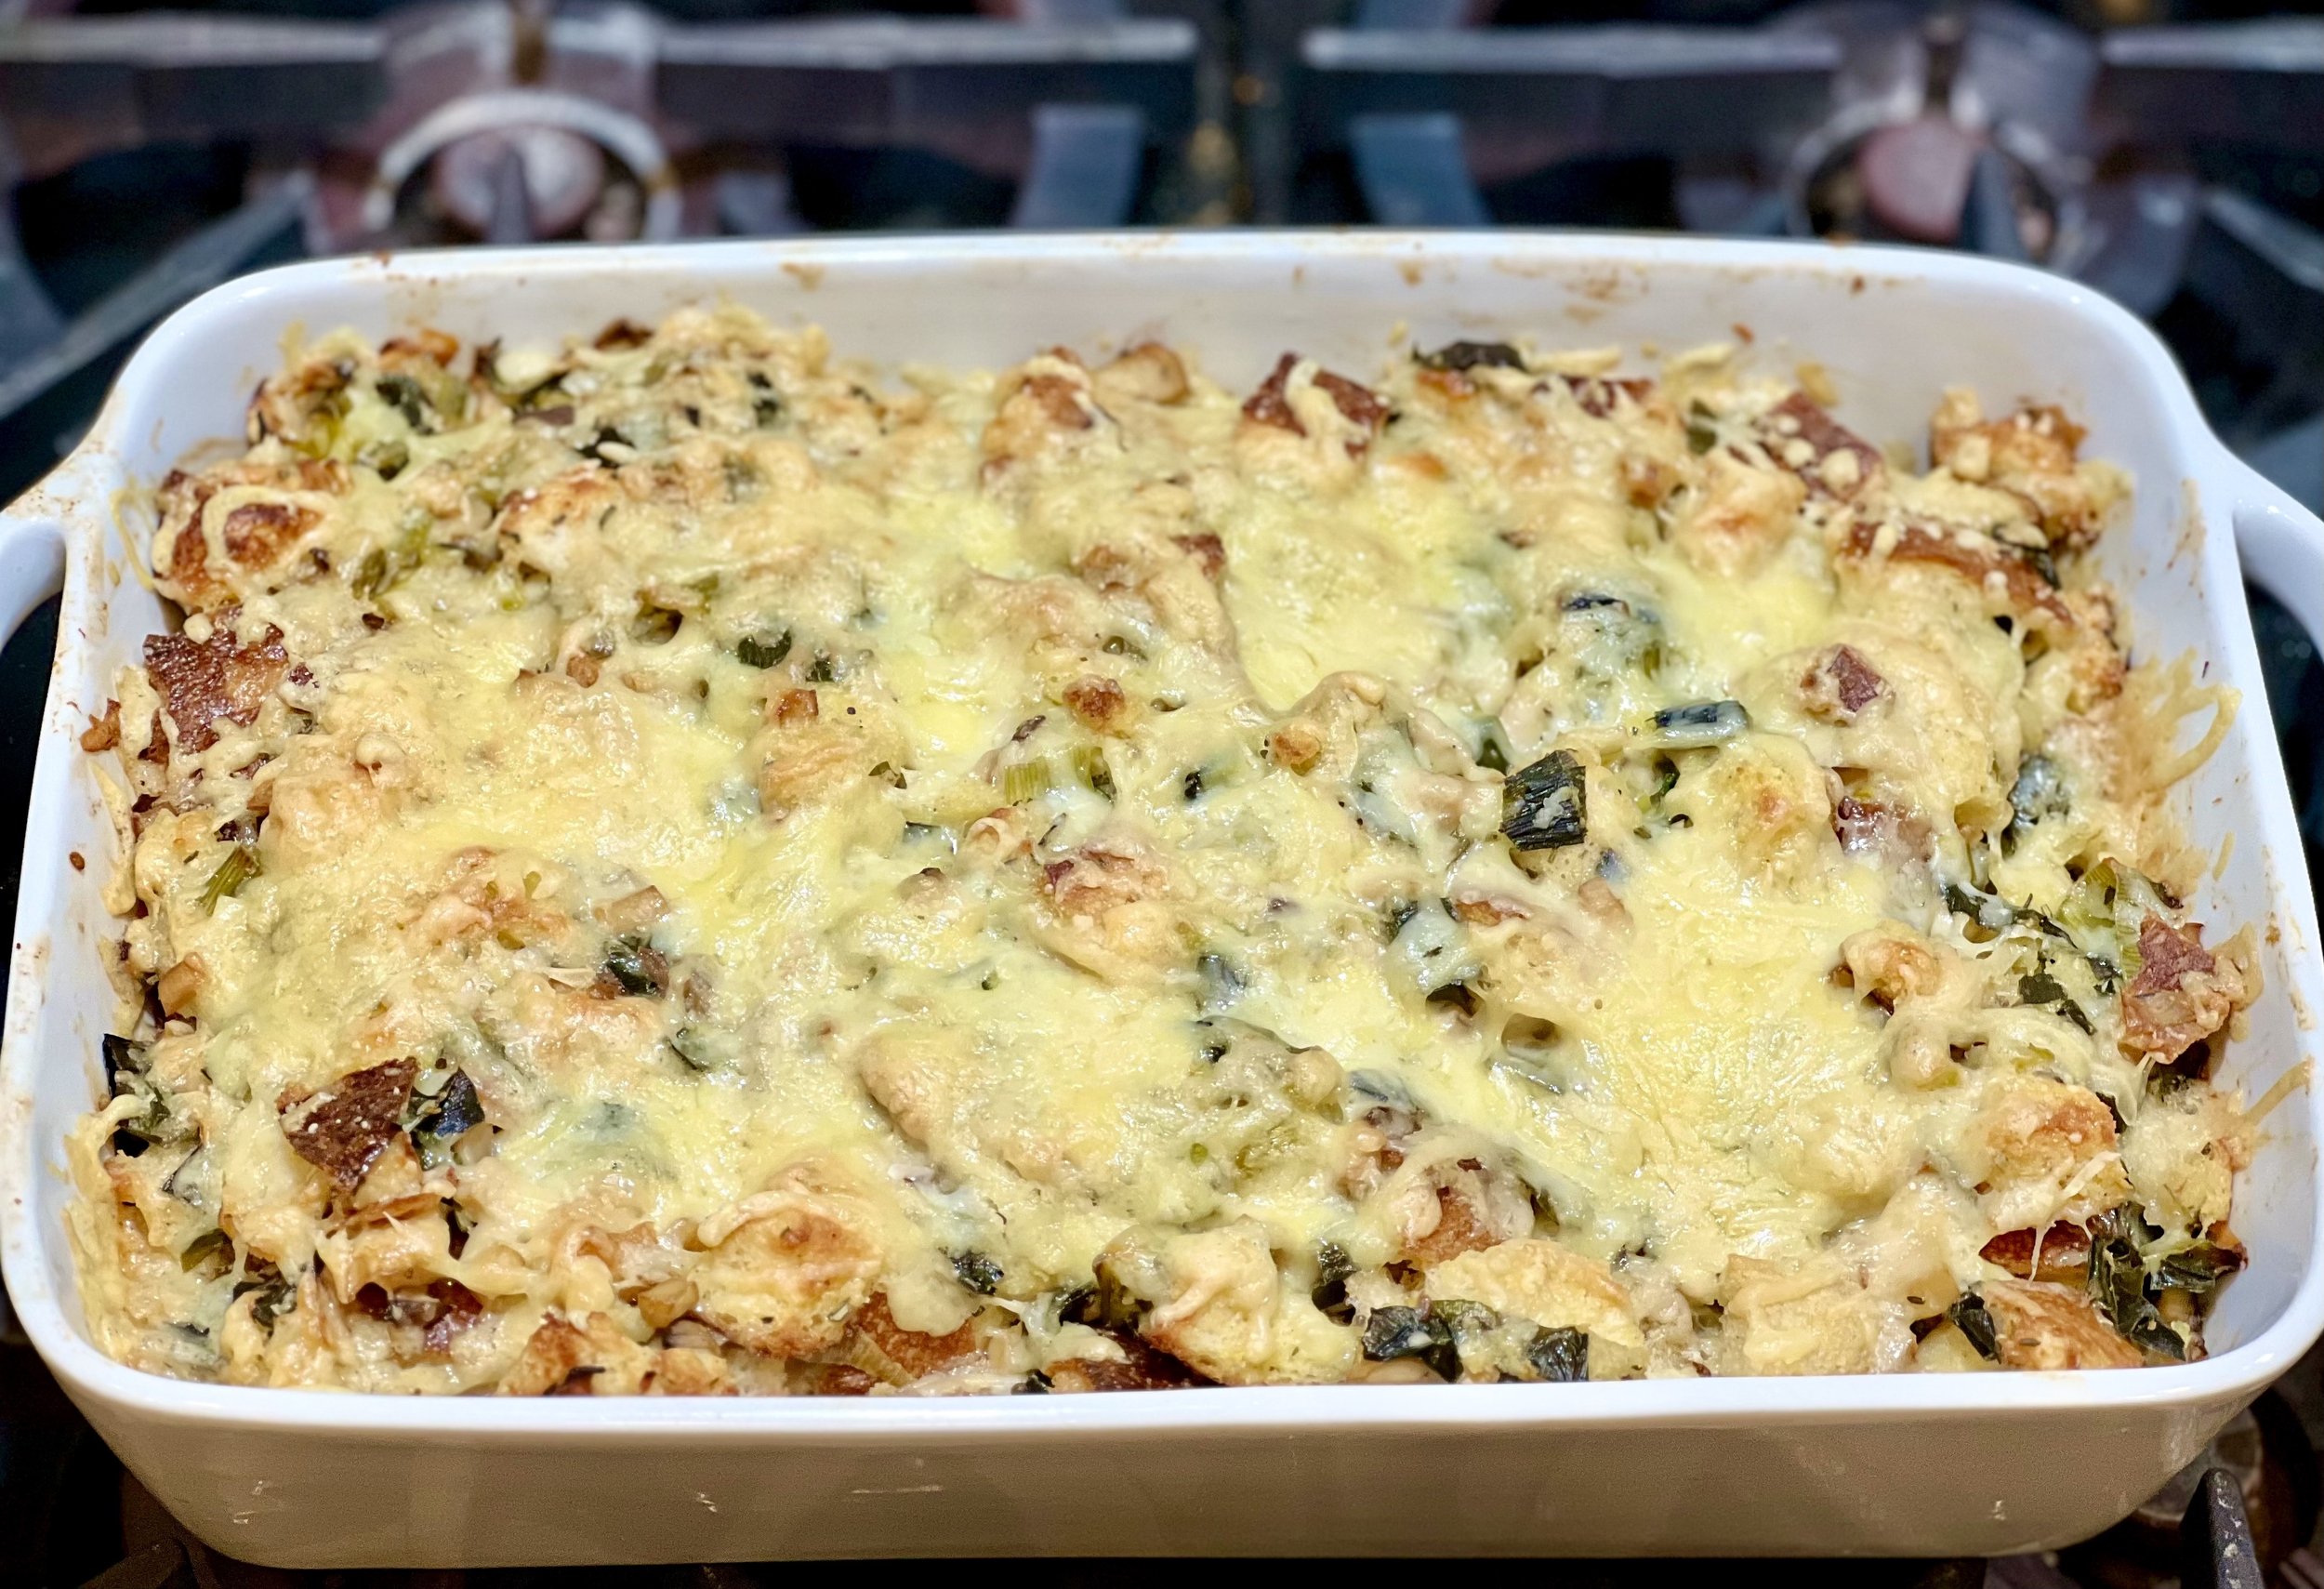
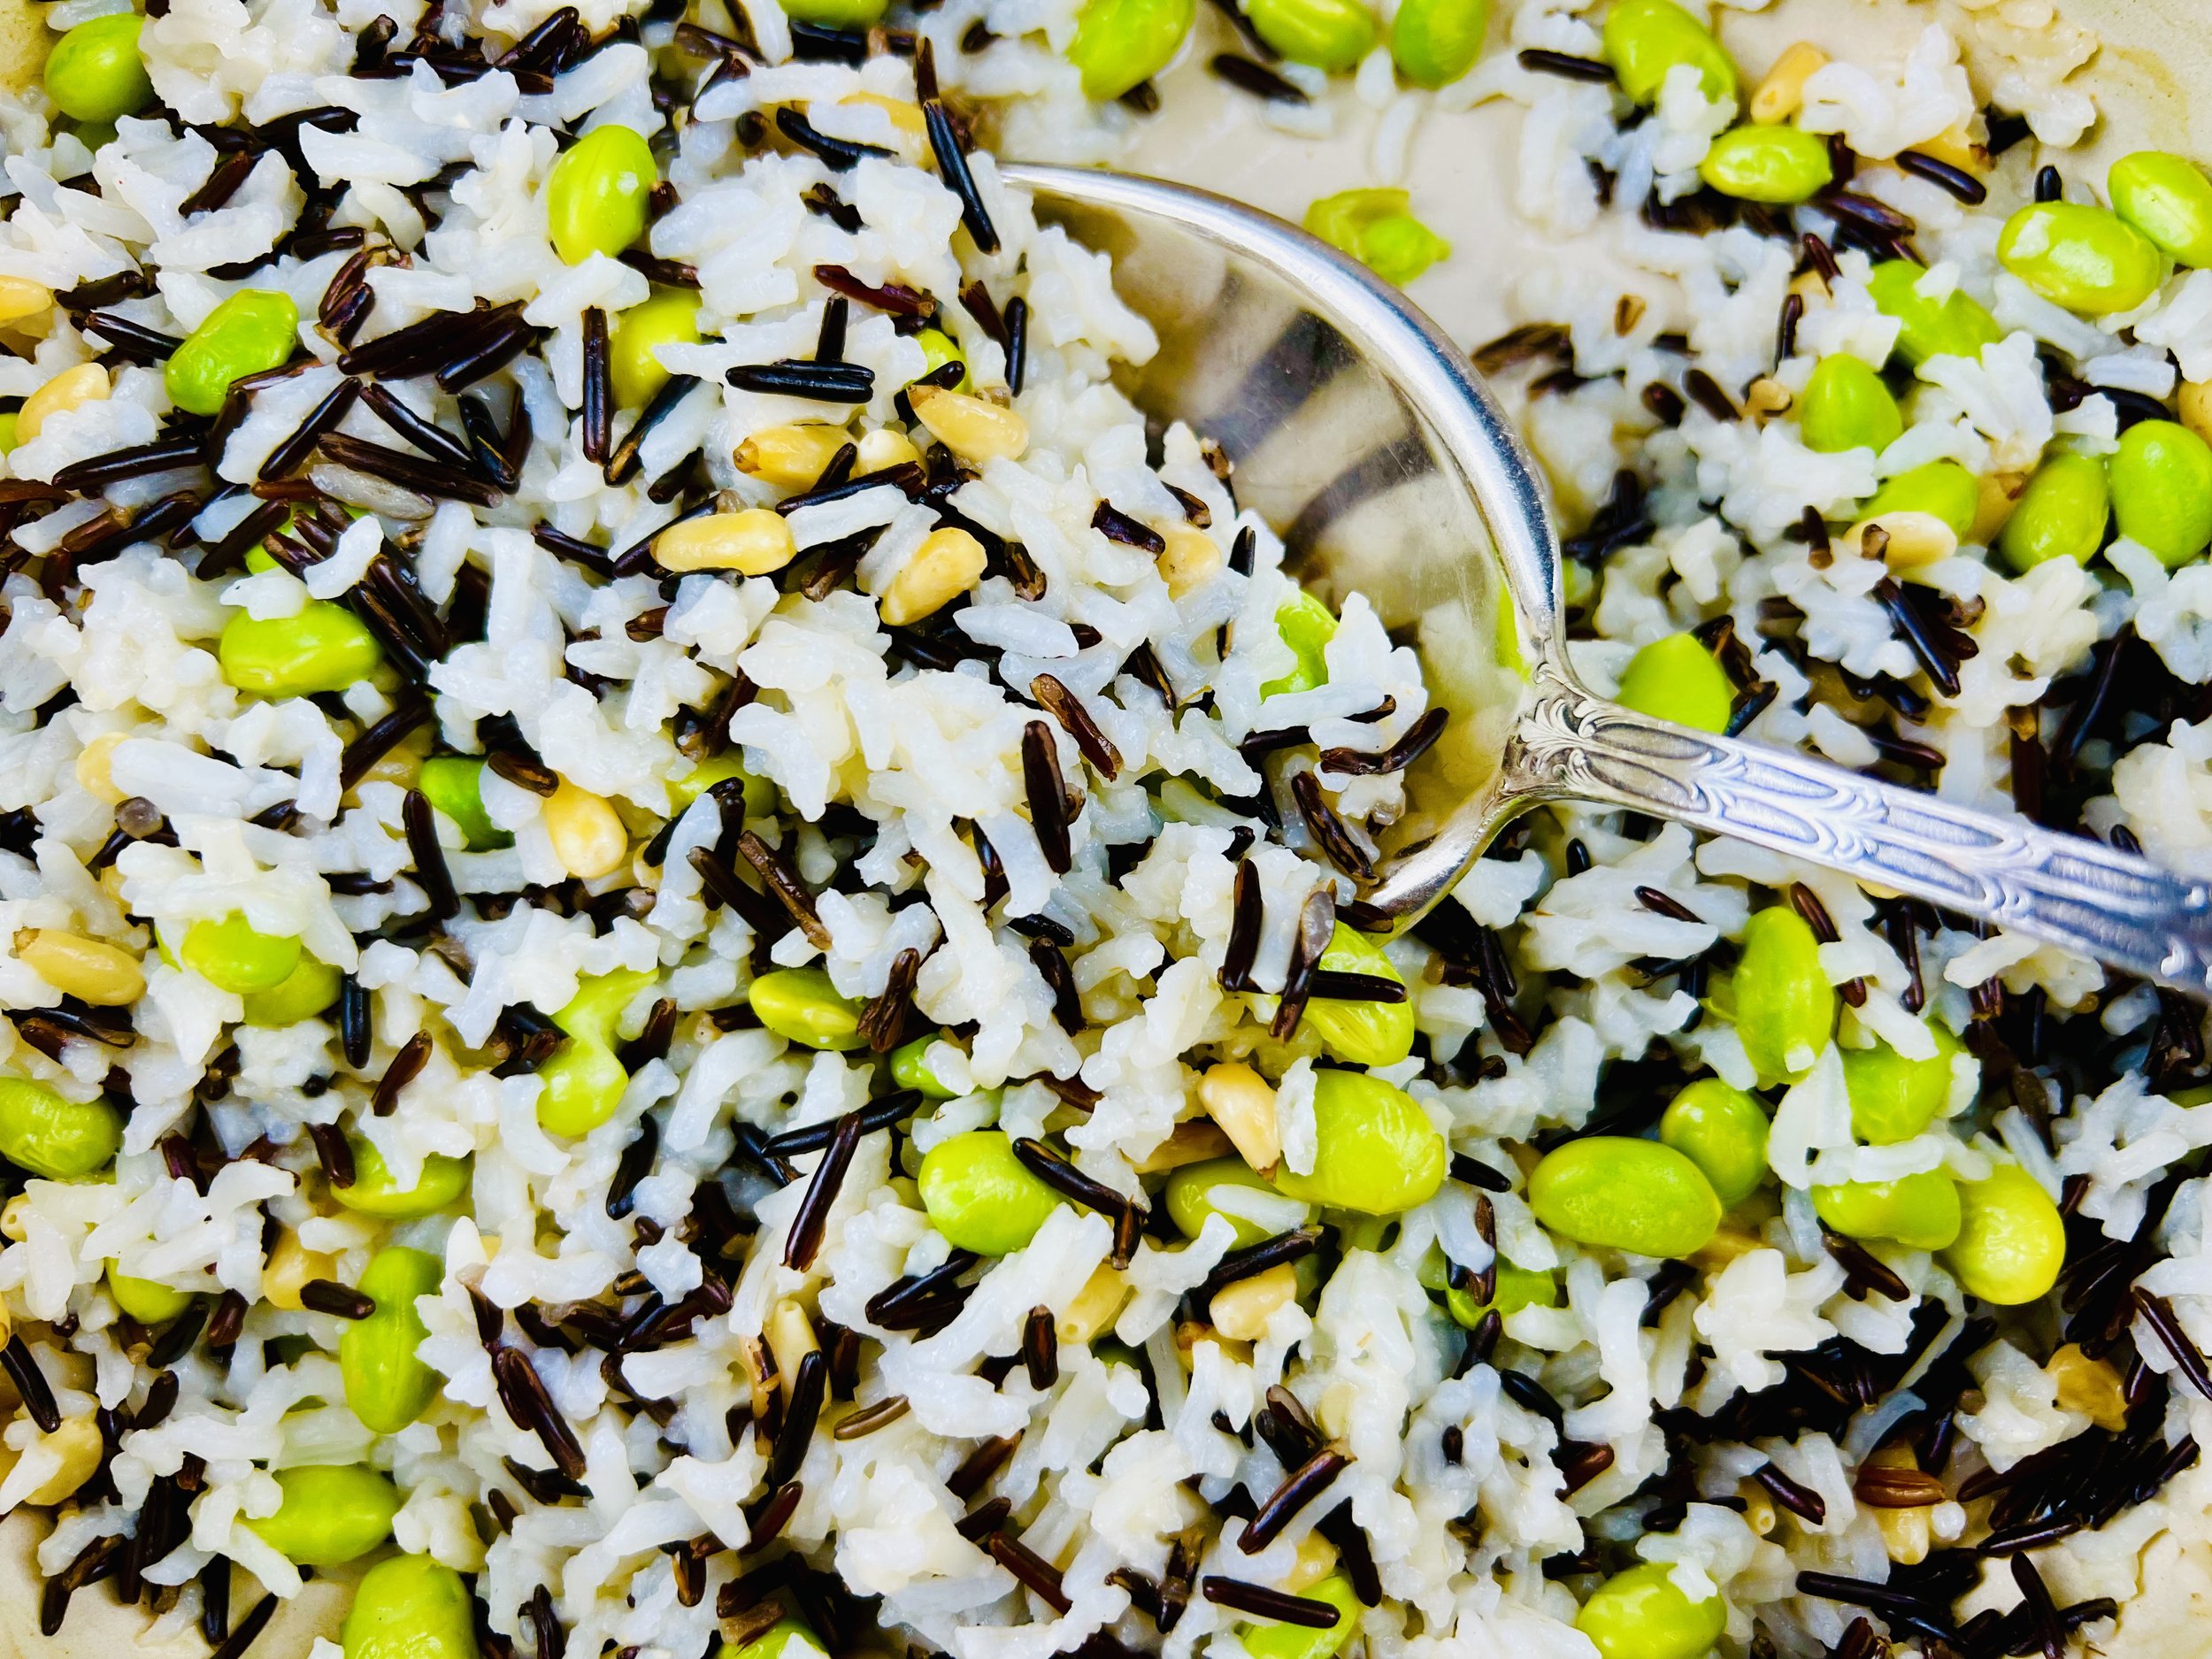
One Pan Broccoli, Mushrooms, and Wild Rice Bake (low FODMAP)
90 Minutes • Gluten-free • Low FODMAP • Serves 6-8
15 Minutes prep • 60 Minutes cook • Low FODMAP • Gluten-Free • Vegetarian • Serves 6 - 8 • Ok to make-ahead: Steps 1 - 4
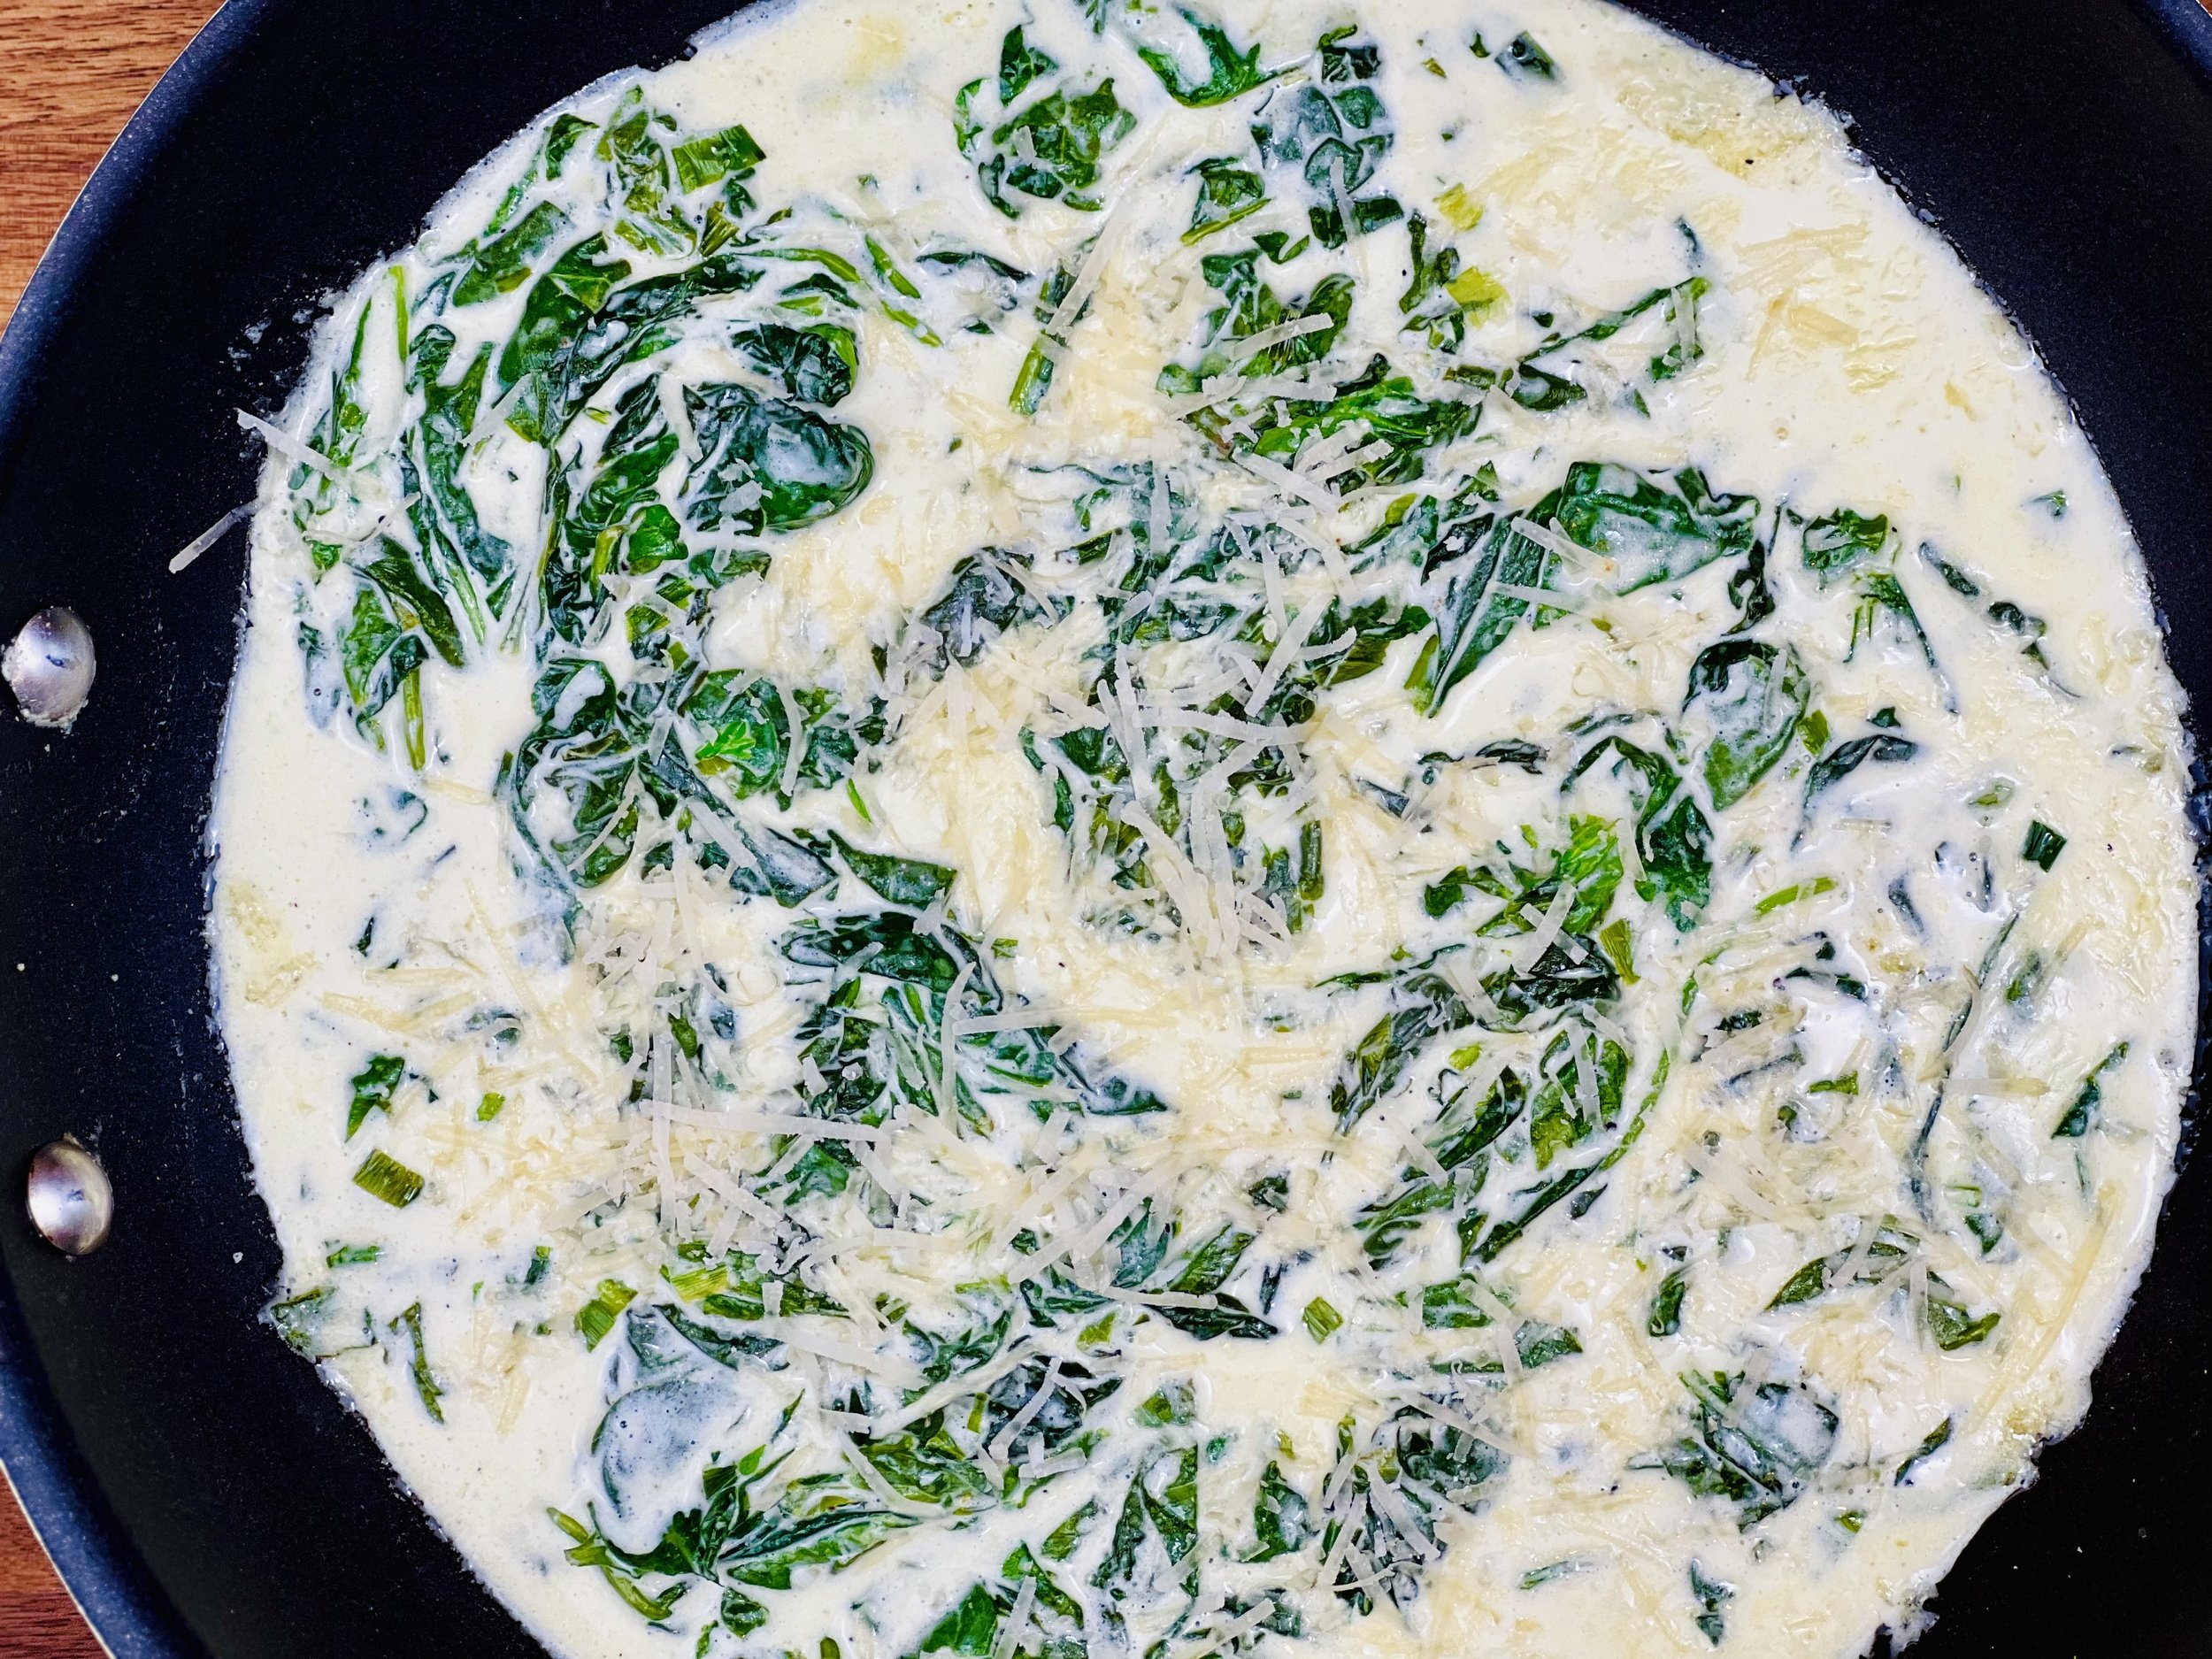
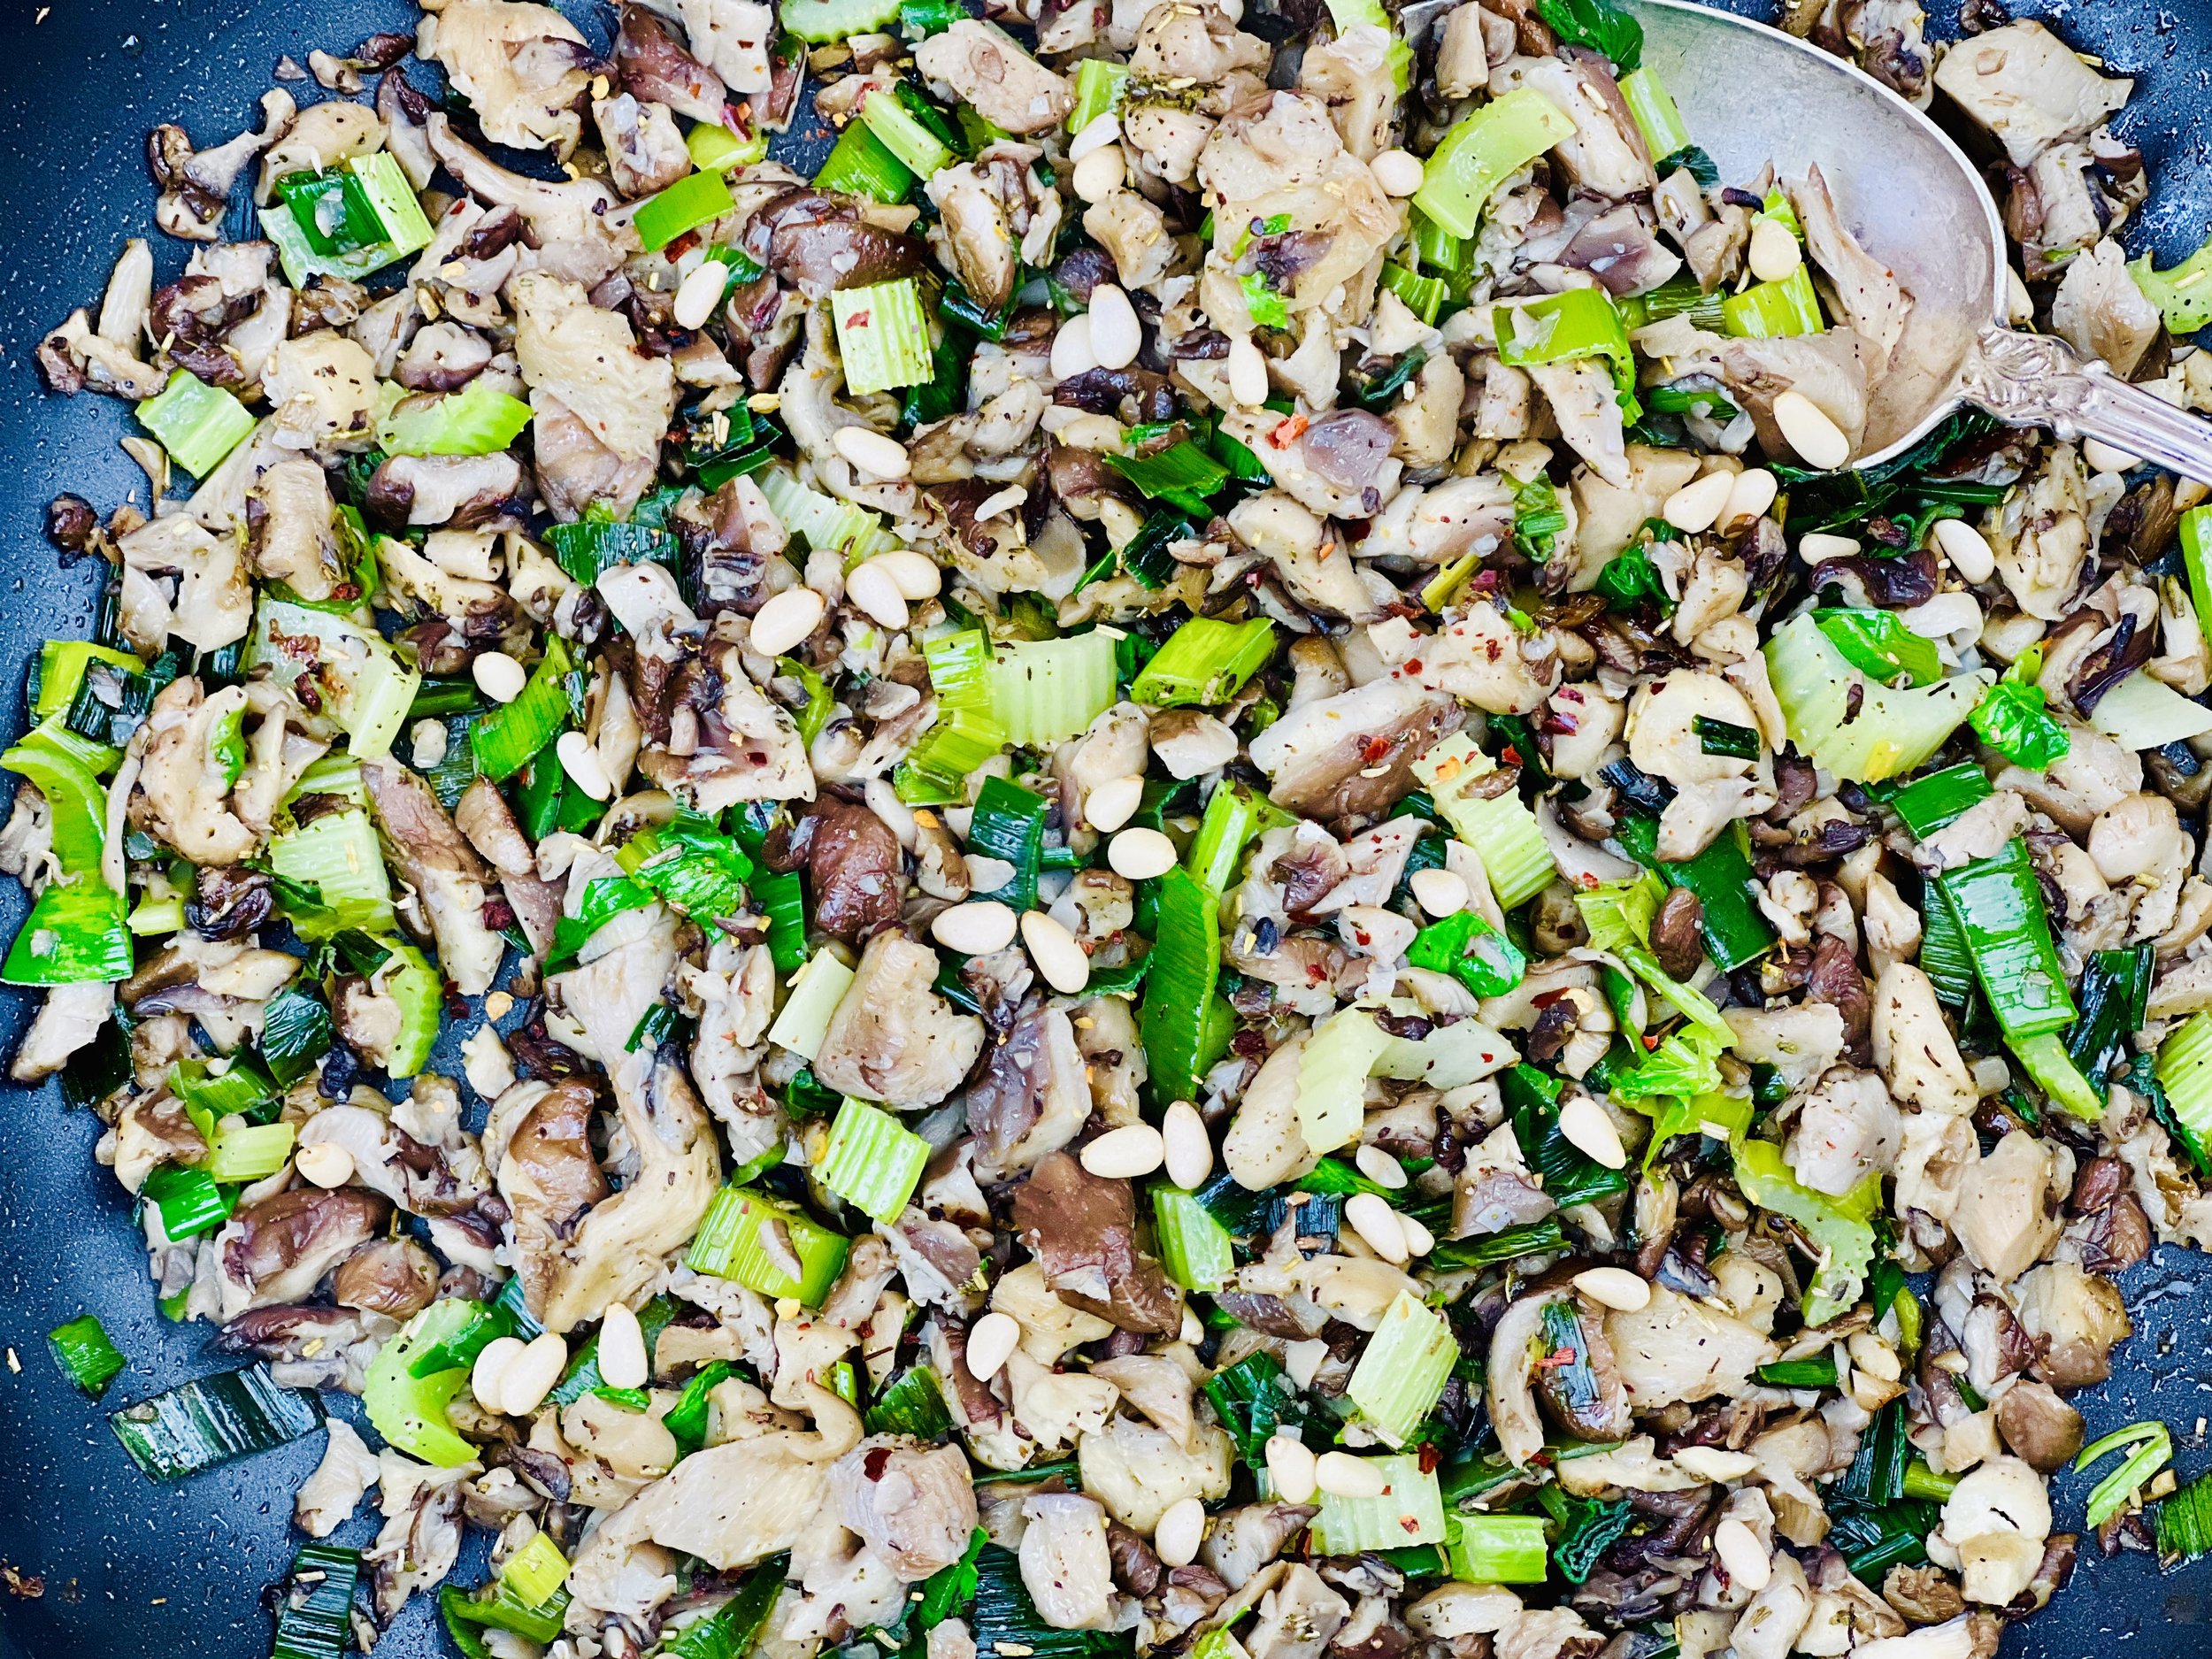
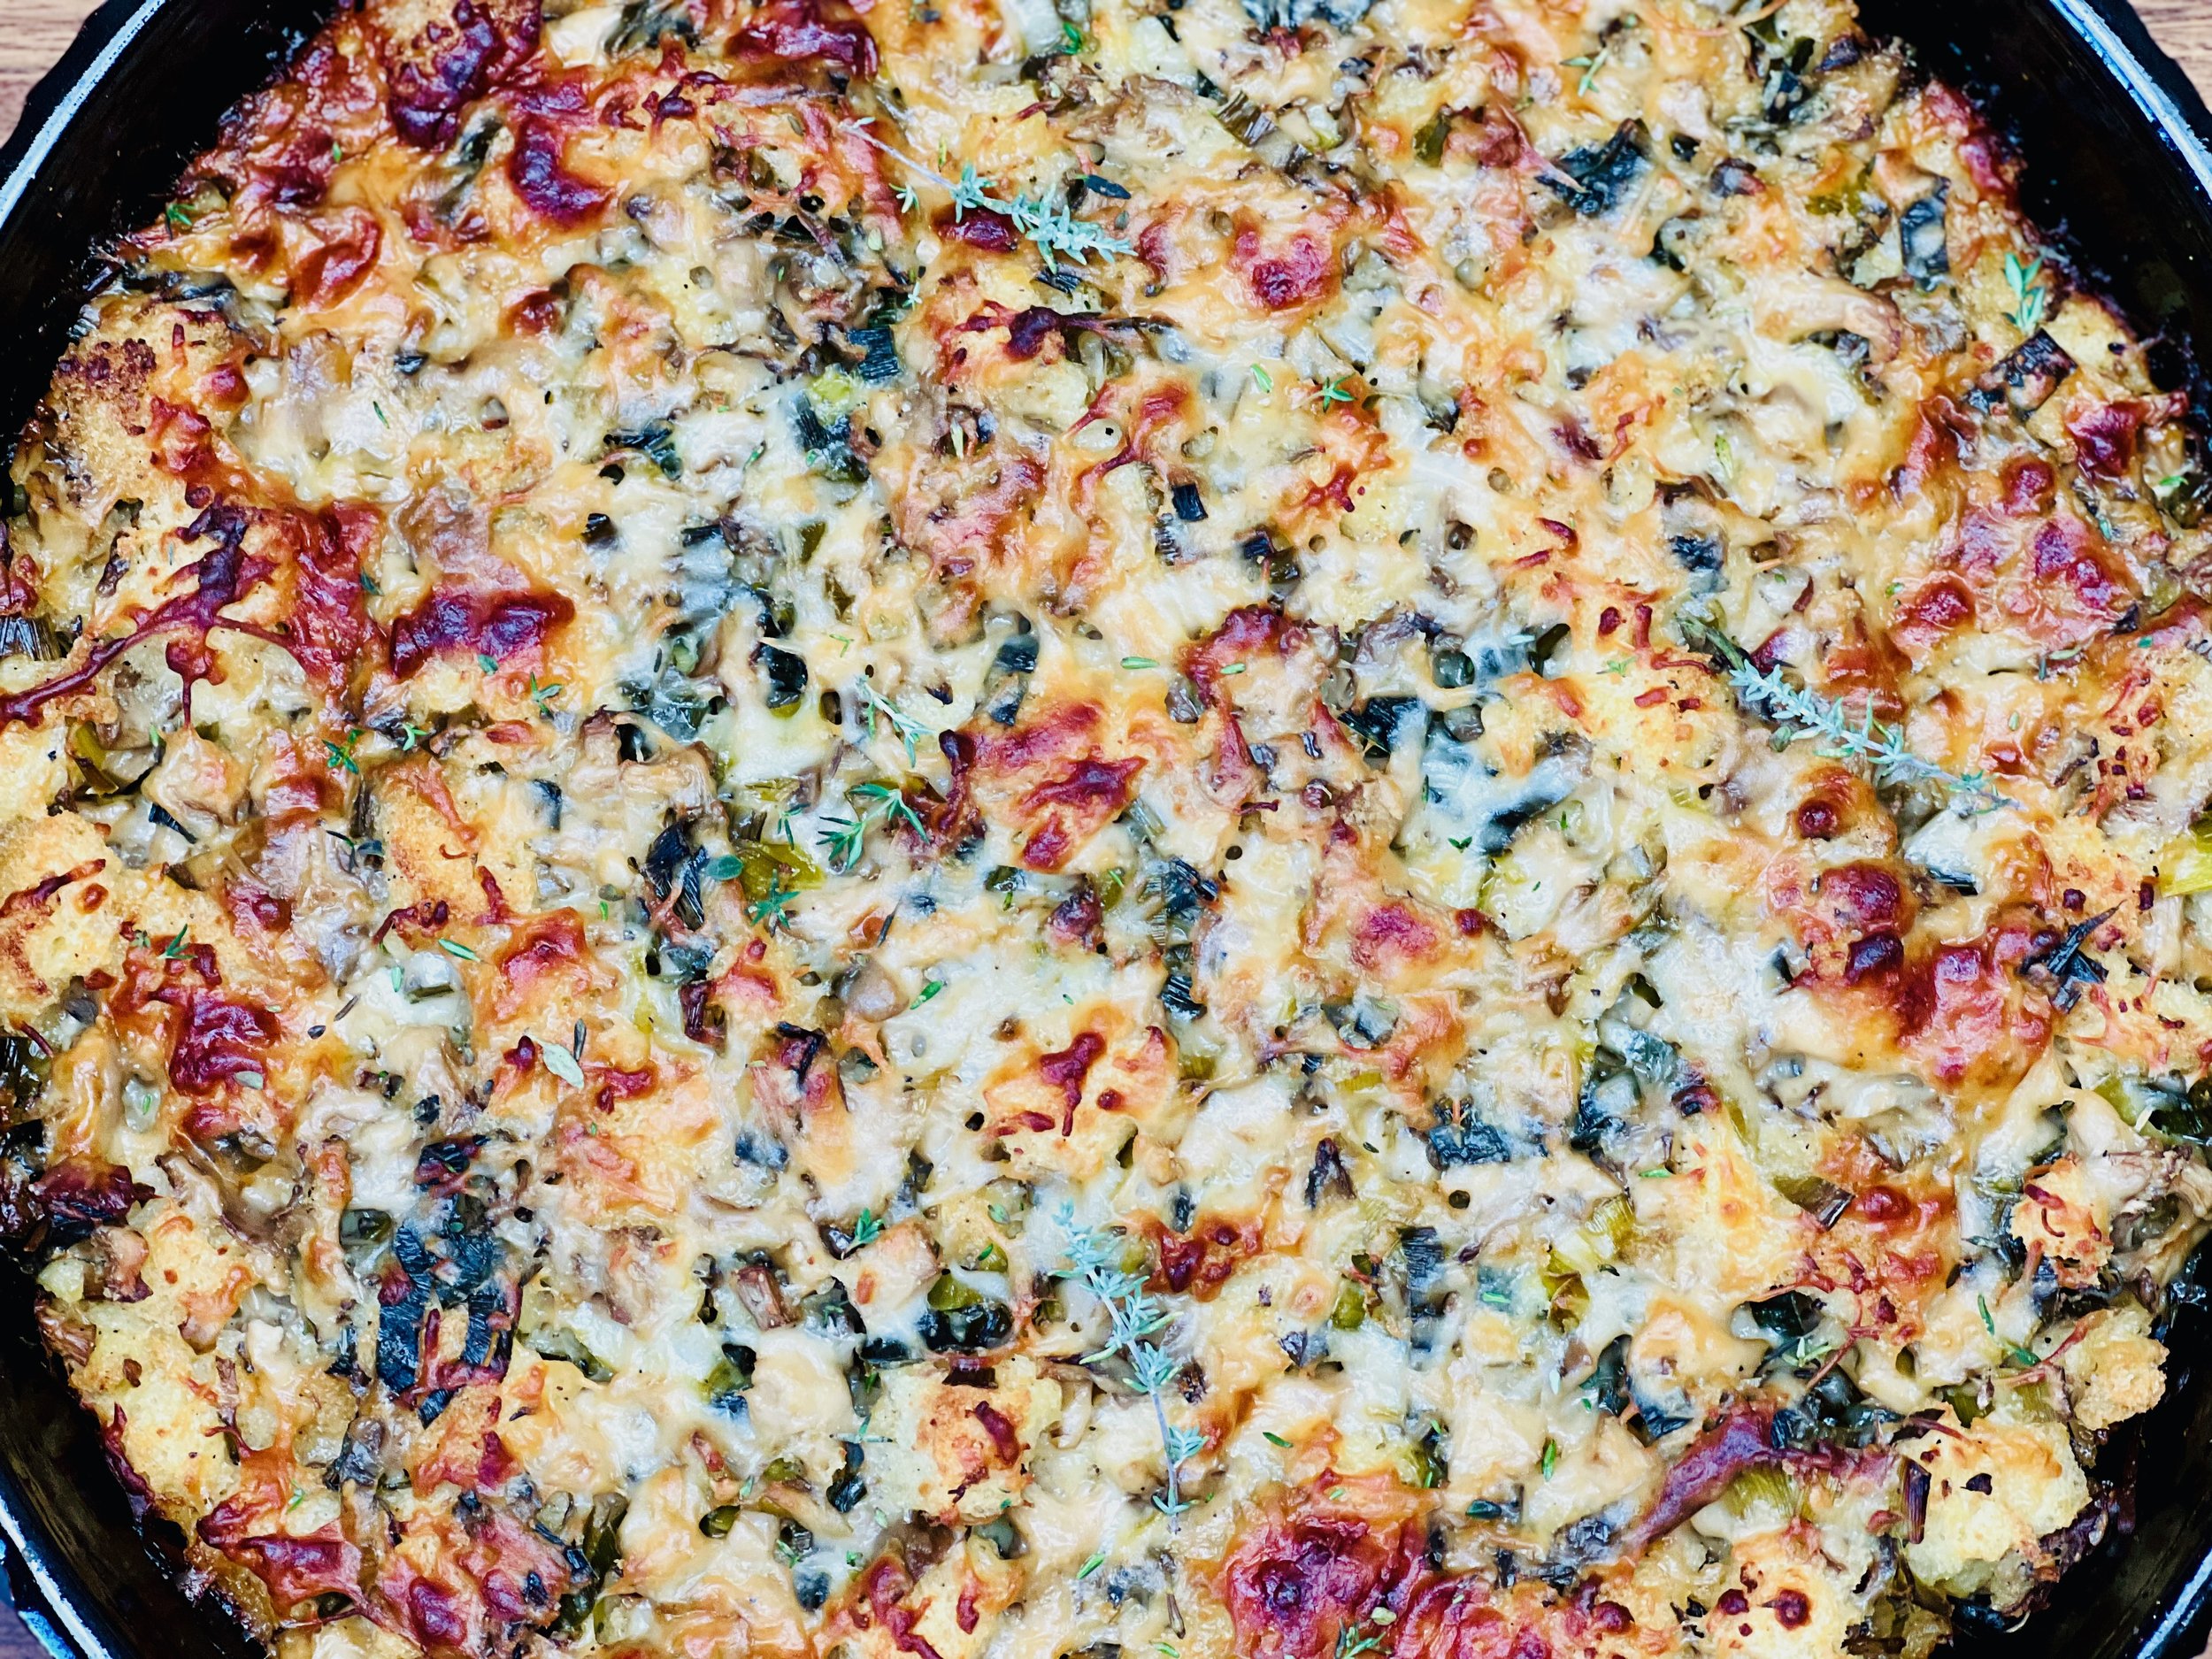
Originally published in December of 2020, I refreshed this one-pan vegetarian dish for an upcoming dinner party so I had to share. Roasted broccoli, fresh herbs and baby spinach, flavorful mushrooms, and melty cheese, all blend perfectly together with the wild rice. Cooking it all in one pan makes it easy to cook and easy to clean. This dish is equally good as a vegetarian main course or as a delicious side dish. And, it’s great to make for company because it can be prepared ahead and finished in the oven when it’s time to serve.
Ingredients
3 tablespoons garlic-infused olive oil
8 ounces oyster mushrooms, chopped
2 leeks, green part only, chopped
1 teaspoon dried dill
2 tablespoons fresh thyme, chopped, plus more for serving
1/2 teaspoon crushed red pepper flakes (or to taste)
2 tablespoons salted butter
2 cups wild rice blend
4 cups water or low-FODMAP chicken broth
1 or 2 Parmesan rinds (optional but add flavor, especially if not using chicken broth)
4 cups broccoli, florets only
2 cups fresh baby spinach, washed and stemmed
1 cup shredded sharp cheddar cheese
1 cup shredded gruyère cheese
1/2 cup chopped walnuts (optional)
Directions
(1) Prepare: Chop the mushrooms and the thyme. Wash and chop the leek greens. After you get the mushrooms and leek greens cooking, wash and stem the spinach, chop the broccoli, and grate the cheese.
(2) Cook the mushrooms: Heat the olive oil in a large, oven-safe skillet over medium heat. When the oil shimmers, add the mushrooms, leeks, thyme, dill, crushed red pepper, and season with salt and pepper. Toss to coat the mushroom in the oil, and cook undisturbed for 5 minutes or until golden.
(3) Cook the rice: Add the butter and wild rice, and cook for 2-3 minutes to toast the rice. Pour in 4 cups of water (or chicken broth if using) and add the Parmesan rinds (if using). Bring to a boil, cover, and reduce heat to low. Cook, covered for 40-45 minutes until most of the liquid is absorbed.
Preheat the oven to 425 degrees F.
(4) Add the vegetables: Once the rice is cooked, remove the parmesan rinds (if used) stir in the broccoli, spinach, and 1/2 cup of each cheese. Season with salt and pepper. Transfer the entire mixture to a baking/serving dish if you’d rather not serve in your frying pan.
Make-ahead note: At this point, you may cool, cover, and refrigerate the rice and vegetables until you’re ready to heat and serve.
(5) Finish: Scatter the remaining cheese over the top of the rice and vegetables. Transfer to the oven and bake 20-25 minutes, until the cheese is melted and just beginning to brown. Serve warm with additional thyme and walnuts (if using) for garnish.
Eat and enjoy every bite because you can!
Recipe note: I use Diamond Crystal Kosher salt in all my recipes because it has a wonderful flat and crisp flake that tastes delicious. It is also the least salty salt available so you can use it more liberally as a seasoning than you can table salt or sea salt. If you use another type of salt, you may need to reduce the amount so it is not over-salted.
Link note: This post contains links for you to easily purchase items listed on the page. In some cases, we have provided a special discount code for IBS Game Changers so be sure to use it when you purchase an item to get the discount that has been arranged just for you! As an Amazon Associate, I earn a commission from qualifying Amazon purchases.
More Deliciously Low FODMAP™ main course recipes
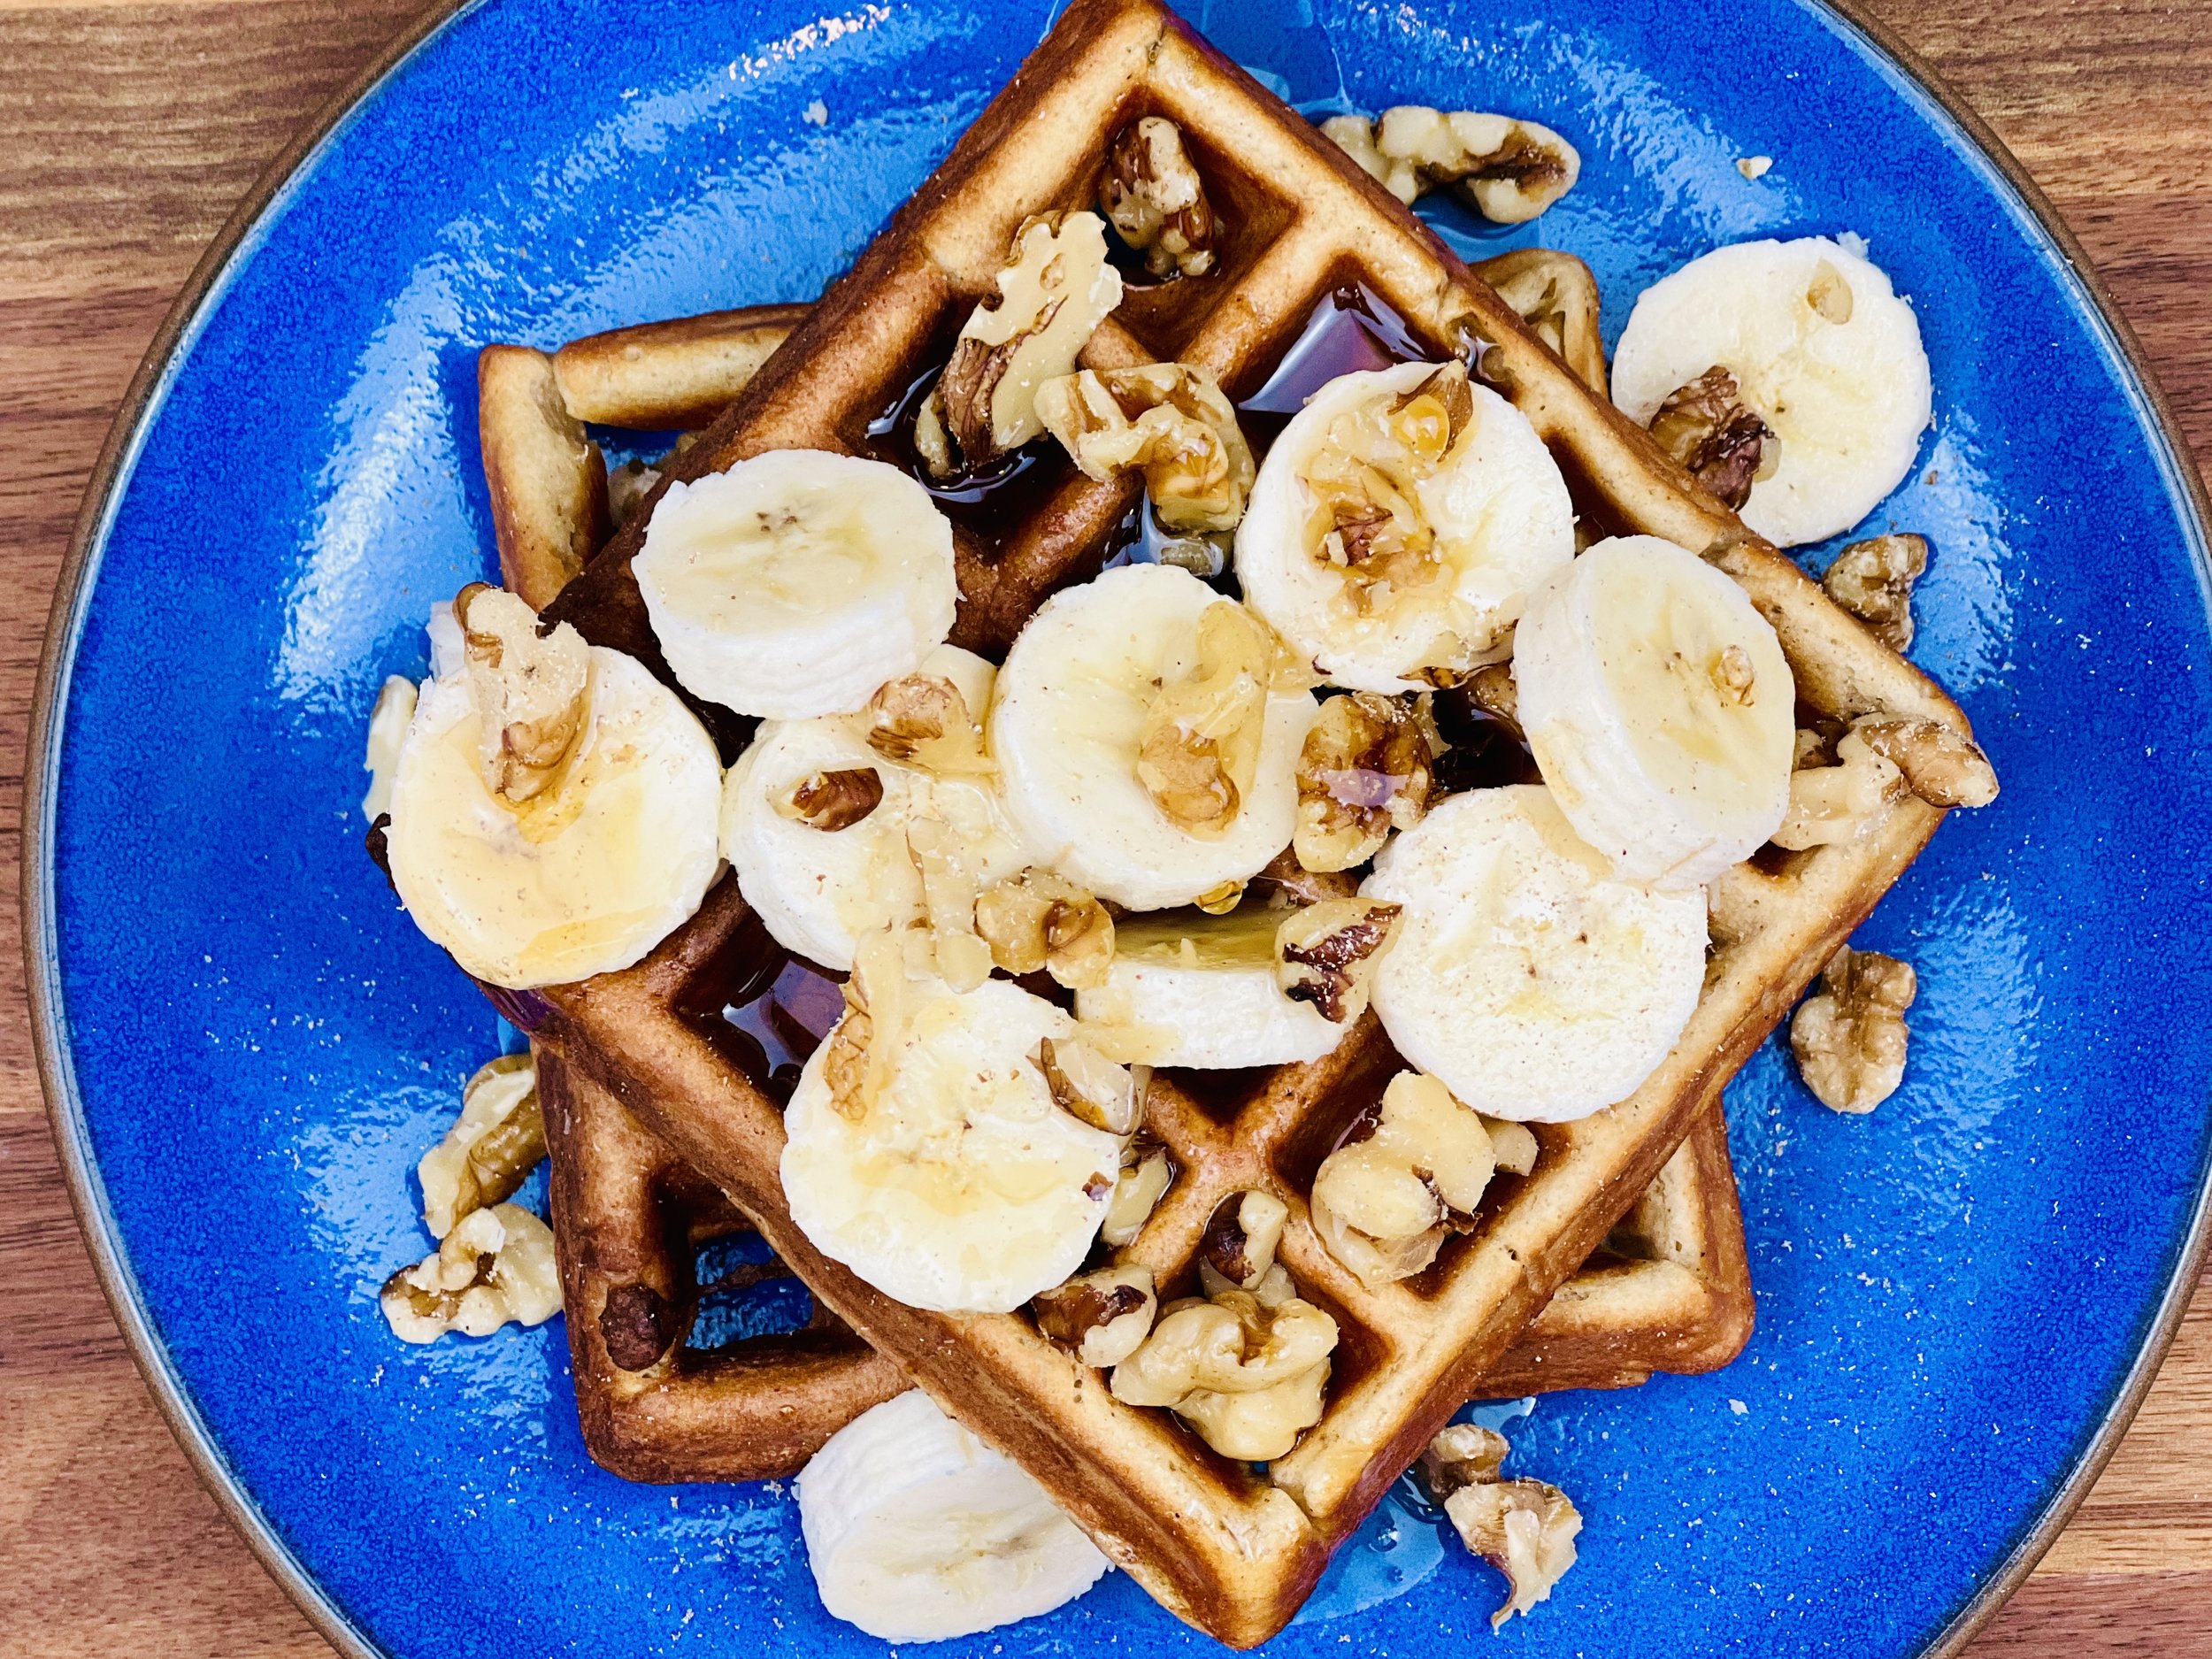
Cinnamon Toast Waffles (low FODMAP)
20 Minutes prep • 10 Minutes cook • Low FODMAP • Gluten-free • Lactose-free • Serves 4
20 Minutes prep • 10 Minutes cook • Low FODMAP • Gluten-free • Lactose-free • Serves 4
I’ve been experimenting with different gluten-free flour blends and this recipe is perfect with gluten-free Bisquick! These waffles are crisp on the outside, tender on the inside, and delicious all the way through. Just like you want a waffle to be! The sweet spices give them a delightful taste without much sugar. They are a perfect complement for butter and real maple syrup, strawberries and cream, or whatever you might like to pile on. They keep well in an airtight container for a day or two and reheat nicely in the toaster or oven.
This is an exclusive recipe just for recipe club members.
In addition to the two free recipes I create each week I am creating and delivering one very special recipe just for my recipe club members. If you’re not yet a member, I encourage you to join! Membership in the club includes access to the complete archive of recipes with filters so it can become your virtual low FODMAP cookbook plus, I am creating and delivering one special NEW recipe every week ONLY for recipe club members. And, for my true fans, I’ll be sharing behind-the-scenes content, and updates on the progress of the new cookbook.
Your membership in the club helps me continue creating new, delicious, easy-to-make, low FODMAP recipes just for you.
As always, all recipes will emphasize simple ingredients, easy preparation, and delicious low FODMAP results. Recipes will be for everything from main courses, salads, soups, side dishes, appetizers, desserts, sauces, breakfast and lunch, and even mocktails and cocktails. Everything you need to prepare fantastic low FODMAP meals everyone will love.
Join the club. Become a Patron. Let’s keep making delicious Low FODMAP meals together.
Link note: This post contains links for you to easily purchase items listed on the page. In some cases, we have provided a special discount code for IBS Game Changers so be sure to use it when you purchase an item to get the discount that has been arranged just for you! As an Amazon Associate, I earn a commission from qualifying Amazon purchases.
More Deliciously Low FODMAP™ breakfast recipes
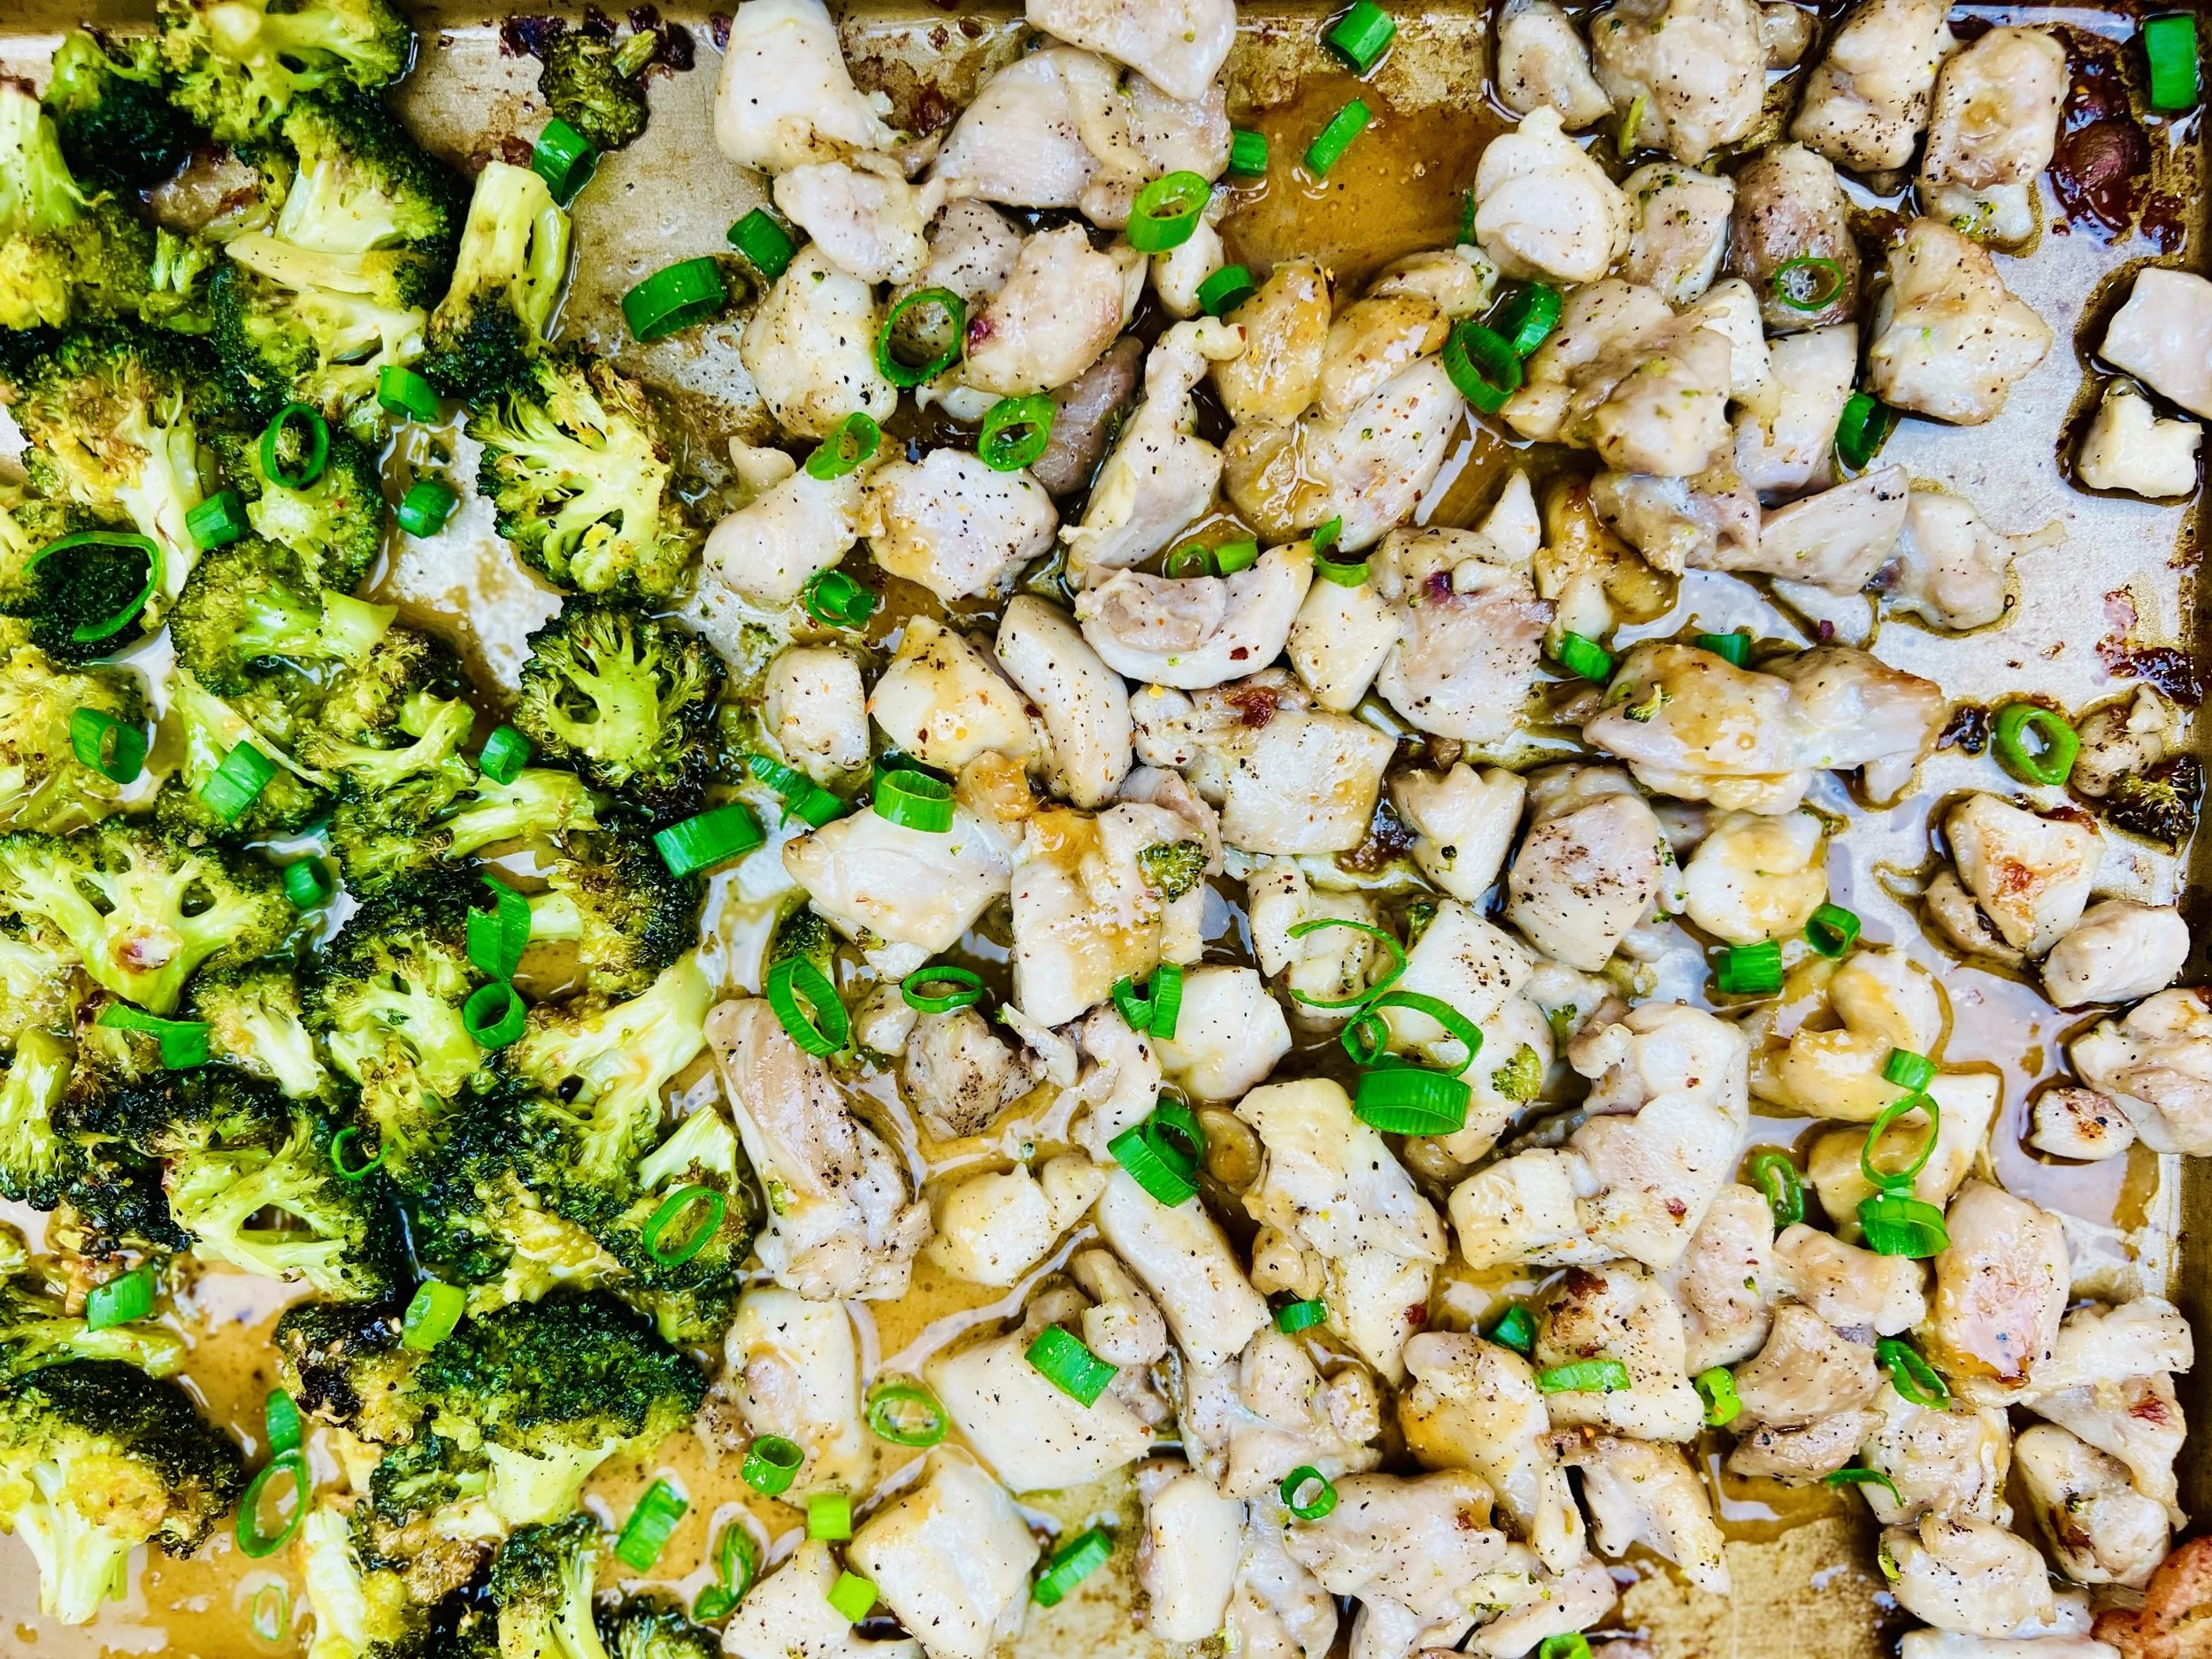
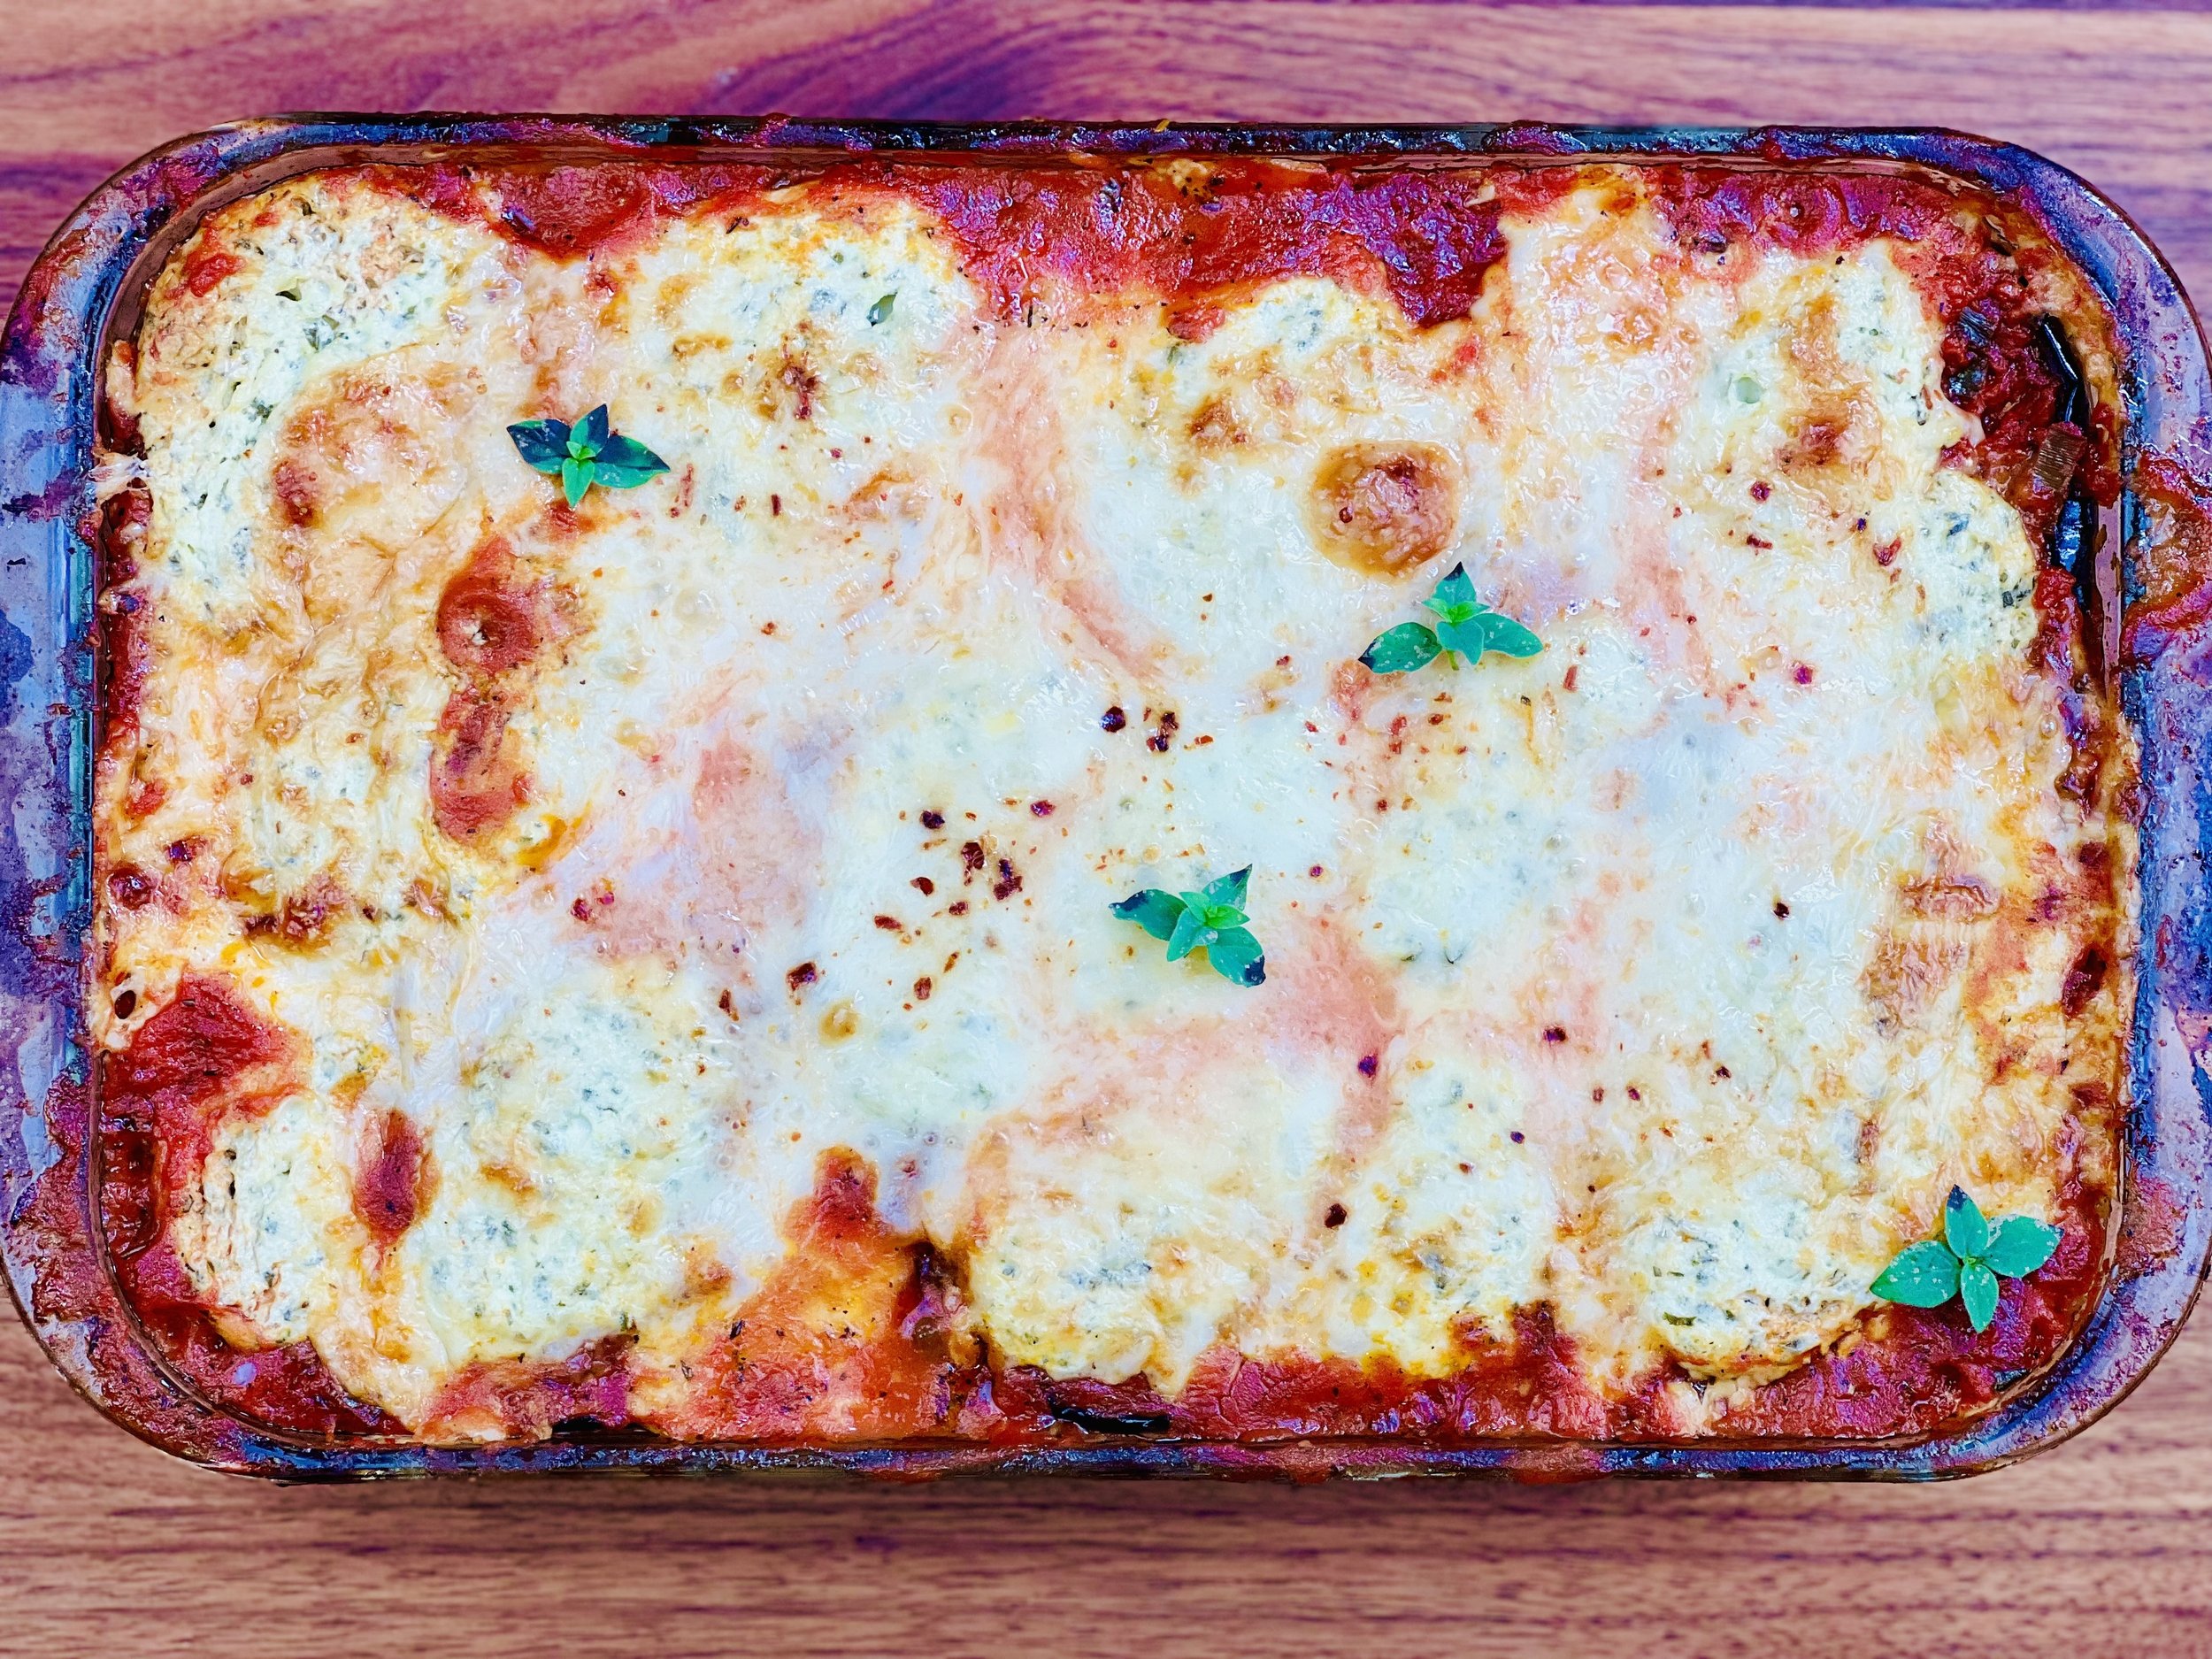
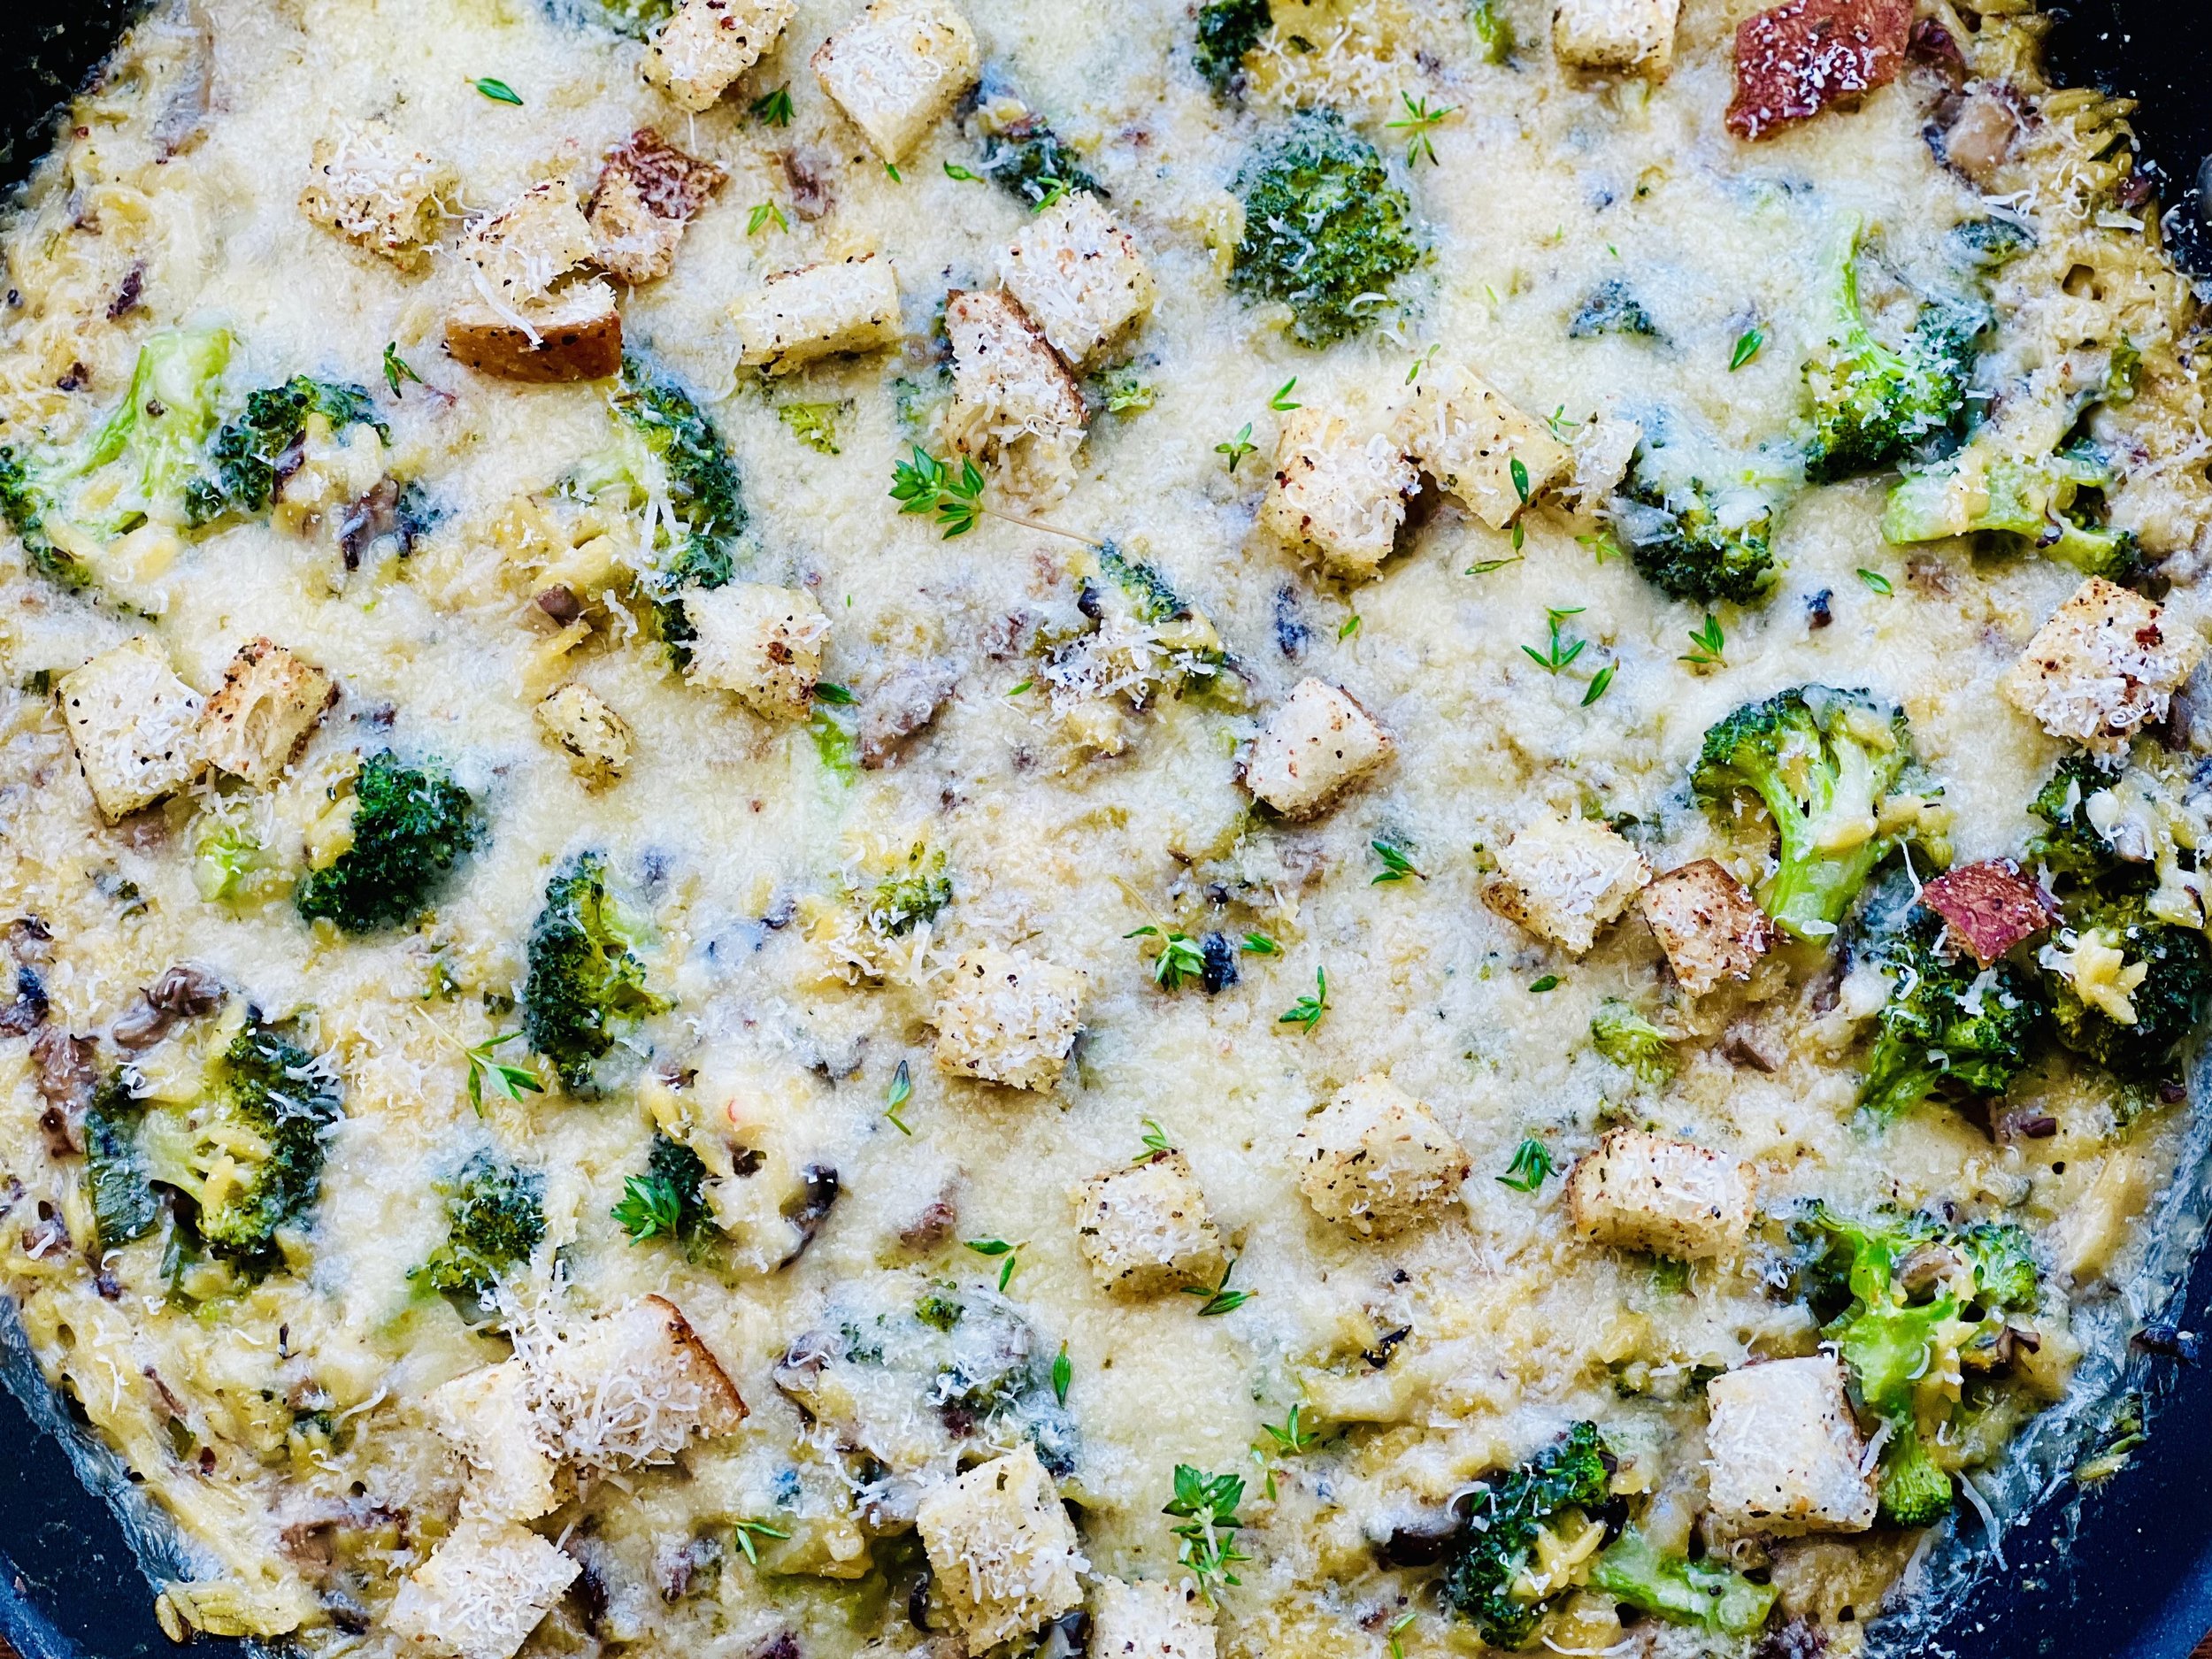
One Skillet Broccoli Cheese Pasta and Mushroom Bake (low FODMAP)
20 Minutes prep • 25 Minutes cook • Low FODMAP • Serves 4
20 Minutes prep • 25 Minutes cook • Low FODMAP • Serves 4 • Ok to make ahead: Steps 1-3
Orzo (gluten-free of course) is a versatile and delicious pasta that is perfect for this recipe. The broccoli and mushrooms become richly flavorful as they cook with the herbs and wine and then bake under a dusting of really good cheese. My low FODMAP garlic-parmesan croutons add a delightful crunch and flavor to this creamy and comforting dish. Leftovers heat up nicely so don’t be afraid to make a little extra so you can have it for lunch!
Ingredients
1 tablespoon garlic-infused olive oil
1 bunch green onions (green part only), chopped
1 cup finely chopped oyster mushrooms
3 tablespoons salted butter
12 ounces dry gluten-free orzo pasta
2 tablespoons fresh thyme leaves, plus more for serving
3 cups low FODMAP chicken broth (For Gourmend use code IBSGC15 for 15% discount)
1/2 cup dry white wine such, as Chardonnay, Pinot Grigio, or Sauvignon Blanc
4 cups broccoli (florets only), cut to bite size
1 bay leaf
1/2 teaspoon Gourmend garlic scape powder (use code IBSGC15 for 15% discount)
1/4 teaspoon cayenne pepper more or less to taste
Zest of one lemon
1/2 cup lactose-free whole milk
1 cup extra-sharp cheddar or gruyere cheese, grated
My low FODMAP garlic parmesan croutons (optional but very delicious)
1/2 cup parmesan cheese, grated
Additional fresh thyme and fresh basil, for serving
Directions
(1) Prepare: Preheat the oven to 425 degrees F. Make the garlic parmesan croutons from my recipe here (if using). Clean and chop the vegetables.
(2) Cook the veggies and pasta: Heat the olive oil in a large oven-safe skillet over medium heat. When the oil shimmers, add the green onions and cook for a couple of minutes. Stir in the mushrooms and season with salt and pepper. Cook until softened, 2-3 minutes. Add the butter, orzo, broccoli, and thyme, and cook for about 5 minutes. Add the wine, chicken broth, bay leaf, garlic scape powder, cayenne, and a large pinch each of salt and pepper. Simmer, uncovered, 8-10 minutes until the orzo is al dente, stirring often.
(3) Prepare to bake: Once the orzo is cooked, stir in the lemon zest, milk, and 1/2 cup of the cheddar. If needed, transfer the entire pasta mixture from the skillet to an oven-safe casserole dish. Sprinkle the remaining cheddar or gruyere cheese over the top of the pasta and vegetables.
Make-ahead note: At this point, you may let the baked broccoli pasta cool, then cover and keep in the fridge for up to 2 days. To bake, remove from the fridge and let sit at room temp while the oven preheats. Bake as directed.
(4) Bake: Sprinkle the sourdough croutons over the top of the cheddar cheese. Sprinkle with the parmesan. Transfer to the oven and bake 10-15 minutes, until the cheese is melted, and the croutons are brown but not burned.
(5) Plate and serve: Serve warm with fresh thyme and basil.
Eat and enjoy every bite because you can!
Recipe note: I use Diamond Crystal Kosher salt in all my recipes because it has a wonderful flat and crisp flake that tastes delicious. It is also the least salty salt available so you can use it more liberally as a seasoning than you can table salt or sea salt. If you use another type of salt, you may need to reduce the amount so it is not over-salted.
Link note: This post contains links for you to easily purchase items listed on the page. In some cases, we have provided a special discount code for IBS Game Changers so be sure to use it when you purchase an item to get the discount that has been arranged just for you! As an Amazon Associate, I earn a commission from qualifying Amazon purchases.
More Deliciously Low FODMAP™ main course recipes
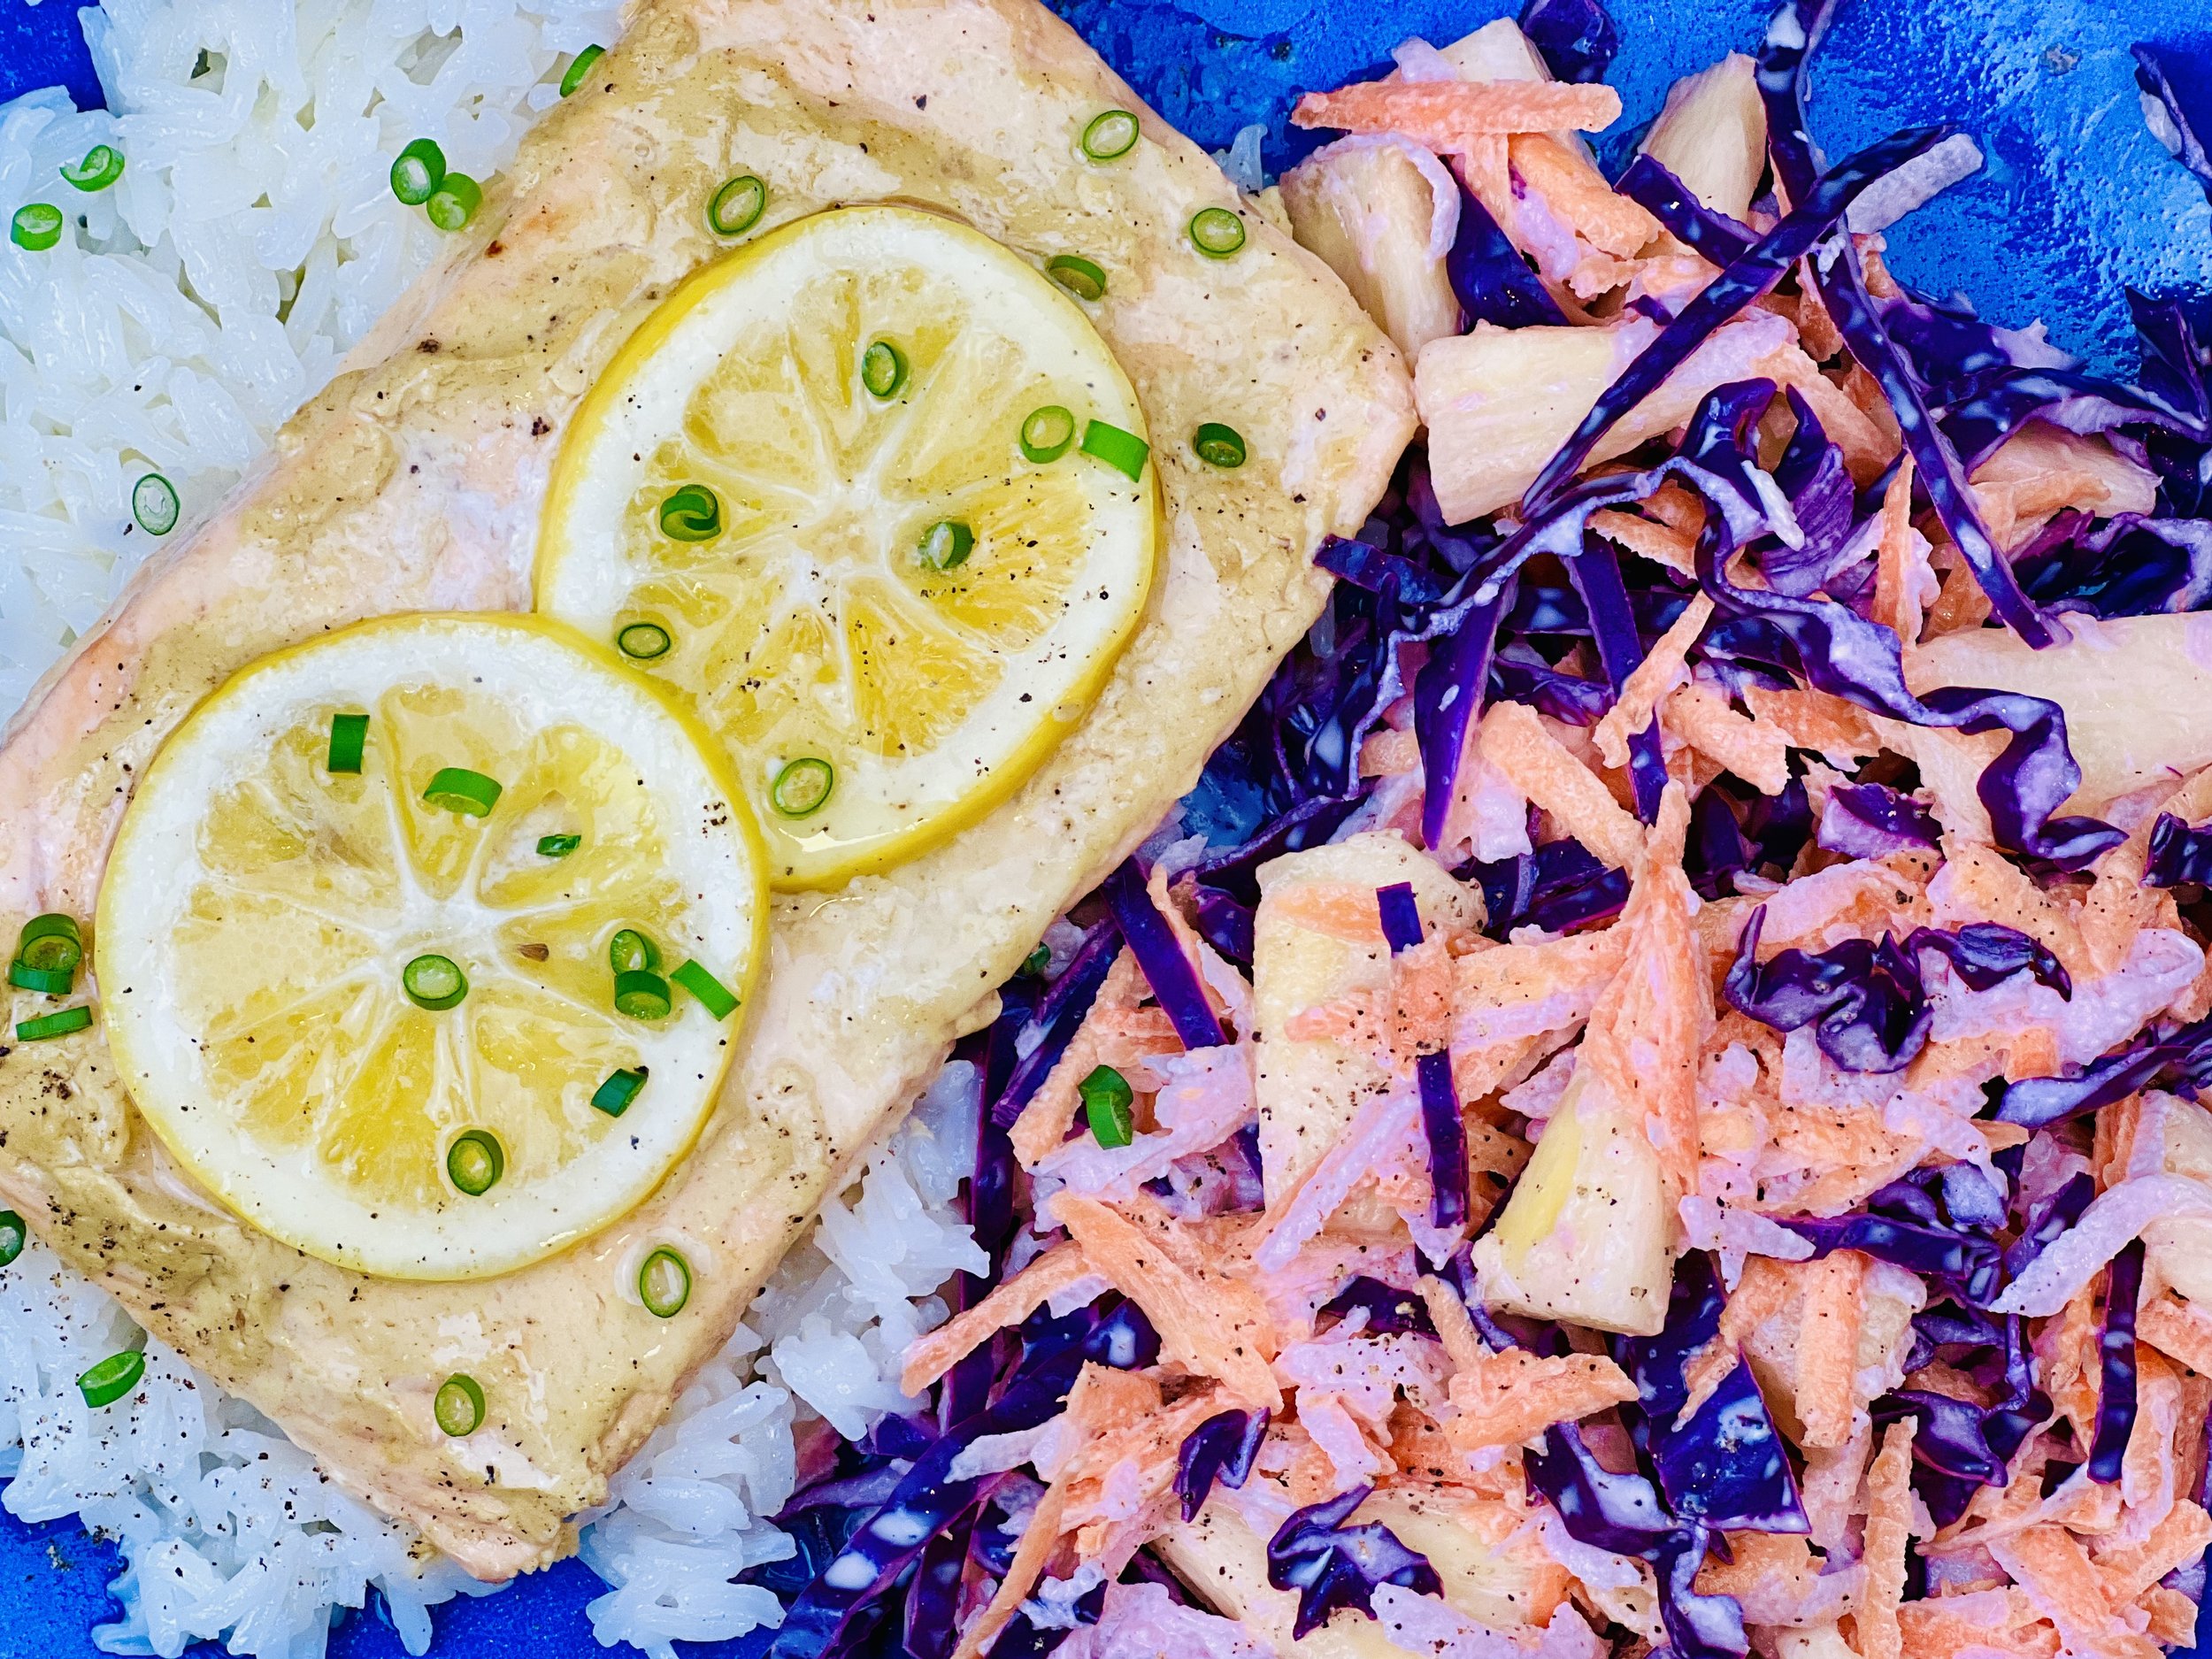
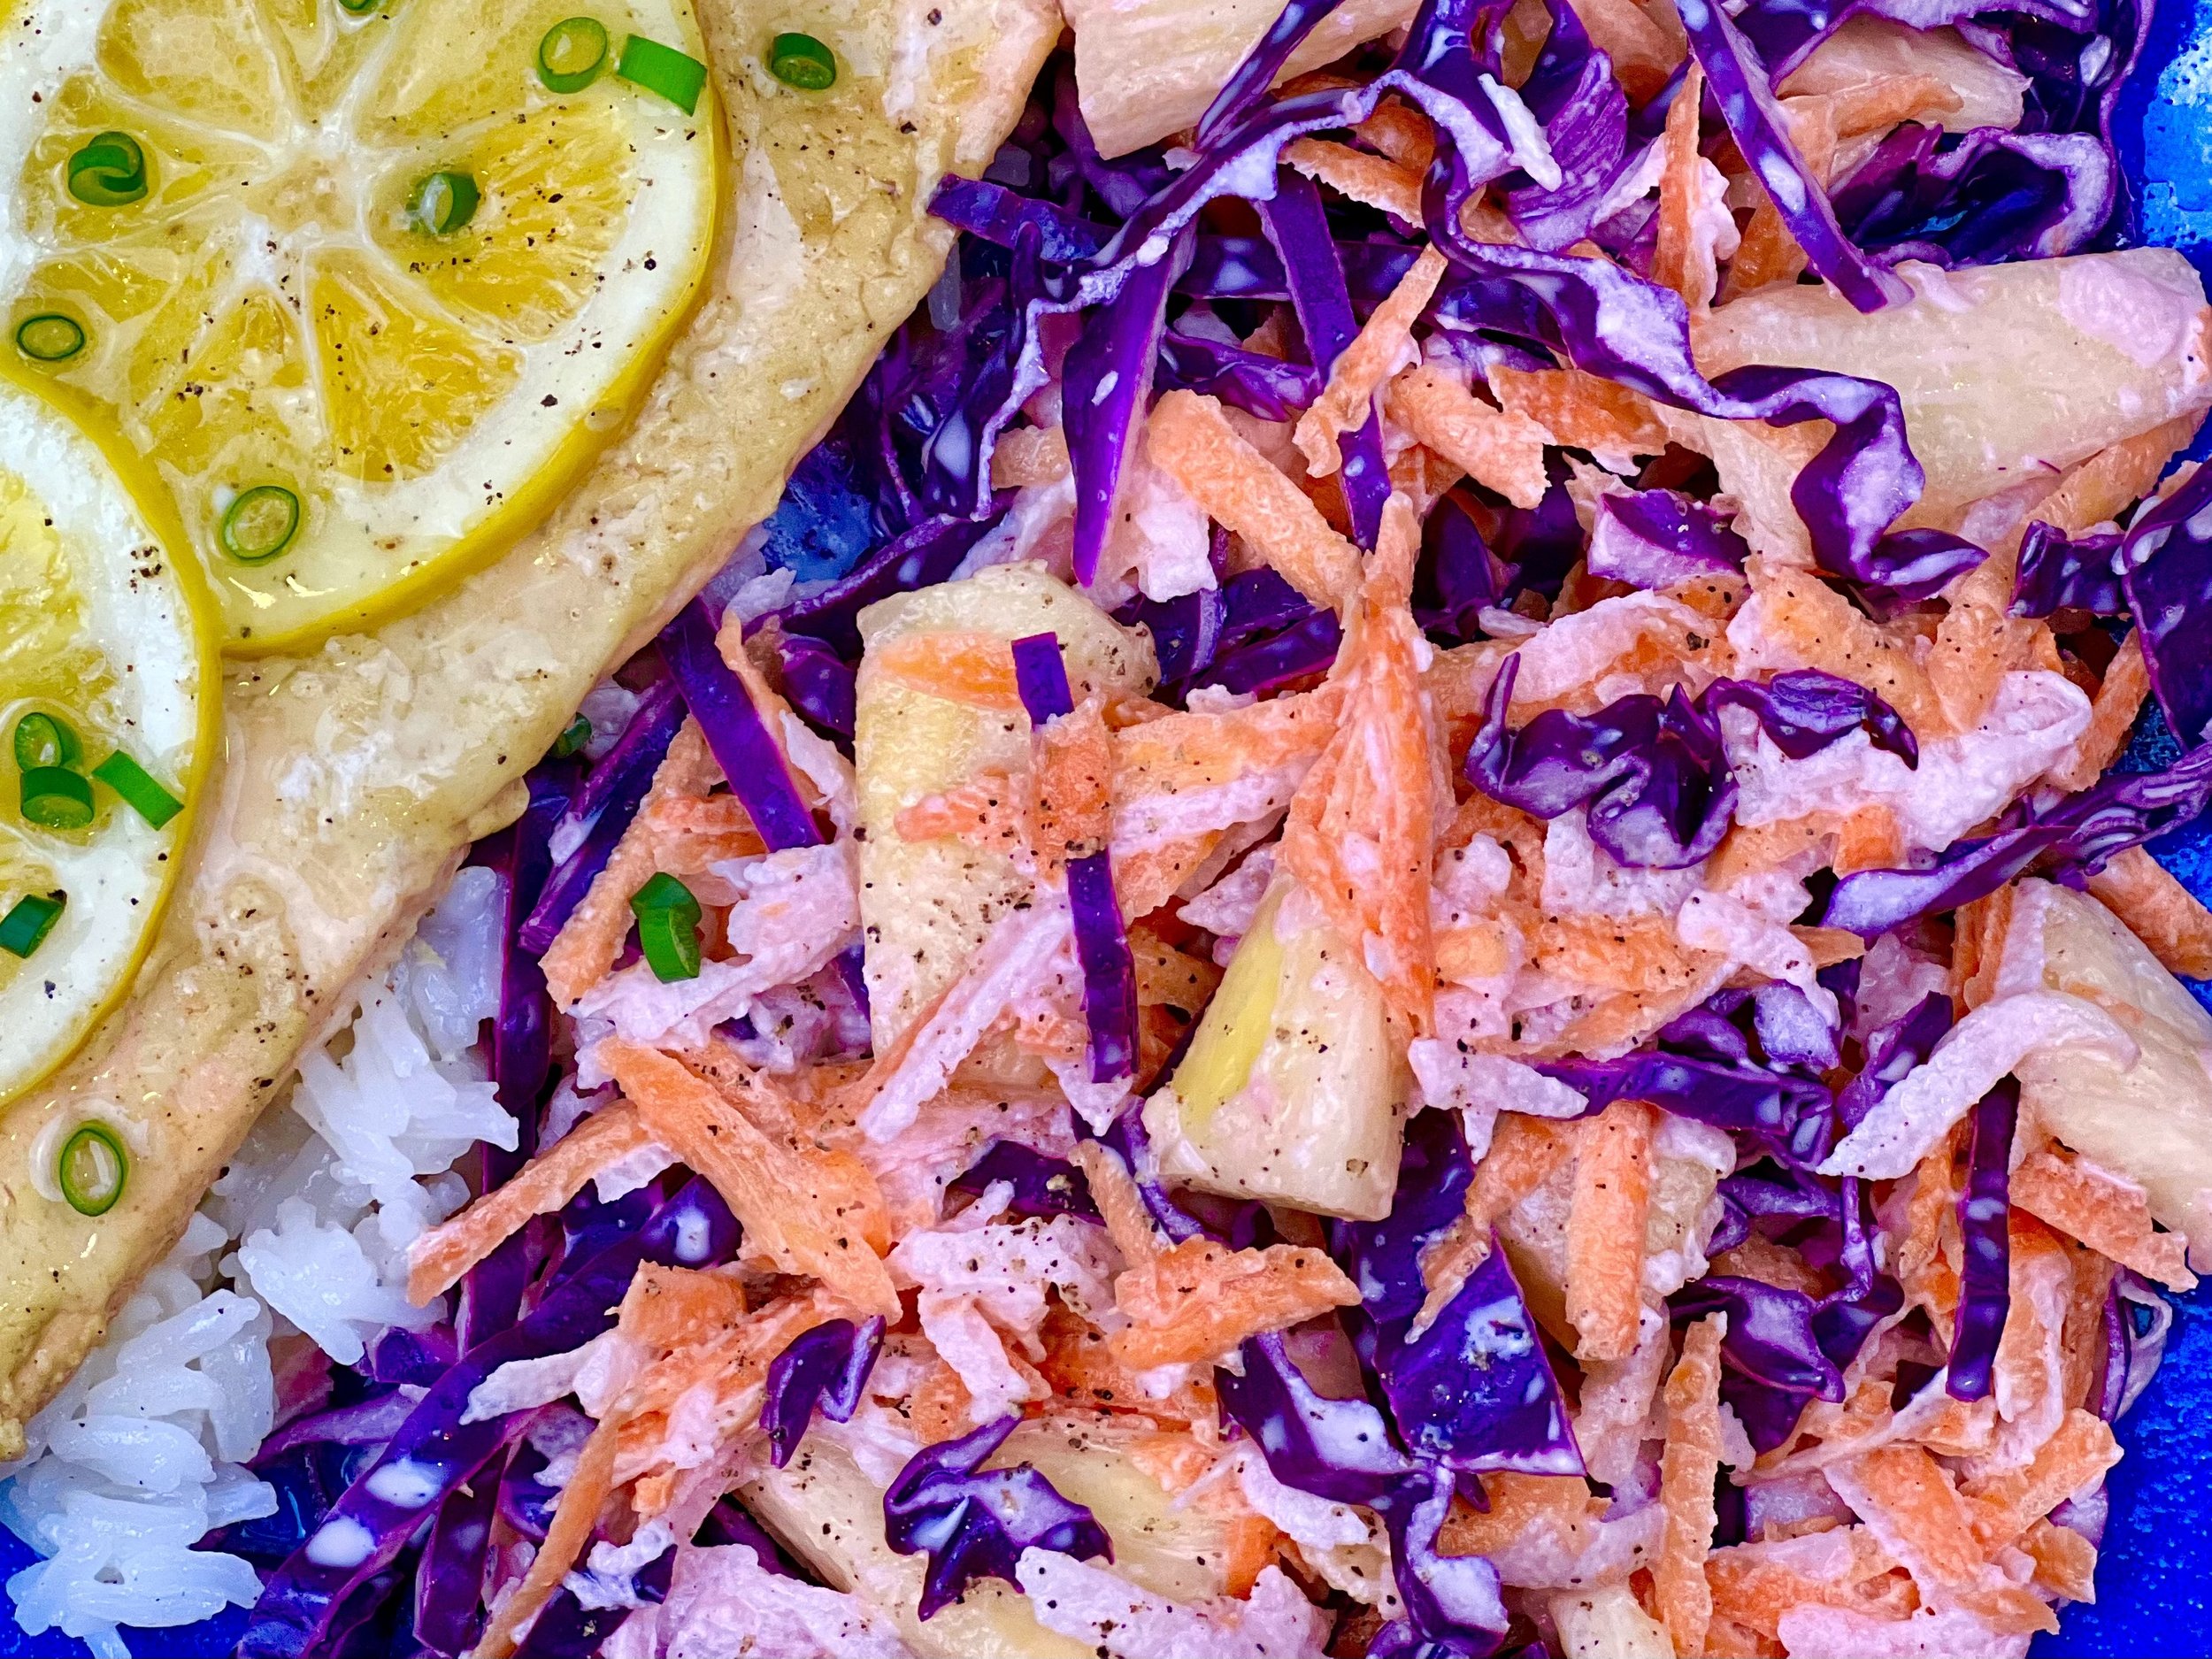
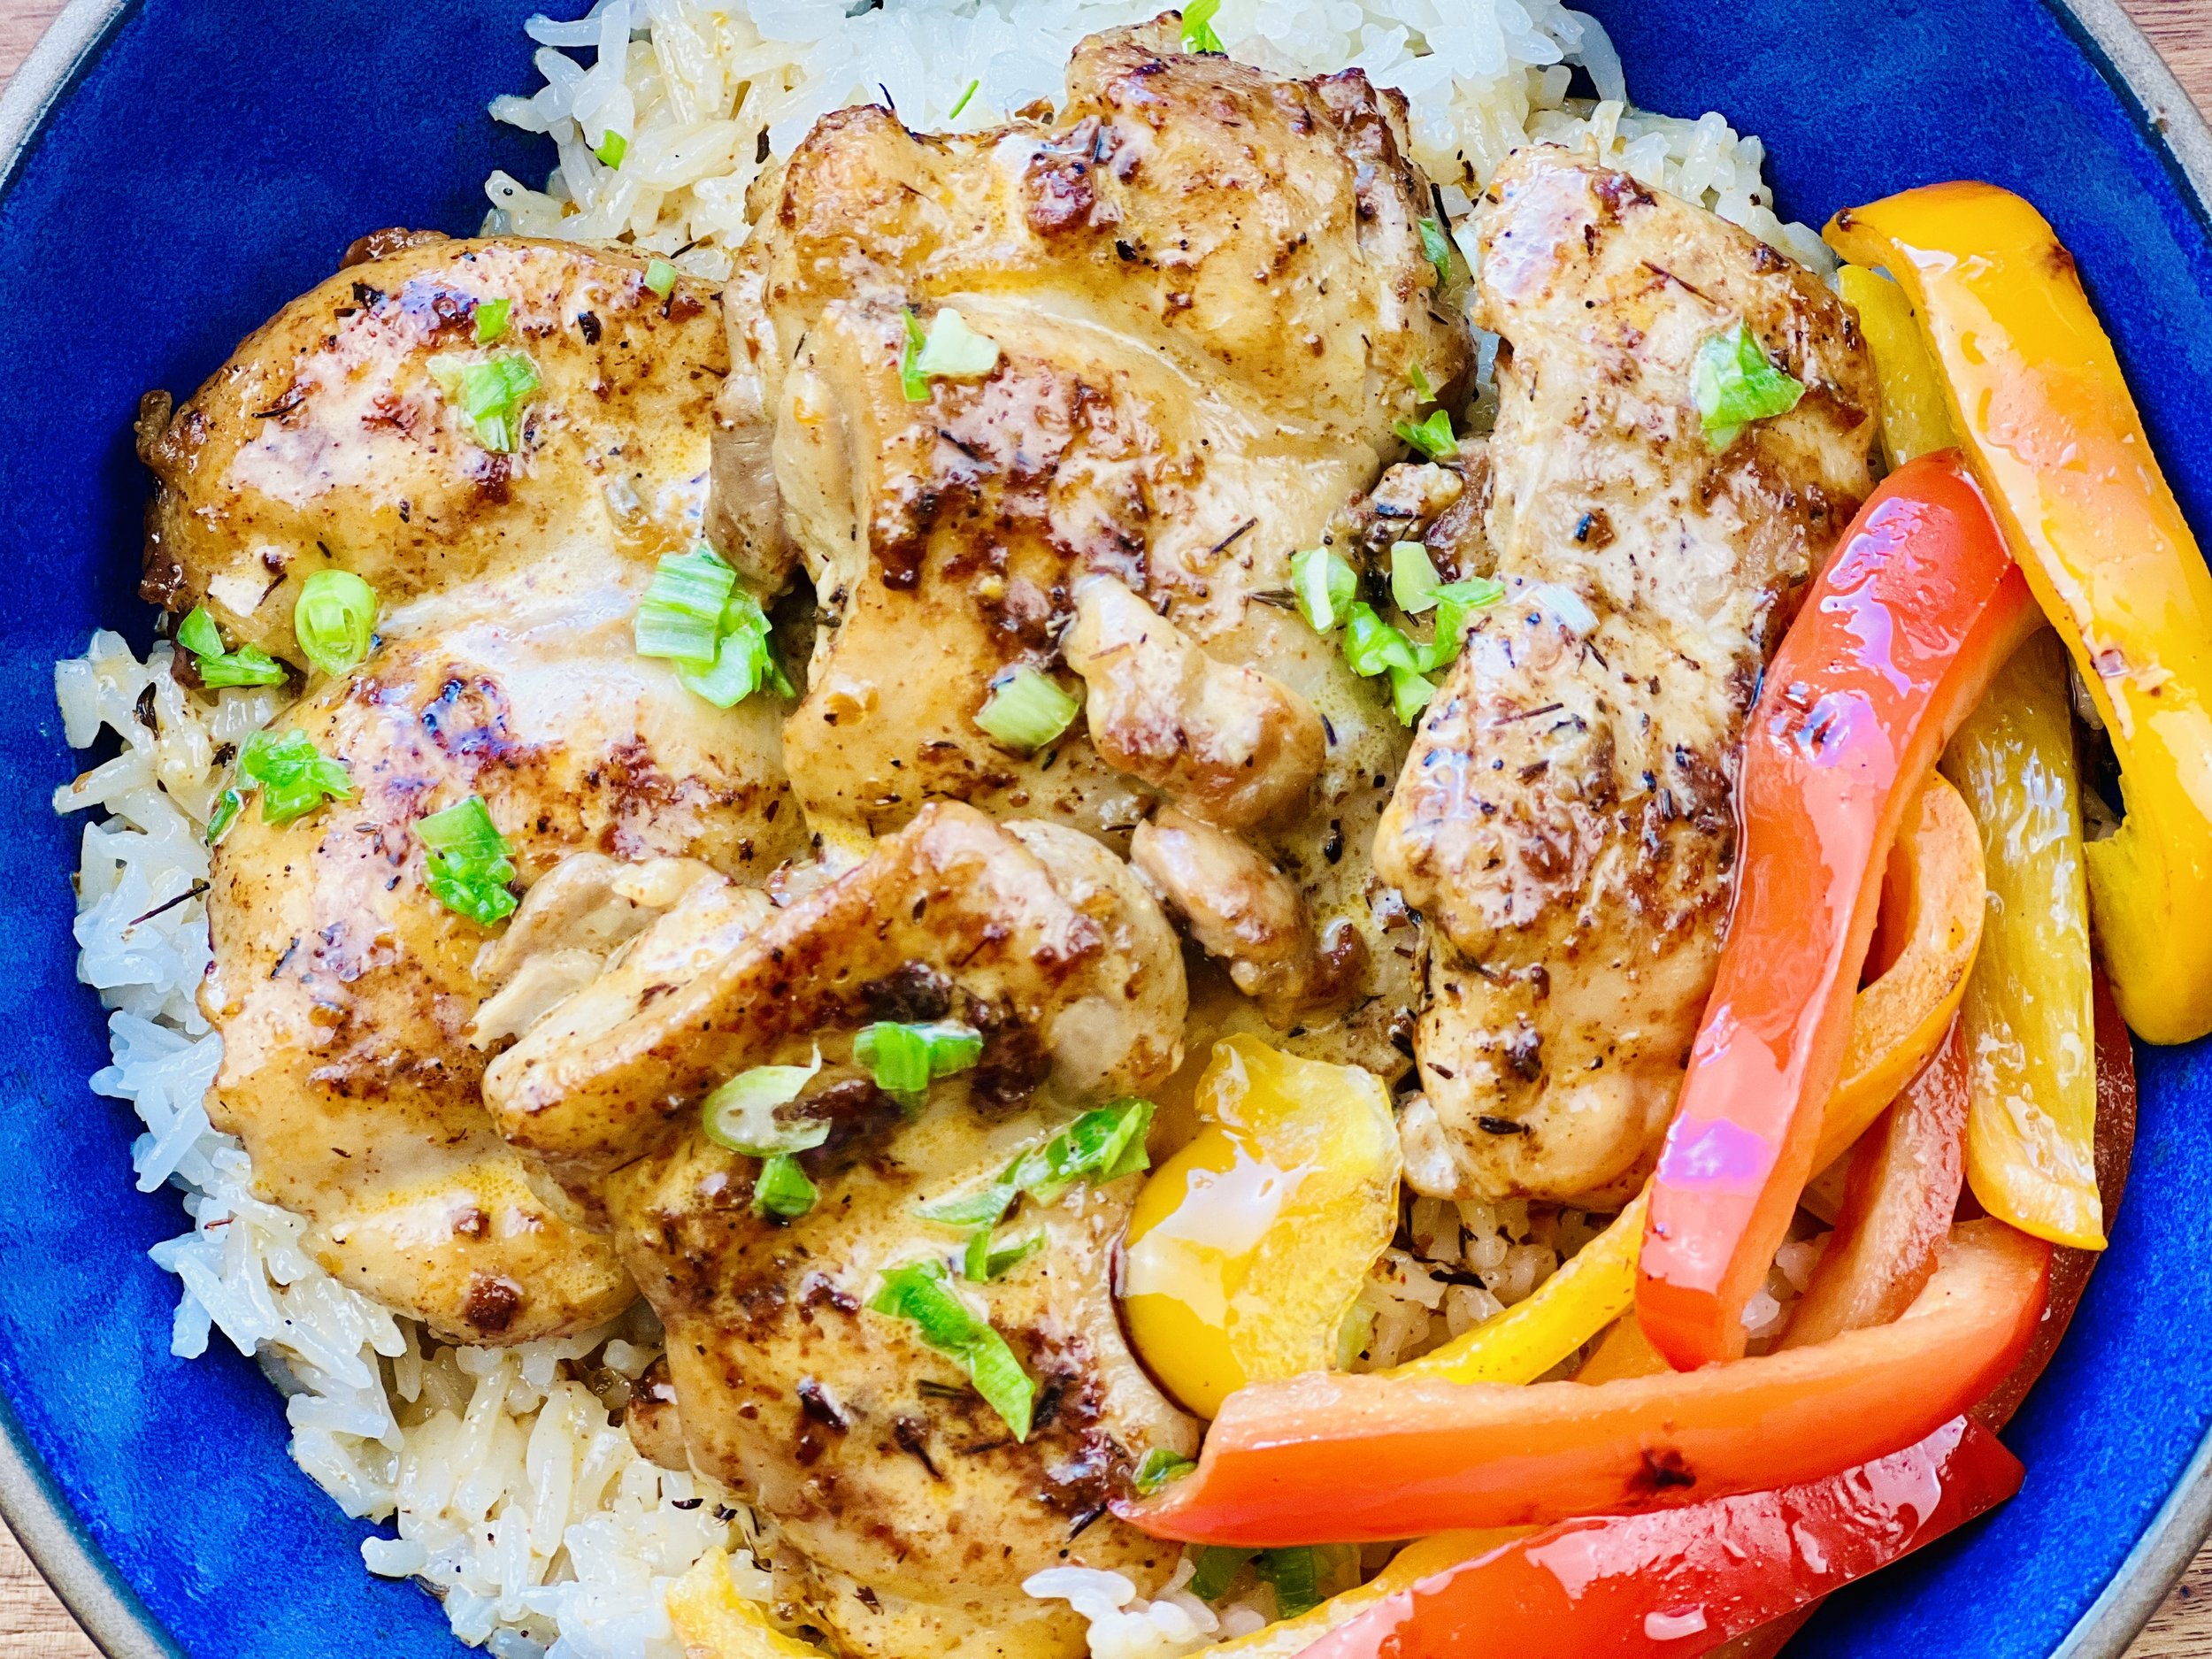
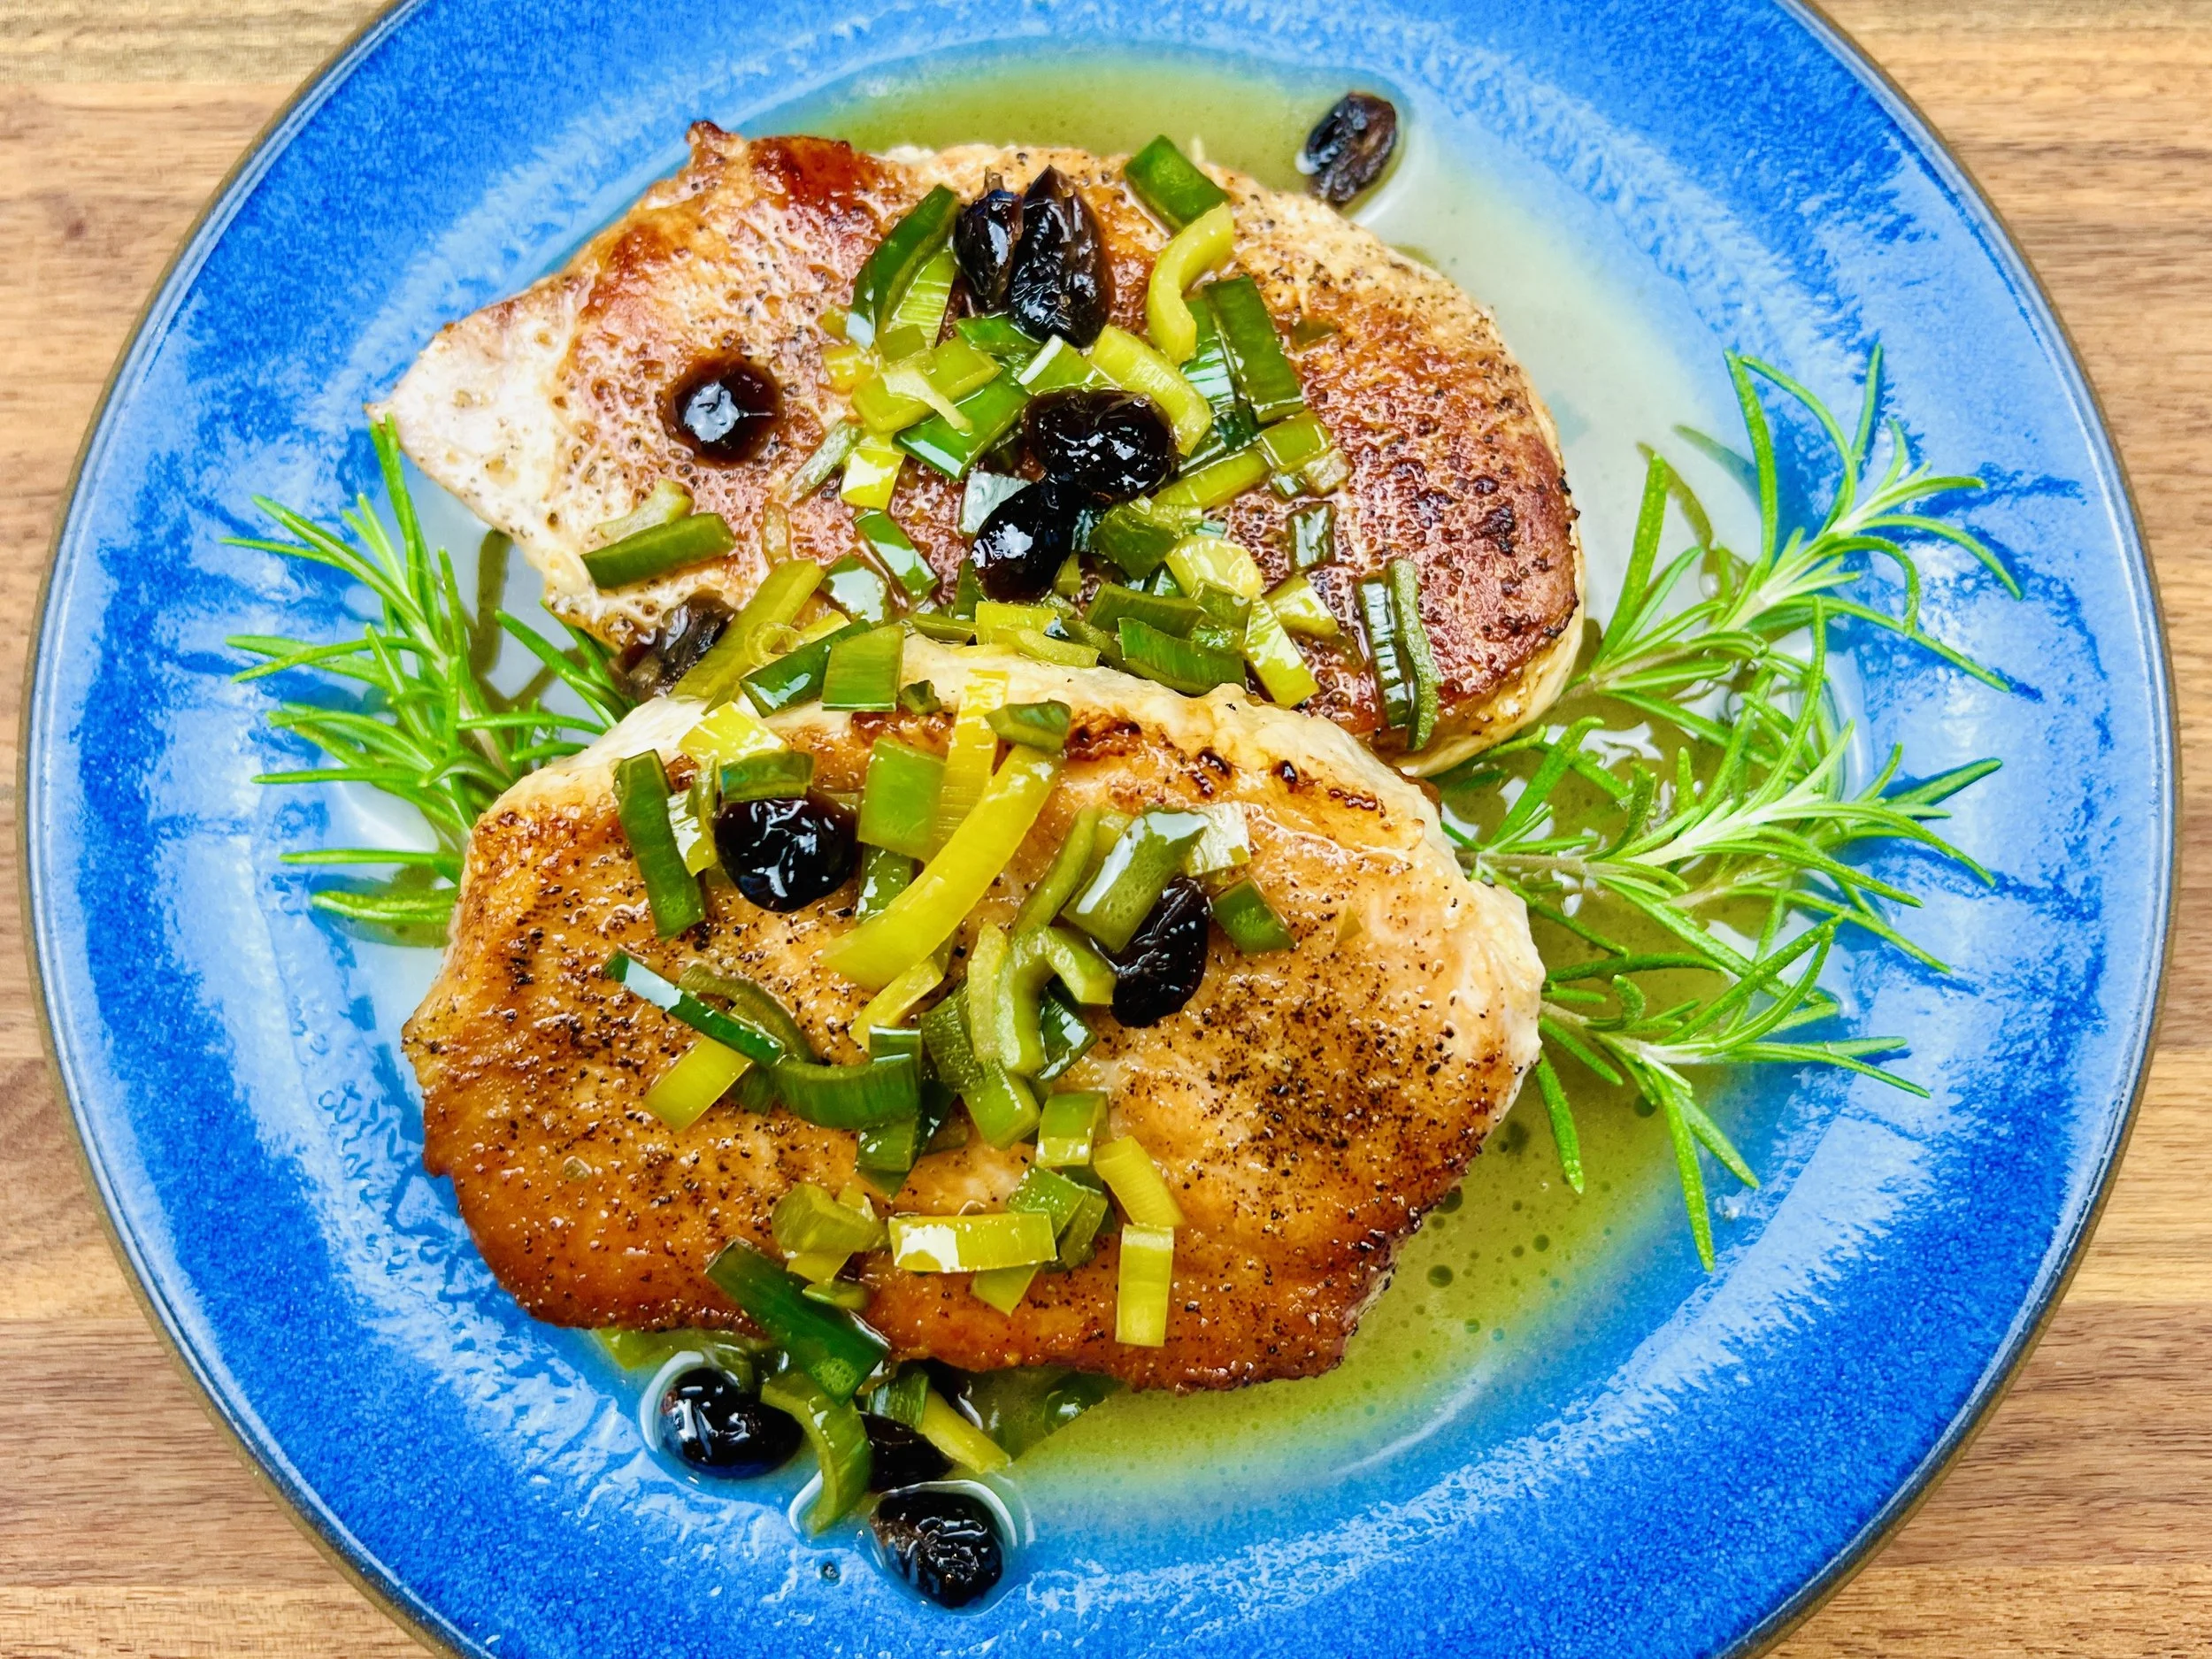
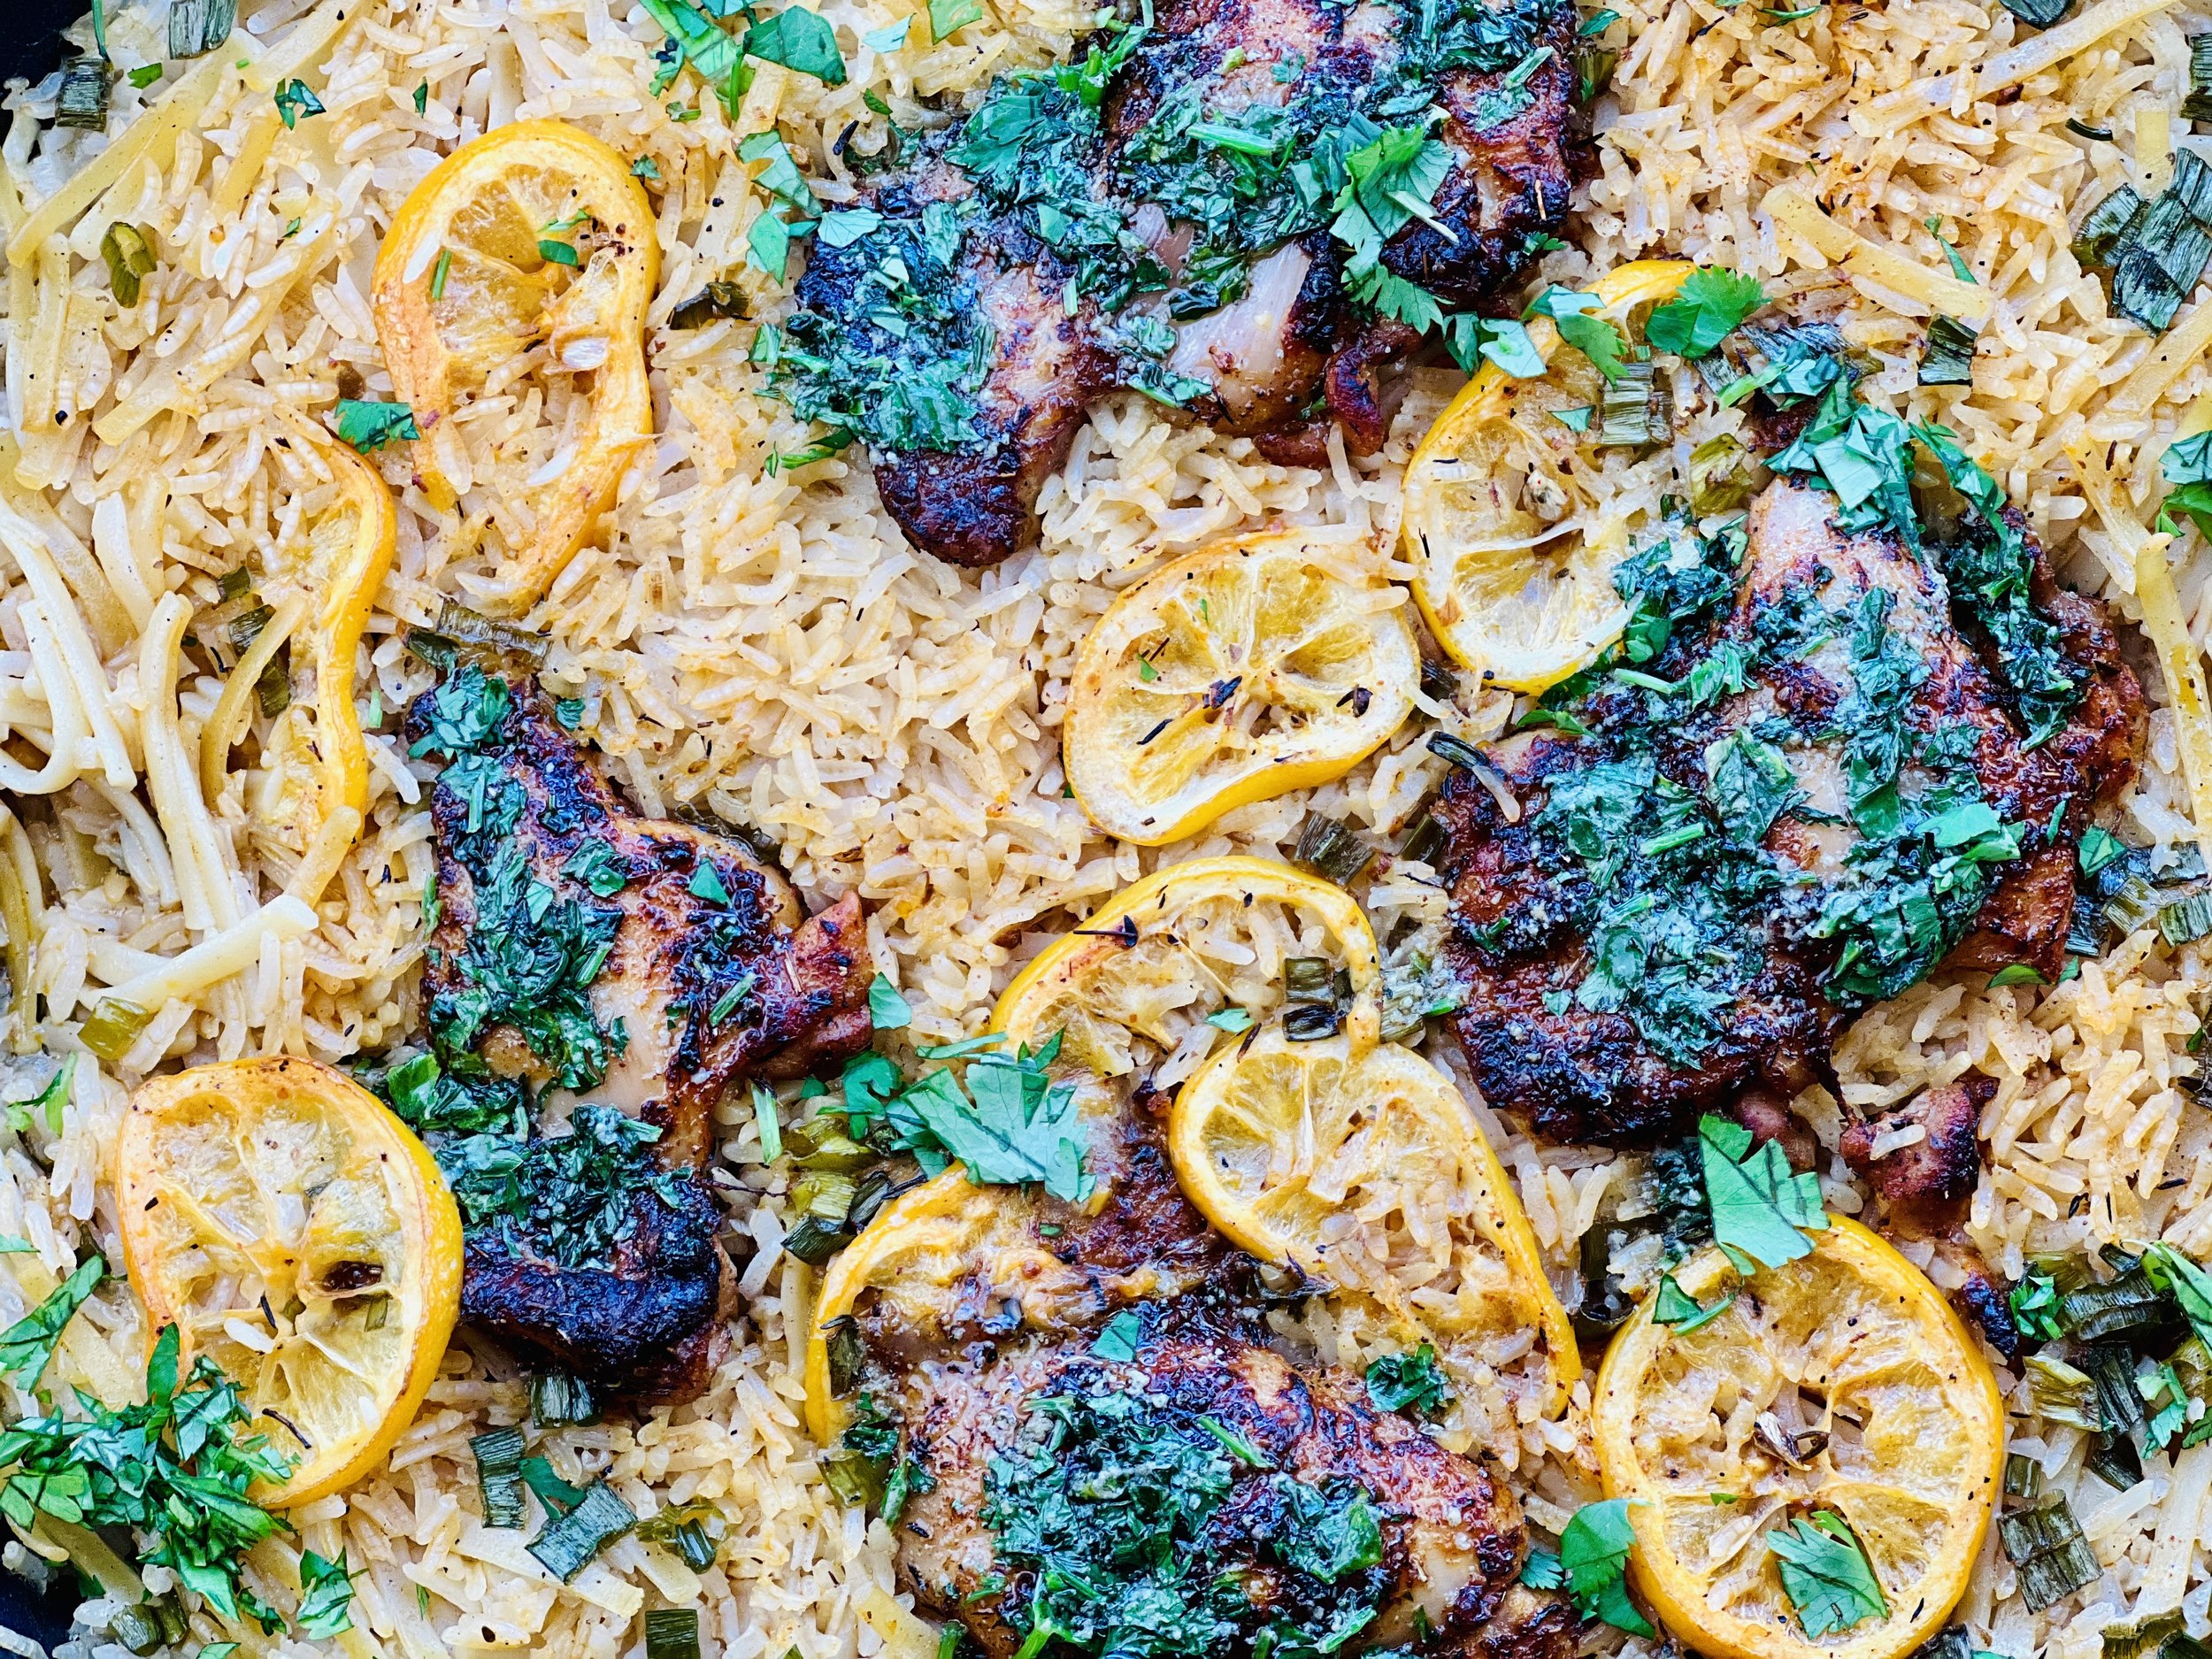
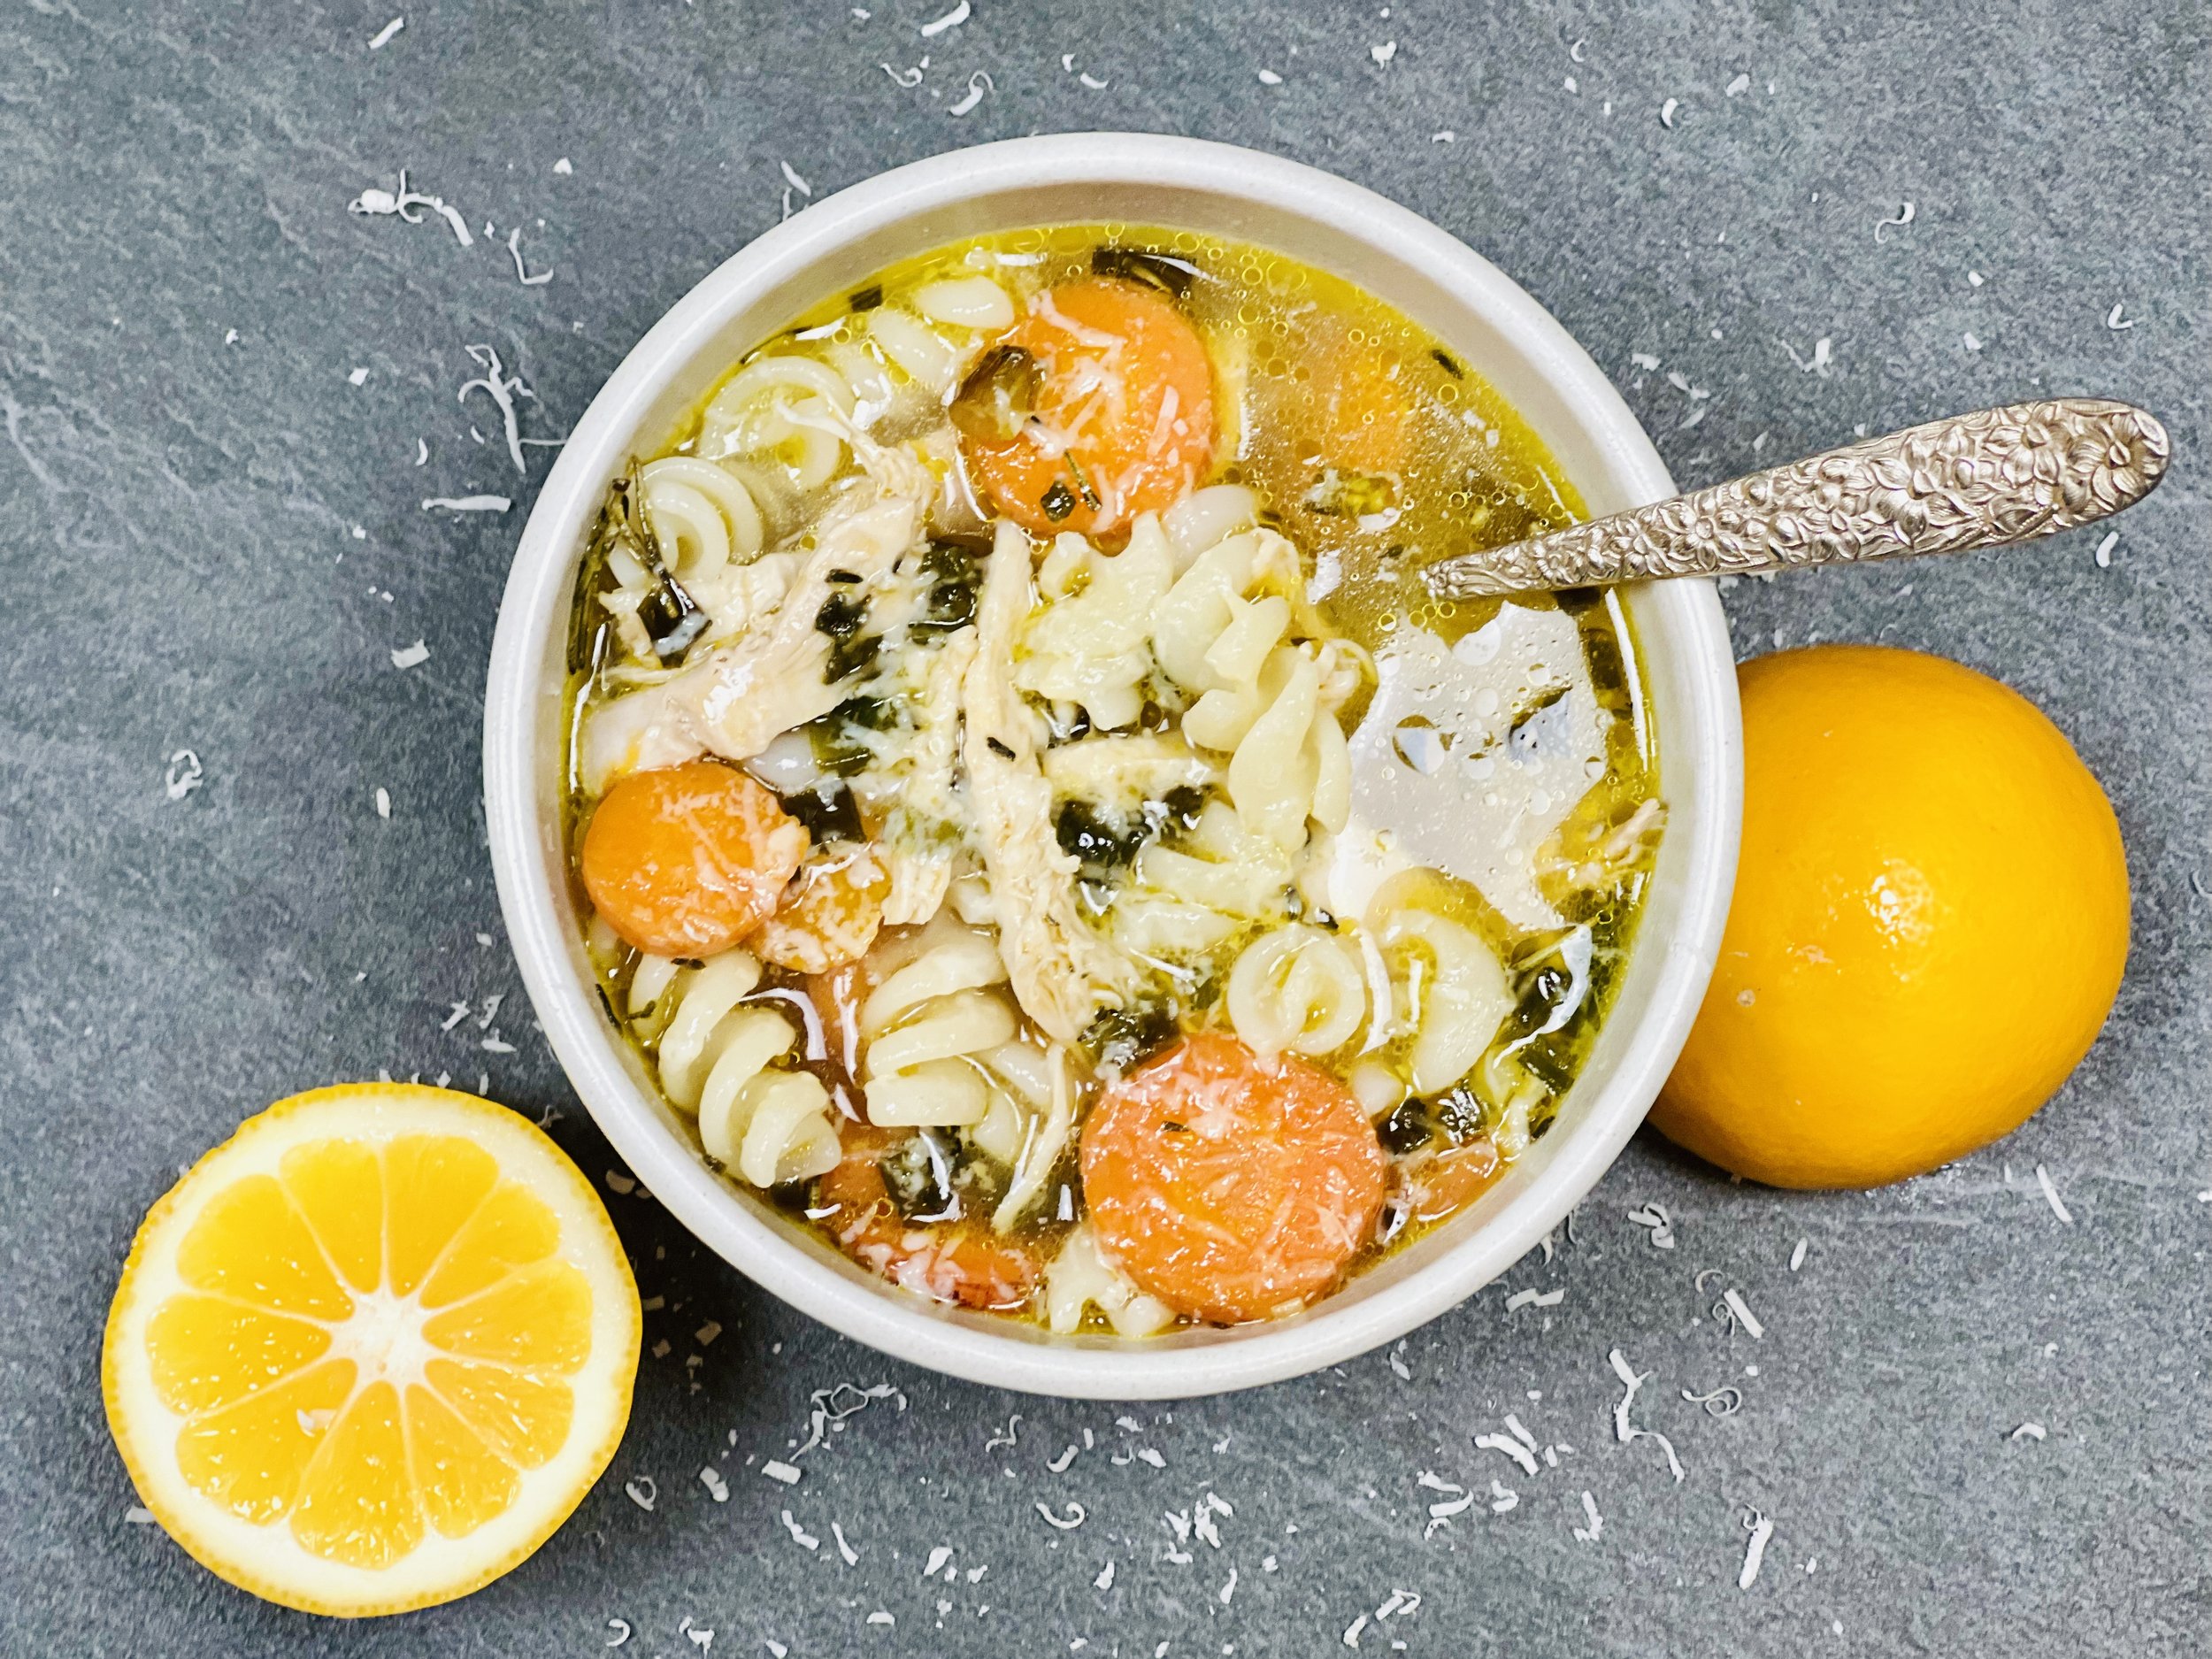
One Skillet Cajun Creole Lemon Chicken and Rice (low FODMAP)
10 Minutes prep • 30 Minutes cook • Low FODMAP • Gluten-free • Serves 4
10 Minutes prep • 30 Minutes cook • Low FODMAP • Gluten-free • Serves 4 • Ok to make ahead: Step 1
Creamy rice and pasta make a delicious foundation for tender and delicious chicken in this recipe. The fresh herbs and lemon add extra flavor and the buttery sauce makes it melt in your mouth. Boneless chicken thighs are perfectly suited for this recipe, but you can use chicken breasts if you prefer. It’s easy to double or triple so you can make it for company. And, since it’s all made in one pan, cleanup is easy too. Leftovers heat up perfectly in a covered skillet so don’t hesitate to make extra. You’ll be glad you did!
Ingredients
2 tablespoons garlic-infused olive oil
1 1/2 pounds boneless, skinless chicken thighs (or breasts if you prefer)
2 tablespoons Smoke N Sanity Cajun Creole seasoning (use code IBSGC10 for a 10% discount)
6 tablespoons salted butter, divided
1 lemon, sliced
1 lemon, cut into wedges
1/2 cup dry broken gluten-free spaghetti or linguini* (I used Rummo Gluten-Free Linguini)
1 cup long-grain rice
1 bunch green onions (green part only), chopped
3-4 cups Gourmend low FODMAP chicken broth (use code IBSGC15 for 15% discount)
1/2 cup fresh tender herbs, chopped (I used cilantro and flat-leaf parsley)
1 teaspoon Gourmend Garlic Chive powder (use code IBSGC15 for 15% discount)
1 teaspoon Smoke N Sanity Essence of Garlic Salt (use code IBSGC10 for 10% discount)
Directions
(1) Prepare the chicken: This step is optional but results in a more flavorful and tender chicken. Remove chicken from the package and put it in one layer on a rimmed plate or baking dish. Season both sides of each piece lightly with Kosher salt. Cover the dish with plastic wrap and refrigerate until ready to use, ideally about 4 hours before cooking or overnight.
(2) Prepare: Preheat the oven to 425 degrees F. Put the chicken in a large oven-safe skillet (without turning the stove on). Drizzle with the garlic-infused olive oil and sprinkle with cajun seasoning. Toss to coat. Remove the chicken. Heat the pan over medium-high heat. Add another tablespoon of garlic-infused olive oil to the pan.
(3) Sear the chicken: Once hot, add the chicken back to the pan and sear on both sides until golden, 3-5 minutes. During the last 1 - 2 minutes of cooking, add 1 tablespoon of butter and the lemon slices to the skillet. After a minute, remove the chicken and lemon slices from the pan and set aside on a plate.
(4) Cook the rice and pasta: Add the rice and pasta to the hot pan. Stir to coat the rice and pasta in the oil and seasonings in the pan and cook until the rice is toasted, about 1 minute. Add the green onions and continue to cook another minute, then pour in 3 cups of chicken broth. Season with salt and pepper. Bring to a boil.
(5) Add the chicken back to the pan: Slide the chicken, lemon slices, and any juices left on the plate back into the pan. Bring to a boil. Cover the pan and turn the heat down to the lowest setting possible. Cook for about 10 minutes until most of the liquid has cooked into the rice, but not all of it. If it seems dry, add another 1/2 cup of broth. Put the pan in the oven and bake, uncovered, for 10-15 minutes or until the chicken is cooked through and the rice is tender (if using chicken breasts, this may only take 5 - 10 minutes). You can add another 1/2 cup of broth during this cook too, if the rice is not tender and the mixture seems dry. (I used a total of 4 cups of broth in this manner when I prepared this dish and it was perfect.)
(6) Make the herbed butter: Meanwhile, in a small skillet, melt 5 tablespoons of butter. Add the Gourmend Garlic Chive powder and the Smoke N Sanity Essence of Garlic Salt and stir to combine. Cook until the butter is starting to brown and froth. Remove the pan from the heat and stir in the chopped fresh herbs.
(7) Plate and serve: Serve the chicken and rice with a few spoons of the herbed butter drizzled over the top and a squeeze of lemon juice.
Eat and enjoy every bite because you can!
Recipe notes: *It’s OK to swap the pasta for an additional 1/2 cup of rice if you prefer a no-flour version of this recipe.
I use Diamond Crystal Kosher salt in all my recipes because it has a wonderful flat and crisp flake that tastes delicious. It is also the least salty salt available so you can use it more liberally as a seasoning than you can table salt or sea salt. If you use another type of salt, you may need to reduce the amount so it is not over-salted.
Link note: This post contains links for you to easily purchase items listed on the page. In some cases, we have provided a special discount code for IBS Game Changers so be sure to use it when you purchase an item to get the discount that has been arranged just for you! As an Amazon Associate, I earn a commission from qualifying Amazon purchases.
More Deliciously Low FODMAP™ main course recipes
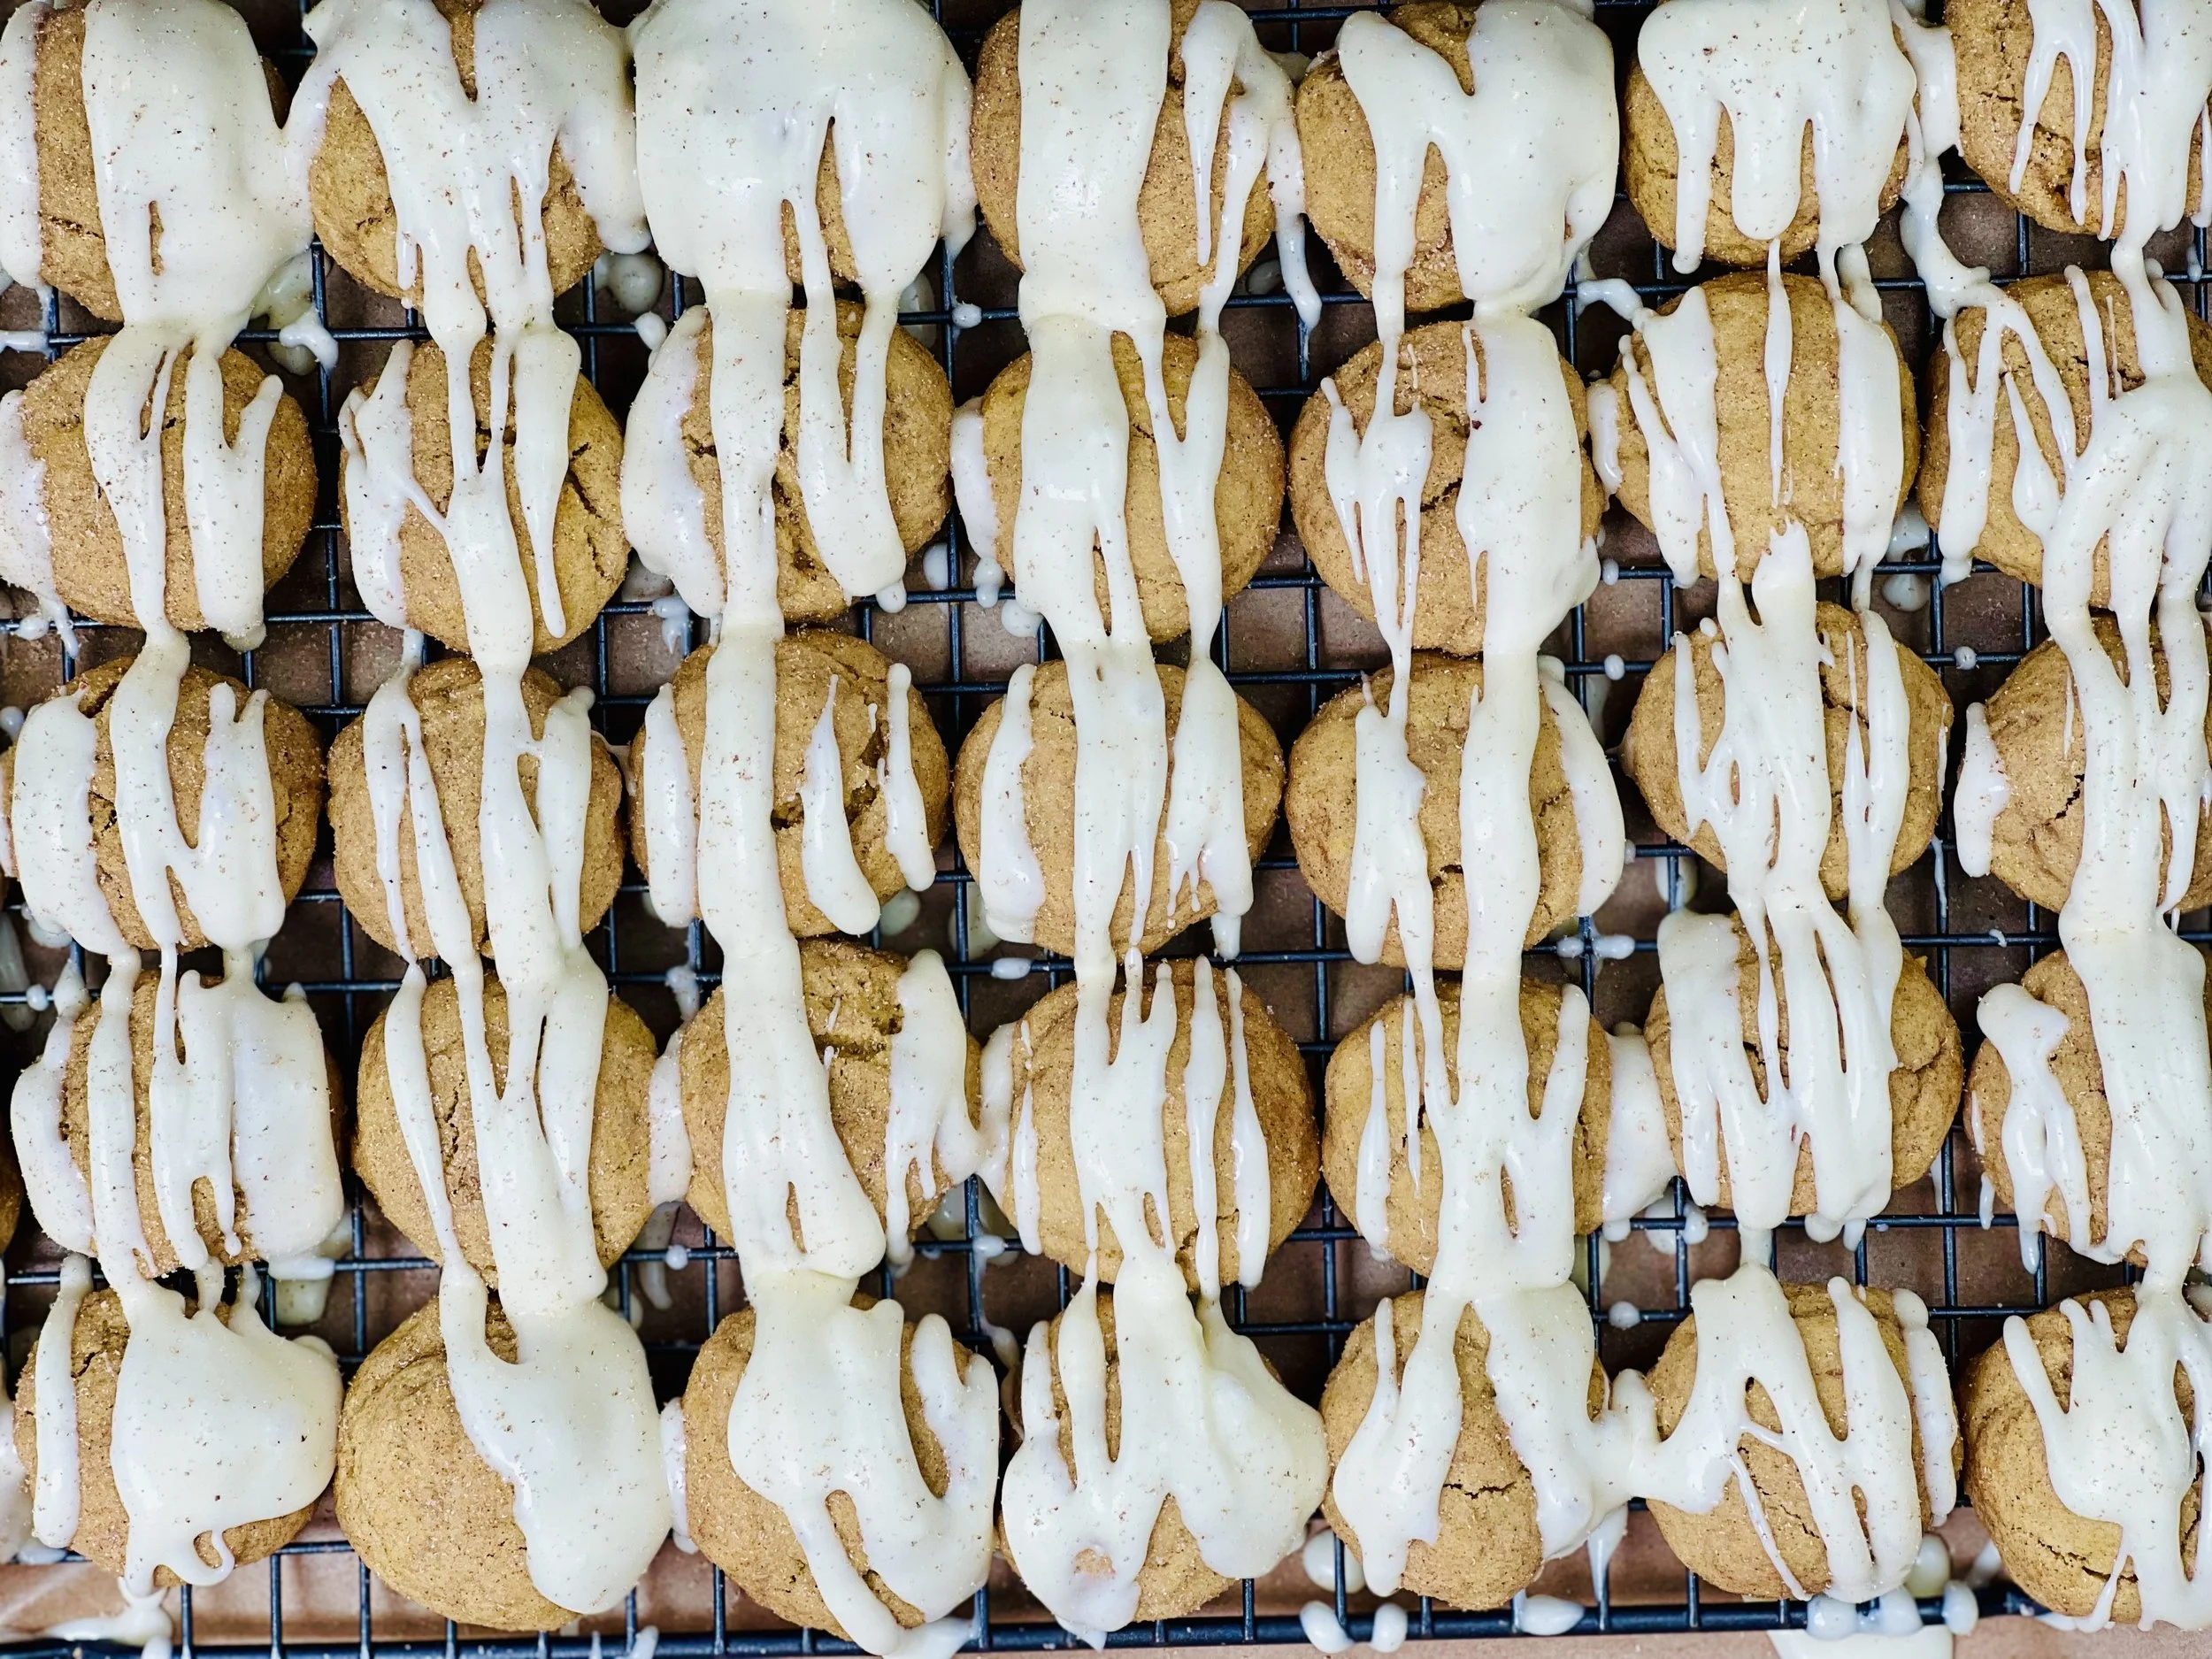
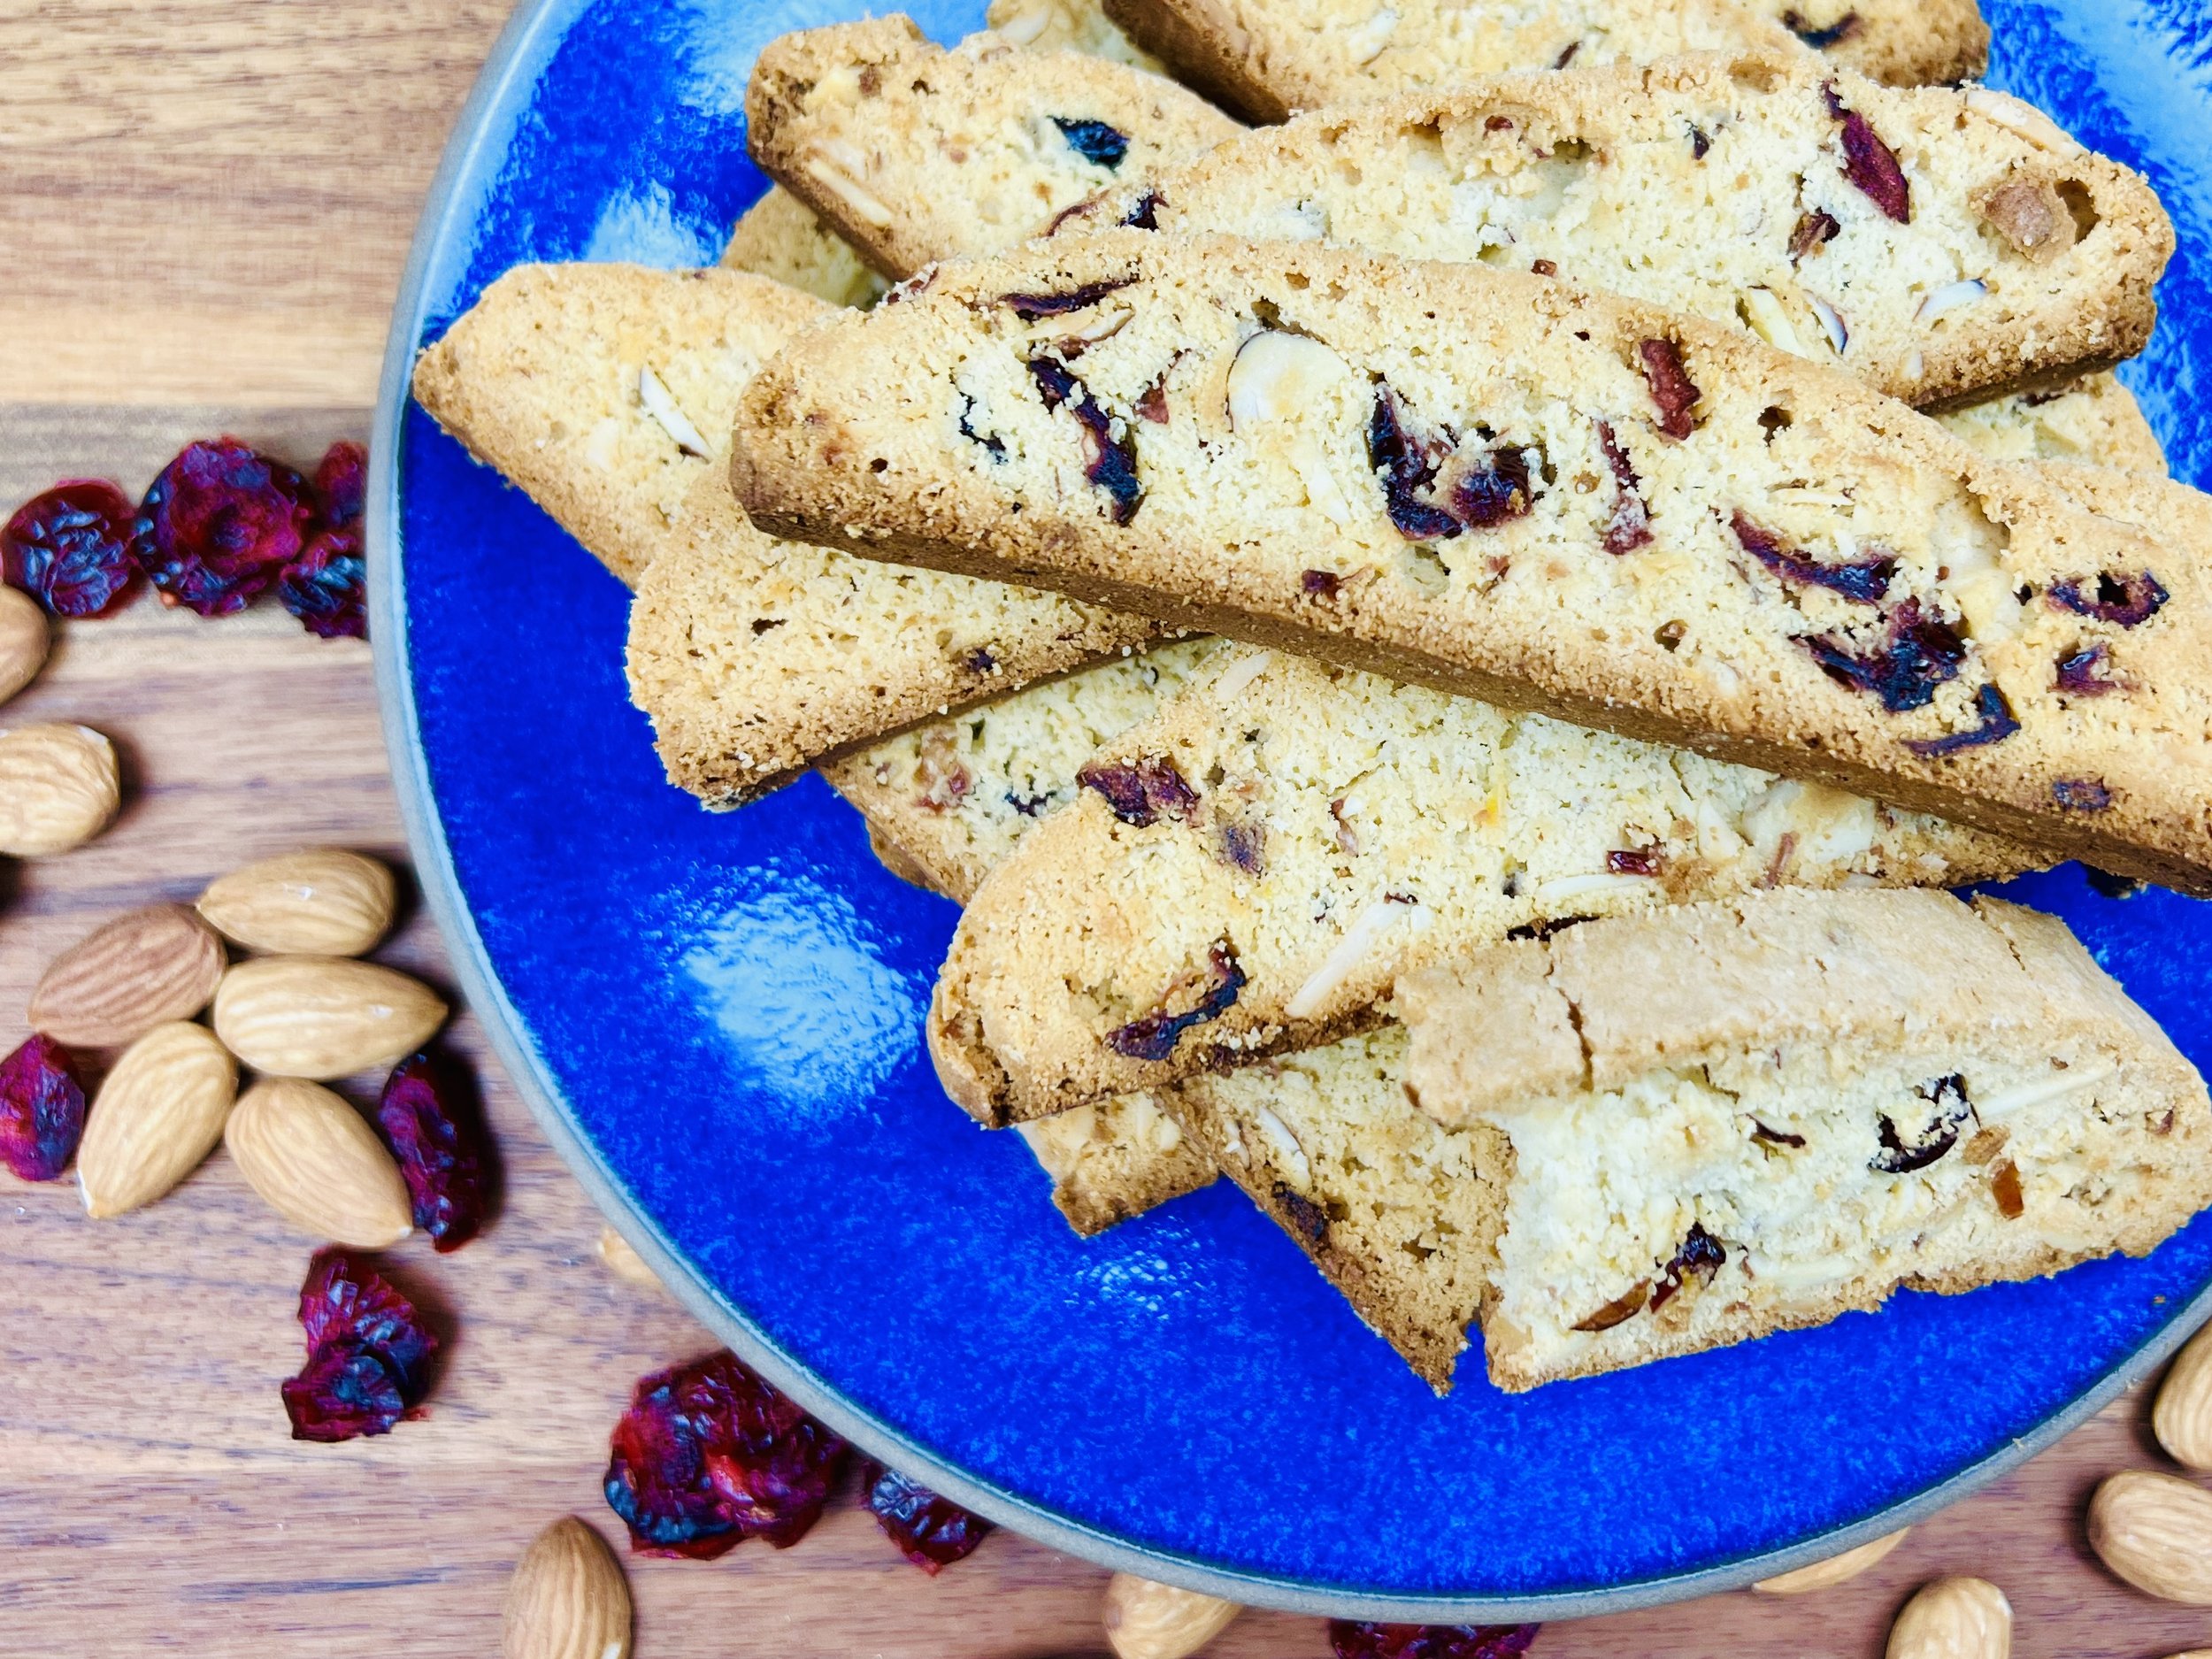
Bourbon Butter Pecan Chocolate Chip Cookies (low FODMAP)
25 Minutes prep • 16 Minutes cook • Low FODMAP • Gluten-free • Makes 24
25 Minutes prep • 16 Minutes cook • Low FODMAP • Gluten-free • Makes 24 • Ok to make ahead: Steps 1-3
These are my new favorite chocolate chip cookies made with my new favorite gluten-free baking flour! They are melt in your mouth tender, with a sprinkling of toasted pecans and a generous volume of semi-sweet chocolate. And, they are simply delicious. The combination of the browned butter, toasted pecans, chocolate, and a sprinkle of salt, complement each other perfectly. You really need to give these cookies a try!
This is an exclusive recipe just for recipe club members.
In addition to the two free recipes I create each week I am creating and delivering one very special recipe just for my recipe club members. If you’re not yet a member, I encourage you to join! Membership in the club includes access to the complete archive of recipes with filters so it can become your virtual low FODMAP cookbook plus, I am creating and delivering one special NEW recipe every week ONLY for recipe club members. And, for my true fans, I’ll be sharing behind-the-scenes content, and updates on the progress of the new cookbook.
Your membership in the club helps me continue creating new, delicious, easy-to-make, low FODMAP recipes just for you.
As always, all recipes will emphasize simple ingredients, easy preparation, and delicious low FODMAP results. Recipes will be for everything from main courses, salads, soups, side dishes, appetizers, desserts, sauces, breakfast and lunch, and even mocktails and cocktails. Everything you need to prepare fantastic low FODMAP meals everyone will love.
Join the club. Become a Patron. Let’s keep making delicious Low FODMAP meals together.
More Deliciously Low FODMAP™ dessert recipes
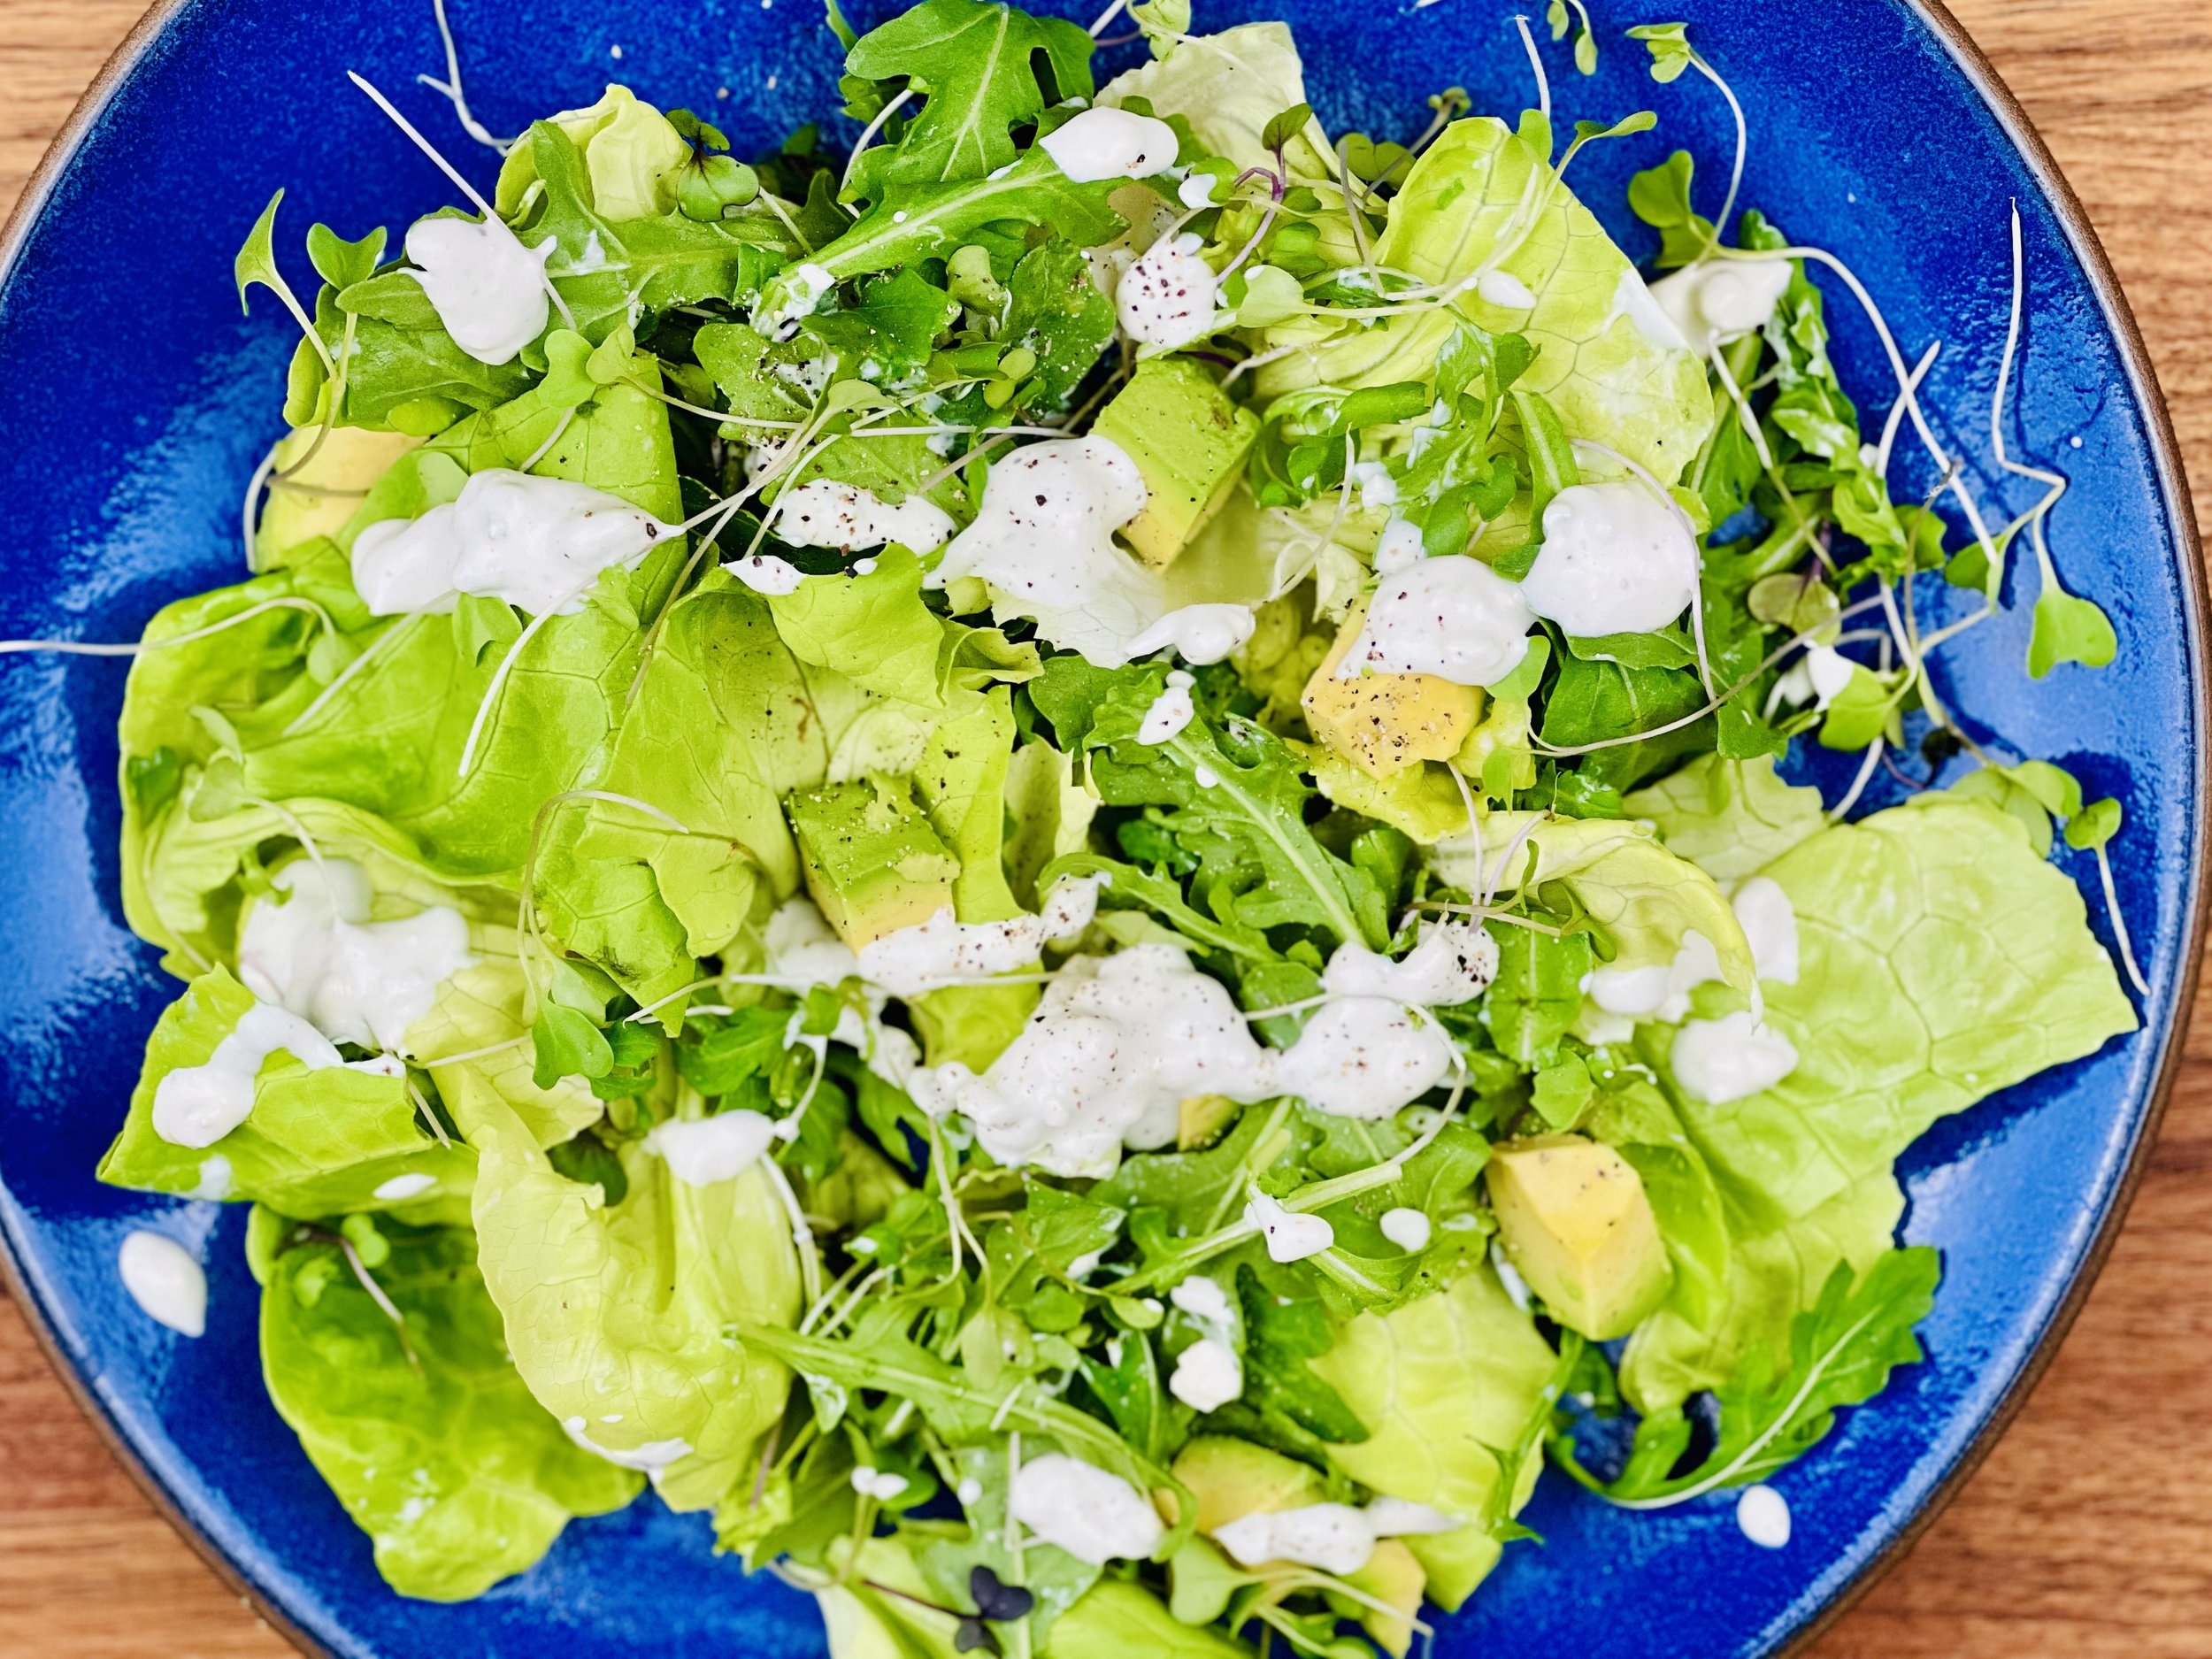
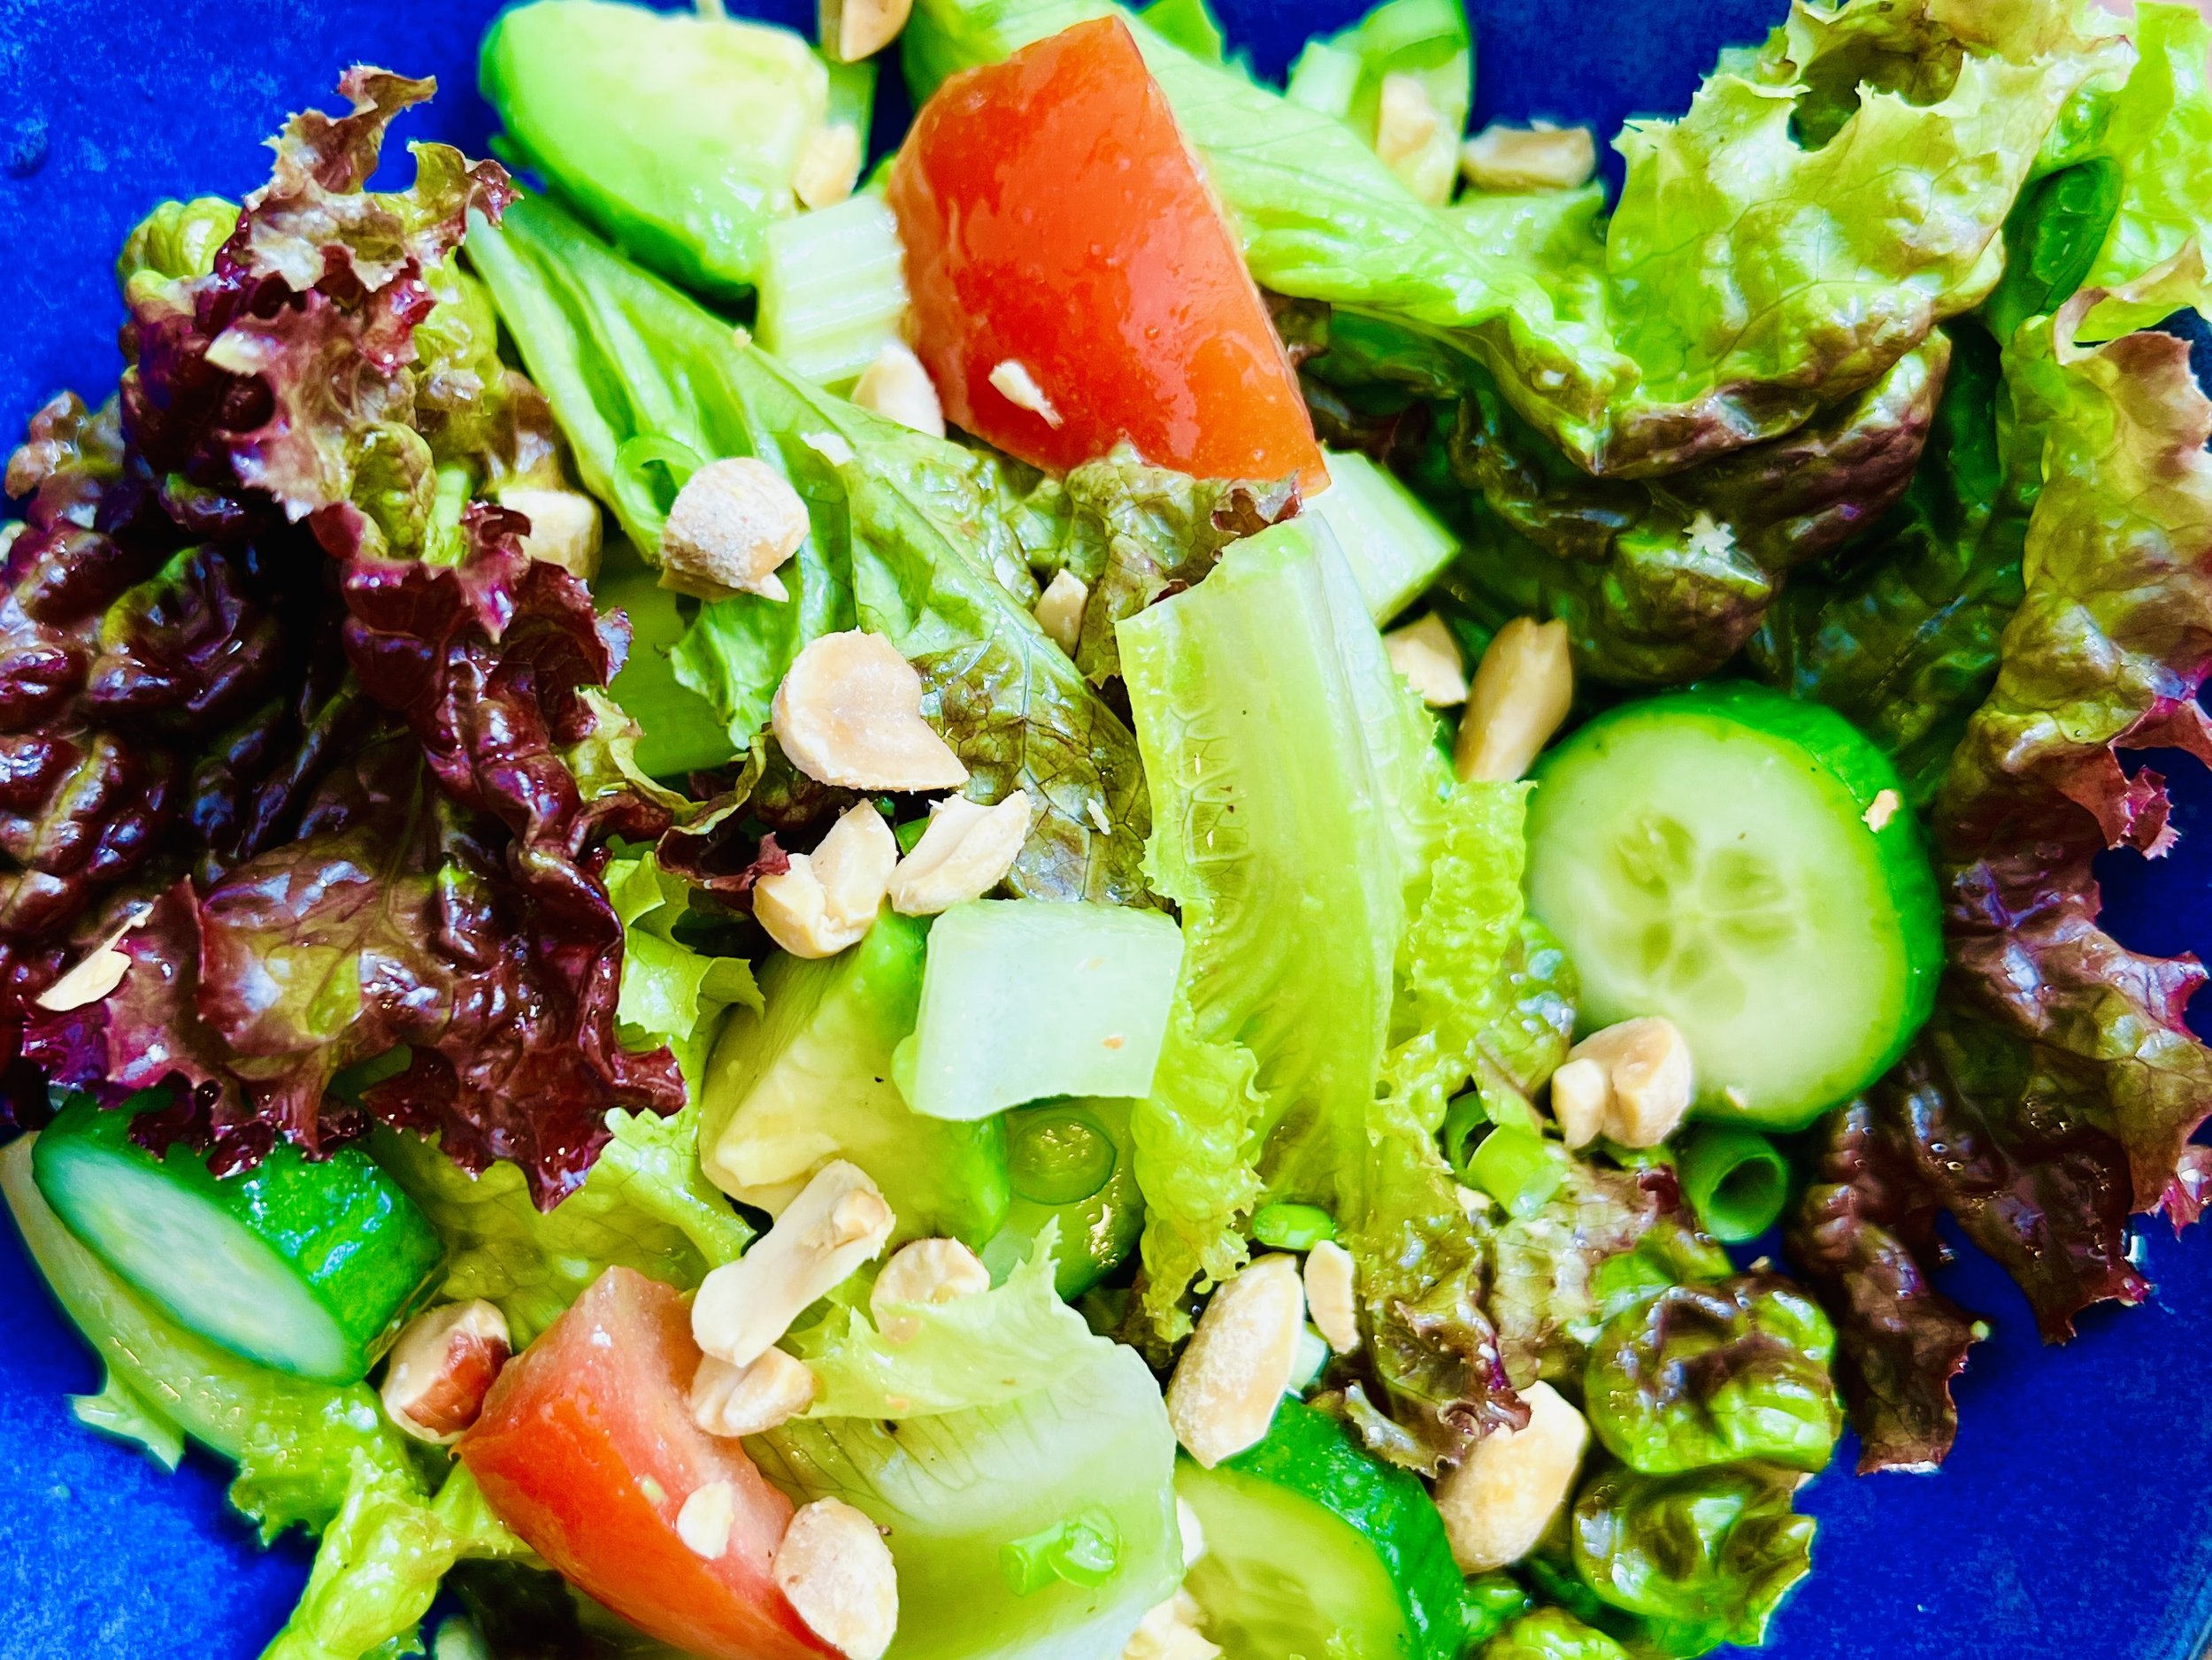
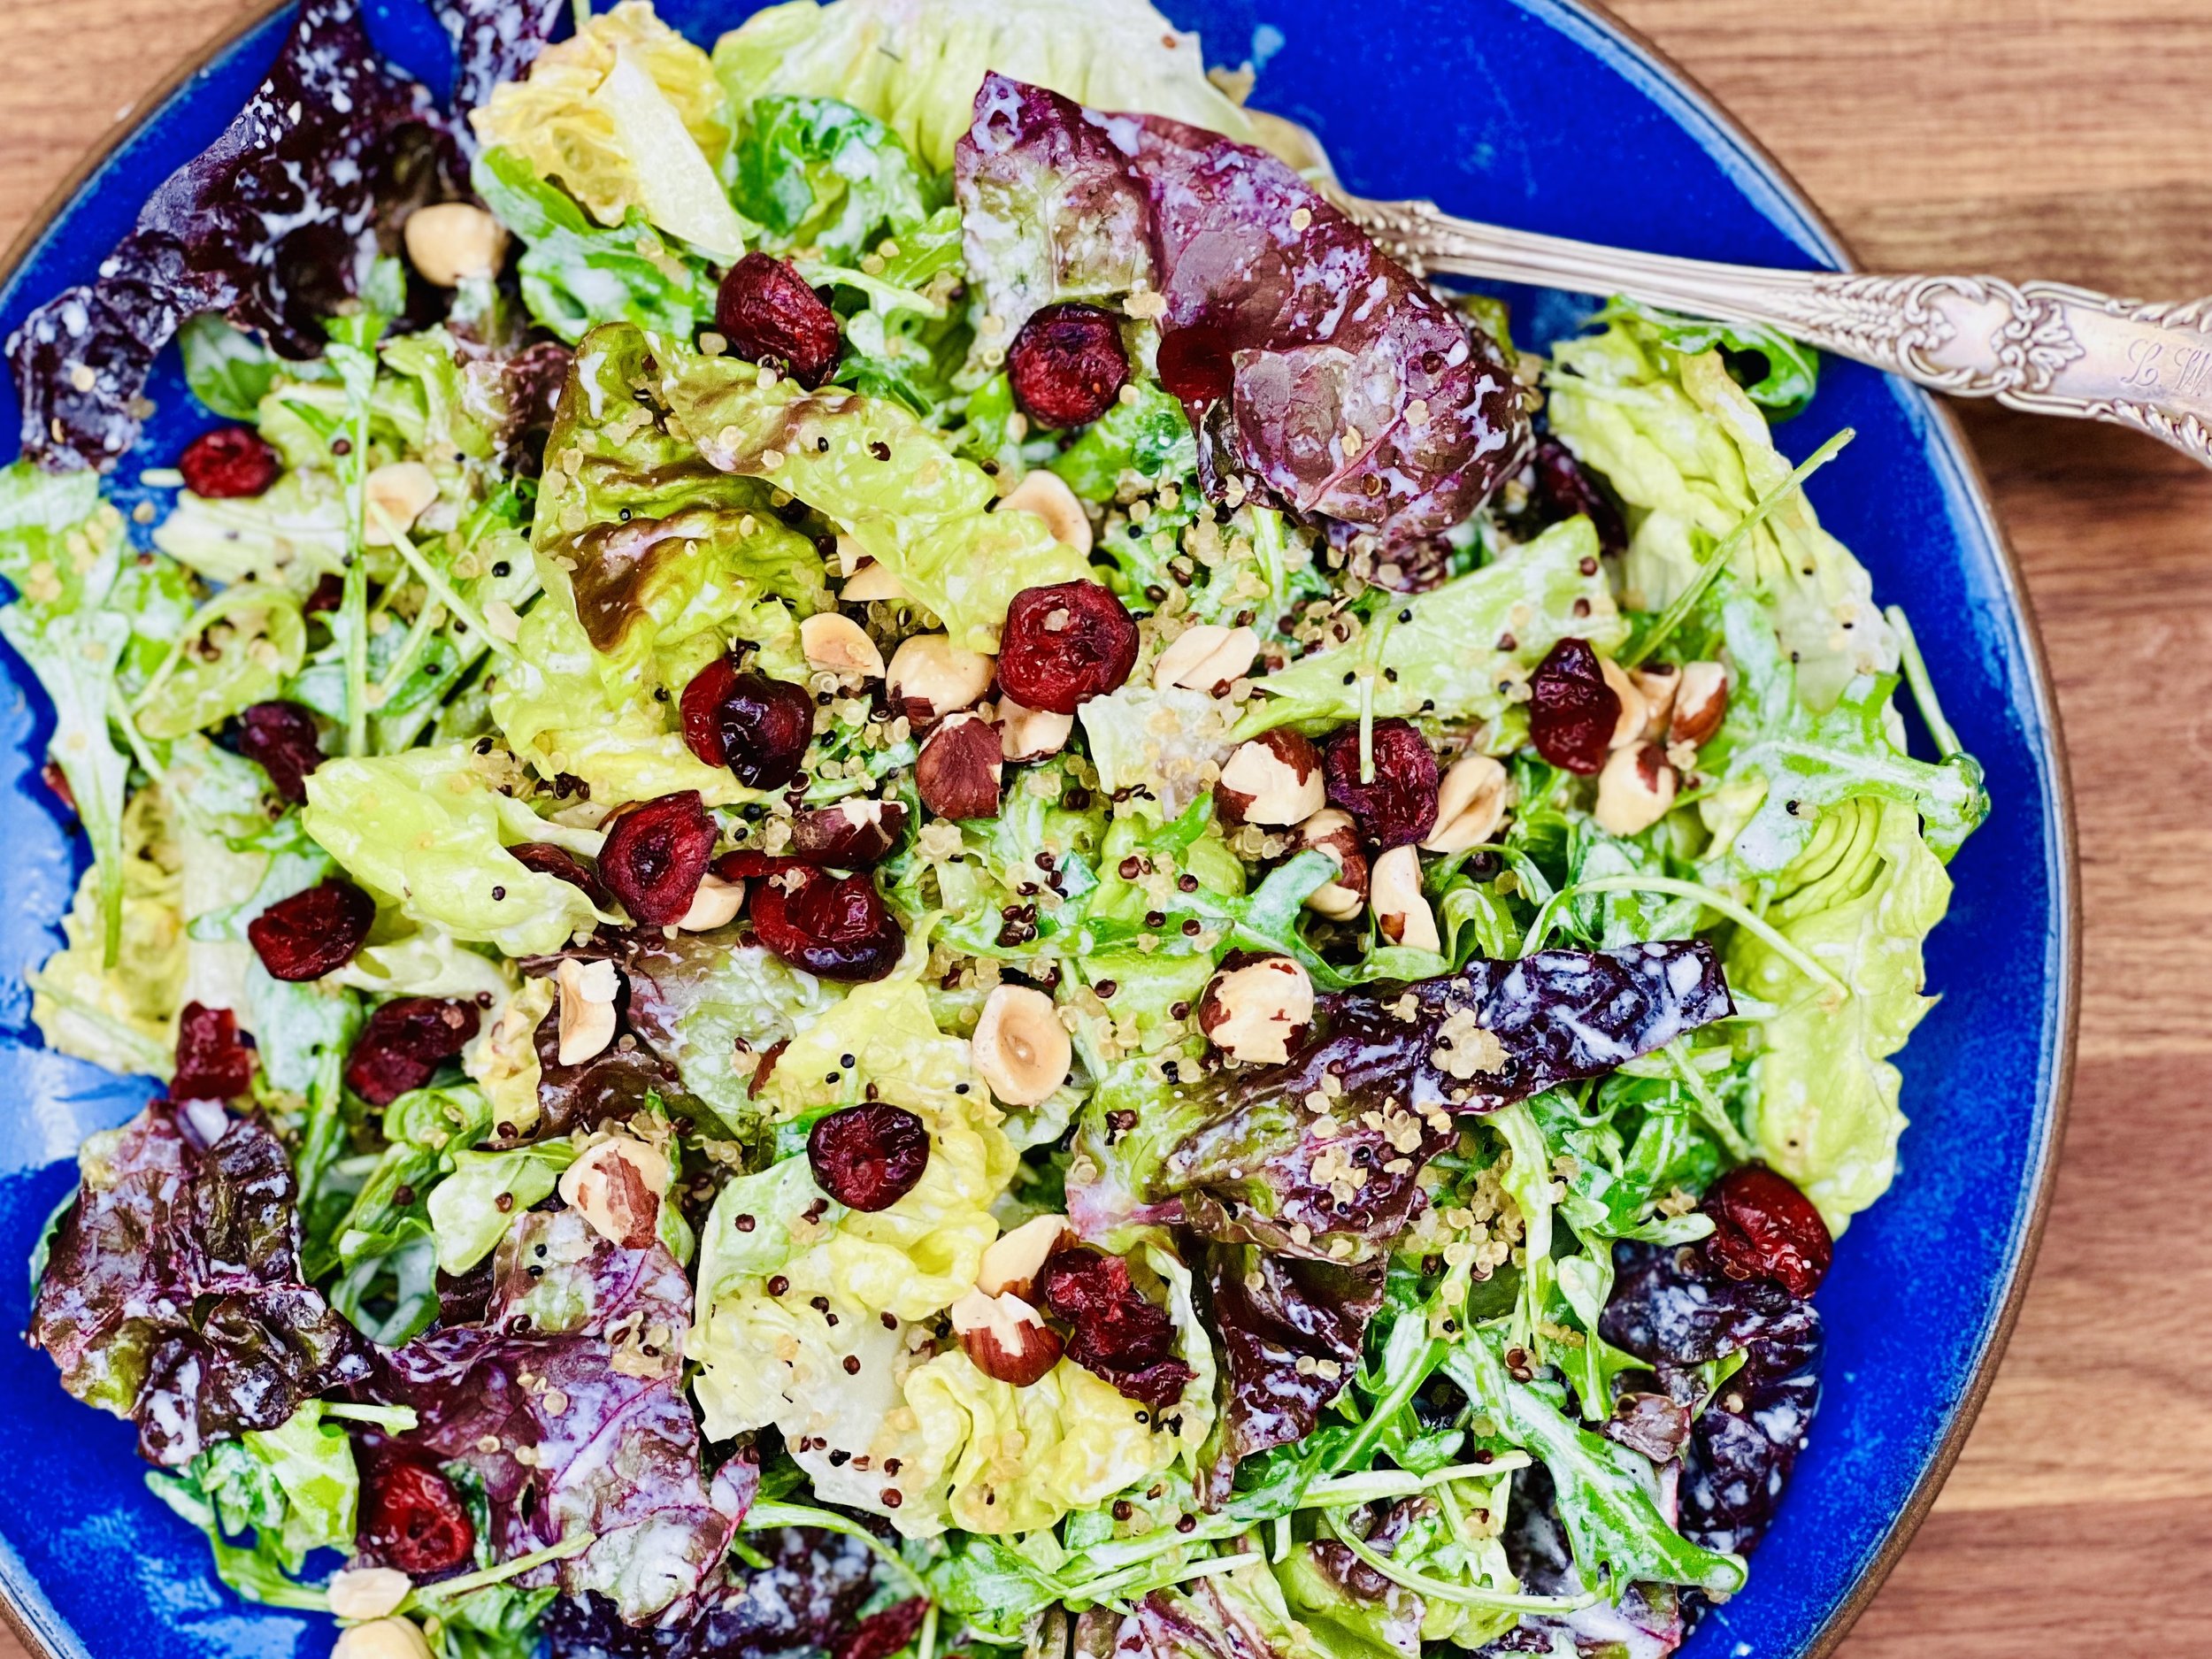
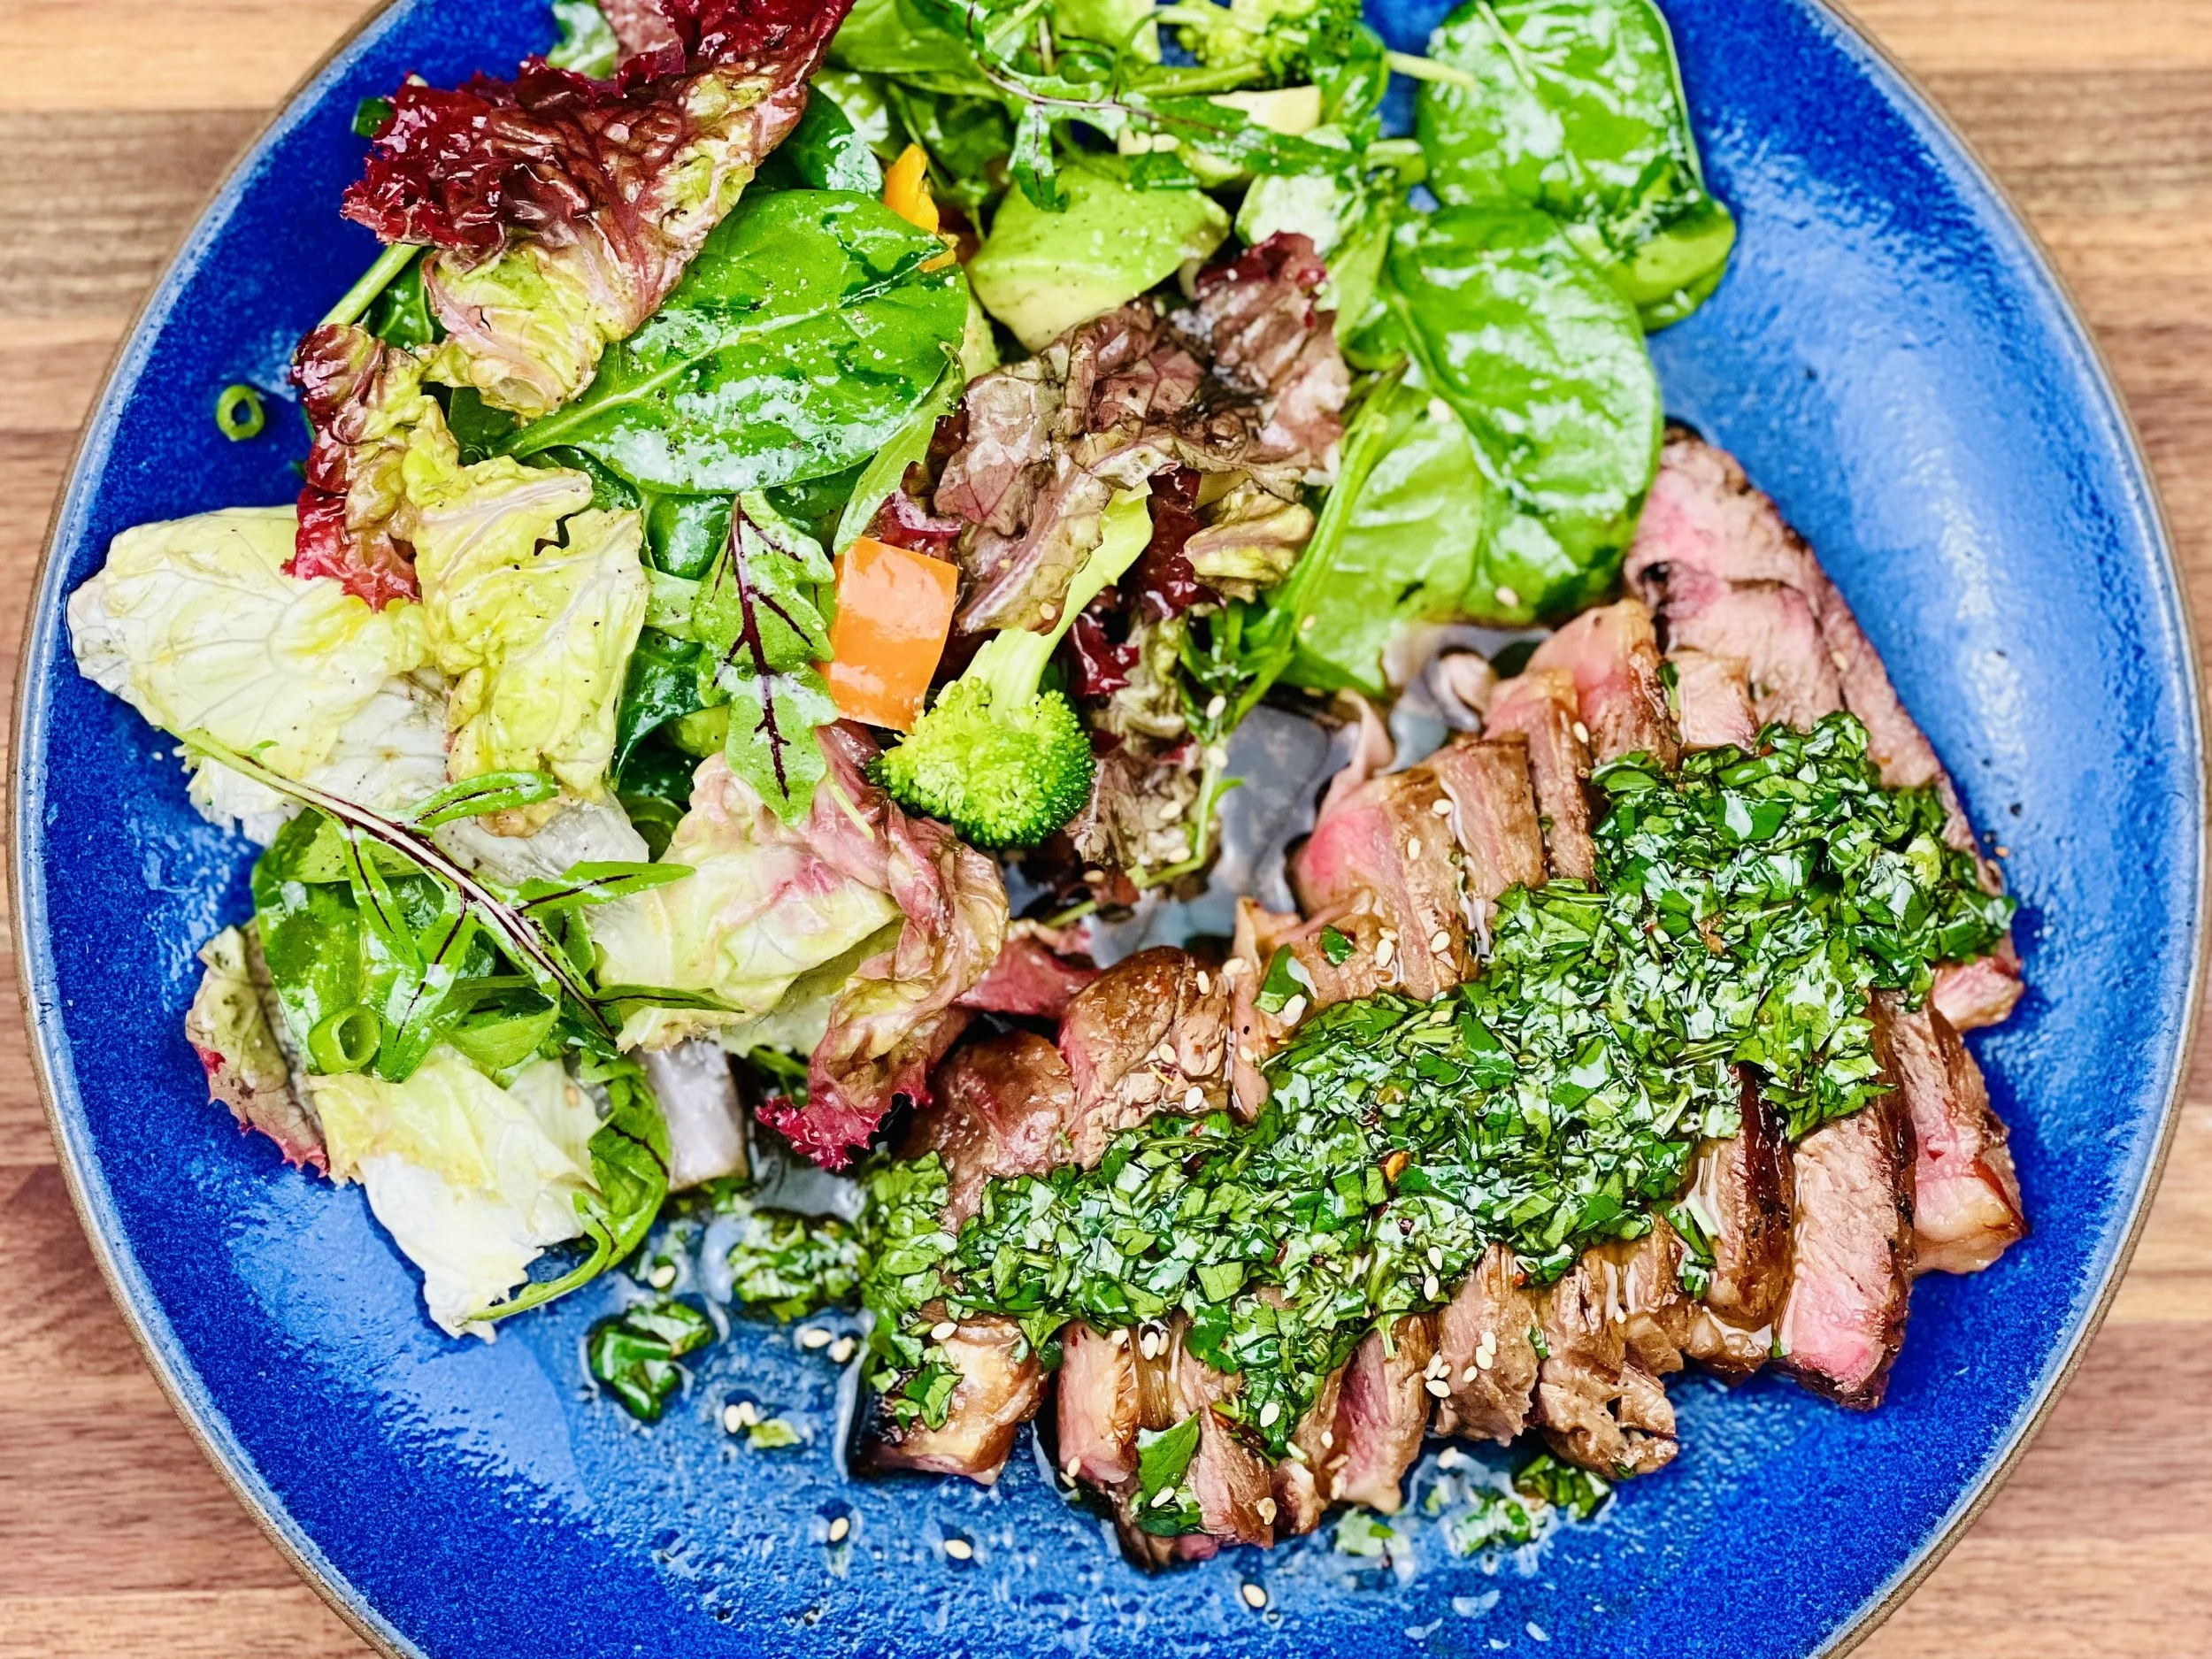
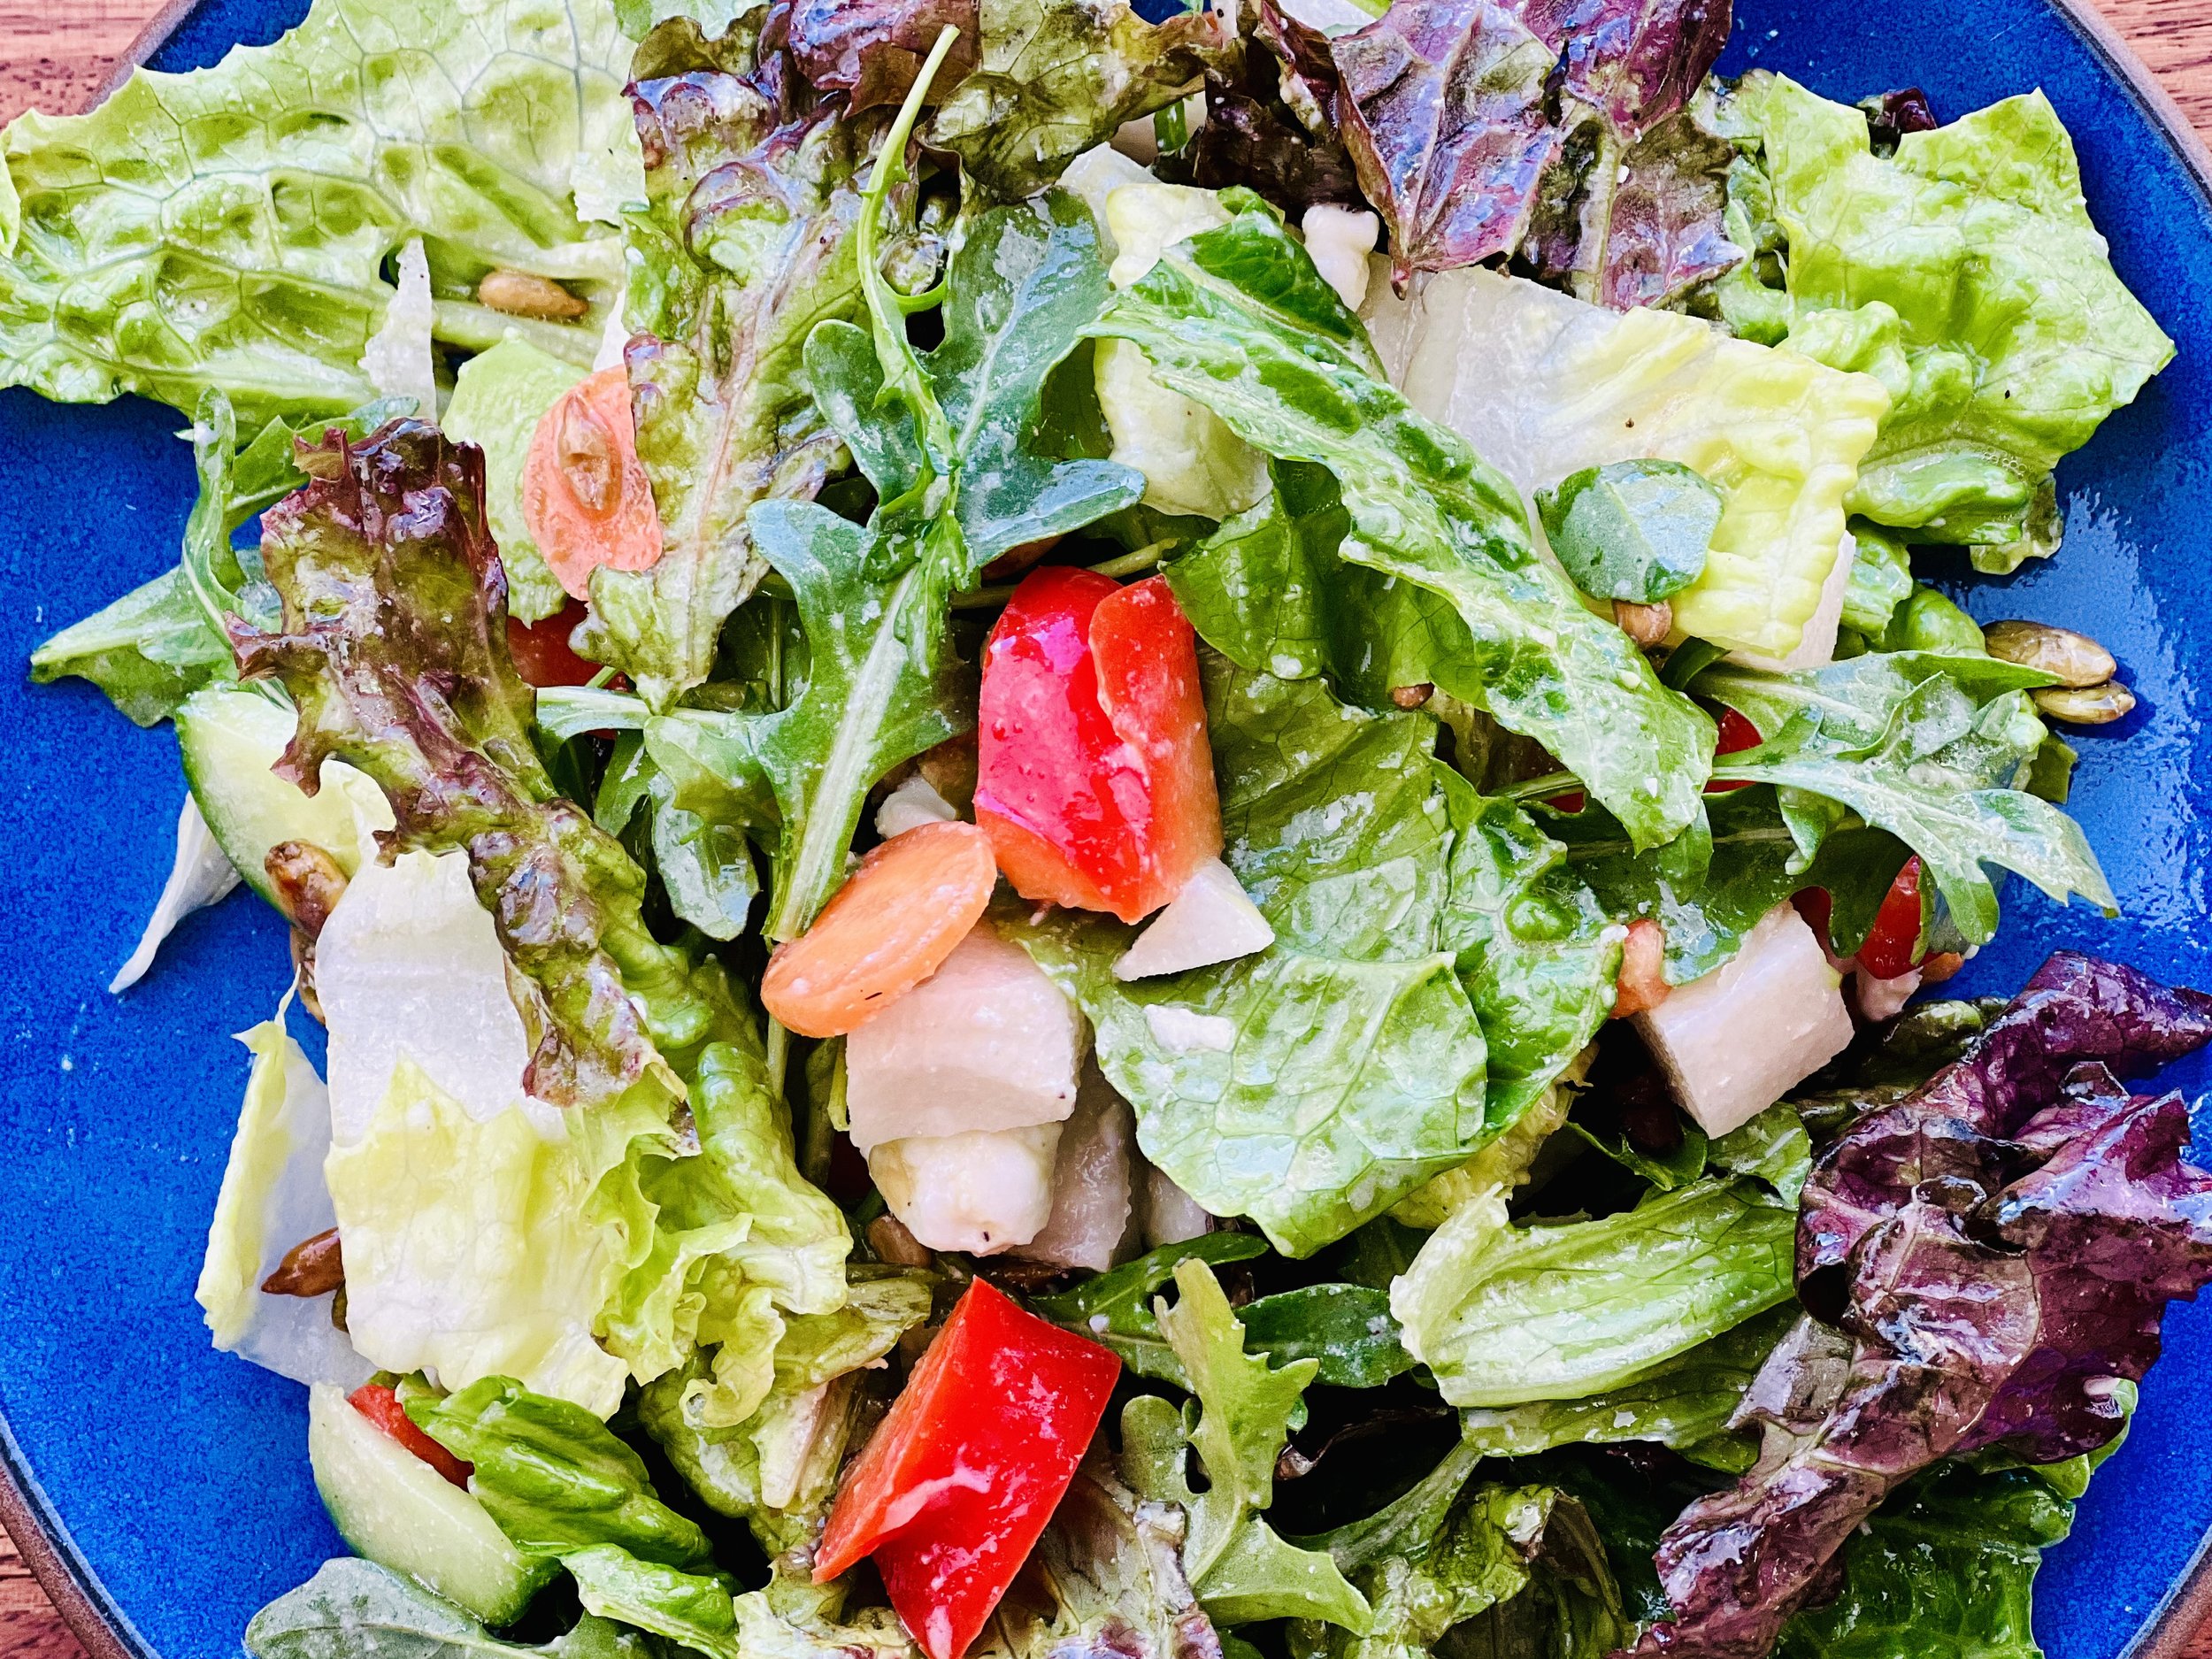
Simple Green Salad with Lemon Dijon Vinaigrette (low FODMAP)
20 Minutes prep • Low FODMAP • Gluten-free • Lactose-free • Vegetarian • Serves 4
20 Minutes prep • Low FODMAP • Gluten-free • Lactose-free • Vegetarian • Serves 4 • Ok to make ahead: Step 1
A few fresh ingredients on hand mean a simple salad can always be simply delicious. You can use the veggies that are “always” in your refrigerator, or you can branch out a bit. Consider this recipe a suggestion for ingredients and don’t be afraid to use alternatives—depending on what you have on hand and what you like. The easy lemon Dijon vinaigrette is really delicious so keep this recipe handy. It’s a great all-purpose dressing for just about any salad, or for leftover steamed broccoli. Want to add some more crunch? Top your salad off with my low FODMAP Garlic Parmesan Sourdough Croutons.
Ingredients: Salad
3 cups lettuce of your choice (red leaf and butter lettuce make a good combo)
1 cup of arugula, spinach, or spring mix
1 red bell pepper, chopped
2 carrots, peeled and chopped
2 Persian cucumbers, peeled and chopped
1/2 cup jicama, peeled and chopped
1/2 cup pumpkin and/or sunflower seeds, raw or roasted (whatever you prefer)
Ingredients: Dressing
1/4 cup lemon juice, fresh squeezed
1/2 cup extra-virgin olive oil
1 tablespoon Dijon mustard
Kosher salt and black pepper to taste
Directions
(1) Make the dressing: Combine all ingredients except salt and pepper in a small jar. Shake to combine. Taste and add salt and pepper to your liking.
Make-ahead note: At this point, you may leave the dressing at room temp for a few hours, or in the refrigerator if longer than that. Just bring it to room temperature before you need to use it. And shake well before adding to the salad.
(2) Wash and dry the vegetables: When you make a salad with vegetables that are wet from washing, the dressing gets watered down and doesn’t taste as good. So, wash and dry your vegetables, including the lettuce, before you make your salad. To dry lettuce, if you don’t have a lettuce spinner, make a pile of washed lettuce in the center of a clean dish towel, gather the corners together, and take it outside and spin your arm around. The water will come off the lettuce and soak into the towel. If there’s a lot of water, it will spin off onto the ground. Voila! Washed and dried lettuce that’s ready for the perfect salad!
(3) Seed, peel, and chop: You can leave peels on carrots and cucumbers for extra fiber. If that’s not what you want, then peel them before you chop them up. Seed the bell pepper and chop. Definitely peel the jicama, if using. The peel is not meant to be eaten.
(4) Assemble the salad: Break the lettuce into bite-size pieces and put them in a salad bowl. Add the rest of the vegetables.
(5) Finish: Drizzle with the dressing. Toss. Add the pumpkin seeds (if using).
(6) Serve: Sprinkle with a bit of Diamond Crystal Kosher salt just before serving.
Recipe note: I use Diamond Crystal Kosher salt in all my recipes because it has a wonderful flat and crisp flake that tastes delicious. It is also the least salty salt available so you can use it more liberally as a seasoning than you can table salt or sea salt. If you use another type of salt, you may need to reduce the amount so it is not over-salted.
Eat and enjoy every bite because you can!
Link note: This post contains links for you to easily purchase items listed on the page. In some cases, we have provided a special discount code for IBS Game Changers so be sure to use it when you purchase an item to get the discount that has been arranged just for you! As an Amazon Associate, I earn a commission from qualifying Amazon purchases.
More Deliciously Low FODMAP™ salad recipes
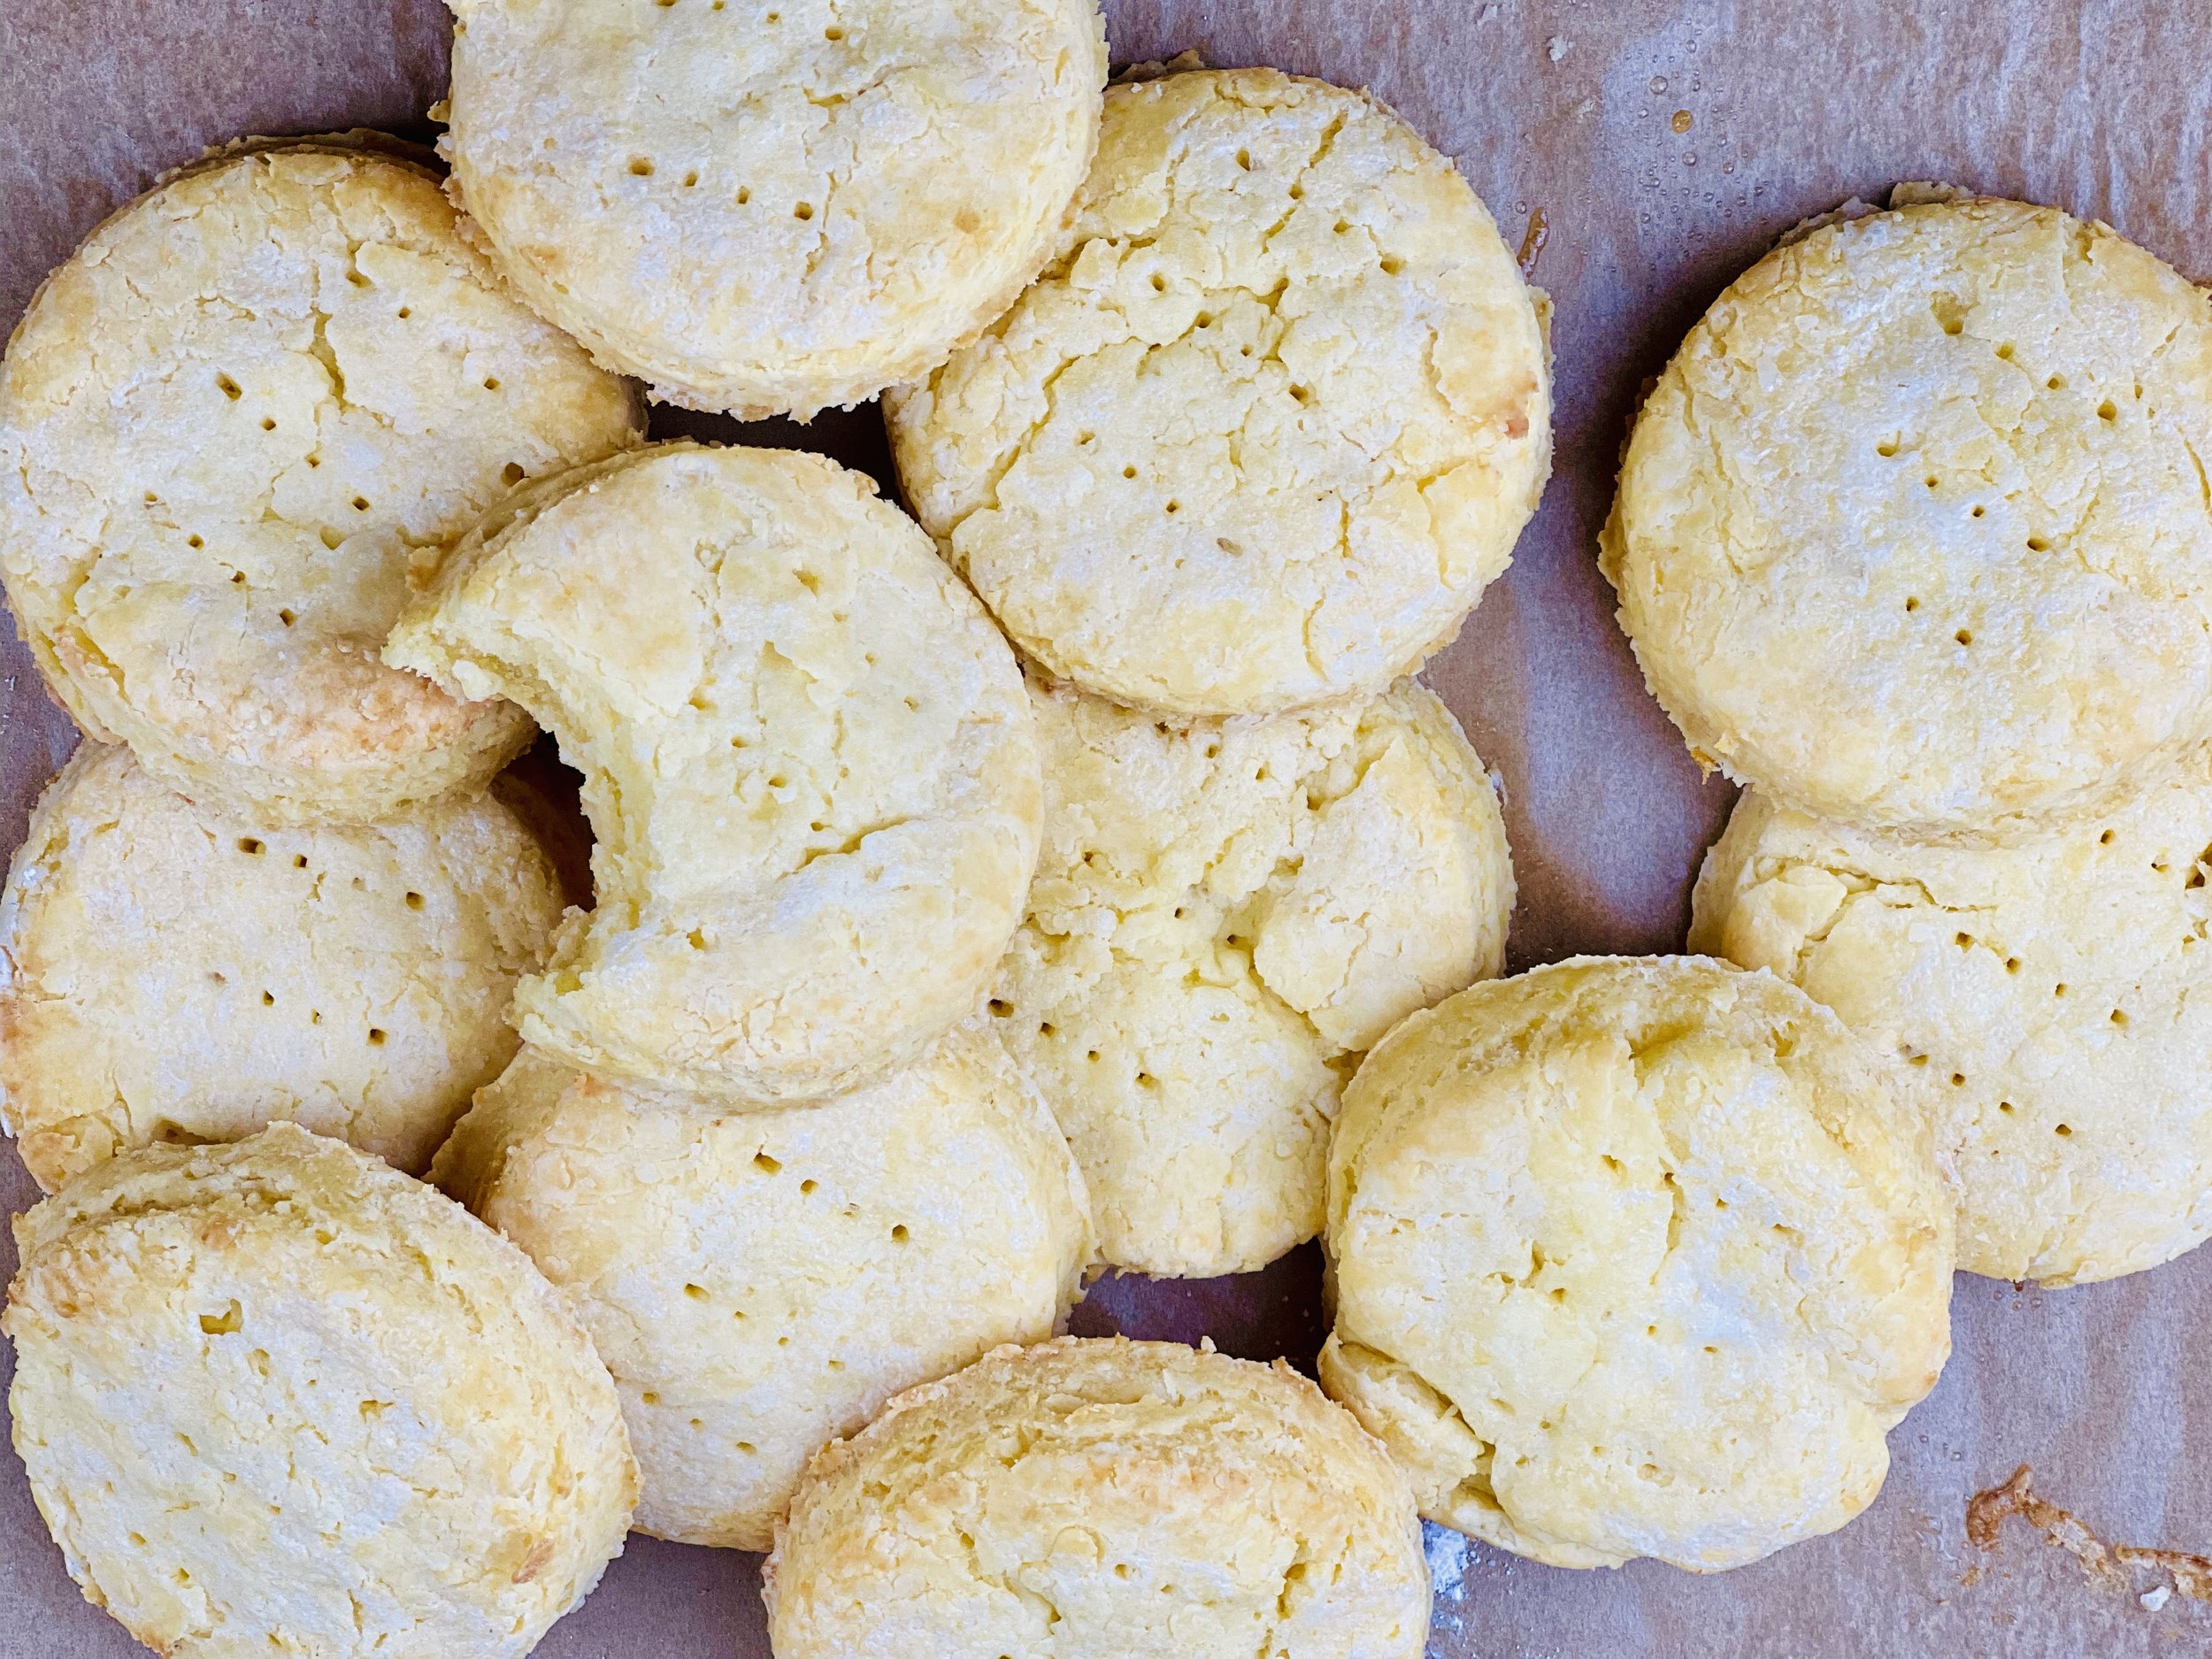
Flaky Sour Cream Biscuits (low FODMAP)
15 Minutes prep • 12 Minutes cook • Low FODMAP • Gluten-Free • Vegetarian • Makes 12
15 Minutes prep • 12 Minutes cook • Low FODMAP • Gluten-Free • Vegetarian • Makes 12
I’ve been experimenting with a new gluten-free flour (gfJules gluten-free flour) and these biscuits are a great showcase for its light and airy quality. The biscuits are buttery, flaky, moist, and delicious—just like you want a biscuit to be! They are perfectly scrumptious with butter or jam or serve them as you would a baking soda biscuit alongside stew or soup. If there are any left over the next day, a few seconds in the microwave or toaster brings them back to their fresh-baked goodness. And, they are perfect for my Cheesy Poached Egg and Biscuit Sandwiches.
Ingredients
2 cups gfJules gluten-free flour (or other gluten-free flour of your choice)
2 teaspoons baking powder
1/2 teaspoon baking soda
1 teaspoon Kosher salt
1/4 cup Bird’s Eye custard powder (you can also use vanilla pudding mix for a sweeter alternative)
4 tablespoons butter, cubed and frozen
1/2 cup lactose-free milk combined with 1/2 teaspoon apple cider vinegar
1/2 cup lactose-free sour cream
12 small pats of butter to top the biscuits before cooking
Directions
(1) Prepare: Preheat the oven to 375 degrees F. Add the apple cider vinegar to the lactose-free milk. Line a baking sheet with parchment.
(2) Make the dough: Put all dry ingredients in the bowl of a food processor. Pulse a few times to blend dry ingredients together. Add the frozen cubed butter and pulse a few more times until the butter is evenly mixed with the dry ingredients. Add the milk and sour cream to the dry ingredients in the food processor bowl and pulse a few more times to combine.
If the dough does not hold together once mixed, you may add a bit more milk, one tablespoon at a time, until the dough holds together well but is not wet.
(3) Shape the biscuits: Put the dough on a lightly floured (with gfJules Flour) board or pastry mat, patting or rolling gently to an even 3/4 inches thick. Dip the rim of a small glass or biscuit cutter into gluten-free flour and push straight down to cut the biscuits; do not twist the cutter. Repeat with the remaining dough, gathering dough scraps together when necessary, and re-patting flat to cut more biscuits.
(4) Bake: Transfer each cut biscuit to a parchment-lined baking sheet and prick the tops with a fork a few times. Lay a thin pat of butter on top of each biscuit before baking. Bake for approximately 12 minutes (depending on thickness - may need to add time), or until the tops are lightly browned and the dough resists when pushed lightly with a finger but is not hard.
(5) Serve: Biscuits are wonderful hot out of the oven just plain, or with butter and jam. If there are any left over the next day, a few seconds in the microwave or toaster brings them back to their fresh-baked goodness. And, they are perfect for my Cheesy Poached Egg and Biscuit Sandwiches.
Eat and enjoy every bite because you can!
Recipe note: I use Diamond Crystal Kosher salt in all my recipes because it has a wonderful flat and crisp flake that tastes delicious. It is also the least salty salt available so you can use it more liberally as a seasoning than you can table salt or sea salt. If you use another type of salt, you may need to reduce the amount so it is not over-salted.
Link note: This post contains links for you to easily purchase items listed on the page. In some cases, we have provided a special discount code for IBS Game Changers so be sure to use it when you purchase an item to get the discount that has been arranged just for you! As an Amazon Associate, I earn a commission from qualifying Amazon purchases.
More Deliciously Low FODMAP™ side dish recipes


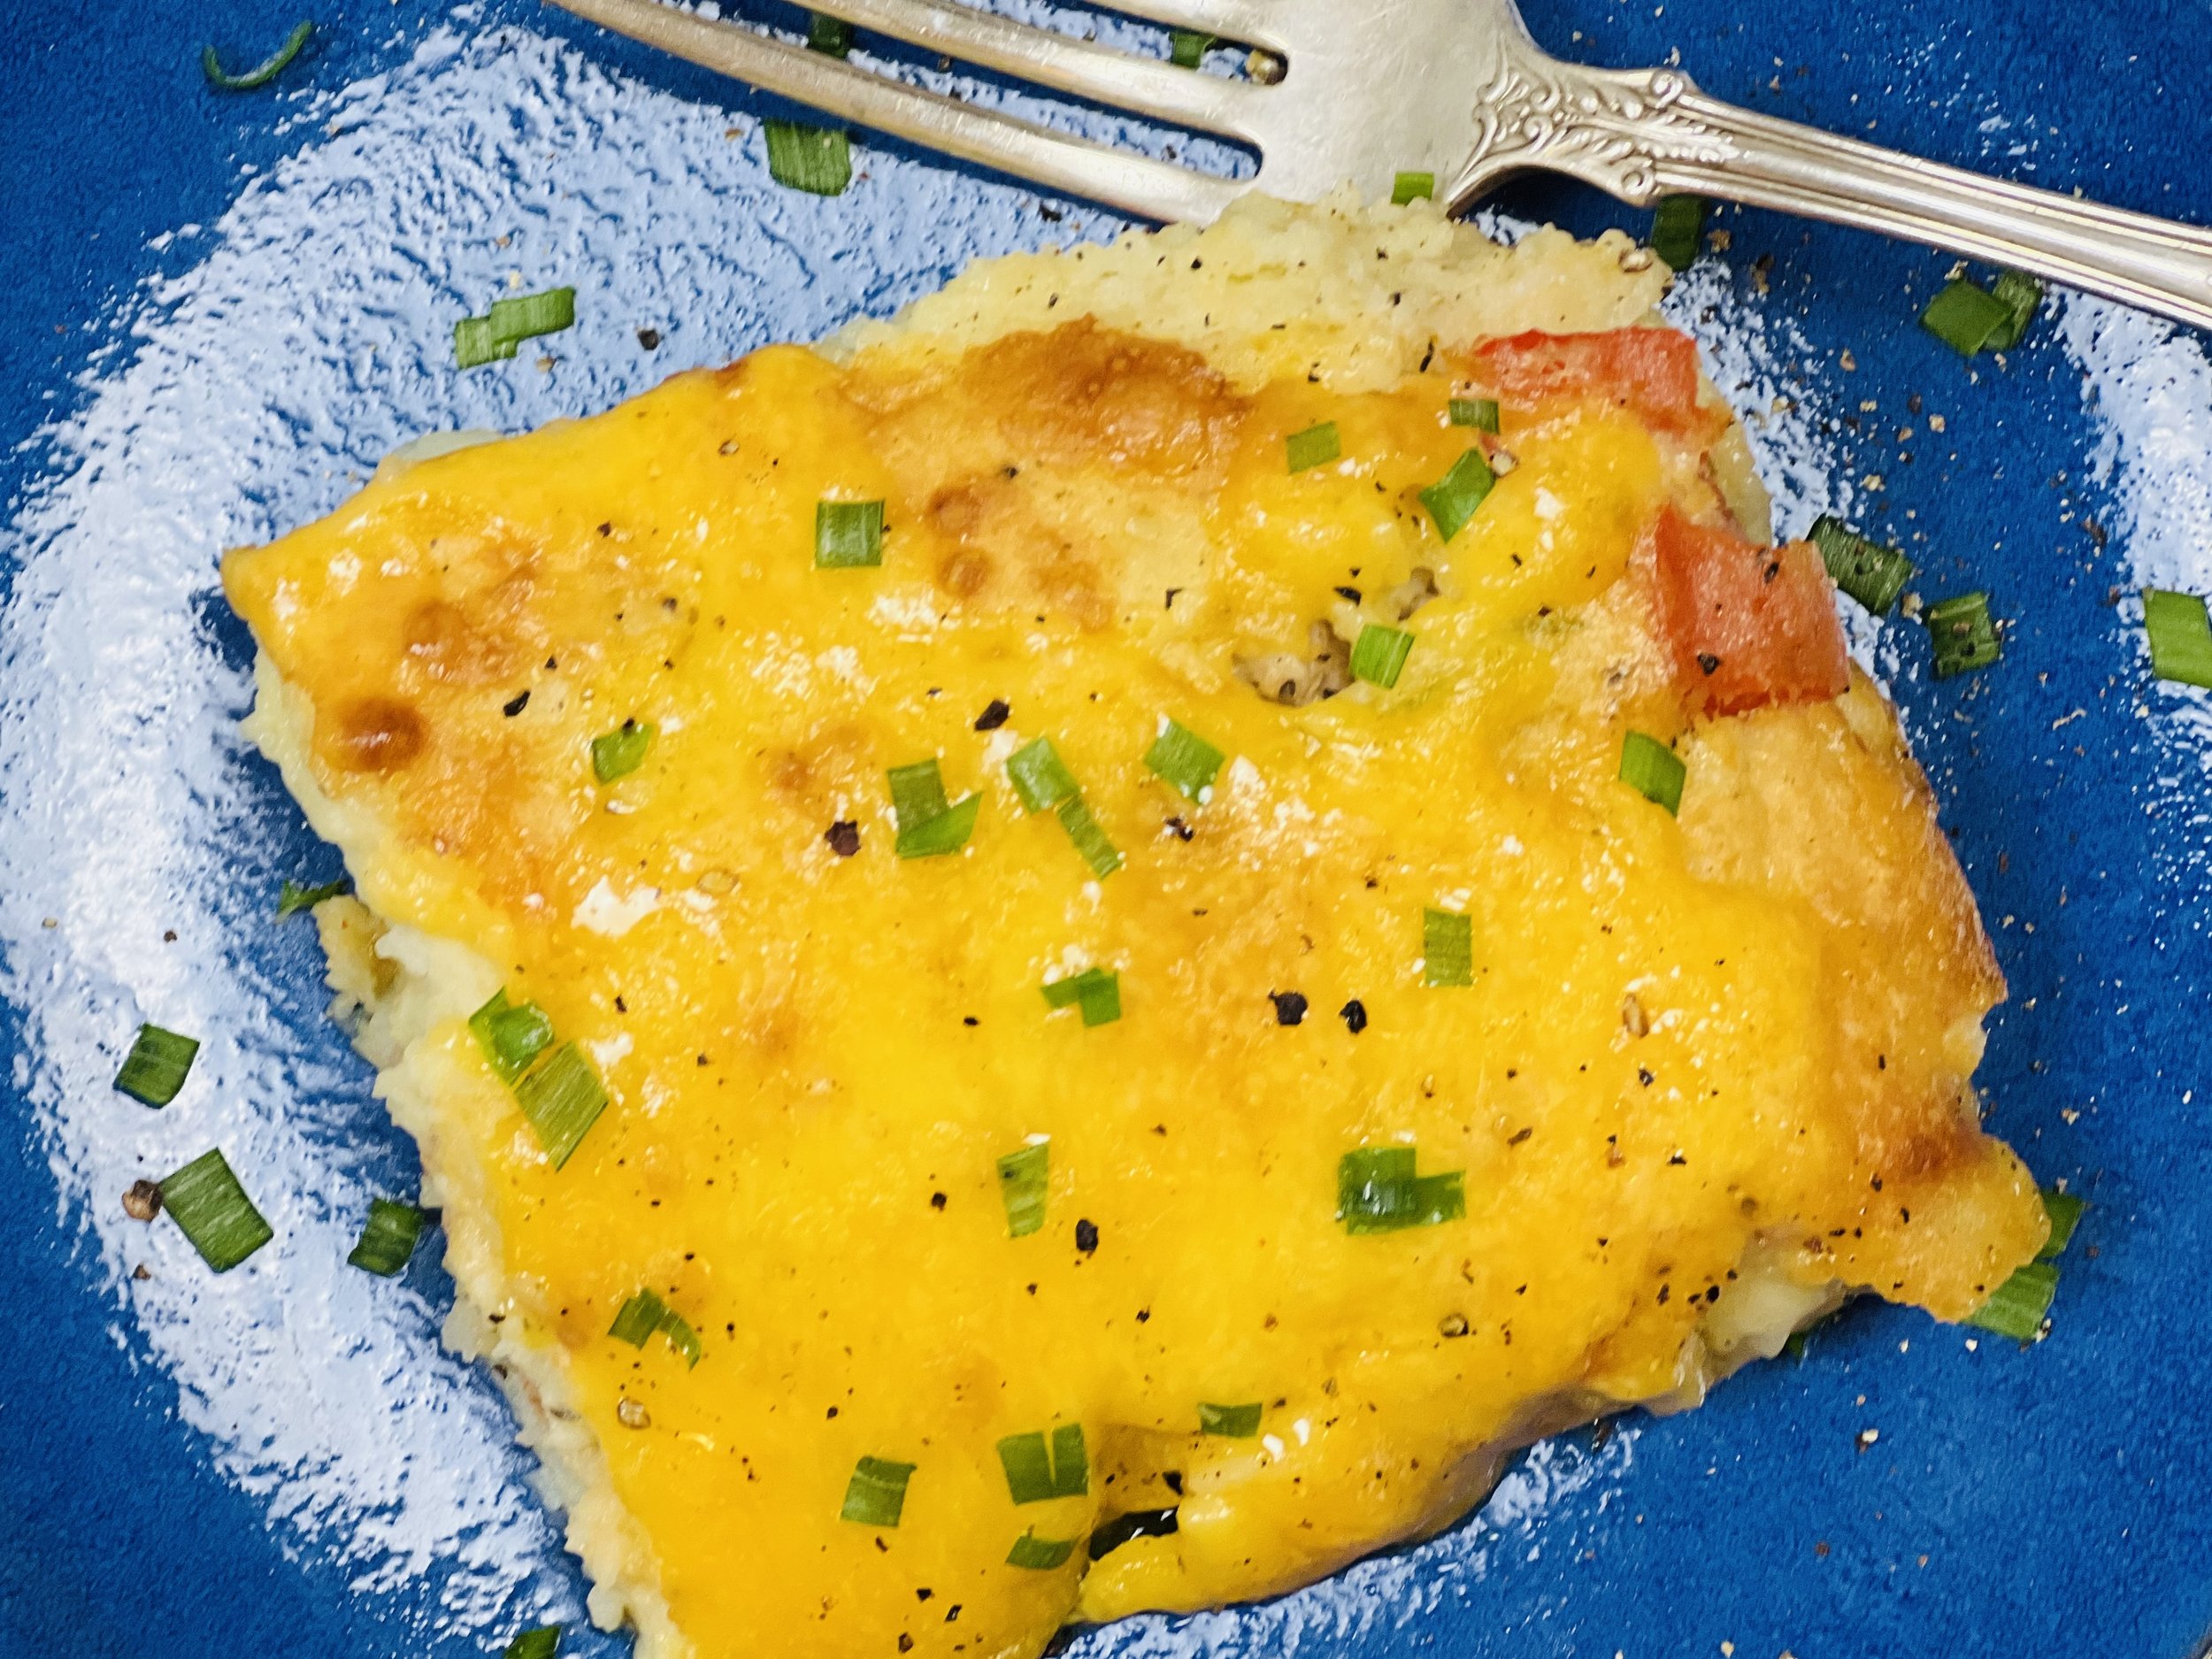
Cheesy Poached Egg and Biscuit Sandwich (low FODMAP)
5 Minutes prep • 10 Minutes cook • Low FODMAP • Gluten-free • Vegetarian • Serves 2
5 Minutes prep • 10 Minutes cook • Low FODMAP • Gluten-free • Vegetarian • Serves 2
My clients often say they can’t think of anything for breakfast (or lunch!) so sharing some of the things I make is my way of helping to inspire you to think creatively. Recently, I had some gluten-free sour cream biscuits leftover and I decided to turn them into a biscuit egg sandwich. The result was delicious! I toasted the biscuits and put a bit of butter on them before layering on a poached egg and some sharp cheddar cheese. A quick trip under the broiler and a few chives later. Voila! You’ve made a perfect breakfast or lunch.

This is an exclusive recipe just for recipe club members.
In addition to the two free recipes I create each week I am creating and delivering one very special recipe just for my recipe club members. If you’re not yet a member, I encourage you to join! Membership in the club includes access to the complete archive of recipes with filters so it can become your virtual low FODMAP cookbook plus, I am creating and delivering one special NEW recipe every week ONLY for recipe club members. And, for my true fans, I’ll be sharing behind-the-scenes content, and updates on the progress of the new cookbook.
Your membership in the club helps me continue creating new, delicious, easy-to-make, low FODMAP recipes just for you.
As always, all recipes will emphasize simple ingredients, easy preparation, and delicious low FODMAP results. Recipes will be for everything from main courses, salads, soups, side dishes, appetizers, desserts, sauces, breakfast and lunch, and even mocktails and cocktails. Everything you need to prepare fantastic low FODMAP meals everyone will love.
Join the club. Become a Patron. Let’s keep making delicious Low FODMAP meals together.
More Deliciously Low FODMAP™ breakfast recipes
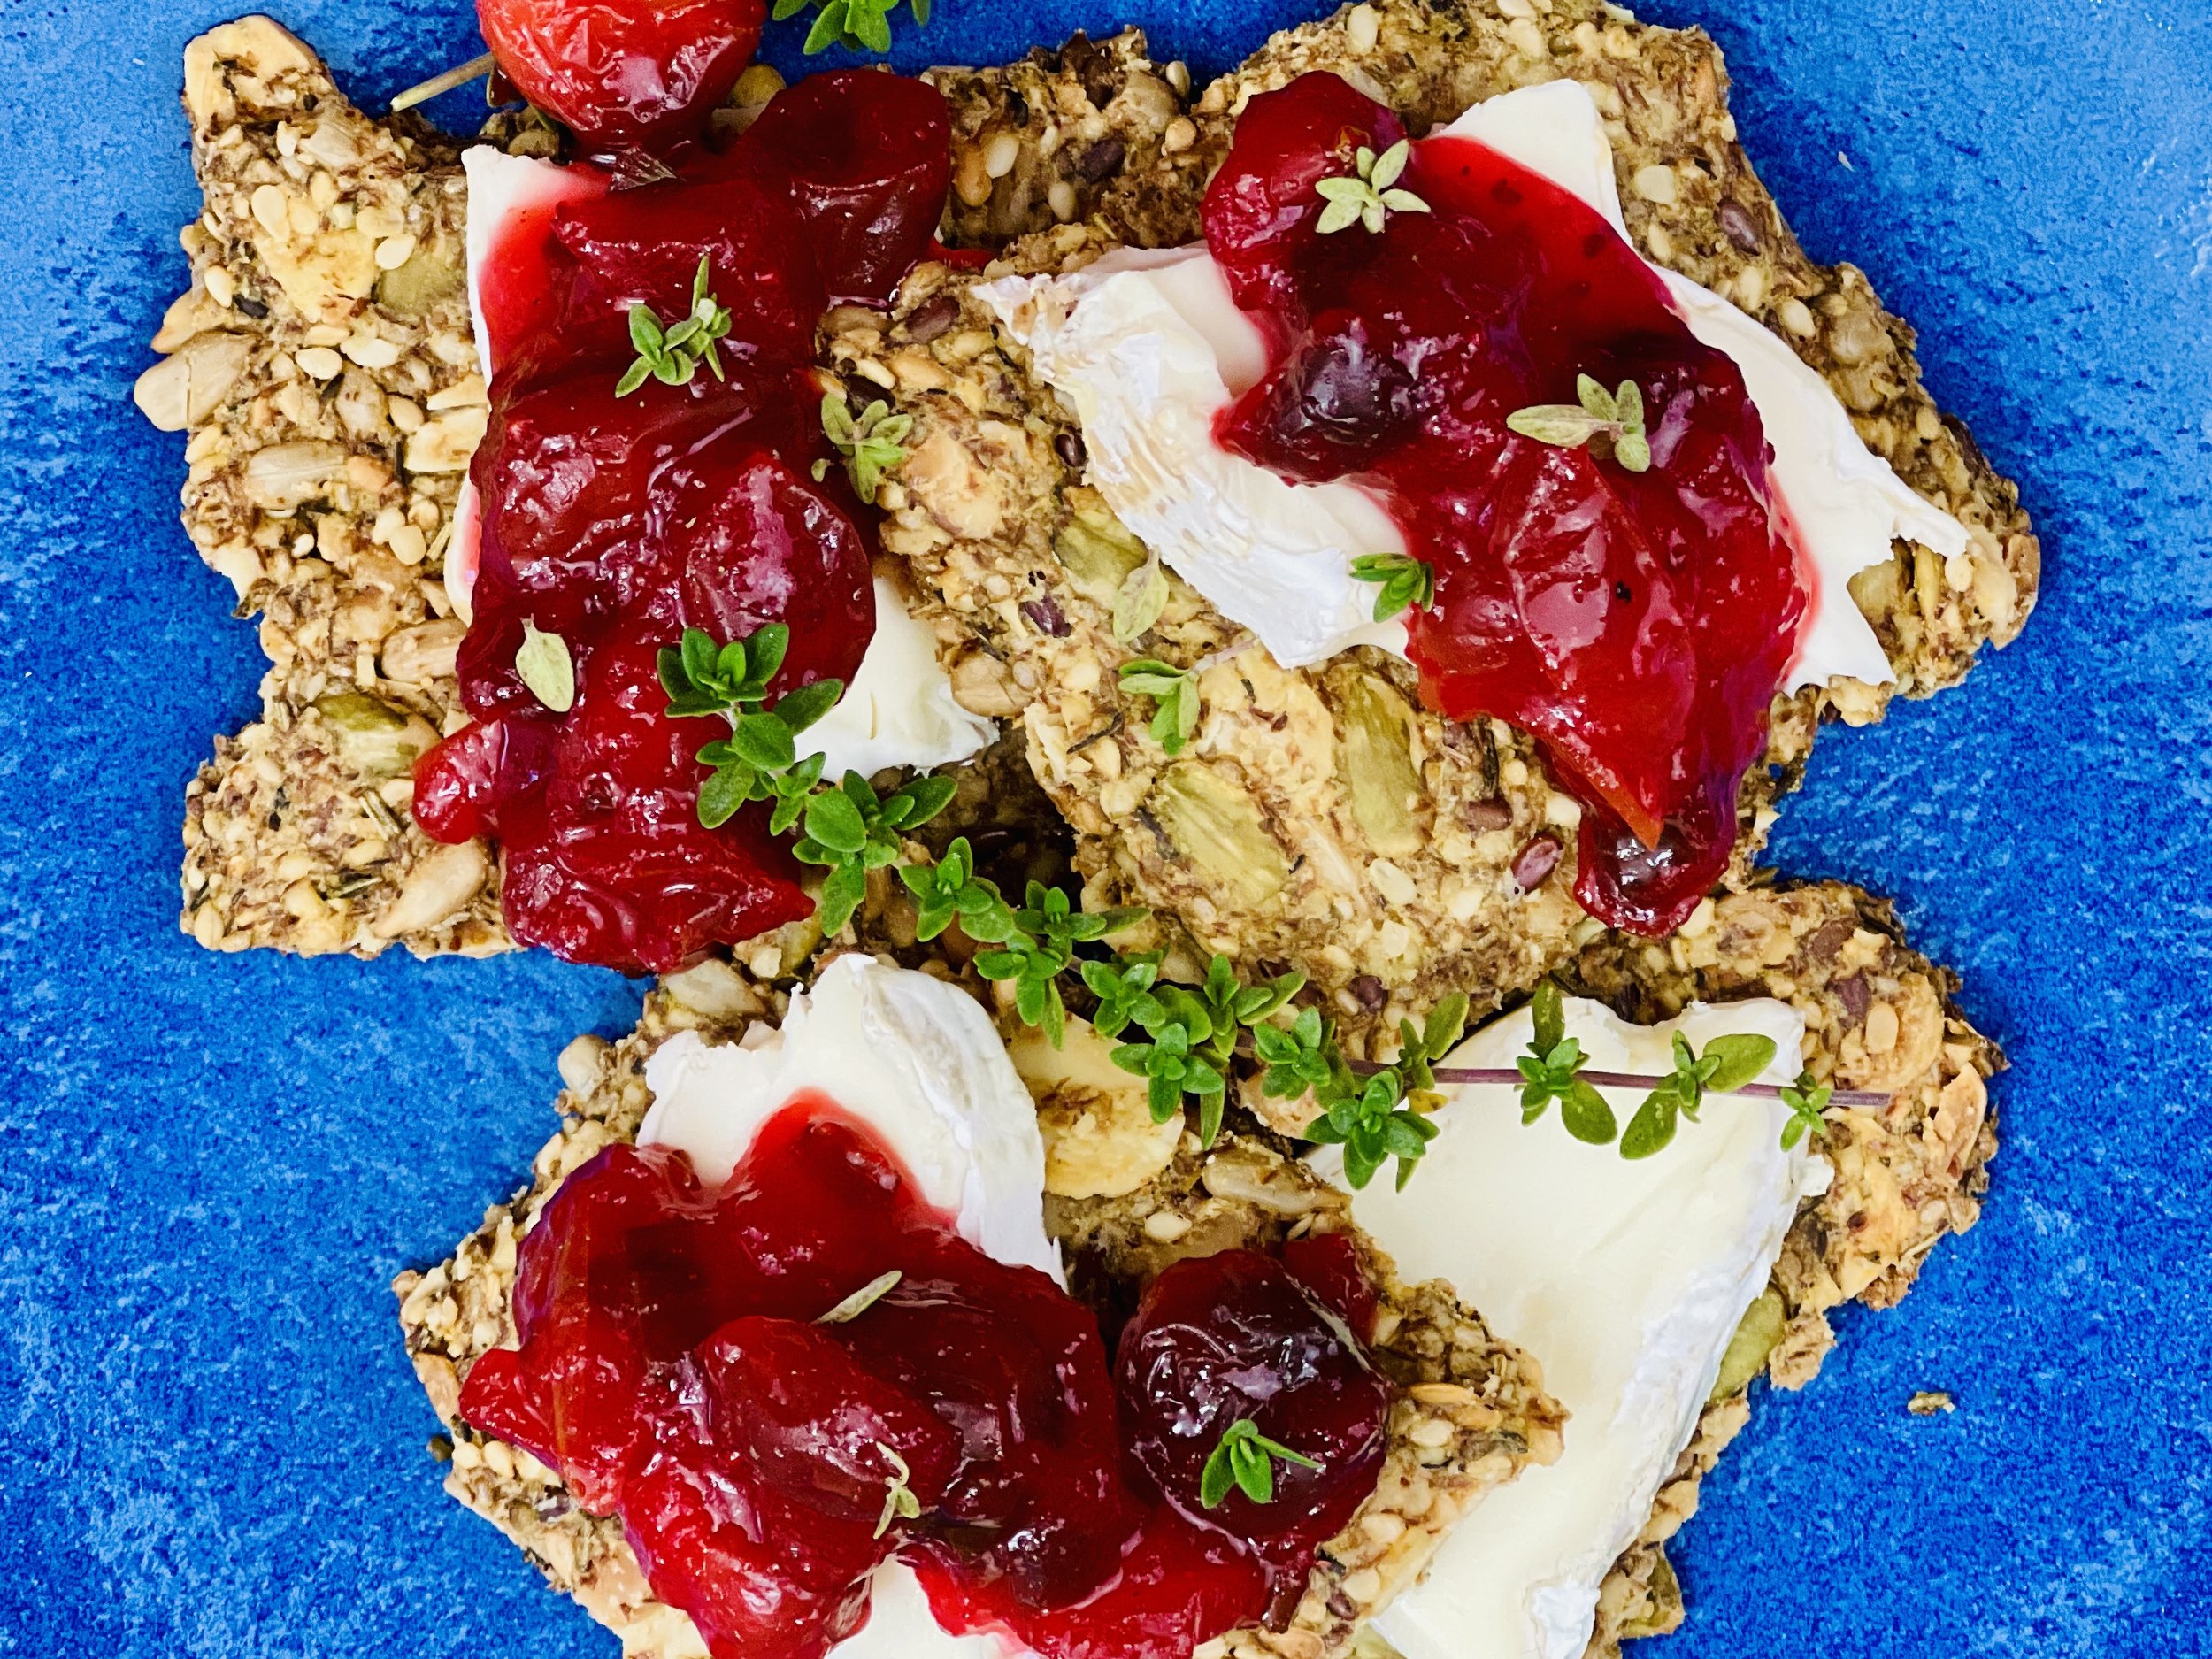
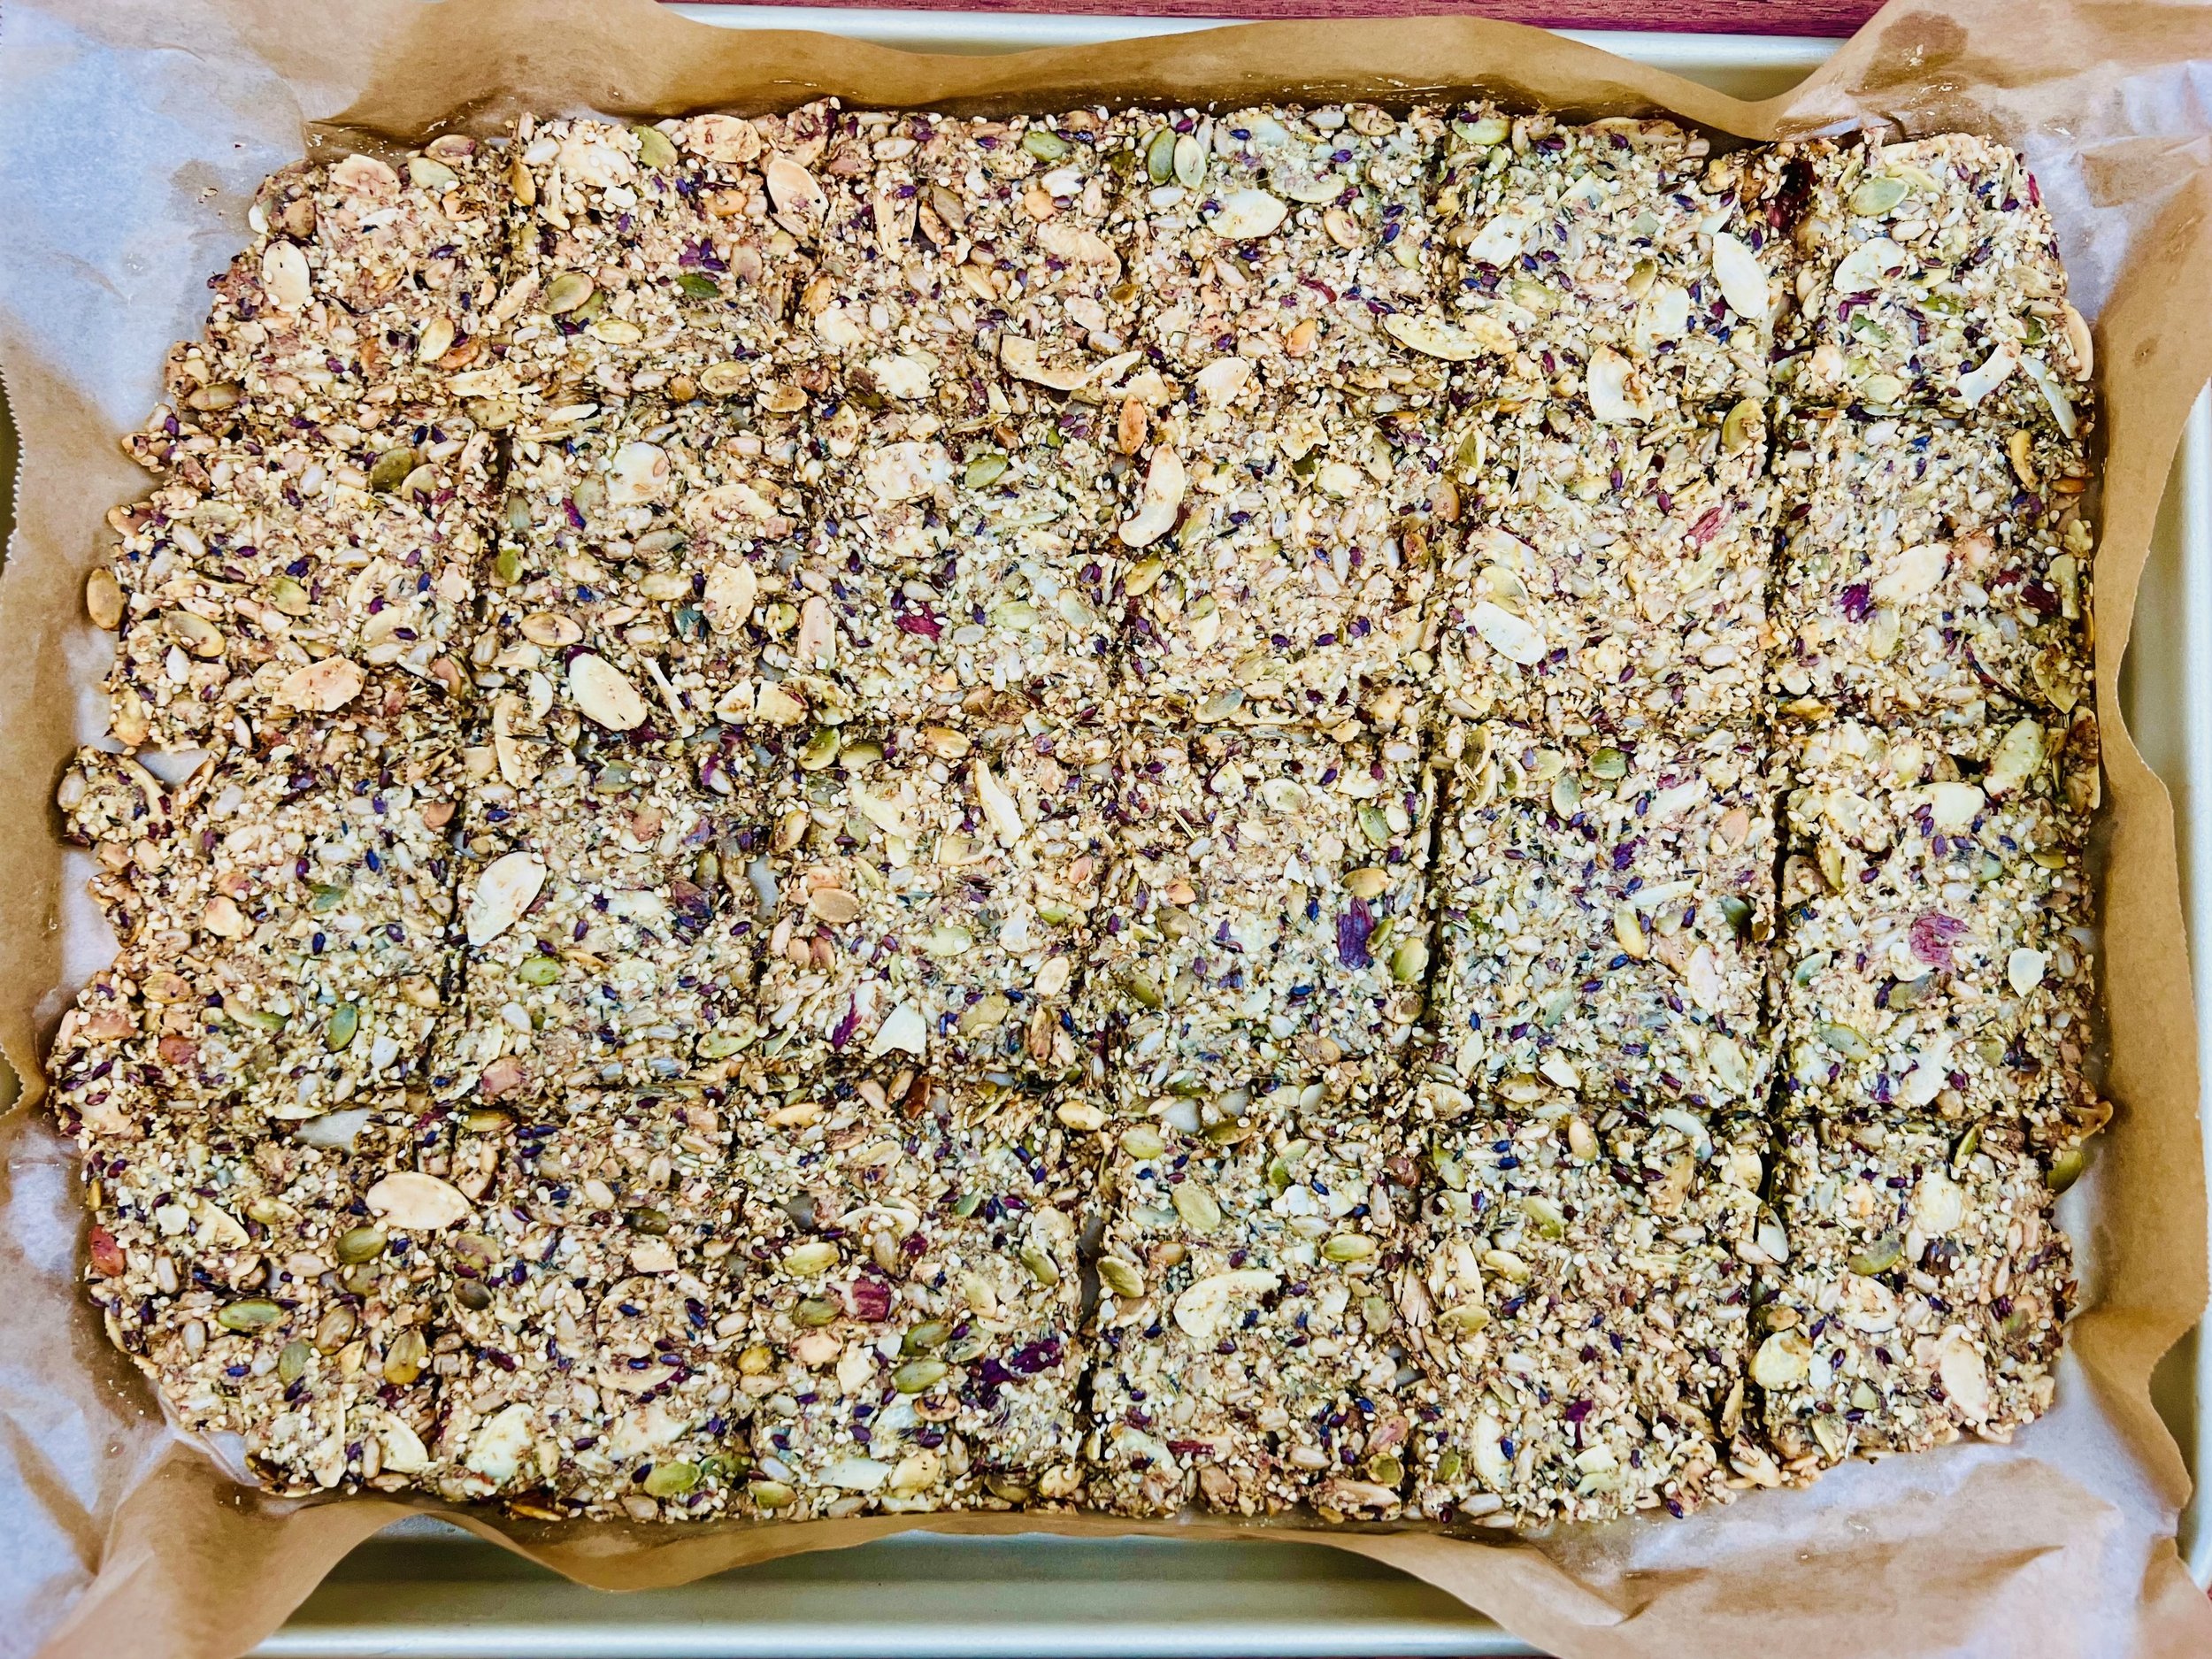
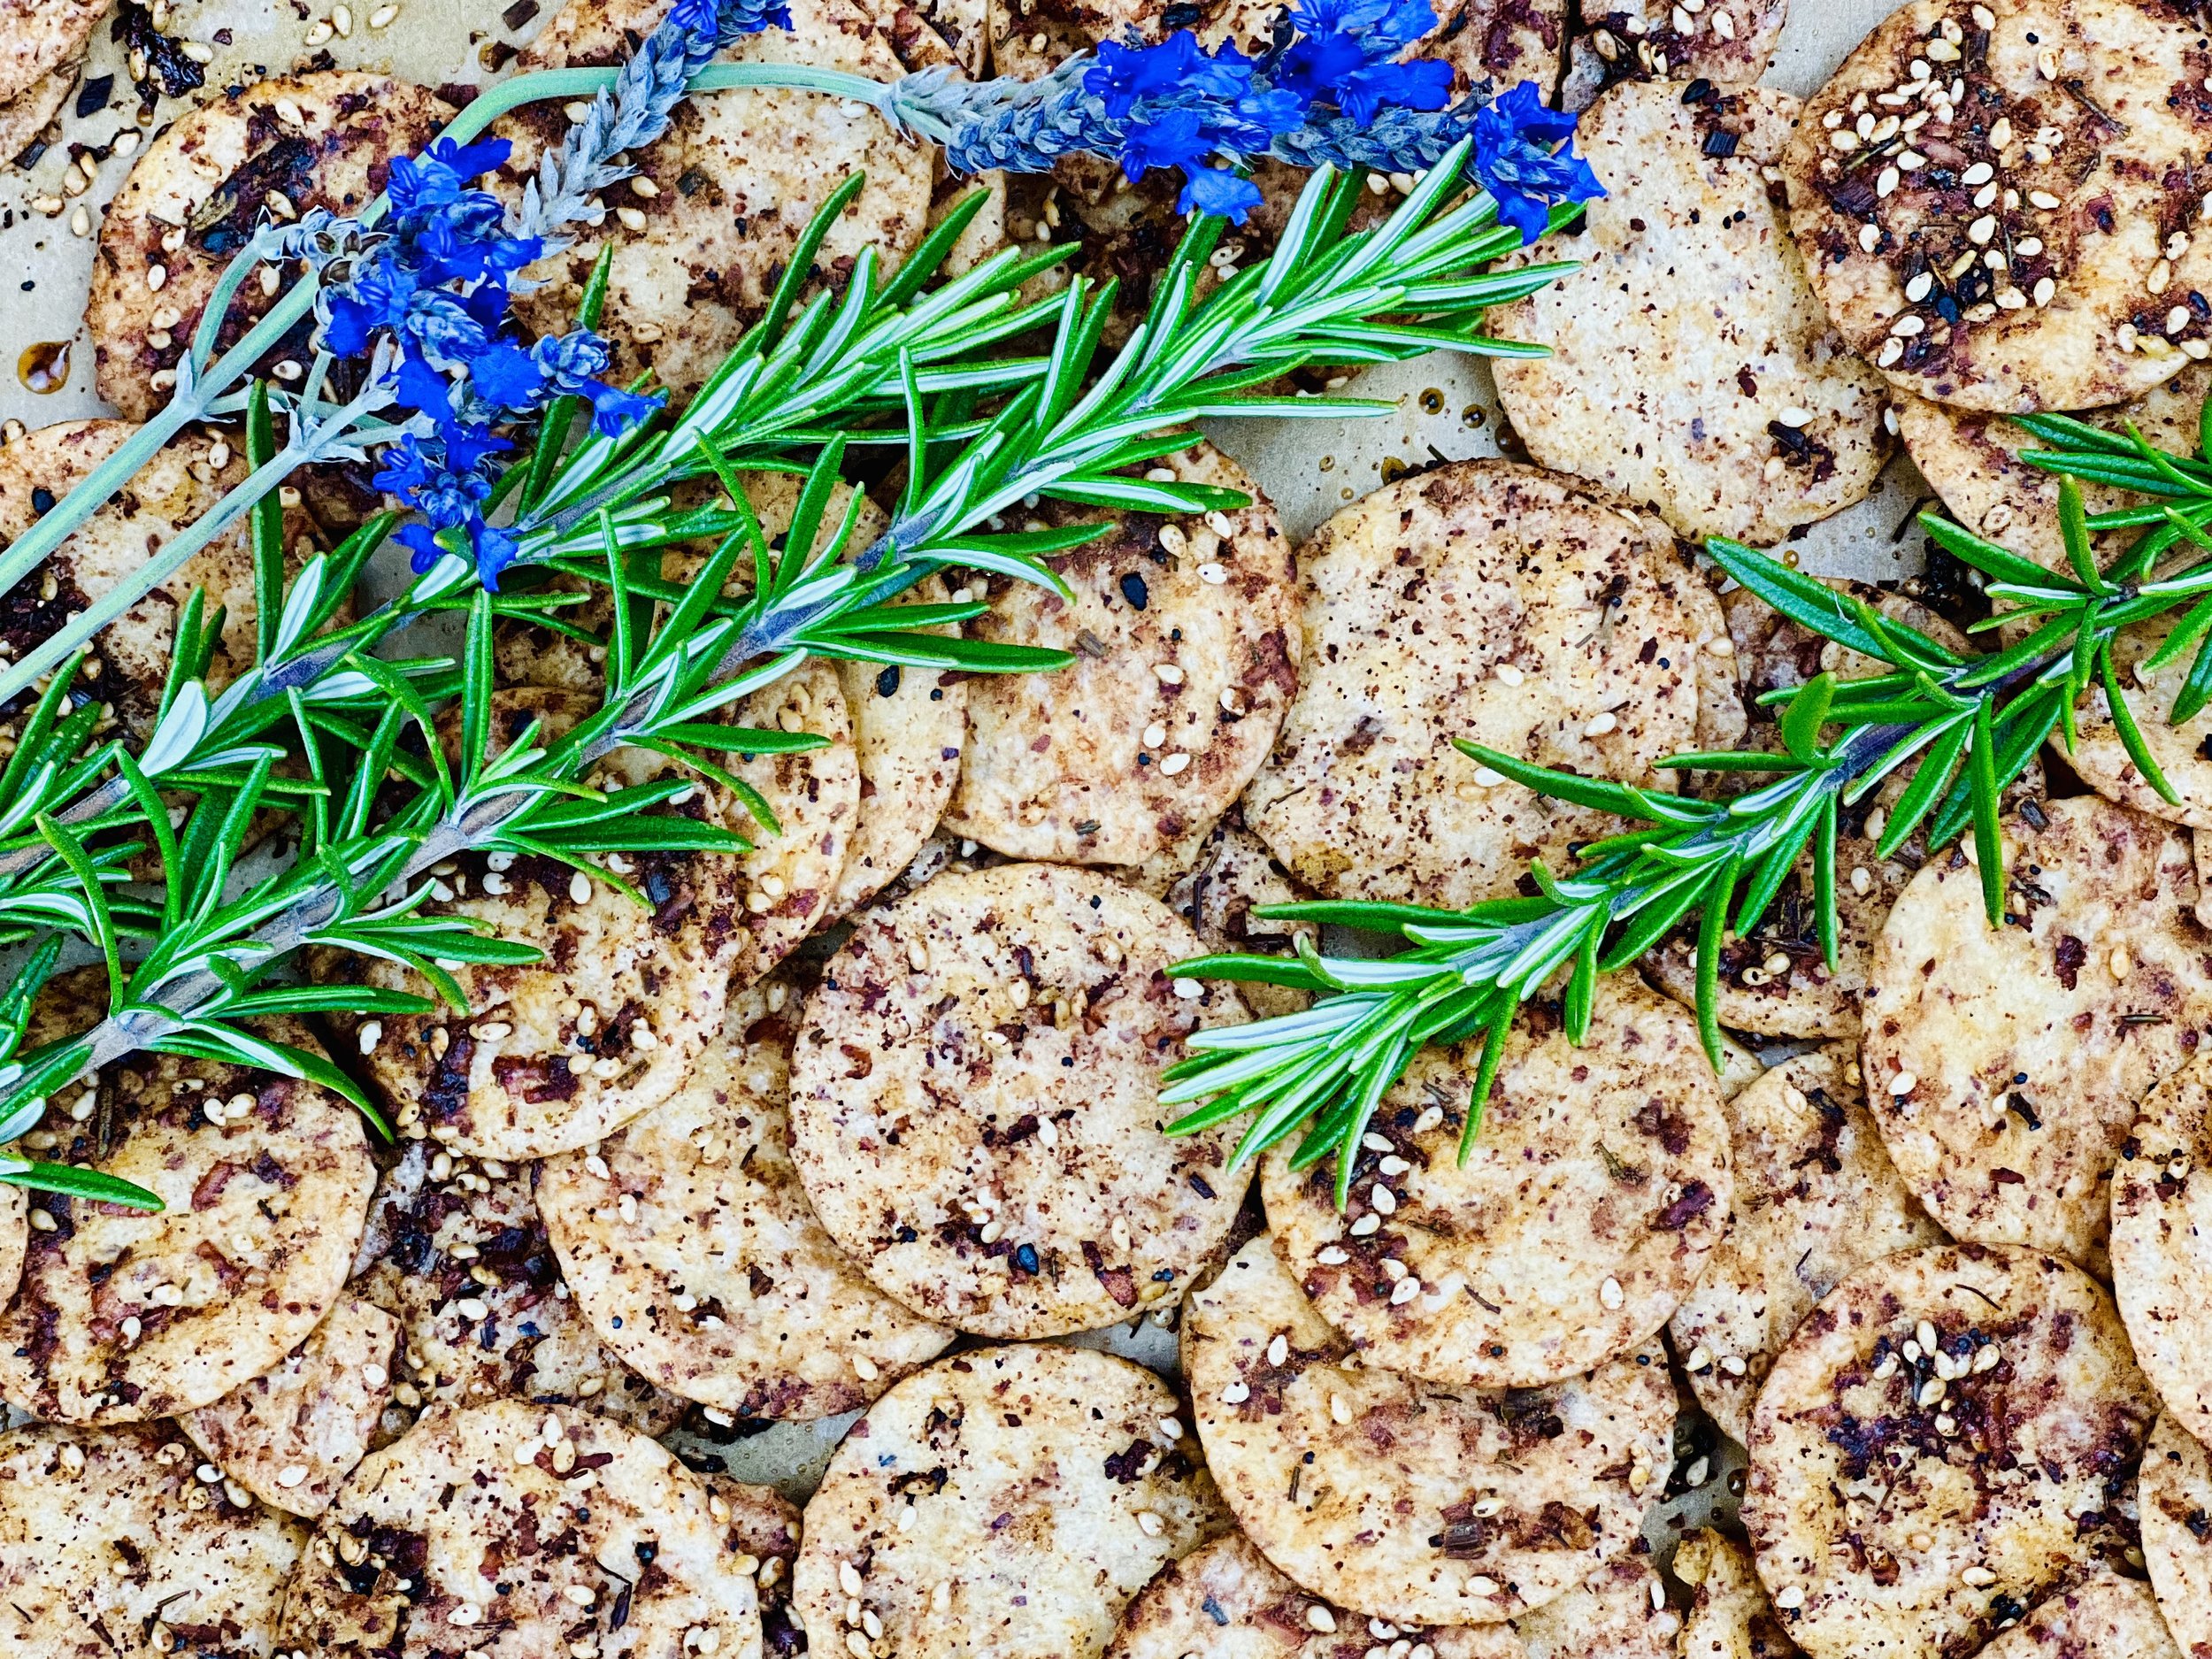
10 Minutes Prep • 50 Minutes Cook • Gluten-free • Dairy-free • Low FODMAP • Serving size 3-4 crackers